


Table of contents:
In 2024, flexibility is the new standard. People expect the option to view your content whenever (and wherever) works for them—so if you want your video content to reach as many people as possible, webinars are the perfect solution.
A webinar takes place live, where you can capitalize on audience engagement and live questions. But when you record a webinar, you can share it with a wider audience, reach even more potential leads, and maximize your ROI.
If you’re one of the 100 million Mac users out there, this article is for you. Below, we’ll walk you through everything you need to know to record a webinar on a Mac.
What is a Webinar?
If you’re unfamiliar with the term, a webinar is just an online seminar—an event where a group of people get together to learn about and discuss information. It’s a great way to communicate efficiently and conveniently.
Webinars can be used to:
- Launch a product
- Market an existing product
- Train new employees
- Provide continuing education to existing employees
- And more!
But here’s the problem for a webinar host: instead of attending live, 81% of viewers watch webinars in the 30 days after the event. In fact, if you’re reading this article, it might be because you can’t make it to an important webinar you were supposed to attend and you need to know how you can watch it at a time that works for you.
Or you might be planning to attend live, but you’re worried about how you’ll remember all the important information that will be shared. Luckily for both hosts and attendees, webinars can now be recorded on any device, so you and your audience will never miss a thing.
What Do You Need to Record a Webinar on a Mac?
Recording Software
The biggest thing you’ll need to decide is which recording software to use. There are a lot of options for software to record webinars, but we’ll walk you through what we think are two of the best: Riverside and QuickTime. Here we briefly introduce each; we’ll go into more detail later.
Riverside: Dedicated Webinar-Recording Software
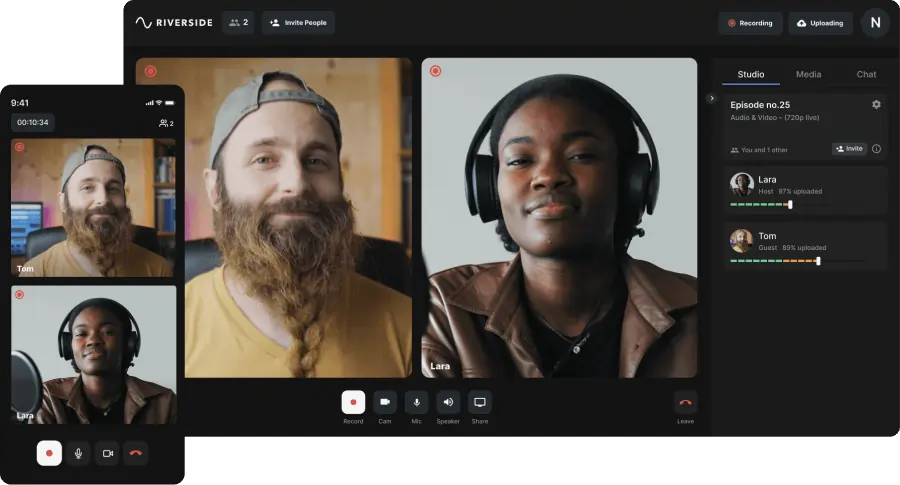
Riverside is an audio and video recording, streaming, and editing software that works on Mac, Windows, iOS, and Android. Among other things, with Riverside, you can:
- Record everyone's audio and video directly on their devices through local recording. This way, you aren’t dependent on the stability of your internet connection for the quality of your recording.
- Produce high-quality recordings with uncompressed, 48kHz WAV audio and 4K video for every guest
- Live stream and invite audiences to call in live for maximum viewer engagement
- Ask a producer to manage your webinar recording behind the scenes in real-time with producer mode
- Get access to your recording seconds after the webinar ends
- Download audio and video recordings separately
- Built-in media board for live editing and inserting audio and video clips in real-time
- Automated audio ai transcriptions for quick captions and easier content repurposing
- Magic Clips tool for breaking up long-form videos into bite-sized content for social media
- Mobile apps for iOS and Android for recording in high quality from wherever you are
- Text-based video editing so anyone can create professional content as easily as editing a text document

QuickTime: Mac’s Built-in Screen Recorder
QuickTime is the basic recording and editing software that comes with every Mac. While it doesn’t offer advanced production features like live streaming or producer mode, it is an excellent minimalist choice for those who simply want to record an online event. It will:
- Record either your webcam or your screen (but not both at the same time)
- Record video and audio simultaneously
- Let you split a recording into smaller clips, rearrange clips, or add clips
- Give you the option to download audio and video recordings separately
- Export recordings in 4K video resolution
Good Internet
Especially if your software doesn’t do double-ender recording, you’ll want to ensure you have a strong internet connection so your audio and video won’t lag or freeze during your webinar.
On a Mac, one simple way to check the strength of your signal is by looking at the Wi-Fi icon at the top of your screen. You need to move closer to your router if there are only one or two bars.
A Good Camera and Microphone
This doesn’t apply if you’re just watching, but if you’re hosting or participating in a webinar, you’ll need a high-quality microphone and camera.
You should also ensure your microphone and camera work before the webinar begins. Using Riverside, you can test your mic and webcam before hitting “record.”.
How to record a webinar on a Mac
Now that you know what you need, here is a step-by-step breakdown of how to record a webinar on a Mac using either Riverside or QuickTime.
Riverside
Note: Follow these steps if you want to host and record your own webinar. We’ll talk about how to record a webinar as an attendee in just a minute.
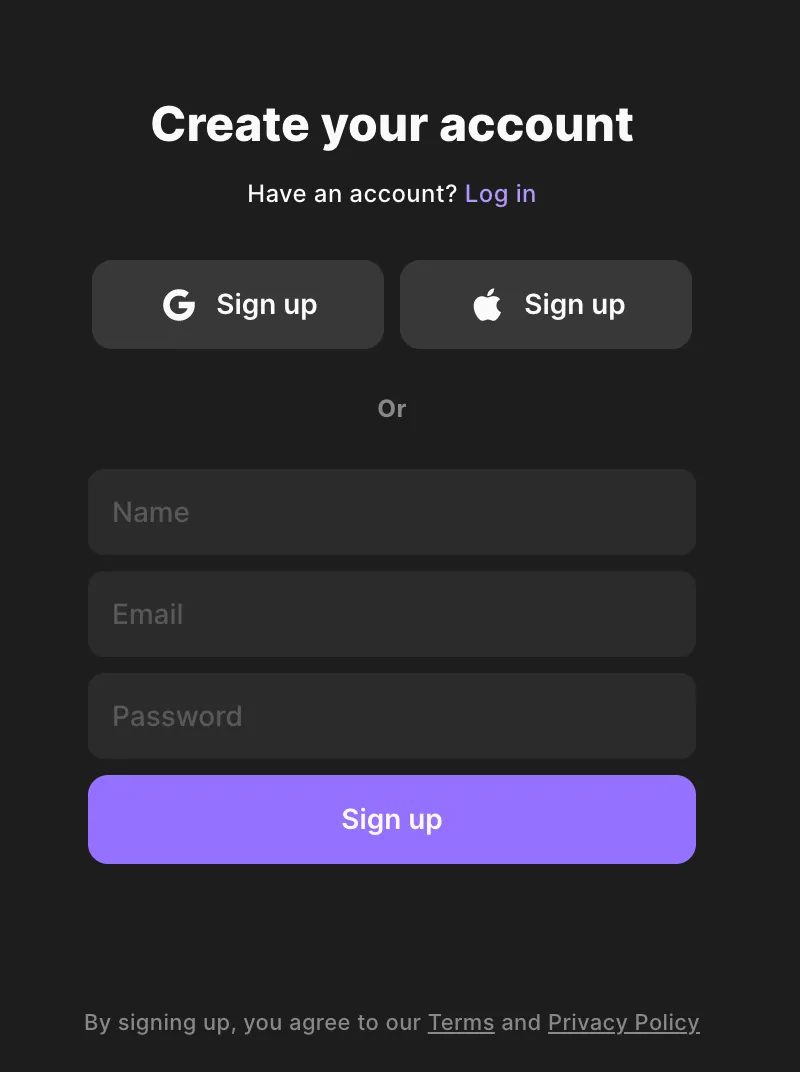
Step 1: Go to riverside.fm and follow the prompts to create an account and log in.
Tip: Make sure you’re using Chrome as your browser. While Riverside lets you record in other browsers, it’s optimized for and works best with Chrome.
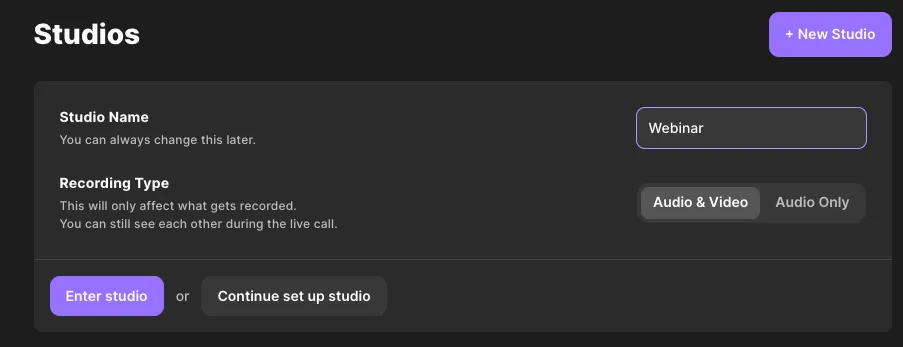
Step 2. Click New Studio and choose a name. You can click “Continue to set up studio” to select between audio and video recording, schedule the recording, and invite other participants.
Step 3: Enter your name, choose your mic and camera settings and click Join Studio when ready.
.webp)
Step 3: Once you join the studio, you can familiarize yourself with how everything works, including recording a short test video. Or, if you’re ready to begin your webinar, you can go ahead and invite guests and audience members from here.
.webp)
You can adjust your studio’s settings by clicking Settings in the bottom left corner. You can also rename it here under the General tab.
Tip: All changes you make under Settings will save automatically.
A couple of other important settings you can adjust here:
Under Audio & Video, you can toggle Echo cancellation on or off. We recommend using headphones during your webinar and turning Echo cancellation off for best results. If you want unmodified sound, this ensures you’ll get it.
If your webinar will be audio-only, you can click Recording and toggle on Record only audio. If you’ll be using video, this is also where you can choose to record with 720p resolution or 1080p/4K resolutions. We recommend 720p for most uses.
Step 4: When you’re happy with your settings and ready to begin your webinar, click Record at the bottom of the screen. You’ll see a countdown from 5 to 1; then you’ll see a red dot appear in the upper left corner of the box containing your picture. This dot means you’re successfully recording.
You’ll also see a box at the top center of your screen that says Recording and another that says Uploading.

Step 5: When you’re finished recording, click Stop at the bottom of your screen. Ensure you wait until the recording has finished uploading before leaving the call. It should take less than a minute.
Step 6: You’ll be taken to a page with your recording. Here you can copy the link to your recording, download it, export it or edit it in Riverside by clicking the purple Go to Editor box on the top right.
Step 7: If you’re editing your webinar in Riverside, next you’ll choose whether you want to create a short story, post, or full-length video.
You can then use your Ai transcript to edit yoru recording. Any text you delete, automatically removed the corresponding audio and video. You can also use the search bar to find an exact quote or phrase without rewatching your recording.
At the top of the editor is a tool bar. Here you can click on Tracks icon choose which tracks you want to include from each participant. The size icon will allow you to change the size of your video. You can also change the layout or background of your video, and you can add a customized logo.
Step 8: Once you’re finished editing, click Export in the upper right corner of your screen. Here you have one last chance to change the video quality and optimize the audio. Note that you’ll need to upgrade your account to a paid subscription if you want to remove Riverside’s watermark from your videos.
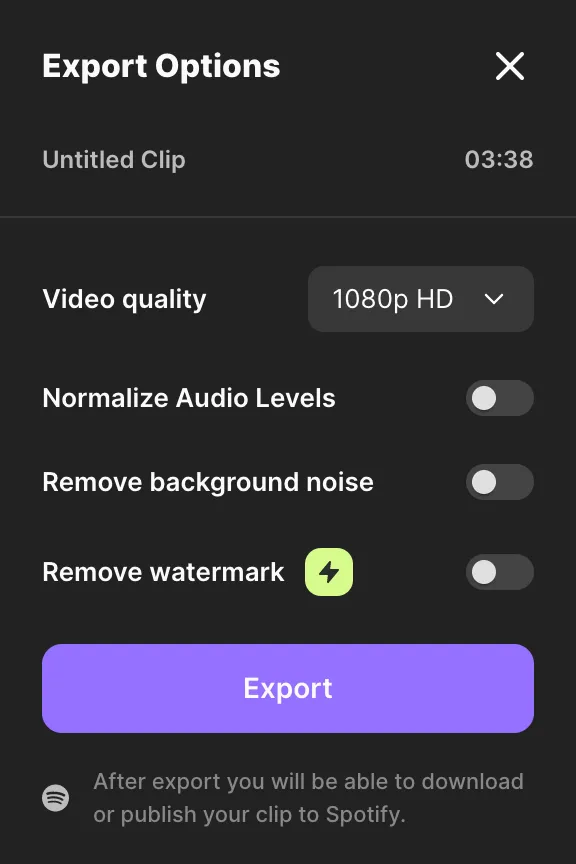
You’ll receive an email with your finished recording within a few minutes.
How to Record a Webinar on a Mac as an Attendee using Riverside
Riverside’s local recording feature does NOT mean that webinar recordings will be automatically downloaded on guests’ and audience members’ computers after the webinar ends.
So if you are attending a webinar as an audience member, you’ll need to either get a copy of the recording from the webinar host or use a dedicated screen-recording software.
If you’re wondering how to record a webinar hosted in another software (such as Zoom) as an attendee, you can record it using Riverside’s screen share feature. Simply open Riverside in another window, share your screen, and click “Record.” Or even simpler, you can just head to our online screen recorder tool.
QuickTime
A convenient way to record a webinar on a Mac as either a host or an attendee is using Mac’s built-in screen-recording software, QuickTime.
Important: If you’re planning to use QuickTime to record a webinar on a Mac as an attendee, keep in mind that there is a reason why it is difficult to find information on how to do this: it is actually illegal to record someone without their permission in many states. So, if the webinar you’re attending isn’t already being recorded, make sure you get the permission of everyone else attending the webinar before following the steps below.
Step 1: Go to your applications and click on QuickTime Player.
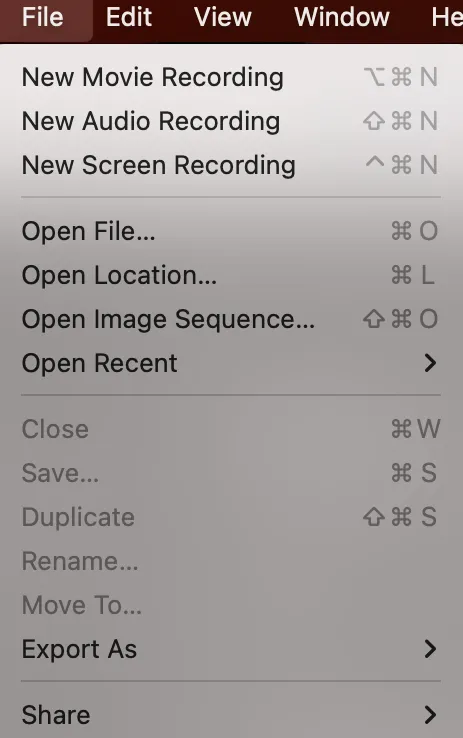
Step 2: Ignore the box that automatically pops up prompting you to open a file and click on File, then New Screen Recording.
Tip: Unlike Riverside, QuickTime does not have the ability to record your camera and your screen at the same time. So if you want to record yourself instead of your screen, rather than clicking on New Screen Recording, you’d choose ‘New Movie Recording’. QuickTime does record both audio and video at the same time.
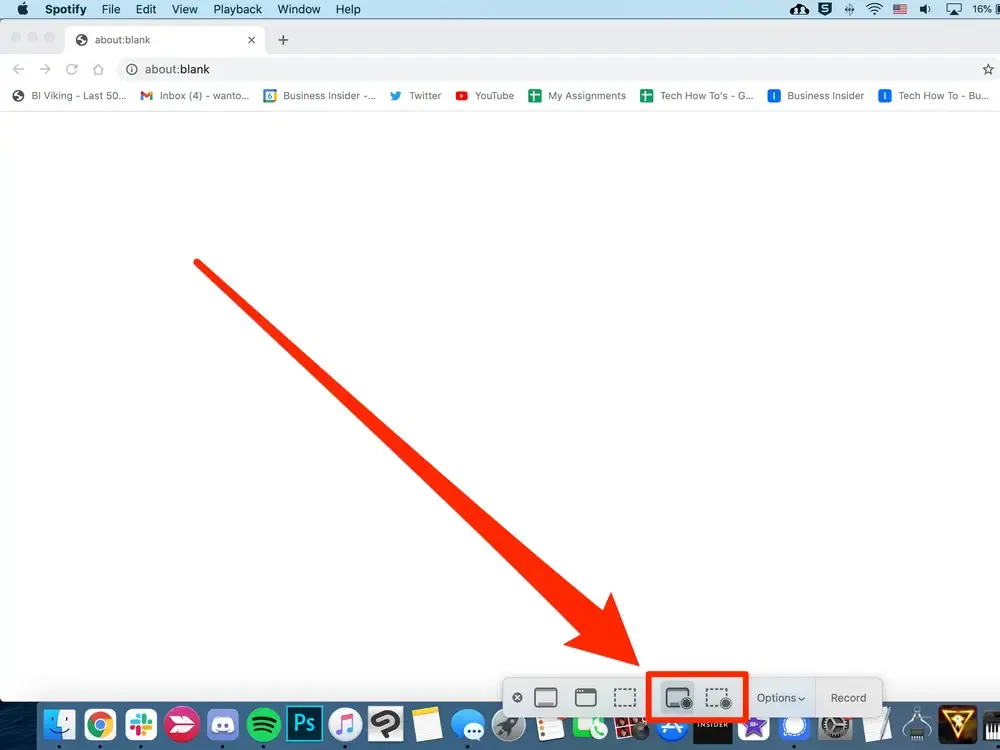
Step 3: QuickTime defaults to recording only a selected portion of your screen. If that’s what you want, you can resize the recorded portion of your screen by clicking on one of the four corners of the recording area and dragging it to the size you want.
If you want to record your entire screen, click on the Record entire screen icon on the bottom horizontal menu bar.
Note, if your Mac operating system is older than Mojave, this will all look a little different.
Step 4: Under ‘Options’ in the same horizontal menu bar at the bottom of your screen, you can choose where you want your recording to save, whether you want a countdown before your recording begins, which microphone you want to use to record audio, and a few other options.
Tip: The Show Floating Thumbnail option only applies to screenshots, not video captures. With this option enabled, your Mac will keep a thumbnail of your screenshot visible in the lower right corner of your screen for a few seconds after you take your screenshot.
Tip: Enable the ‘Show Mouse Clicks’ option if you want your mouse clicks to appear as a circle in your webinar recording. This is most useful if you are the one hosting the webinar.
Step 5: When you’re ready, click ‘Record’ in that same menu bar at the bottom of the screen.
More Tips for recording a webinar on your Mac
Use Do Not Disturb Mode
Put your Mac in Do Not Disturb mode to silence any notifications you might receive during the recording. You can do this by clicking this icon in the upper right corner of your screen:
Then click ‘Focus’, then ‘Do Not Disturb’.
Make Sure You Have Enough Storage on your Mac
You don’t want to find out the hard way that your computer doesn’t have enough storage space for your webinar.
If you’re using Riverside, check out these simple, step-by-step instructions. If you’re using QuickTime, click the Apple icon at the top left of your Mac’s screen, then ‘About This Mac’, then ‘More Info’. Scroll down to the bottom of the menu to see how many GB of storage are left on your Mac.
If you’re recording with QuickTime and your Mac’s operating system is Mojave or newer, you can just hit ‘command-shift-5’ to open QuickTime instead of going through the steps outlined above.
FAQs on How to Record a Webinar on a Mac
Can I record a webinar I am watching on my Mac?
Yes, you can! You can use QuickTime, which comes installed on every Mac, or another screen-recording software to record a webinar that you are attending.
Keep in mind, however, that to record a webinar legally in most states, you’ll need advance permission from everyone who is being recorded.
Will Zoom know if I screen record on Mac?
If you aren’t using Zoom to do the recording, then no. Zoom doesn’t have any way to know what you’re doing on any other software. So it won't know you're screen recording on your Mac.
How do I record my screen with sound during a webinar?
Both Riverside and QuickTime can capture your screen and your computer’s audio output at the same time.
How do I record a video session on my Mac?
If you want to record a video call or webinar on your Mac, we recommend using Riverside. Simply create an account, invite your guests with a link, and start recording in professional-quality audio and video! After recording, Riverside makes it easy to edit and export to your preferred channels.
With these simple ways to record a webinar on a Mac, it’s easier than ever to get your product in front of customers, your training material to employees, and your curriculum to students, permanently.


.webp)
.webp)


