.webp)


Table of contents:
Videos are a powerful way to connect with your audience. But the video-creation process can feel overwhelming for beginners.
How can you stand out among all the other creators?
In this article, we’ll give you a step-by-step guide to creating videos that will set you apart. No matter your experience level, the tips in this article will help you achieve your video-creation goals. We’ll start by listing the tools you need and then walk you through the publishing and promoting process.
What do you need to make a video?
You can make videos using only a smartphone. Their built-in cameras are high quality and have plenty of storage.
But smartphone microphones are notoriously bad—and smartphone speakers don’t produce accurate audio playback.
Smartphones can also only perform basic edits.
To make higher-quality videos, invest in a few pieces of hardware and software. Below, we’ll tell you exactly what you need and how to use it. We’ll also walk you through the entire video-creation process.
How to make a video professionally: Step by step
Planning your video
First, decide what you want your video to do. That could be:
- Driving traffic to your website,
- Gaining social media followers, or
- Advertising an upcoming event.
Next, use your video’s goal to pinpoint your target audience. For example, if you’re advertising an event, your video should appeal to people who will enjoy that event.
Create the video with that audience in mind. The topic, script, background, and music should all appeal to that audience. Your video will be more successful if you’re intentional about that from step one.
Creating a storyboard and script
Creating a storyboard will help you visualize your video before you start filming. Storyboards look like comic strips—they display scenes from your video in order.
Here’s an example:

Your storyboard can have as much or as little detail as you want. The idea is to plan the topics you’ll cover.
Then, write a script for your video.
Scripts are often more detailed than storyboards. But it’s usually better not to write out everything you plan to say word-for-word; that can make your video seem forced and less engaging. So, include only enough in your script to help you remember what to talk about.
Getting organized before filming will make your video clearer and more engaging.
Choosing the right equipment and software
No matter how carefully you plan, your video will only be as good as the tools you use to film it.
Here’s what you need:
Microphone
You need a high-quality microphone to create a high-quality video. Most devices’ built-in mics aren’t good quality; they struggle to capture speech clearly and filter out background noise.
That’s a problem because, as you can imagine, sound quality is very important in videography.
So if you buy nothing else from this list, buy an external microphone. Our article on the best microphones is a great place to start.
Camera
Your smartphone’s camera is great, but external cameras are often better. They capture images in more detail, recreate color more accurately, and zoom in more closely.
Look for a camera that works for the type of content you create and records in 4K resolution. To learn more, see our best video-recording cameras guide.
Headphones
Headphones let you hear your video’s sound the way your audience will hear it. They capture more detail than external speakers do. Sound-blocking headphones also ensure you don’t hear distracting background noise.
It’s best to wear headphones while recording so you can check your video’s sound and make adjustments in the moment. If you can’t do that, record a short clip wearing headphones. Then, make adjustments before you start filming the full video.
Computer
After recording, it’s important to edit your video. While you can perform simple edits on a smartphone, you can do much more on a computer. Additionally, some editing software only works on a computer. And computer processors can handle larger video files than phones can.
The MacBook Pro is still one of the best video-editing laptops—but you can get away with something less expensive if you need to. For other options, take a look at our full list of editing equipment for high-quality videos.
Recording and Editing Software
The last tools you’ll need to make a video are recording and editing software.
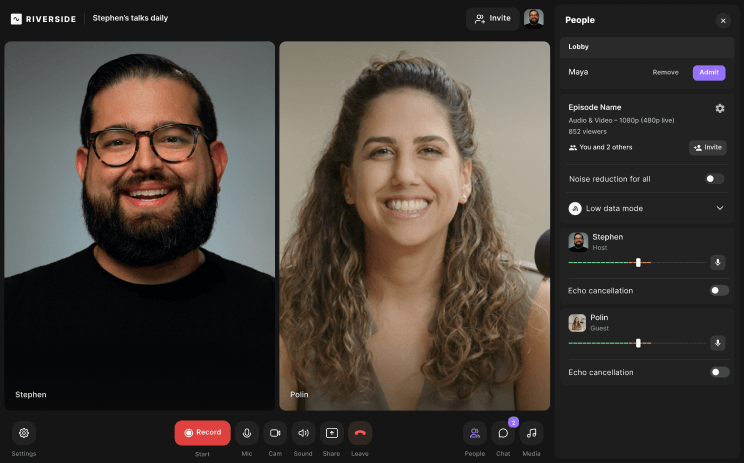
Recording software streamlines video creation. It gives you everything you need to create videos in one place. It also handles tasks you’d otherwise have to figure out how to do on your own. It lets you adjust video settings, invite remote guests, and live-stream videos.
And editing software puts the finishing touches on your videos by letting you add filters, sound effects, and music. You can also create video captions and cut out unnecessary audio.
You can buy recording and editing software separately, but we recommend choosing an all-in-one option. Recording and editing in the same software saves both time and money.
Because this is such an important video creation tool, we’ve compiled a few good options for you to choose from:
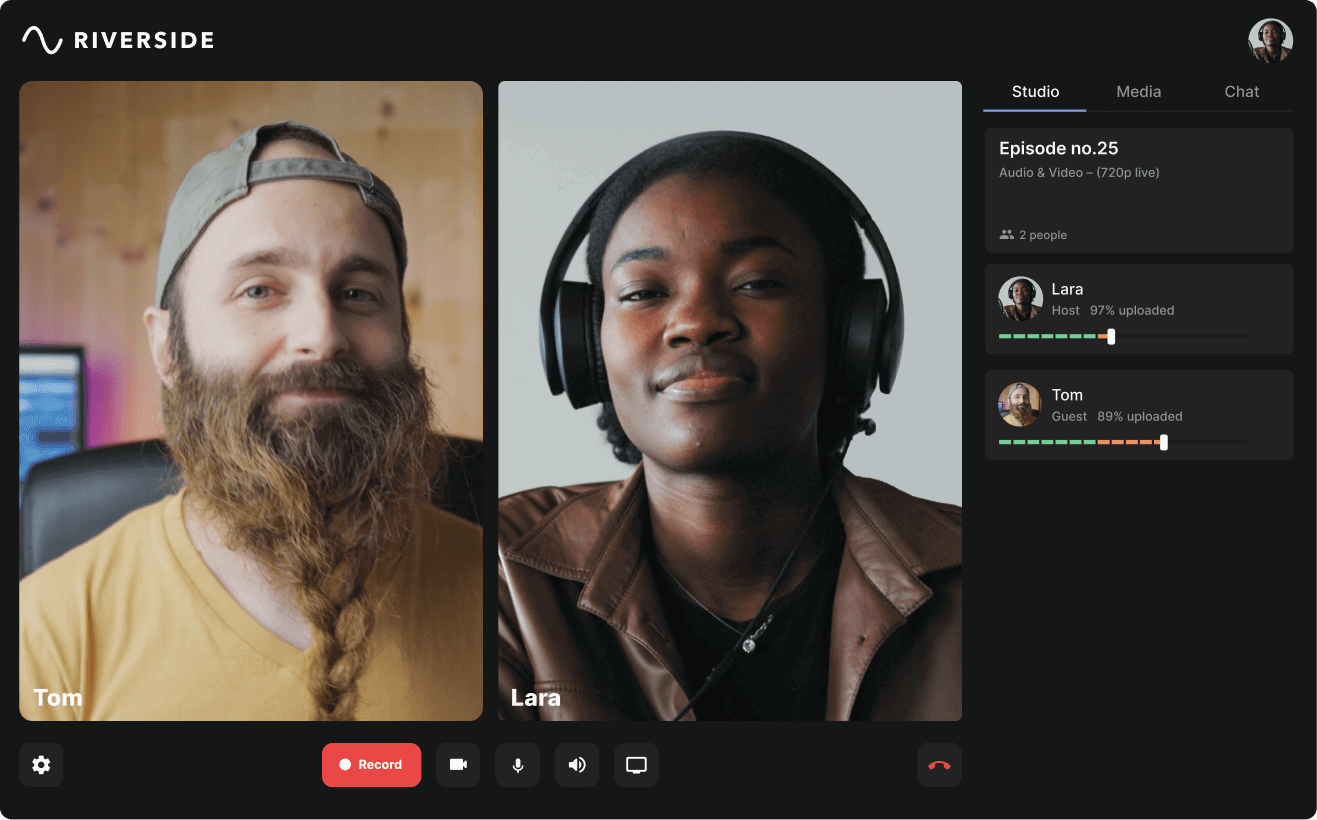
1. Riverside
Price: Free plan available. Paid plans start at $15/month.
Compatibility: Windows, Mac, Android, iOS
Riverside is a robust recording, streaming, editing, and transcription software. It can record audio or video through your computer or smartphone. It records studio-quality 4K video and lossless 48 kHz WAV audio.
Unlike other popular video conferencing tools, Riverside records locally. Local recording means using your computer to record instead of the internet. You’re probably familiar with Zoom’s internet instability warning. That instability causes audio and video disruptions—and those disruptions end up in your recording.
Riverside’s local recording, on the other hand, isn’t affected by interruptions or lags in your internet signal.
Besides producing clear recordings with no lag, using Riverside you can:
- Record your video, audio, and screen in separate tracks
- Capture up to 9 remote guests in one recording
- Live stream to platforms like YouTube, Facebook and more
- Add sound effects with Riverside’s Media Board
- Create video clips for social media effortlessly in minutes using Riverside Magic Clips tool
- Download highly accurate AI video transcripts and captions
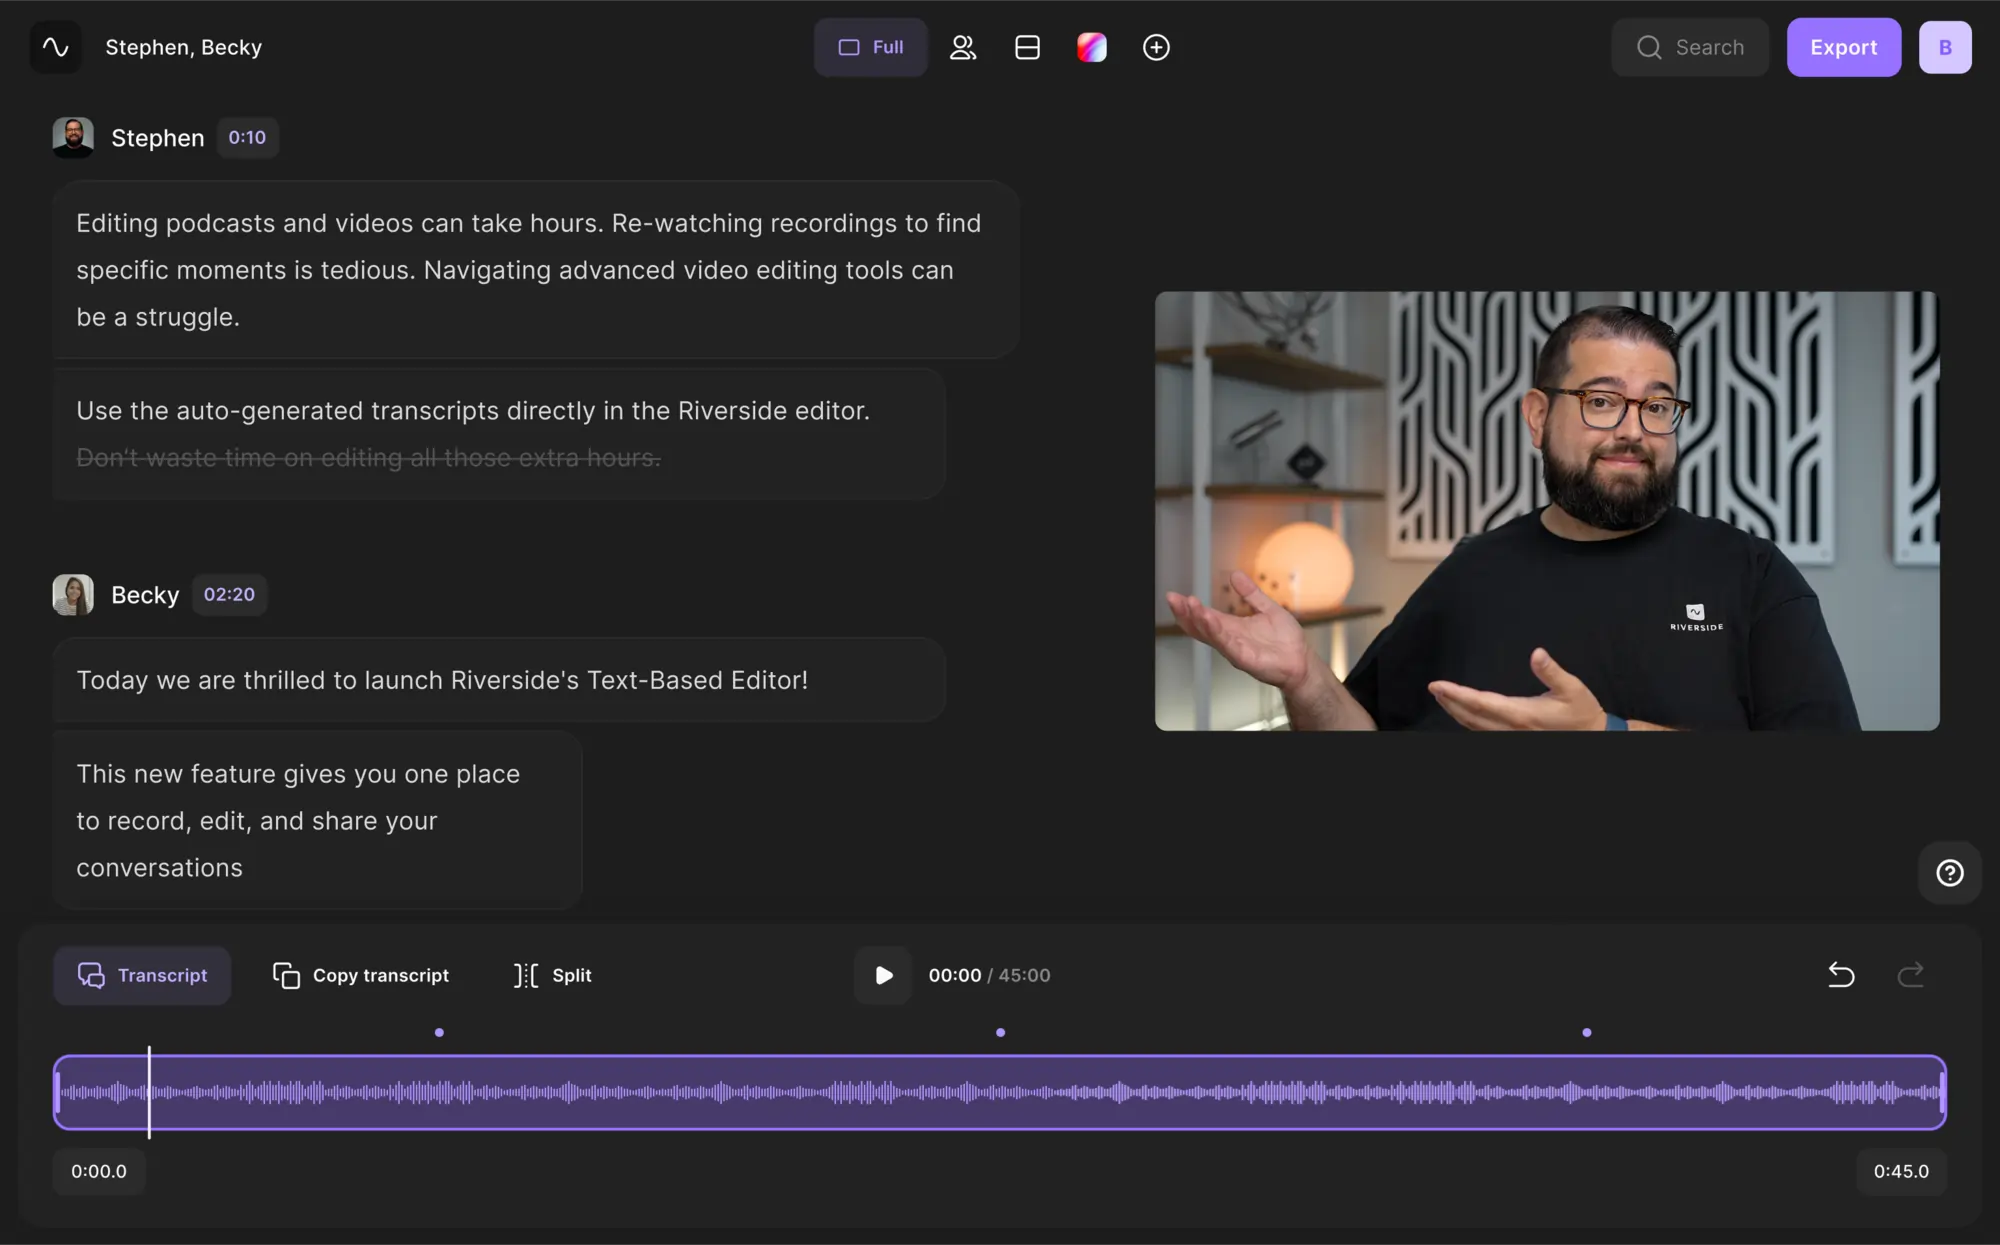
- Edit your recording by simply editing a text transcript in the platform’s text-based video editor.
- Customize your video recordings with our automated templates
See how easy it is to create a video with Riverside! No need to download anything. Head to Riverside.fm to make a free account and start filming!
2. QuickTime Player
Price: Free
Compatibility: Mac
QuickTime Player is a simple recording and editing tool native to Apple. It records both audio and video and lets you perform basic edits. It also exports recordings in a few formats.
QuickTime comes free with every Mac, making it convenient for Mac owners—but it can’t do most of what Riverside can do.
3. Windows Camera
Price: Free
Compatibility: Windows
Windows Camera is the Windows version of QuickTime. It’s free and comes with most PCs.
Windows Camera records in up to 1080p video resolution. You can then use it to make basic video adjustments. It doesn’t have as many capabilities as Riverside, but it’s a good option for those on a strict budget.
Now that we’ve given you a few tools to choose from, we’ll tell you how to use them to record professional videos.
Setting up your shots
There are several factors to consider when setting up your shots. Here are a few of the most important:
1. Lighting
First, use the three-point lighting method. This method uses three lights to illuminate the subject of your video.
Put the two brightest lights in front of the video’s subject. Then put the dimmer light behind the subject. That will keep harsh shadows off the subject and create depth without making the subject look backlit.
Here’s how to set up your lights using this method:
You can buy a three-point lighting kit or create your own. You can even use the sun as one of your bright light sources (but if you do, film during the morning or evening). Outdoor lighting is the softest and most flattering at those times.
2. Sound
There are two sound-related factors to consider: filming location and acoustics.
Choose a quiet filming location. That means a room or outdoor area away from traffic noise and home appliances. Turn off your air conditioning or heat while filming; remember that microphones are sensitive to even small noises.
And for the best acoustics, film in a small room with soft surfaces. The farther sound waves travel and the more hard surfaces they hit, the more echo you’ll have. You want to avoid that.
If you don’t have access to a room like that, create one. You can buy sound partitions and sound panels, or you can DIY them. Get creative—place armchairs or sofas in the center of a room to create a sound barrier. Lay towels and blankets on hard floors to absorb sound.
We recommend filming a test clip to check your sound before beginning your full video.
3. Framing
Use the rule of thirds to frame your video. The rule is that videos tend to look better when the video’s subject is not in the center of the frame. So when framing your video, place the subject in one of the outer thirds of the screen.
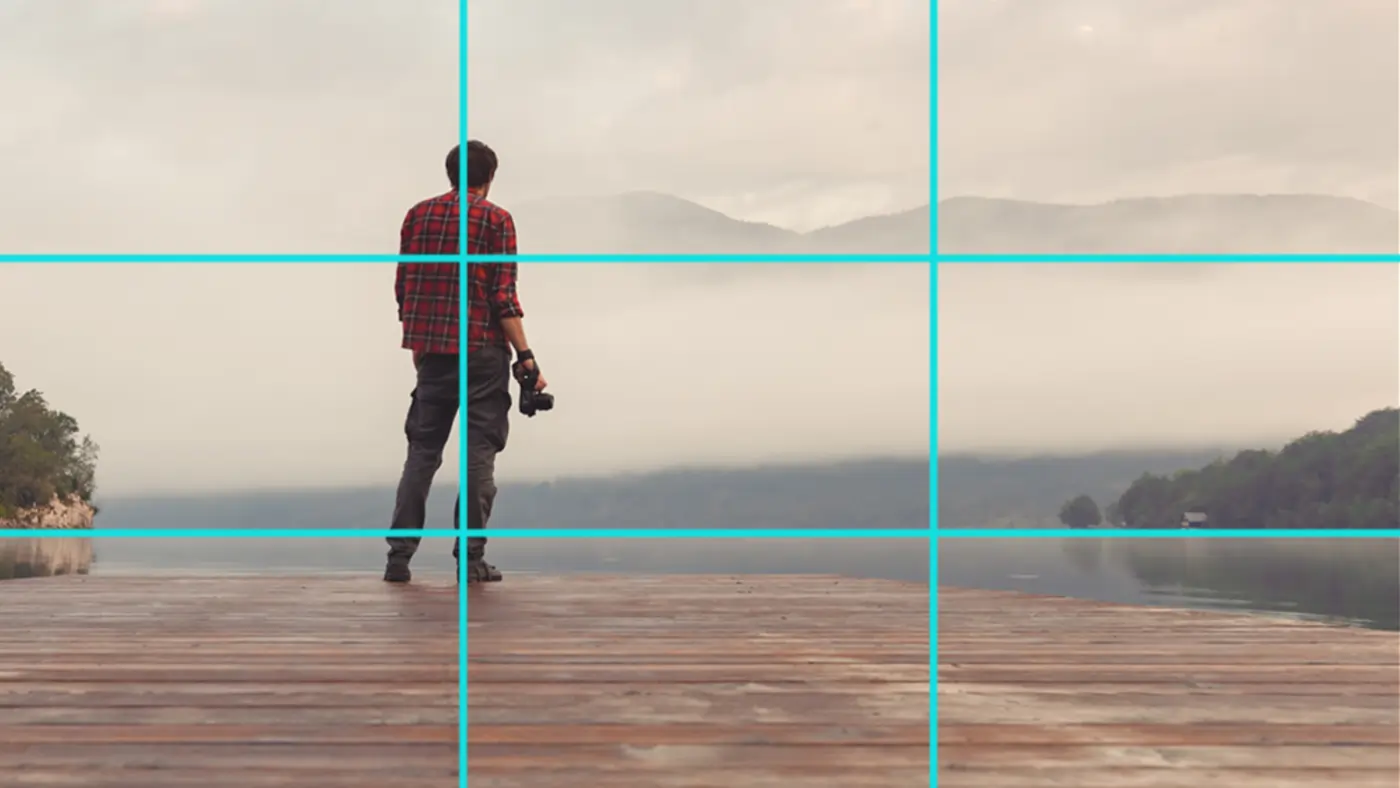
Many cameras overlay a grid onto the shot to help you do that. If yours has that feature, place the video’s subject at one of the line intersections in the grid, like the image above.
This technique draws the viewer’s eye to the background of the shot. The background is often more visually interesting than the video’s subject.
Recording your video footage
It’s finally time to start recording! But that isn’t as simple as setting up your camera and letting it roll. Instead, to film a high-quality video, you’ll want to take several steps.
1. Record an introduction
Ease your audience into your video by recording an introduction.
Although we mention this first, we recommend recording your introduction last. You’ll have a better idea of exactly what the video covers once you’ve recorded it. Then, in the intro, you can tell viewers what to expect.
Include a teaser to get the audience hooked. Many creators use an engaging clip from later in the video as their hook.
Keep your intro as short as possible. You don’t want viewers to lose interest before you get around to the important stuff. It’s best to limit the intro and keep it short.
2. Record transitions
You don’t just want to transition your audience into your video. You also want to transition between scenes. That ensures a smooth, cohesive video.
Your transition shots will depend on the type of video you’re making. But as one example, if you’re vlogging, you could film yourself entering and leaving the scene of your video. You could also film time-lapses to let viewers know time has passed between scenes.
3. Record a variety of shots
We don’t recommend filming yourself from the same position for your entire video. Instead, periodically move both yourself and the camera. Film yourself in different locations. Use different camera angles.
And even if you are the focus of the video, snag a few shots of something other than your face. You could capture nature footage or a timelapse of city commuters. Point the camera at your hands while you’re crafting or baking rather than at your face.
The idea is to avoid monotony in your videos. Your viewers will be more engaged if you give them variety.
4. Record an outro
Transition your audience out of your video by recording an outro. You can do that by fading your video out at the end, but it’s even better to have a dedicated clip for this purpose.
Your outro doesn’t need to be long. It could circle back to the teaser you put in your intro, or provide a new teaser for your next video. You could even use the time to share funny blooper footage.
Having an outro in your videos is also great because your viewers will come to expect it. When they watch your next video, they’ll be more likely to stick around until the end.
Editing your video
Once you’ve finished filming, you may think you’re ready to publish your video—but editing is an important step that you shouldn’t skip. Video editing can really take your content to the next level.
While the edits involved will depend on your content style and goals, here are a few steps most video edits include:
Importing Your Footage
Like we mentioned earlier, most professional video-editing software only works on a computer. So if you filmed on a phone or external camera, you’d have to import your footage to your computer.
One way to do that is to airdrop the footage to your computer. Another way is to connect your phone or camera to your computer using physical cables.
Better yet, film your video with software that automatically syncs with your computer.
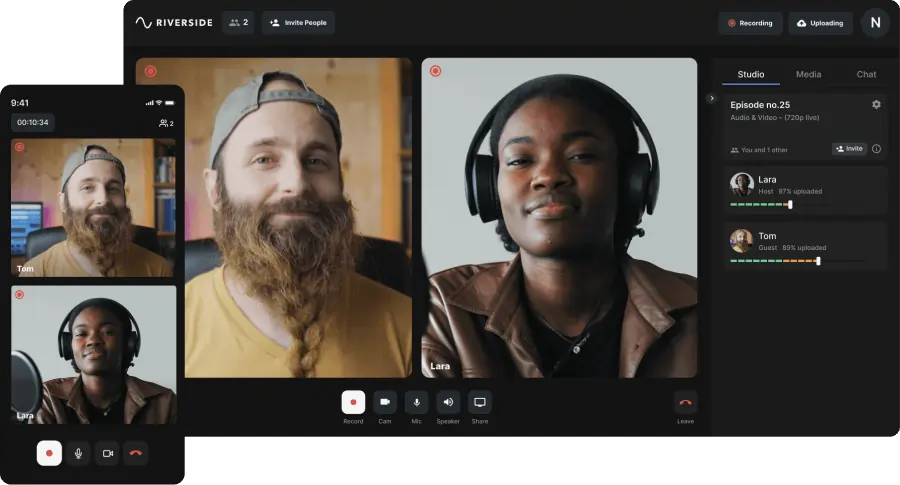
For example, Riverside saves videos in an online recording studio so you can access them on any device. You can record on your computer or phone, then edit on your computer.
Cleaning Your Footage
Riverside makes footage cleaning easy, too. When you record with Riverside, you automatically receive a transcript of your video. Then, using Riverside’s Editor, you can edit your video by editing the transcript. Need to remove or change a word or sentence? No problem! Just change it in the transcript.
Riverside records separate video and audio tracks for each video participant. That’s useful in this stage of the editing process. It enables you to adjust one person’s audio without changing someone else’s, and you can make changes to the video without disturbing the audio.
Assembling and Mixing Your Video
Mixing refers to combining your cleaned video and audio tracks.
Use advanced editing software like Adobe Premiere Pro to mix your video. Riverside has an integration with Premiere, so you can easily import your footage. Then drag and drop each track into your timeline.
Adding Finishing Touches
To polish your video, add any of the following:
- Music
- Sound effects
- Audio fading between scenes
- Text overlays
- Special effects
- Filters
- Graphics
As you’re adding these effects, remember to cater your video to your target audience. Also, keep a consistent tone, whether silly or serious.
For a more detailed look at how to edit videos, see our article on video editing for beginners.
Publishing and Promoting Your Video
The last steps in the video-creation process are publishing and video promotion.
To publish your video, you’ll need to upload it to video hosting software. Popular hosting software includes YouTube, Brightcove, and Wistia. These tools store your video securely.
Once you’ve uploaded your video to hosting software, you can put it on your website.
Then, let your audience know your video is out there! One of the best ways to do that is by sharing teaser clips on social media. You can also reformat your video transcript into a blog post. Share a link to your blog on your social media or distribute it to your audience in a newsletter.
Video transcripts are also useful for SEO (search engine optimization). Translating your content into text makes it visible to search engines. When your audience does a Google search for keywords in your transcript, they’ll see your video.
Pro tip: To help your video rank even higher in Google searches, add keywords to its title and description.
Whew—you’re done! Now, sit back and watch your viewers engage with your content and your follower count grow.
Tips on making videos that stand out
We’ll leave you with a few extra tips for making professional-quality videos:
- Look at the camera lens while recording
- Use a tripod and gimbal for video smoothness
- Use both words and visuals
- Subscribe to a music library for access to quality background music
- Take a good video thumbnail photo
Little things like these add up and increase the quality of your video.
Use the advice in this article and the links we’ve provided to start creating videos that wow your audience. It may feel overwhelming, but remember—take it one step at a time.
FAQs on How to Make Videos
How do I make a video on my phone?
You can use your smartphone’s built-in camera app to record a video. But you’ll need to transfer it to your computer to perform any advanced edits.
A better way to make a video on your phone is by using video recording and editing software. We recommend Riverside for its high-quality videos and ease of use. Download Riverside’s iOS or Android app on your phone to start recording.
Riverside saves videos in your online recording studio, so you can open them on your computer. Then, edit your video using Riverside’s Editor.
How do I create a video on my computer?
Most computers have built-in video-recording software. These tools include QuickTime for Mac and Windows 10 Camera for PC. They’re fine if you don’t need to make high-quality videos.
But if you want to keep up with all the YouTubers out there, you need to make professional-quality videos. For that, we recommend Riverside. Make a free account on Riverside.fm and record a video in your browser using your computer’s webcam. Then, edit the video using Riverside’s Editor.
How to make videos for free?
You can use Riverside’s recording and editing software to make free videos. First, make a free account with Riverside. Then use your phone or computer to record unlimited high-quality videos.
Last, with Riverside’s Editor, create video captions and clips for social media—all for free.
How do I make videos for YouTube?
There are a few rules to know when recording videos for YouTube.
First, YouTube displays videos in landscape orientation, not portrait orientation. That means you need to turn your phone sideways while filming.
Second, YouTube is very strict about copyrighted content. You can’t play music in your video unless you own it! But you can subscribe to a music library like Epidemic Sound to access copyrighted music.
Third, you have to verify your Google account to upload a YouTube video longer than 15 minutes. Once it’s verified, your limit is 12 hours or 256GB.
Other than that, film a YouTube video the same way you’d film any other video. We recommend recording and editing videos for YouTube using Riverside’s software. It produces high-quality video and sound. It also automatically generates a transcript that you can use to make video captions.
For a more detailed look at making YouTube videos, take a look at our article on How to Make a YouTube Video.


.webp)