Table of contents:
Can you record a podcast on Zoom?
How to Record a Podcast on Zoom: Step-by-step guide
Step 1: Sign up for an account
Step 4: Optimize your Zoom quality
Step 6: Edit and publish your podcast
Step 7: Save and upload your podcast
Bonus: Best practices for optimizing your Zoom podcast quality
TL;DR:
- To record a Zoom podcast in higher quality you’ll want to enable original sound and record your speakers separately.
- Then you can set up a meeting as usual and use Zoom’s built in recording feature.
- You’ll need to download your files and edit them on external editing software.
- For studio-quality separate track recordings, you’re better off with dedicated podcast software like Riverside.
Recording a podcast remotely with guests?
One of the easiest options is to use Zoom to get the job done. But wait, how do you make sure you get the highest quality recording?
In this guide, we cover everything you need to know to record your podcast on Zoom like a professional.
Table of contents:
- Can you record a podcast on Zoom?
- How to Record a Podcast on Zoom: Step-by-step guide
- Step 1: Sign up for an account
- Step 2: Set up a meeting
- Step 3: Set up your equipment
- Step 4: Optimize your Zoom quality
- Step 5: Start your recording
- Step 6: Edit and publish your podcast
- Step 7: Save and upload your podcast
- Bonus: Best practices for optimizing your Zoom podcast quality
- Is Zoom good for podcasts?
- Top Zoom alternatives for podcasters
- FAQs on Recording a Podcast on Zoom
Can you record a podcast on Zoom?
The short answer is yes! You can totally record a podcast on Zoom. Zoom is actually a popular choice among podcasters merely because they’re familiar with it. It’s comparatively easy to use — and it also has a ‘Basic’ tier that is attractive to cash-strapped beginners.
The drawback here is that Zoom isn’t built for high-quality recordings. Your recording quality will rely on your internet connection, which can lead to blurry content.
You also won’t be able to capture separate audio and video tracks, making your editing process a bit of a mess.
That said, there are a few things you can do to improve your Zoom podcast experience.
Let’s get to it and show you how to make a Zoom podcast.
How to Record a Podcast on Zoom: Step-by-step guide
Here's the step-by-step guide on how to use Zoom to record your podcast.
Step 1: Sign up for an account
Sign up for a Zoom account if you don’t have one already. Zoom starts you off on a free basic account that allows you to host a meeting of up to 40 minutes.
Open the app and select the “Sign In” button. Enter your login details or sign up. You can also use your Facebook and Google accounts to sign up quicker.
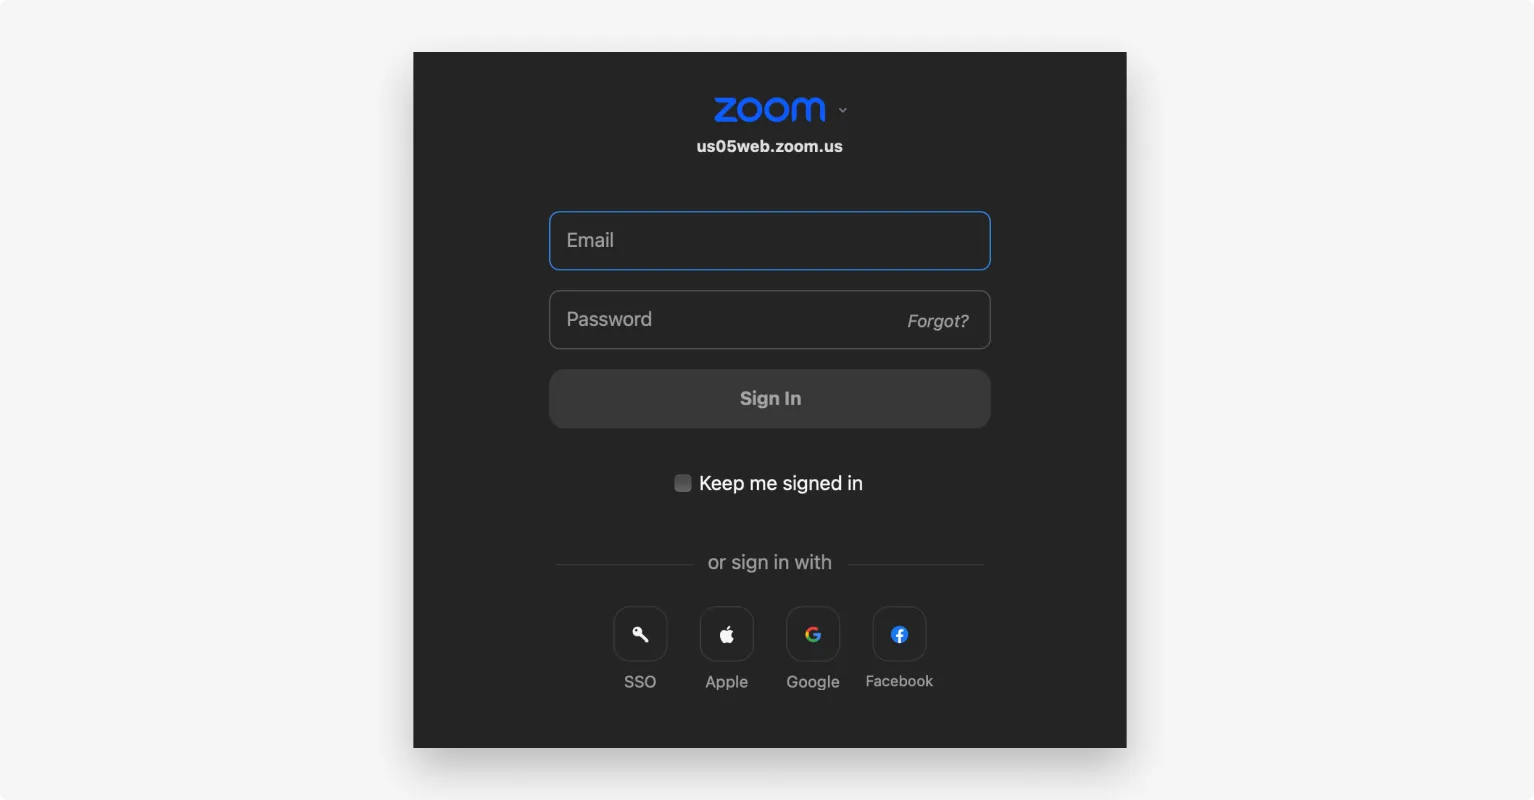
Note: Consider upgrading to one of their paid plans if your podcast will go beyond 40 minutes. You can use Zoom directly on your browser on zoom.us or download the app to your device.
Step 2: Set up a meeting
Next, you want to prepare your meeting room for a recording.
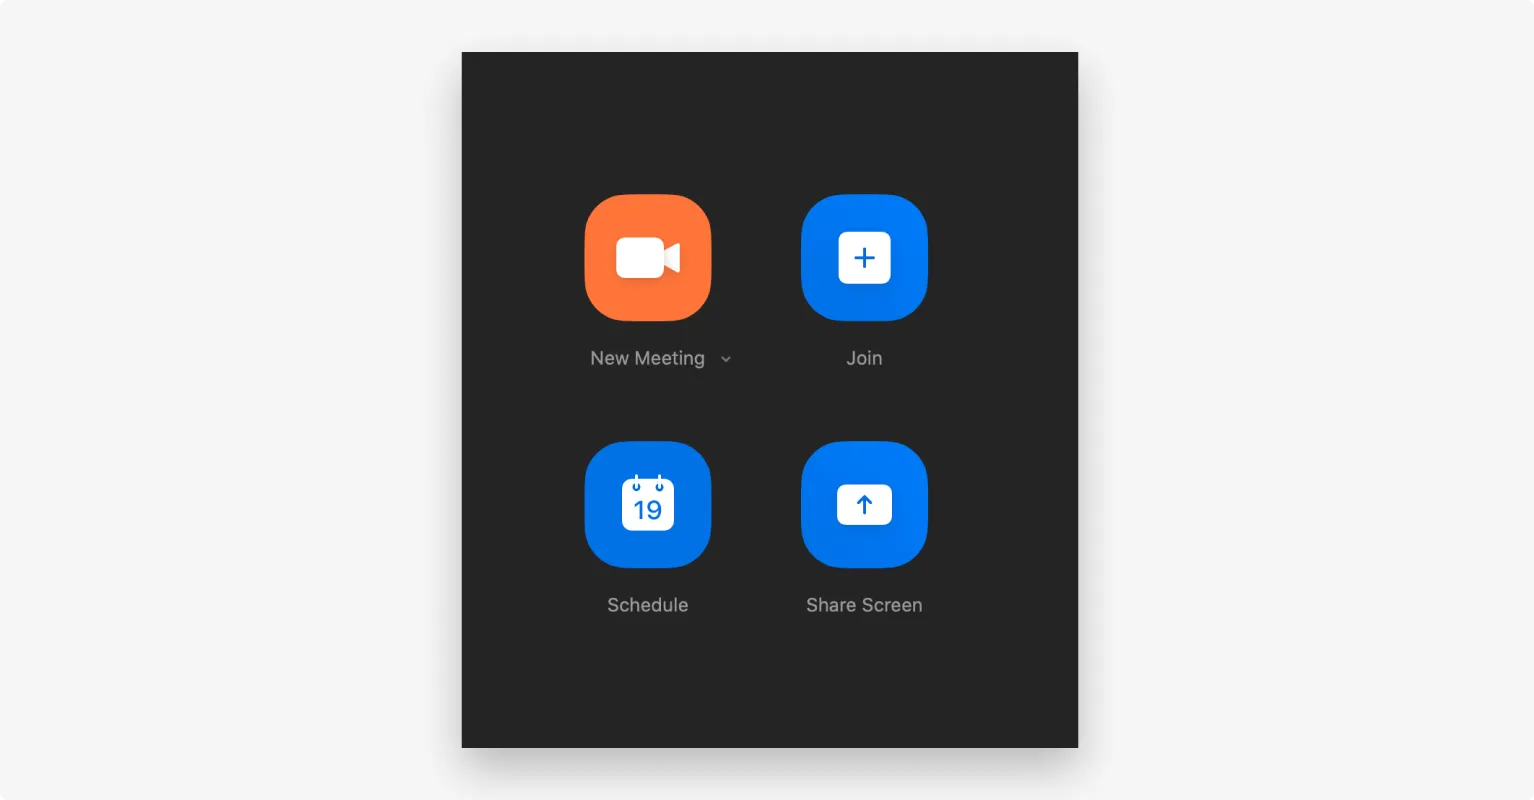
To do this, select “New Meeting”. You can also select “Schedule” if you’d like to record at a later date.
When setting up your meeting, fill out all the necessary information about your meeting like:
- The topic
- Date and time (and time zone)
- Approximate duration
- Whether it’s a recurring meeting
Save the details to complete setting up your meeting.

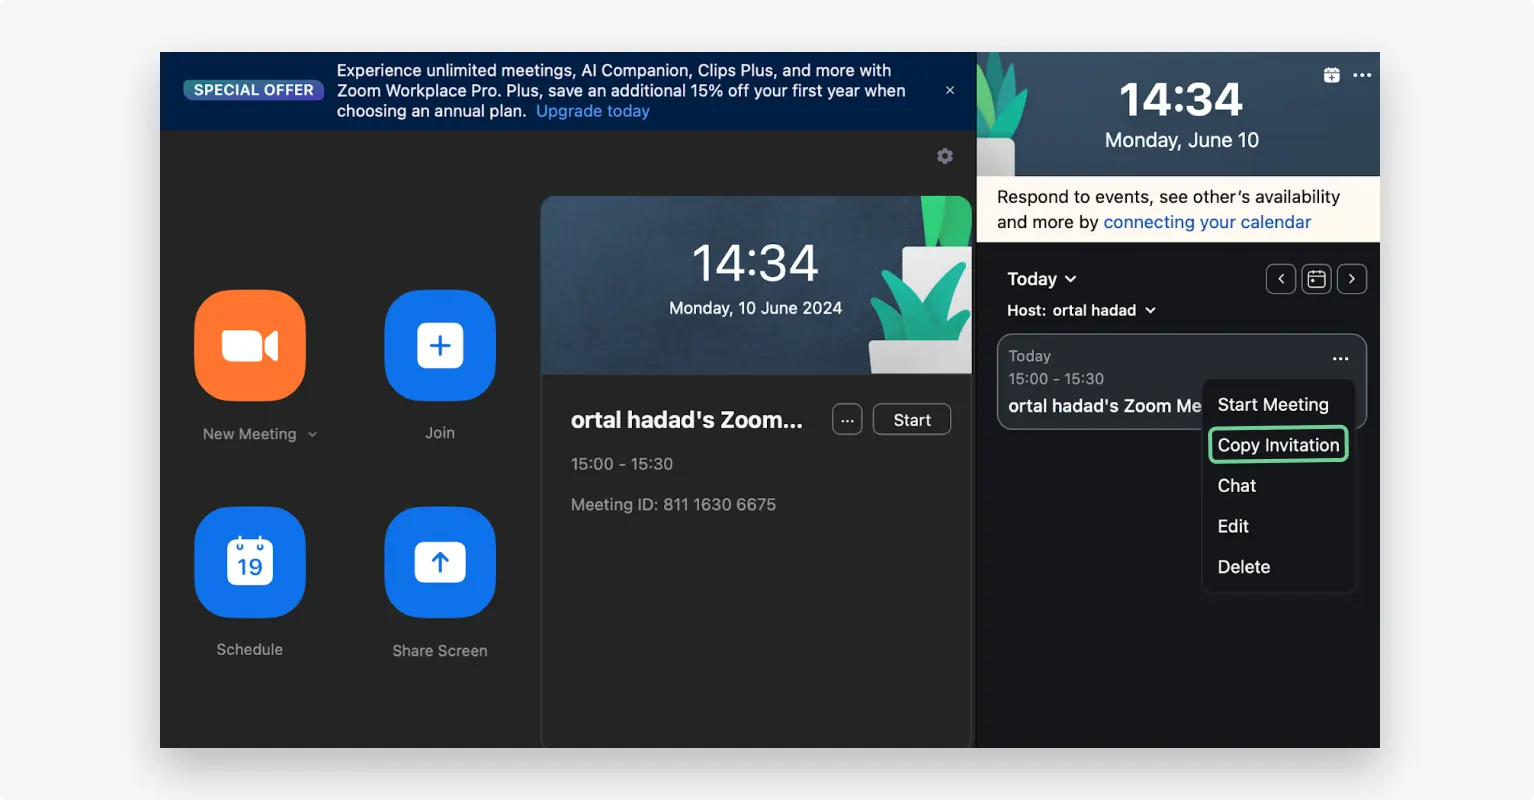
Copy the invitation link and send your guests the invitation.
You can find this by clicking on your meeting in the right dashboard. Here you’ll see a link. Alternatively, click on the three-dotted menu next to your meeting title and you’ll see the option to “Copy invitation”.
It’s a good idea to secure your meeting with a passcode to prevent unauthorized access.
Step 3: Set up your equipment
Zoom reduces the video and audio quality by default, so you must counter this before you start your recording.
Part of this involves choosing the right equipment and recording location.
Podcast equipment
All your prep should start before your meeting. If you don’t already have podcast equipment, we suggest getting the basics:
- A microphone
- Headphones
- A dedicated camera (or you can use your phone instead.)
We’ve got a full guide on podcast equipment to help you out.
Studio setup
Next, you’ll want to find a quiet room or place with good lighting and low to no background noise.
You can create your own podcast studio setup without the need for any fancy equipment. Try choose a place with soft furniture as this prevents excessive reverb or echo.
Testing equipment setup
Once all this is done, we suggest testing your equipment on Zoom.
You’ll have the option to do this when entering a meeting. Click “Test Speaker and Microphone” to check out your sound quality.
.webp)
Here you’ll have the option to test your speaker and then your microphone. You can also adjust your microphone input if you’d like.
After you’ve tested everything, select “End test”.
You’ll be back in the meeting room, where it’s a good idea to do a trial recording.
Click the headphone button “Join Audio” and then you’ll find the correct pop-up to press “Join with Computer Audio”.
Your microphone should now be set up. if you’d like to adjust it, you can access your “Audio Settings: from the arrow next to the microphone button as described in the previous step.
Make sure you’re also happy with your camera footage.
If you want to do a full test-run recording, follow the same steps we cover later on for recording.
Step 4: Optimize your Zoom quality
Before you start recording, you’ll want to adjust a few settings to ensure the best quality possible on Zoom.
Go back to “Audio Settings” which you can access from the arrow next to the microphone.
Once you’re in Audio Settings adjust the following:
1. Enable Original Sound
Zoom tries to cut out echo and interference to help the quality of your call with noise reduction. The problem here is that this means you’re not fully capturing the original sound.
You also don’t necessarily need this if you have a decent setup.
In the Audio settings tab, scroll to “Audio Profile”.
Here, make sure the checkbox next to “Original Sound for musicians” is selected.
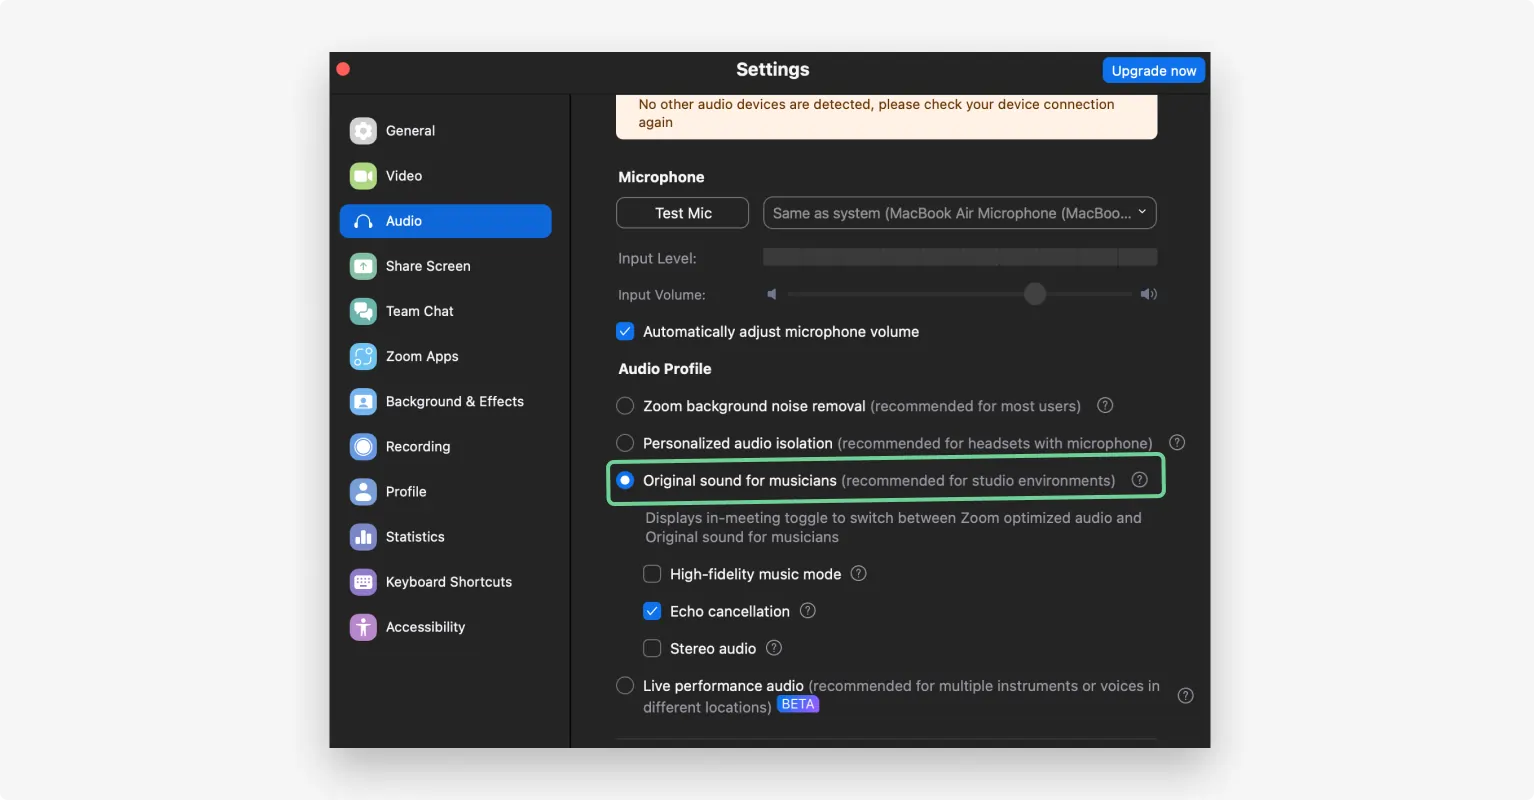
When you go back to your studio, you’ll now see the option to toggle this on or off at the top of the screen.
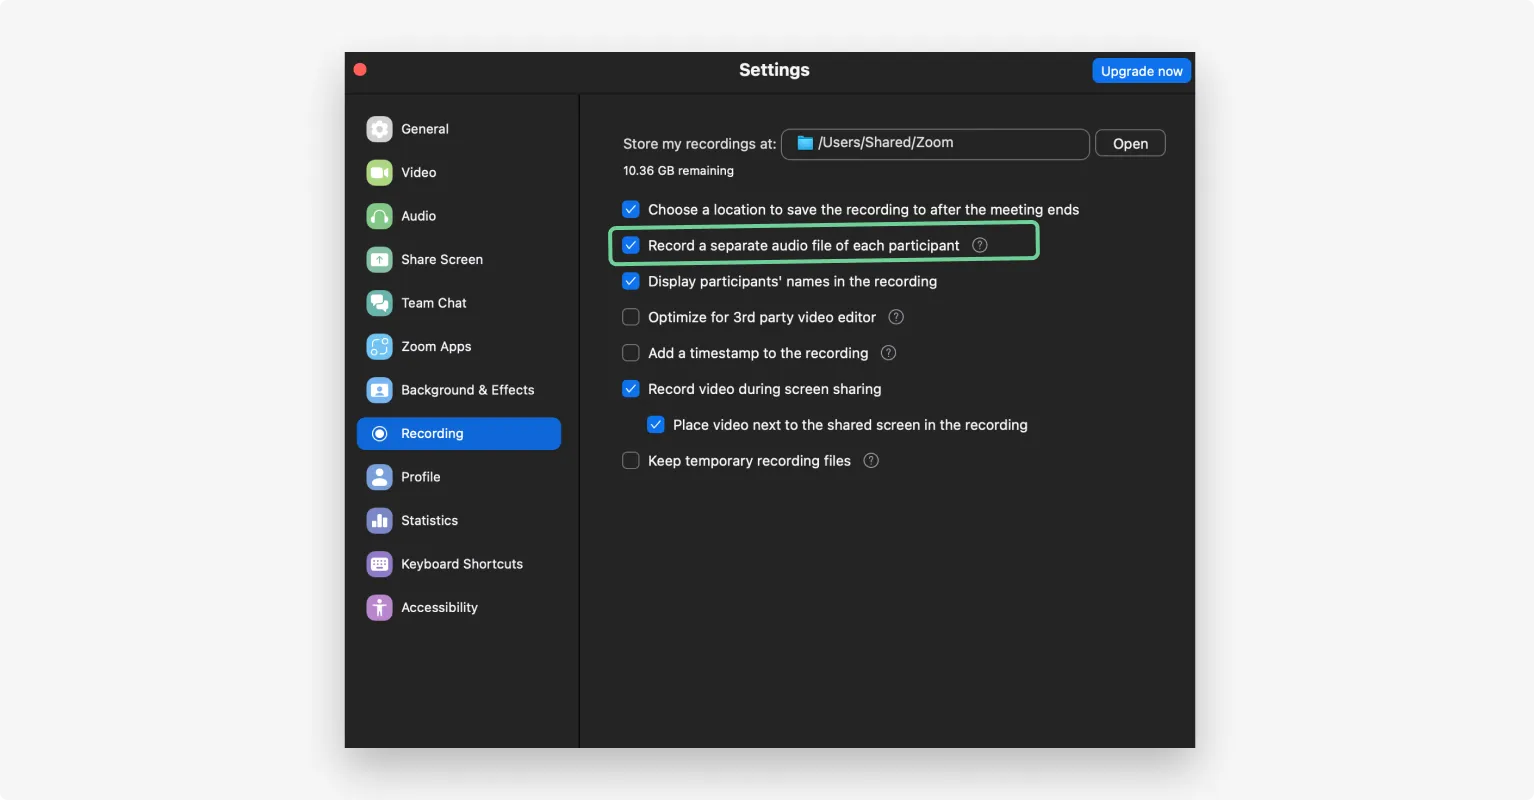
2. Record Speakers Separately
The next thing we suggest is to make sure you’re capturing separate audio tracks. This will give you more room in editing as you’ll be able to edit one person’s audio without effecting anyone else's.
For example, if one speaker’s volume is too low or they have a loud noise in the background, you’ll want to be able to adjust their audio without interfering with the other tracks.
Note: Zoom only lets you record separate audio tracks. You will need to use different software to capture each participants video on a separate track.
To enable this, head back to your settings. (You can do this by going back to Audio settings.)
Go to the “Recording” tab and then make sure the box is checked next to “Record a separate audio file for each participant”.
Step 5: Start your recording
Once your whole setup is ready, let in the participants and click on the “Record” button.
Proceed with the meeting as planned and click on “Stop recording" at the end of the meeting.
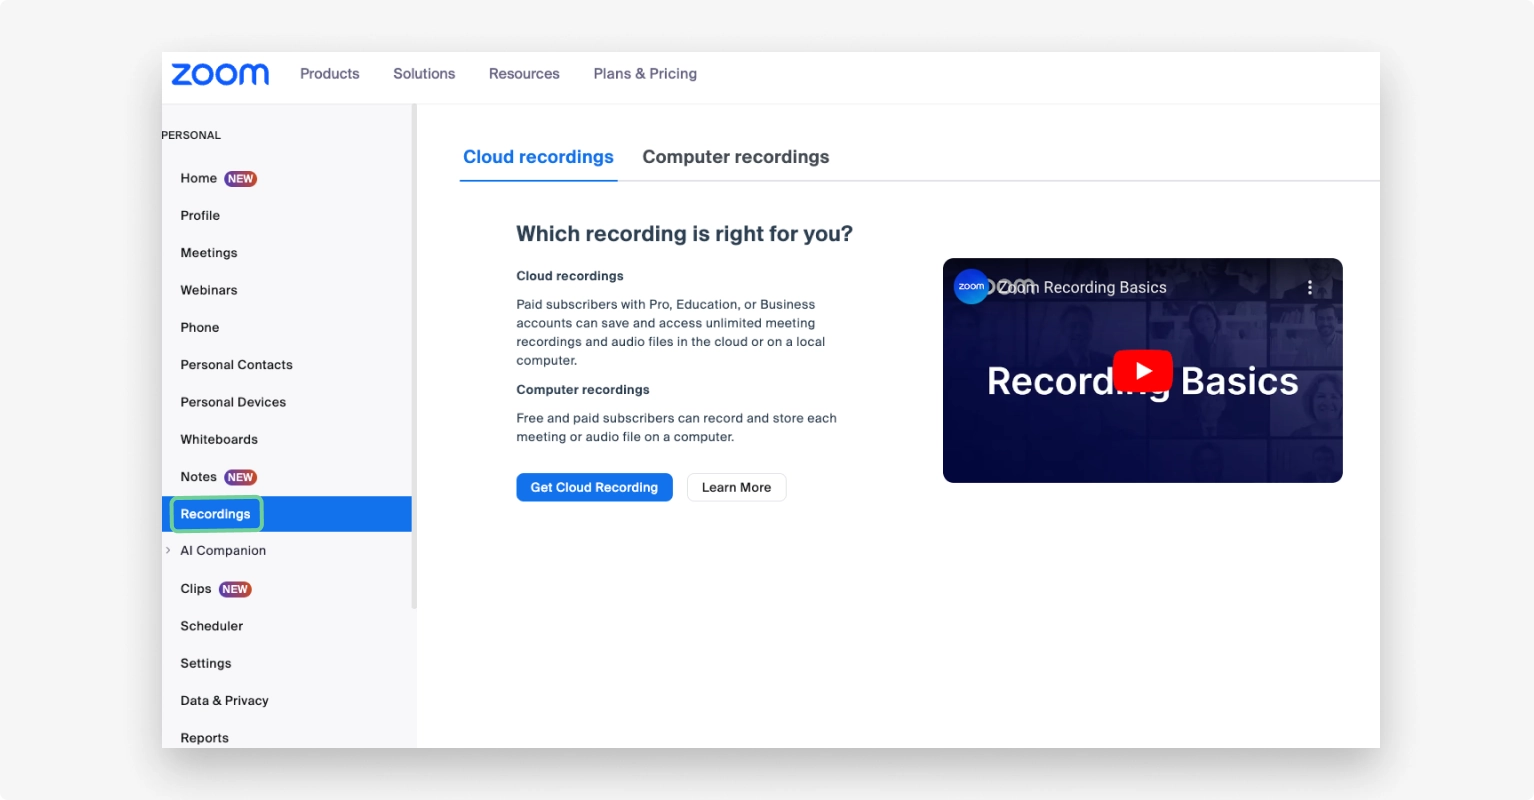
Zoom automatically saves your meeting recording locally or on the cloud, depending on your plan. Local recordings are available for free and paid users, while cloud recordings are only available for paid users.
Zoom also allows you to record your meetings using an iOS or Android device. But you must have a paid account, privileges as the host or co-host, and cloud recording enabled.
Note: It’s important to mention that Zoom’s local recordings refer to how files are stored. The actual files still record over the internet, which means your recordings are affected by your connection.
If you’d like to record your files directly on each person’s device we’d suggest using a platform like Riverside that offers actual local recording.
Step 6: Edit and publish your podcast
Note that Zoom does not offer separate video tracks, which can make editing complex.
However, here’s what you need to do.
You can access your recordings from your local computer storage or Zoom Cloud. On your local storage, they'll be saved under the “Zoom” folder. If you saved them on the cloud, they'll be available under the "Recordings" tab.
Zoom does not have native editing software, so you must invest in one. Start by importing your files to a video or audio editing software.
No matter what editing platform you choose, we suggest you:
- Trim your recording intro sections and cut out any irrelevant sections.
- Create a narrative and ensure theres a sequential flow.
- Fix up audio. Cut out background noise and normalize your audio levels.
- Add in your intro, outro and any other sound effects.
We have a full guide on podcast editing, if you’d like to learn more.
If you’d like to simplify the editing process, then we’d suggest working with a platform, like Riverside that has automated editing tools.
Step 7: Save and upload your podcast
Once you’ve finished editing, save the podcast episode in a format compatible with your podcast hosting platform.
Finally, upload and publish your podcast.
You should check the guidelines of your individual podcast platform. However, MP3 or MP4 formats tend to work best.

We have a whole guide on publishing your podcast, to get you started.
Bonus: Best practices for optimizing your Zoom podcast quality
Zoom is not designed as a podcasting app. But there are a few adjustments you can make to get podcast-quality recordings:
- Boost your internet. Optimize your internet connection by minimizing bandwidth-intensive activities by closing all tabs. You may also consider using an Ethernet cable.
- Adjust your volumes. In Zoom settings, adjust the input and output volume to the desired level.
- Get a decent microphone. Use an external mic that’s compatible with Zoom. This will help to improve the sound quality of your podcast.
- Use an audio interface. You should also use an audio interface alongside an external mic to give you more control over your sound.
- Select the right audio settings. For example, you should use original audio if you use an external mic.
- Get up close. Get in front of and as close as possible to your device if you’re using the built-in mic.
Is Zoom good for podcasts?
While Zoom is a popular platform for capturing online meetings, it’s not as well matched for recording high-quality content.
Pros and Cons of Using Zoom for Podcasting
Here are some pros and cons of using Zoom to record your podcast.
Pros
- Easy to access. Zoom is easy to access and use for beginner and expert podcasters.
- Remote usage. Zoom is convenient for interviewing remote guests.
- Cheap. Zoom offers a cost-effective podcast recording solution.
Cons
- Internet dependent. You need a stable internet for quality video and audio and there is no local recording — only locally-saved recordings.
- No separate video tracks. You can not record separate video tracks, which may make editing tricky.
- Fewer controls. The platform lacks controls that you may use when recording leading to less flexibility.
- Lack of features. Zoom lacks editing features outside its video-trimming capabilities.
- Short recording times. You can only record for 40 minutes at a time for free.
- Lack of security. Security concerns make Zoom unsuitable for confidential recordings.
Watch the video below to hear the difference between recording with Zoom vs a dedicated recording tool for podcasting.
Top Zoom alternatives for podcasters
Zoom is incredible for instantly recording interviews, but there are other alternatives you can use to record your podcasts. If you find that Zoom doesn’t give you everything that you need, you should look for other options. Two of the best are:
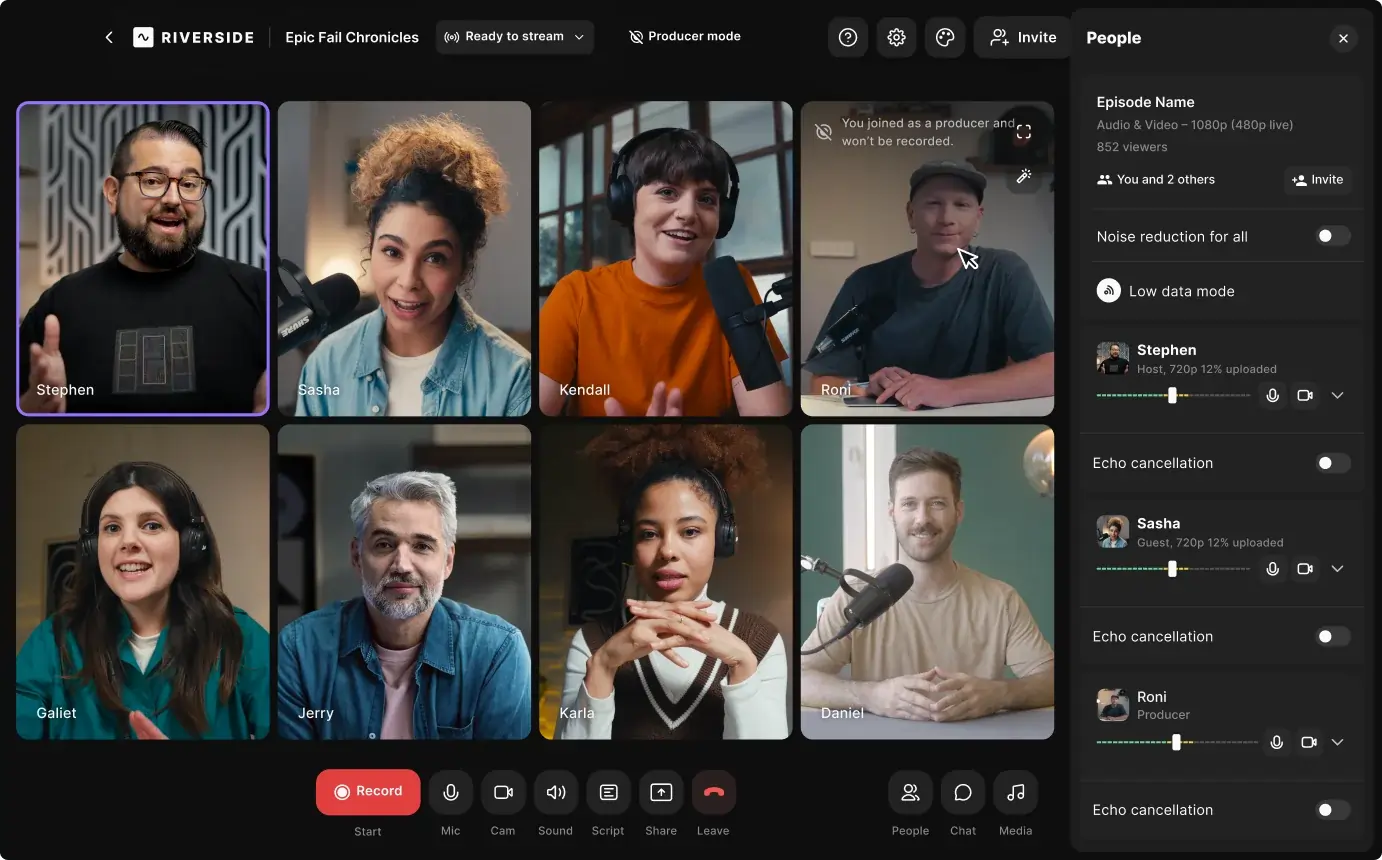
Riverside
Riverside is an affordable and straightforward remote podcasting platform.
Record top-quality interviews in up to 4K video and 48kHz audio resolution without worrying about your internet connection dropping out and ruining the recording. Invite up to 10 guests and download separate audio and video tracks for each.
The platform is built with podcasting in mind, leading to a smoother workflow and more flexibility. From bespoke customization to editing features, there’s a whole lot to love here. Riverside also includes distribution features to make the whole process easy to manage from start to finish.
Other features include the following:
- High resolution: Create ultra high-quality recordings in 4K video and 48kHz audio resolution
- Separate tracks. Record on separate tracks, which makes editing easier.
- Local recording. This helps with high resolution recording and means you don’t always need the internet.
- AI-powered Editor: With text-based editing, a seamless editing timeline and automated tools you can edit recordings in less time.
- AI clips: Magic Clips isolates the best snippets and turns them into shareable short videos
- Highly-accurate transcripts: AI-generated transcription available in 100+ languages
- Built-in teleprompter: Teleprompter feature to make presenting a breeze
- Live audience engagement: Live call-ins for audience members during webinars
- Automatic audio enhancement: Background noise removal and level normalization
- AI show notes: Automatically generated show summaries, with descriptions, chapters, titles and key takeaways.
- Presentation recorder: Record your content in high quality when you are presenting
- Remote guests: Record with up to 10 guest speakers at the same time.
- Producer mode: Gives someone on your production team behind the scenes controls to access audio and video controls, accept guest invites etc.
- The Media Board makes it simple to add something extra special to your webinars, such as intro music, clapping, vocals, transitions, and even an audience laughing.
Best for: beginner and professional podcasters
“Riverside is far better than Zoom for recording interviews.” - Seth Godin, author, entrepreneur and marketing leader.

Audacity
Audacity is a free and open-source remote recording software. It allows you to record and edit audio. Audacity supports separate audio streams for speakers. It is easy to use and ideal for people who are simply starting out as a podcaster.
Best for: beginner podcasters
Read more about the Zoom alternatives in our full article here.
FAQs on Recording a Podcast on Zoom
How do I host a podcast on Zoom?
To host a podcast on Zoom, you need to set up a new meeting and invite your guests to participate. However, you will need to adjust a few settings, such as the audio to ensure you record high-quality video and audio. Once you record your meeting, you can edit and publish your podcast on a podcast platform.
How do I get the best audio quality on a Zoom podcast?
Quality audio on Zoom requires stable internet, a good microphone, and a noiseless recording environment. You must also adjust native Zoom settings such as input and output volume and noise cancellation for quality audio.
How to convert Zoom audio to WAV files?
Zoom does not record in WAV, which may mean that your files are incompatible with your editing software. To convert your Zoom audio files, open your Zoom profile on your computer. Go to meeting recordings. Select the file you want to convert, click, and choose the 'convert’ option. Alternatively, you can convert your file using WAV converting software.
How do I change my Zoom recording to a podcast?
Zoom does not record on separate tracks. To change your Zoom recording to a podcast, import the recording to a video or audio editing platform. Edit the file, enhance the sound, and add other branding elements. Export the recording from your editing software in a format compatible with your podcast publishing platform.
What quality is Zoom audio for podcasts?
The audio quality on Zoom doesn't match the quality of podcasting platforms. Audio quality on Zoom will depend on your microphone, internet connection, Zoom settings, and audio enhancement devices that you use. Zoom’s highest video recording resolution is 1080p (1920p x 1080p).
How do I improve sound quality for a podcast on Zoom?
You can improve Zoom sound quality by using a quality external mic with noise cancellation features. You should also maintain a stable internet connection throughout the recording. You can adjust in-built audio settings in Zoom, such as enabling original sound. Using an audio interface with your external mic also helps to improve sound quality.


-(1).webp)