


Table of contents:
Creating top-notch YouTube content demands more than just visual appeal; crisp, clear audio is essential, not optional. It's a significant factor boosting viewer engagement and propelling your channel's growth.
That’s why having the right hardware, software, and techniques is important to get the clearest and crispest audio possible. And that's exactly what we're going to dive into in this guide!
Read on to learn more.
Why does your audio quality matter for YouTube content?
Here’s why audio quality matters for YouTube content:
Bad-quality audio can prevent your channel from growing
Ponder this: among the YouTube content you watch daily, how many of them have bad audio?
I’d wager almost none.
And if you do come across bad audio, it’s probably because the video is from an unknown YouTuber with a low view and subscriber count.
Popular YouTubers carry themselves with a certain degree of professionalism. And professionals are people who are meticulous, knowledgeable, and competent. But bad audio conveys the opposite. It signals sloppiness, lack of knowledge, and incompetency.
So your video must showcase professionalism, and having good audio is one way to achieve that.
Good audio enhances the viewer’s experience
Good sound quality is important in music videos, podcasts, or educational content.
In the case of music, it makes it enjoyable, and in the case of podcasts and educational content, it makes it easier to understand and digest.
Reduces audience bounce rate
Listening to long videos with terrible, grating audio is torturous. Viewers won’t stick around for long, especially if they have to strain to understand or listen. So bad audio can tank your place in the YouTube algorithm.
Makes captioning easier
The more clear your audio is, the easier it becomes for your transcription or captioning software to identify words. If you want to avoid inaccurate transcriptions that you’ll need to clean up, it’s worth working with crisp and clean audio.
What do you need to record quality audio for YouTube videos?
To create quality audio and video, you’ll need both hardware and software for the job.
Hardware for recording YouTube audio
Microphones:
The first order of business is to get a good YouTube microphone.
You’ll need to pay attention to your budget and requirements. For example, USB microphones are generally more affordable and easier to use, while XLR microphones offer better sound quality and are used by professionals but tend to be more expensive. We’ve got a full guide on choosing a microphone, but you’ll likely want to try tick these boxes:
Cardioid or shotgun mic polar pattern: These pick up less background noise and are ideal for speech.
Portability or hidden: Lavalier mics clip on your clothing so you’re free to move around. Alternatively, a hidden shotgun mic works well even if it's farther away from your face.
Easy to set up: If you’re a beginner a USB mic is generally easiest to set up.
Learn more with the video below:
Recommendations:
- Lavaliers: Rode SmartLav+, Shure MVL, and Sony ECM-44.
- Shotguns: Sennheiser MKH416, the Sennheiser MKE 600, and the Rode VideoMic.
- USBs: Blue Yeti X, Rode NT-USB, and the Shure MV7.1.
Headphones:
A good pair of headphones is essential for monitoring your audio while recording. They help you catch any issues with the audio immediately so you can re-record if necessary.
Recommendations:
- Budget-friendly: Audio Technica ATH-m20x and the Sony MDR7506.
- Higher-end: Shure SRH1540 and the Sennheiser HD 660S.
Audio interface:
If your microphone has an XLR connector, then you’ll need a USB audio interface to connect it to your computer. Two excellent options include the Focusrite Scarlett 2i2 and the Rodecaster Pro II.
Pop filter:
This reduces or eliminates plosive sounds, which are bursts of air produced when a person pronounces consonants like ‘p’ or ’b.’ When these bursts hit the microphone, they can create a loud, distracting noise like a ‘pop.’
Getting a pop filter can also save your microphone from saliva and moisture.
Portable audio recorders (optional):
Portable audio recorders like the Zoom H6 or the TASCAM DR-05X come in handy for on-the-go recording when you don’t have a computer nearby and you need to store your audio.
YouTube audio software
Besides hardware you’ll want to make sure that you’ve got suitable recording and editing software for YouTube content.
Riverside
Riverside is a recording and editing software that’s an excellent choice for both beginners and advanced users. It can record sharp, crisp 4K video and, more importantly, pristine 48 kHz audio.
The best part? Once you’re done with the recording, you get separate files for both audio and video. With other platforms, you may have to set this up manually, or it may not be an included feature.
A separate audio file can make it easier for you to edit the file in an editor like Audacity.

Audacity
Audacity is a free tool that can help you enhance the quality of the video. People use it to record audio for voice-over or narrations, edit audio tracks, batch process multiple clips, add audio effects, and more.
How to record audio for YouTube: 4 Steps for high-quality audio
Once you’ve planned for and prepped to make the YouTube video, here’s how to ensure you have high-quality audio during recording.
Step 1: Get the right equipment
If you want to record high-quality audio, a good microphone and headphones are a must.
You might also need some additional tools discussed in the above section. Before purchasing any of them, make sure that they are all compatible with your computer and setup.
Step 2: Setup your recording environment
Your recording environment can affect the quality of your video audio quite a bit. Here’s what you can do to set it up properly:
If you’re indoors, find a quiet room that’s free from ambient noises like fans, outside traffic, people talking, etc. If that’s not possible, here are some additional things you can do:
- Add carpeting: A room with carpeting as it helps in absorbing sound.
- Seal gaps: Make sure the windows and doors have tight seals.
- Add acoustic panels: Add absorbent panels or foam panels to soften the noise within the room while absorbing outside noise.
- Use solid doors: Replace hollow doors with solid ones or add an extra layer to existing doors.
- Use thick curtains: Use heavy, dense curtains to reduce noise leakage through windows. In general, soft materials like carpets, curtains, soft furniture, and foam panels help to dampen sound reflections.
If you’re outdoors:
- Choose a time and location that’ll be the least noisy.
- If you are recording in a public area, you’ll need a shotgun or hypercardiod mic, so it only captures your audio and not that of the ambient sound.
- Use windscreens or furry windjammers to protect the mic from wind noise.
No matter your setup, make sure the mic is at the correct distance from your mouth. This should be at least 6-12 inches away from it. The mic is pointed directly at you for best results.
Once all the hardware and software are set up, do a few test recordings to check the sound quality and adjust levels as necessary.
Step 3: Record your audio
When you’re all set, hit record. You can record directly on your equipment, but we’d suggest using dedicated YouTube recording software. You’ll have way more controls and everything will automatically save to your computer. Monitor your audio to help you spot background noise or other sound anomalies rather than discovering them in post-production.
If you’re recording remotely try Riverside. Our platform records in up to 4K video and 48 kHz audio. If you’re recording multiple people, then you’ll get separate audio and video tracks for each person. This gives you more flexibility when editing your audio in post-production.
If you’re capturing a YouTube video in your house and have multiple guests, then an audio interface added to your software can help you record separate soundtracks.
Step 4: Edit your audio
Use audio editing software like Audacity or Riverside to clean up and edit your audio. Some audio editing basics you may want to implement include:
- Removing background noise and plosives: First thing first, make sure you remove any unwanted noise, clicks, or pops that distract from your content.
- Adjusting audio levels and equalization: Cut out unwanted frequencies and adjust volume levels so everything sounds smooth and uniform
- Adding an intro and outro, plus sound effects and background music: You may want to add a jingle or transitional effects to spice things up and make your videos recognizable.
How to record top-quality audio & video for YouTube with Riverside
There’s no better app to record high-quality video and audio for YouTube than Riverside. If you have capable equipment, then it can record up to 4K video and 48 kHz audio top-production quality YouTube videos.
Our software uses local recording, capturing recordings directly on your device and making sure the audio and video quality is unaffected by poor internet connection. We also have background noise removal and echo cancellation to keep your audio as clear as possible.
After recording, you get separate audio tracks for each person. This lets you edit your audio without touching the video files and you can edit one person’s audio without affecting anyone else's.
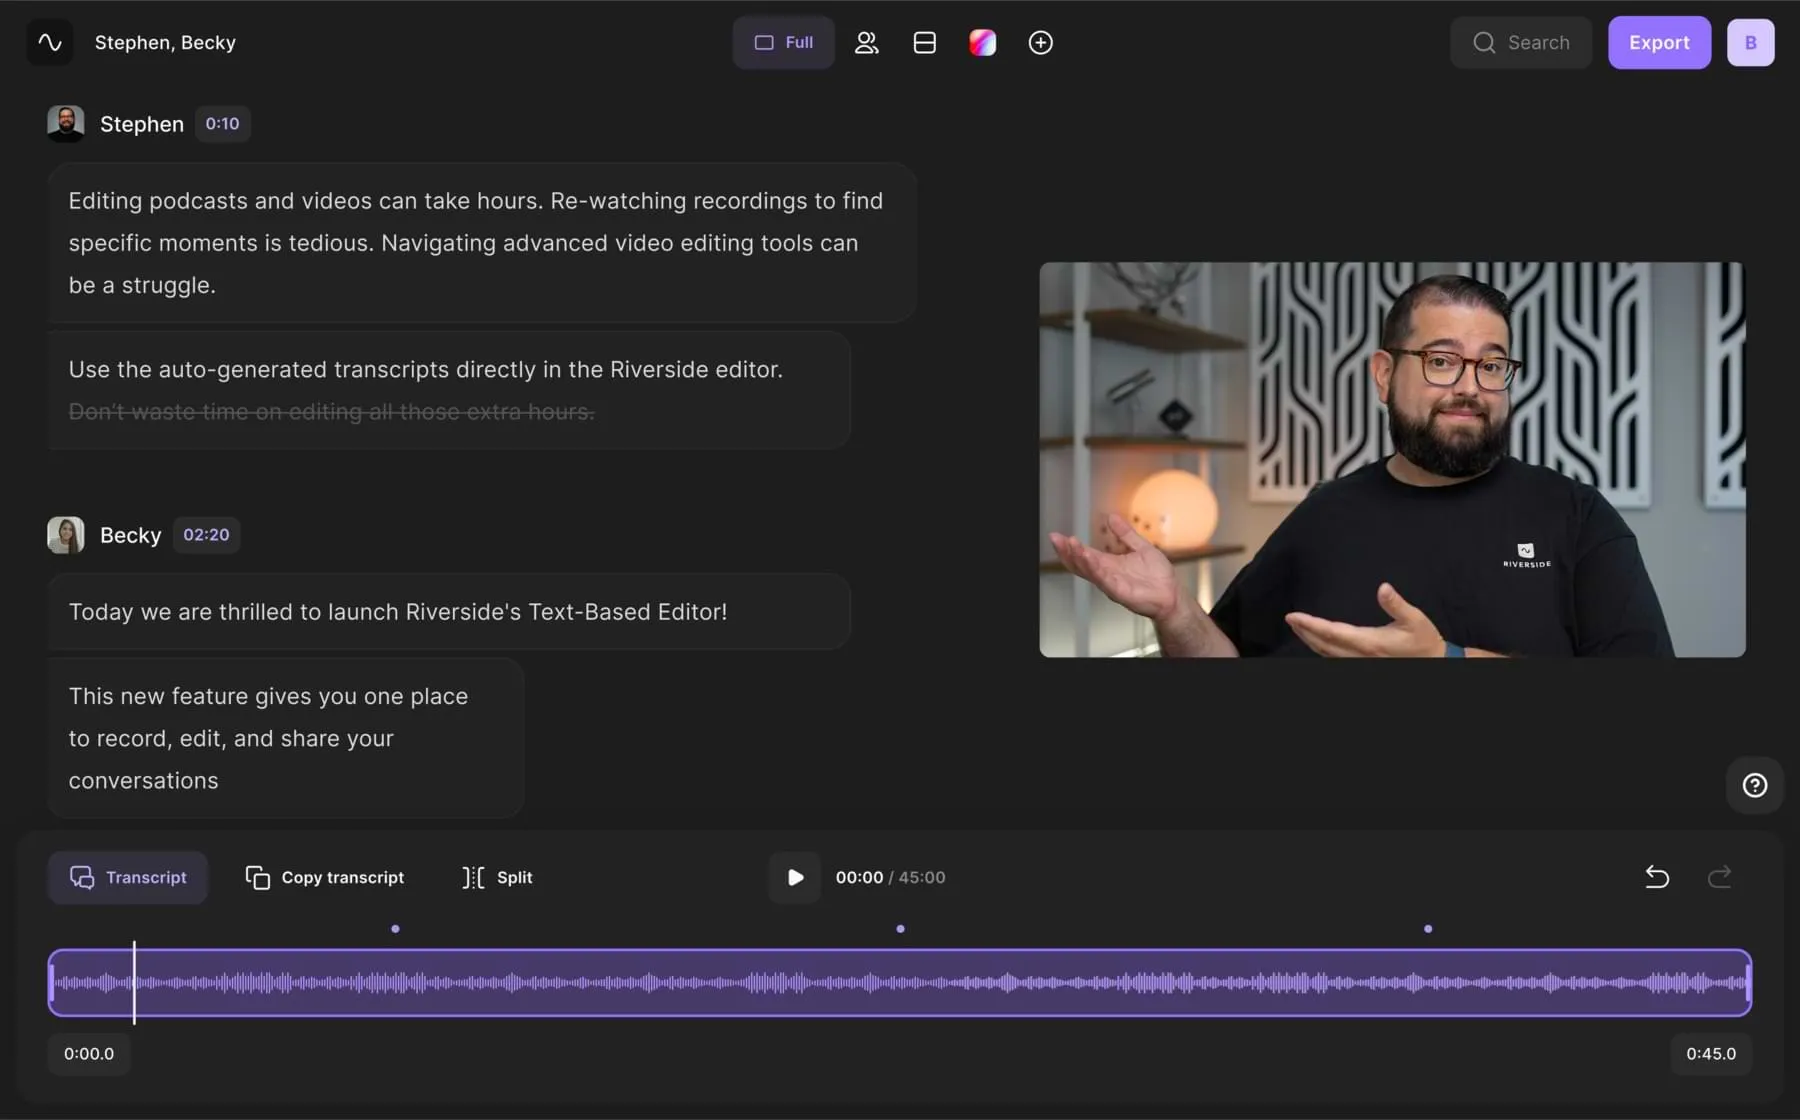
To make editing even easier, try our text-based editor. This works with AI transcriptions so you can trim video and audio as easily as deleting text in your recording transcript. Finish off with a custom background, captions and a set layout.
We also suggest turning your YouTube video into Shorts with our Magic Clips feature. This uses AI to turn your recordings’ key moments into shareable snippets.
Key features
- High-quality resolution at up to 4K video and 48kHz WAV audio
- Background noise removal to reduce disruptions to your main audio
- Multi-track recording so you have more editing control
- Remote recording with up to 9 guests without worrying about internet issues
- Text-based video and audio editing, so trimming your recording is as easy as editing a text transcript
- Magic Clips tool so you can effortlessly turn your long-form content into Shorts
- Media board so you can add sound effects and background music live
- Mobile app available for iOs and Android so you can record on the go
- Highly accurate AI transcription for easy transcripts and captions in over 100 languages
- Live streaming and multistreaming to up to 1,000 people.
FAQs on How to Record Audio for YouTube
How do Youtubers record their audio?
YouTubers record their audio using the following:
- Microphones: Either a USB microphone, XLR microphone, lavalier microphone, or a shotgun one, depending on the recording situation and your budget.
- Audio recorders: For outdoor recording and high-quality audio recording.
- Headphones: These help YouTubers monitor the audio in real time and keep the sound quality up to par, free of unwanted noise. They also help them edit the audio during the editing phase.
- Audio editing and recording software: YouTubers may enhance the audio by removing noise, adjusting levels, and adding effects using audio editing software.
- Professional studios: Established YouTubers or those with higher budgets may even rent or build professional recording studios with high-end equipment and soundproofing.
- Collaborating with audio professionals: For more complex projects, YouTubers might collaborate with audio professionals who have expertise in recording, editing, and mixing audio.
Do YouTubers record audio and video separately?
Yes, many YouTubers record audio and video separately. A separate audio file can help YouTubers edit and enhance the audio file and later sync it to the video file. And if these YouTubers record a podcast with multiple people, they use apps like Riverside to get separate audio and video recordings of each guest. This makes editing the audio of an individual person easier.
How do I record audio from my phone to YouTube?
First, record your audio on your phone using a voice recording app. Riverside is a great option to capture audio in a high-quality, lossless format.
Then, convert this audio recording into a video format. To do so, you’ll need to import the audio file into a video editing app, add images to go along with the audio, and then export it as a video file.
The last step involves uploading the video to YouTube.


