Table of contents:
Zoom meetings are here to stay. With that, it’s worth learning how to transcribe your Zoom recordings.
Recording transcripts are not only for keeping track of meetings. Transcripts are great for repurposing meetings into written media such as blogs or social media posts. If you’d like to post your recording online, then transcripts make it easy to add captions and boost your reach on search results.
Ready to get started?
This Zoom transcription guide walks you through each step. We’ll show you how to transcribe meetings directly on Zoom, plus we share a better alternative.
Can you transcribe a Zoom meeting?
You can easily produce a Zoom meeting transcript natively.
All you need to do is enable automatic transcriptions in your settings. After recording, Zoom will automatically forward a finalized transcript to the email associated with the host's Zoom account. If you’d like to fix up errors, you can do so directly on Zoom’s web portal. Here, you can also toggle on or off your transcripts as closed captions on your video.
Note that all Zoom transcriptions are in VTT format. This means it includes timestamps, and you can format the text as you’d like. But before you transcribe, you should know that transcriptions are only available with specific requirements.
Requirements for Zoom transcriptions
Zoom's audio transcription services are available for all users with access to Cloud recording, such as those with a business, education, or enterprise license. If your Zoom account falls under these requirements, you can access the site's full recording, transcription, and editing tools anytime.
How to transcribe Zoom meetings: Step by Step
Need an audio recording transcript of your Zoom meeting? Follow these simple steps to get started with Zoom's in-built transcription tools.
Step 1: Login to your Zoom account
Log in to your Zoom account on the web portal. Remember that transcription requires a business, education, or enterprise license. If you don’t have one of these accounts, sign up to access cloud recordings and Zoom transcription.
Step 2: Enable cloud recordings and automatic transcriptions
To activate cloud recordings:
Navigate to your account and then under personal select ‘Settings’, then ‘Recordings’. Toggle ‘Cloud Recording’ on if it’s not already enabled.
To enable Automated Zoom transcription:
From cloud recording, navigate to ‘Advanced cloud recording settings’. Here, enable ‘create audio transcript’ and save your changes.
In settings, ensure that you have enabled Zoom's audio transcription function.
Step 3: Record your Zoom meeting
As usual, record your Zoom meeting. You can activate live transcripts here by clicking the Live Transcript CC button. We’ll cover this in more detail later.
Once your meeting is complete, select end recording and end call.
Step 4: Download your Zoom recording transcript
After recording, Zoom will send the host two emails. The first is a link to your recording file, and the second should include a link to your Zoom transcriptions. This may take a few minutes, but once you receive the email, you can click the links to navigate to where your recordings and transcripts are on the cloud.
Just like that, you should have access to your Zoom meeting transcription.
Read more: How to Transcribe Video to Text | 101 Guide to Transcribing Video
How to edit Zoom audio transcriptions
Want to make changes to your Zoom transcription?
One option is to download your transcription as a VTT file and open with a text editor or word-processing application. Alternatively, follow these steps to edit transcriptions in Zoom.
Step 1: Sign in to the Zoom web portal.
Step 2: Go to the navigation menu, and click recordings.
Step 3: Click on your recorded meeting, and view your recording files.
Step 4: Select the play icon. Transcription text will display on the right side of the screen.
Step 5: Playback your recording, and review your transcription. To edit, hover over a phrase, and select the pencil icon.
Step 6: To edit a speaker's name, hover over the current speaker name, and click the pencil icon.
Step 7: Make any desired changes to your transcription text. Click the check mark to finalize changes.
Step 8: Save and download your completed transcription files.
How to generate live captions in Zoom meetings
Using Zoom technology, you can generate live captions, helping you improve accessibility for all call participants during Zoom meetings. Follow these steps to get started.
Step 1: Open your Zoom account, and go to the Zoom web portal.
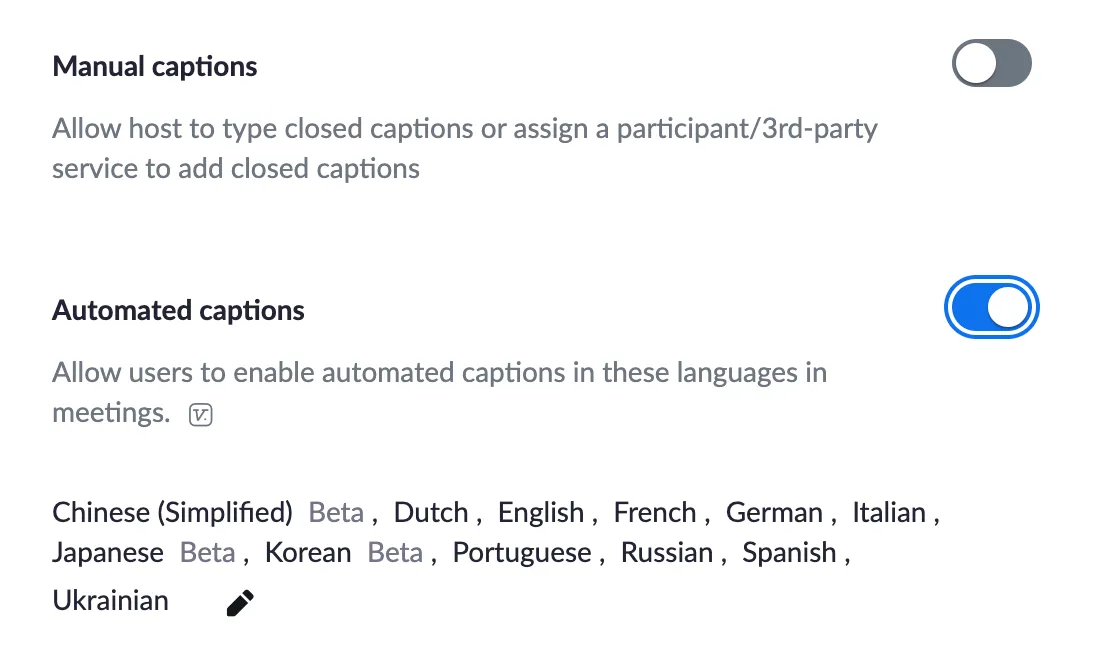
Step 2: Navigate to your account settings, and enable the auto-generated captions feature.

Note that you can also enable manual captions if you’d like the option to type our captions yourself.
Step 4: Invite all relevant participants, and begin your Zoom call.
You’ll need to select the Show captions button from your toolbar to turn your live captions on and ensure they are working properly before diving into meeting content.

Is Zoom good for transcription?
If you often conduct meetings with Zoom, the site's in-built audio transcript tools makes it easy to produce transcripts natively and automatically. Automated transcription saves you time and labor, but you must use robust software that yields accurate transcripts.
While Zoom transcription is a good choice, it may not be as accurate as dedicated video and audio transcription software tools. This is partly because the recording quality isn’t the best, and Zoom relies on your internet connection for resolution. Generally speaking, you want crisp and clear audio, as this leads to the most accurate transcription results.
Zoom transcription alternative: Riverside
Instead of relying on Zoom, rather turn to software that offers you accurate transcriptions without any extra effort.
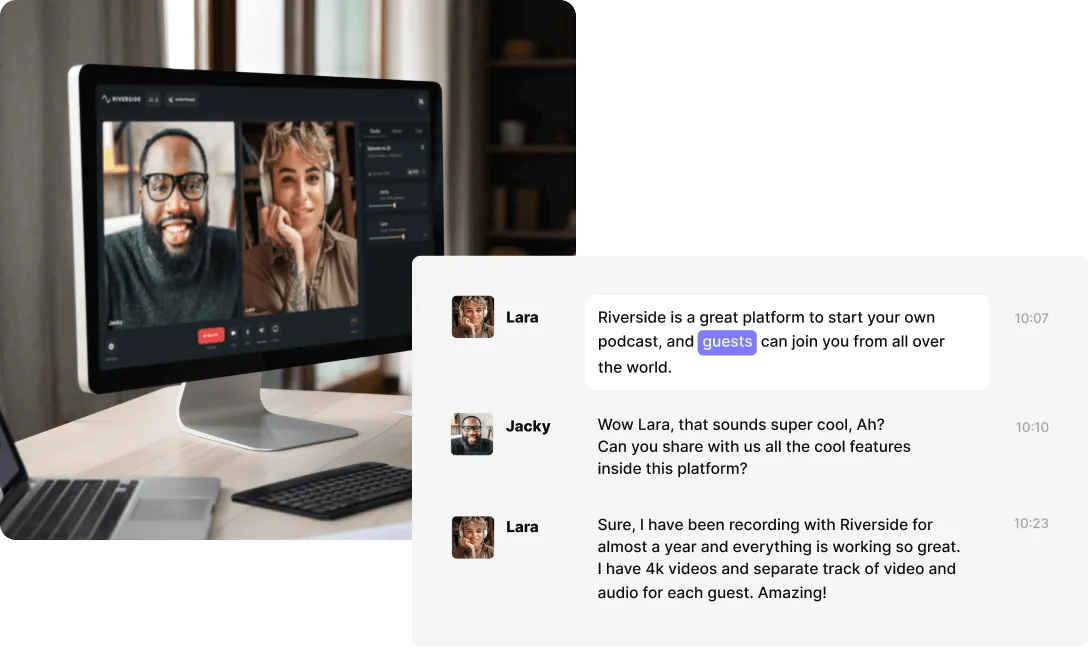
We suggest trying Riverside, which offers you automated transcriptions straight after recording. You don’t need to set up anything extra, and transcriptions are currently available on all of our plans. Best of all, you can use our AI transcriptions to edit your videos with our text-based editor.
Riverside is a top-quality recording software that allows you to record everything on your device instead of relying on internet conection. This means high-resolution audio (and video) at up to 48kHz, no matter where you are. Crystal-clear recordings lead to more accurate transcripts, but Riverside offers a lot more.
“Riverside is far better than Zoom for recording interviews.” - Seth Godin, author, entrepreneur and marketing leader.
With Riverside, you can:
- Generate transcriptions in over 100 languages without paying anything extra
- Download SRT transcripts ideal for video captioning or TXT files idea for content repurposing.
- Receive highly accurate transcripts straight after recording, just at the click of a button.
- Get transcripts that differentiate between speakers, so you know who’s talking when
- Record audio at up to 48kHz and video at up to 4K resolution without worrying about internet connection.
- Capture separate audio and video tracks for all participants
- Edit your video and remove unwanted parts, create shareable clips, and customize your branding.
It’s also worth noting that, unlike Zoom's VTT files, Riverside's SRT files are compatible with most social media platforms. This makes it a seamless experience to add captions to videos on Facebook, Instagram, TikTok, YouTube, and more.
Find out more, or sign up to transcribe recordings accurately without the extra effort. You can also try our free transcription tool!
FAQs on Zoom transcriptions
Still unsure about how best to navigate and understand Zoom transcription tools and processes? Here are our answer to a few frequently asked questions.
Where are Zoom transcripts saved?
Your Zoom transcripts are available in various locations.
You’ll usually receive an email with a link to your transcriptions. You can also navigate to your transcriptions on the Zoom web portal. You’ll need to go to Cloud Recordings and then locate the meeting you’d like to find transcripts for.
Can I transcribe on Zoom without recording?
Zoom automatically transcribes the meetings which you record. If you’d like to create live transcripts, you can do so without recording first. Simply follow the guidelines above on turning on live transcription in Zoom meetings. Otherwise, without a recording, you won’t receive transcriptions.
Does Zoom offer free transcription?
Zoom's transcriptions are available for free and are applicable to all recordings saved on the Cloud. However, there are some prerequisites that your account must meet in order to be eligible for the full suite of transcription tools. To access some advanced features, including transcription of long recordings, you may require a paid Zoom subscription.
How do I get transcription of Zoom recording?
To get a transcript of your Zoom recording, make sure that your recording is saved to the Cloud and is eligible for auto transcription, as determined in your account settings. Once you've done this, you can access a transcription by navigating to your saved recording in the Zoom web portal. Easy!
Can you print a Zoom transcript?
Your Zoom transcripts can be printed if needed. To print a Zoom transcript, you'll need to download the transcript to your device and open the document using a text editor or word-processing tool. Remember that text may appear differently on screen than on paper, so you'll need to accommodate for margin overlap and other stylistic elements.
How do I transcribe a Zoom meeting in Word?
If you need to produce a transcript in a Word document, simply download your finalized Zoom transcription and use Microsoft Word to open the document. Here, you'll be able to make changes as desired.
Alternatively, you can take manual notes directly in Word during your meeting or use the platform’s dictation tool. These are likely to be less comprehensive than an automatic transcription but can be a valid option for recording simple information.
In what languages can I transcribe on Zoom?
All of Zoom's transcription and closed caption features are currently available in English. The site's transcription tools are available in over 35 languages, including French, Spanish, German, Chinese, Hindi, Arabic, and more. Over time, Zoom plans to add additional languages to its repertoire for both transcript and close caption compatibility.


.webp)


