Table of contents:
Key takeaways:
Subtitles make your content more accessible and engage viewers. They can also boost your visibility online as they make it easier for search engines to crawl your content.
Creating an SRT file might sound technical, but it’s surprisingly straightforward, especially with the right software.
So, let’s get to it. Here’s how to make an SRT file across different devices and platforms.
What is an SRT file?
An SRT file, short for SubRip Subtitle file, is a text-only document used to create subtitles for video or audio content. This file includes line-by-line captions for every frame. Every caption is timestamped and arranged in a sequence. This helps ensure precise synchronization between captions and the corresponding audio or video.
An SRT file has four main components:
- A sequence number for each frame
- Beginning and ending time codes
- A caption for each time code
- A blank line after each frame
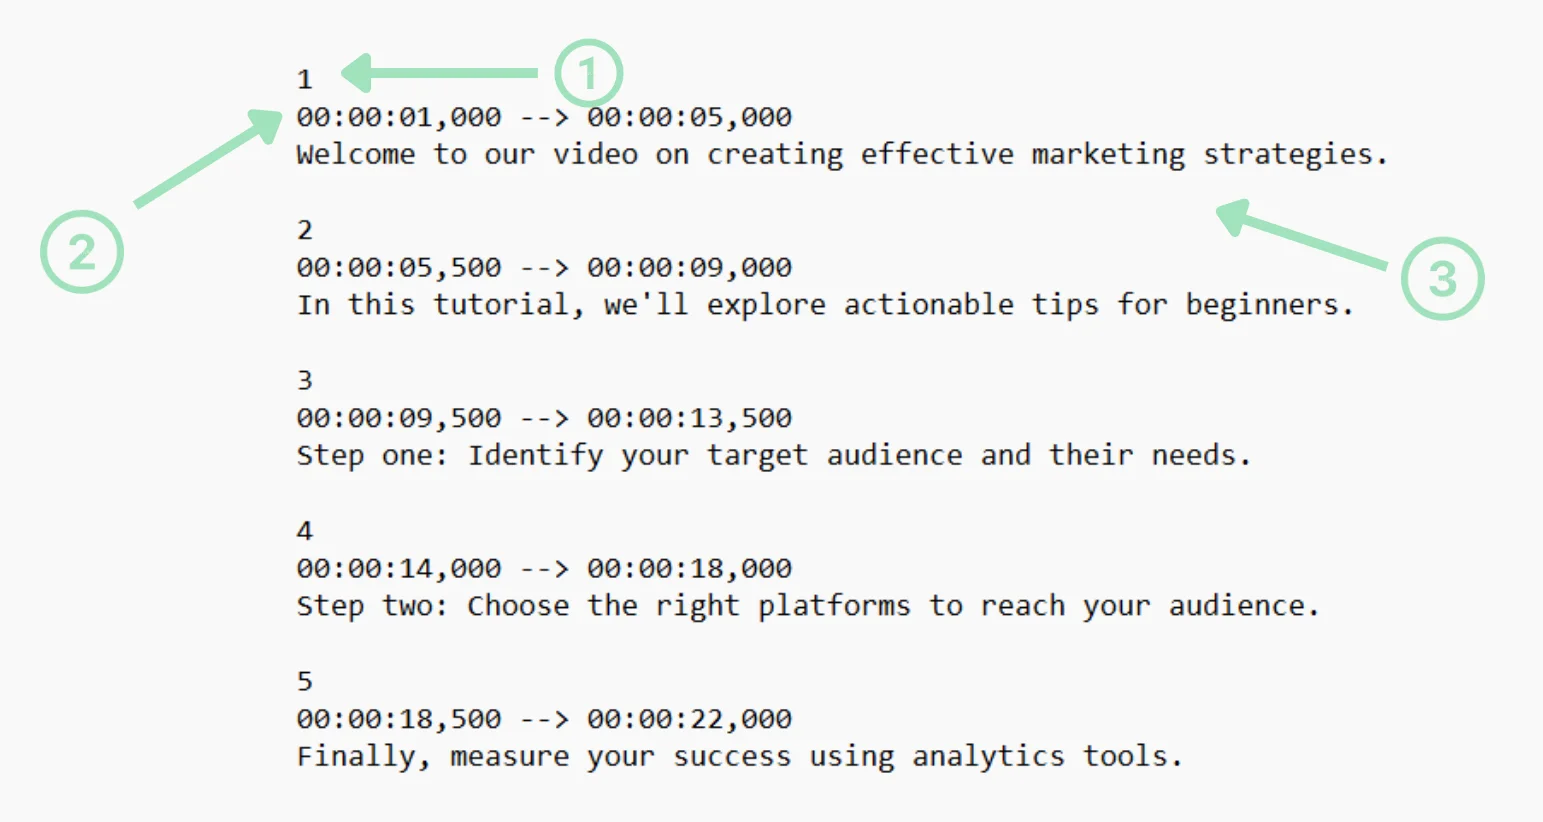
Here are a few reasons why you should consider adding video-to-text subtitles using SRT files:
- Improved accessibility: Subtitles make your content more accessible to people with hearing and visual difficulties.
- Expand reach: Appeal to a global audience and become discoverable among people who don’t speak the same language as you.
- Better SEO: Give search engines more context about your video with an SRT file. This will improve rankings and increase visibility in organic search results.
You can use SRT files to add captions across all major video platforms like YouTube, Facebook, and Vimeo. Let’s explore different methods for creating subtitle files.
How to create an SRT file
There are two ways you can create an SRT file: manually, or automatically with a subtitle generator tool.
The manual method can be time-consuming since you must rewatch the video and type every word based on the exact timestamps. This can be a lengthy process if your video is longer than a few minutes.
An automatic captioning tool like Riverside makes SRT file creation much faster (and easier).
Simply add your video, and Riverside will generate timestamped subtitles with the correct formatting and sequence.
Let’s check out how to use Riverside’s automatic transcription tool to create accurate subtitles quickly.
How to create an SRT file automatically with Riverside
Creating SRT files with Riverside is quick and hassle-free. If you have a Riverside plan, SRT transcriptions are automatically generated for all your recordings and can be downloaded directly from your dashboard. Select the recording, navigate to the transcription tab, and download your SRT file. (You can learn how here).
Alternatively, if you don’t have a Riverside account, try using our free SRT file generator. Here’s how easy it is:
Step 1: Upload your file
Go to Riverside’s free SRT file generator and upload the audio/video file you want to create subtitles for.
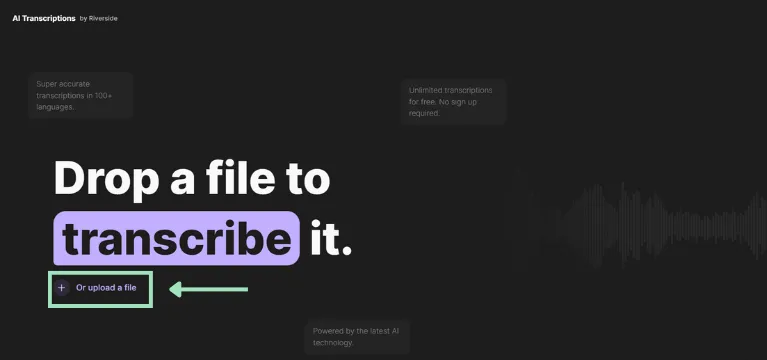
Step 2: Pick your preferred language
Choose the language in which you want to transcribe your content. Riverside can generate subtitles in 100+ languages to help you reach a large audience worldwide.

Step 3: Set the content format
Choose the format of content you’re transcribing, whether it’s a podcast, webinar, or video content.
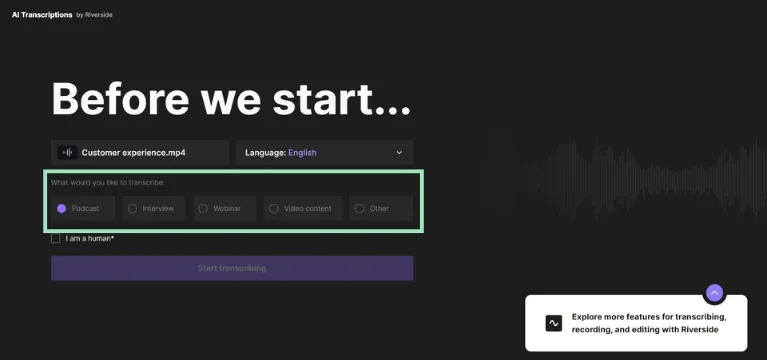
Step 4: Generate and download the transcript
Click “Start Transcribing” to generate an SRT subtitle file. This process will take a few minutes, depending on your video's length.
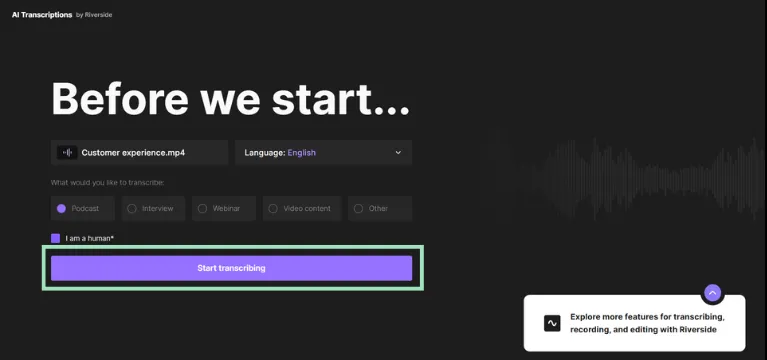
Once your subtitles are ready, you can copy and paste the text, or download captions as an SRT file. If you want to make corrections, just open your SRT file in a text editor like Notepad.
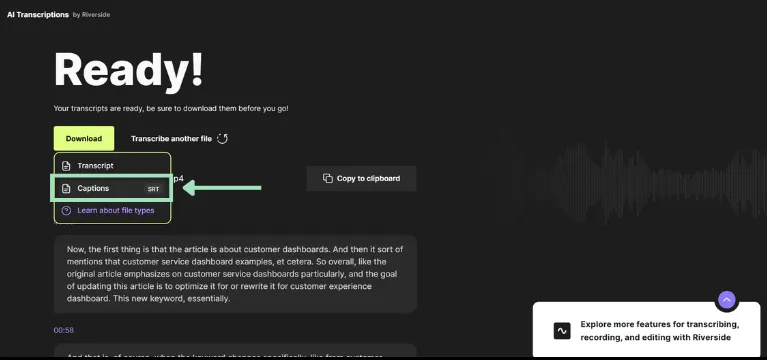
Now you have an SRT file that you can upload to platforms like YouTube, Facebook, Twitter, and LinkedIn.
Riverside also produces studio-quality audio and video recordings with a powerful editor to polish your content. Its built-in transcription tool has a lot to offer, including:
- Subtitles in SRT and TXT file formats
- Nearly instant and automatic transcriptions in more than 100 languages
- The ability to detect and label speakers for complete clarity in the subtitles
- Subtitles delivered within minutes and instantly after recording with Riverside
- AI-generated summaries for quick content overviews, titles, and chapters
Now that you’ve learned the easiest way to create SRT files, let’s check out how to manually create subtitles on Mac and Windows devices.
How to create an SRT File on Windows
Pick the video you want to generate subtitles for and go through these steps to create an SRT file on Windows:
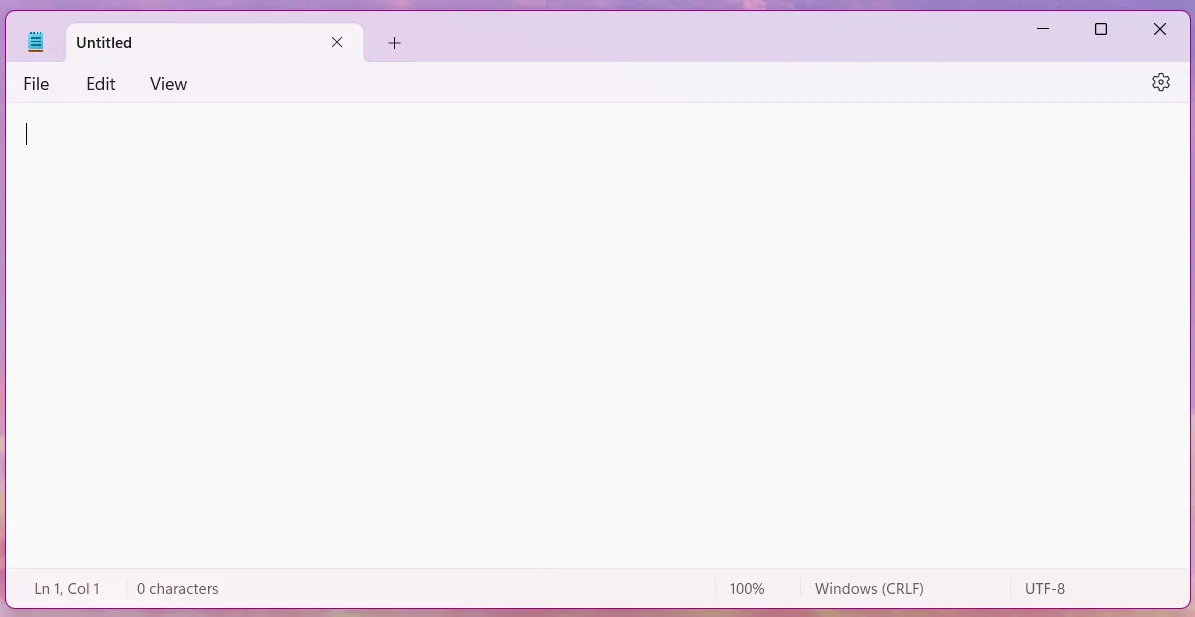
Step 1: Open a new file on the Notepad app
Open Notepad, the text-based editor available in Windows.
Step 2: Start with the subtitle sequence and timestamps
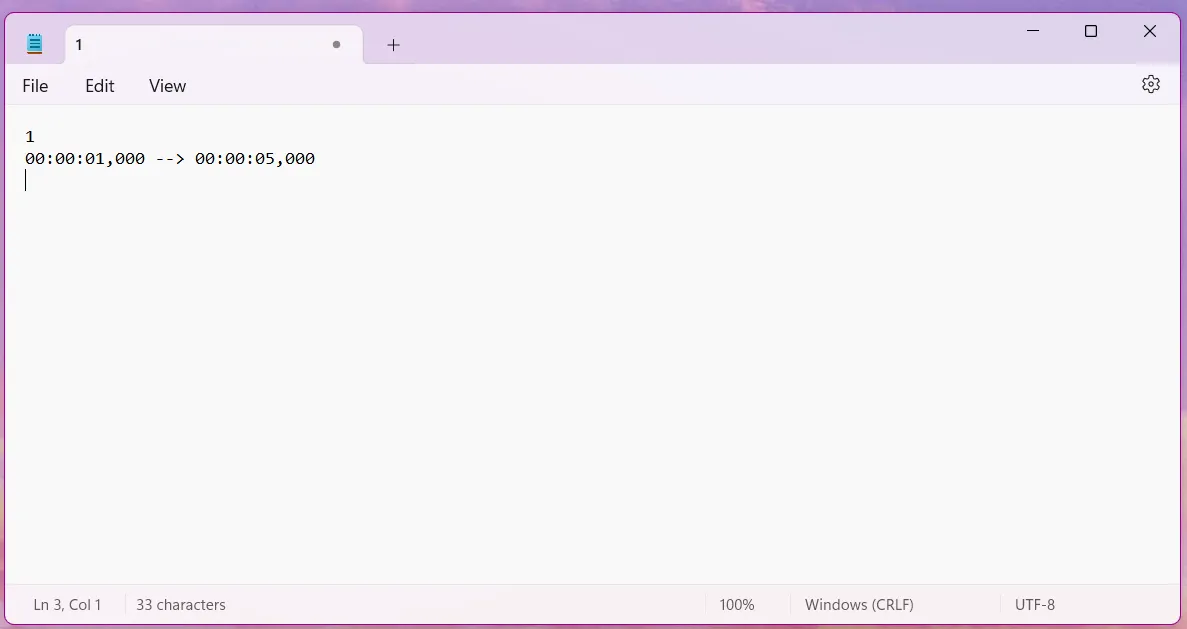
Type “1” for the first subtitle as the sequence number. Then, hit “Enter” and add the start and end time codes for the subtitle in the format HH:MM:SS,MS --> HH:MM:SS,MS. These define when the subtitle appears and disappears on the screen.
Here’s an example:
Step 3: Add the subtitle text
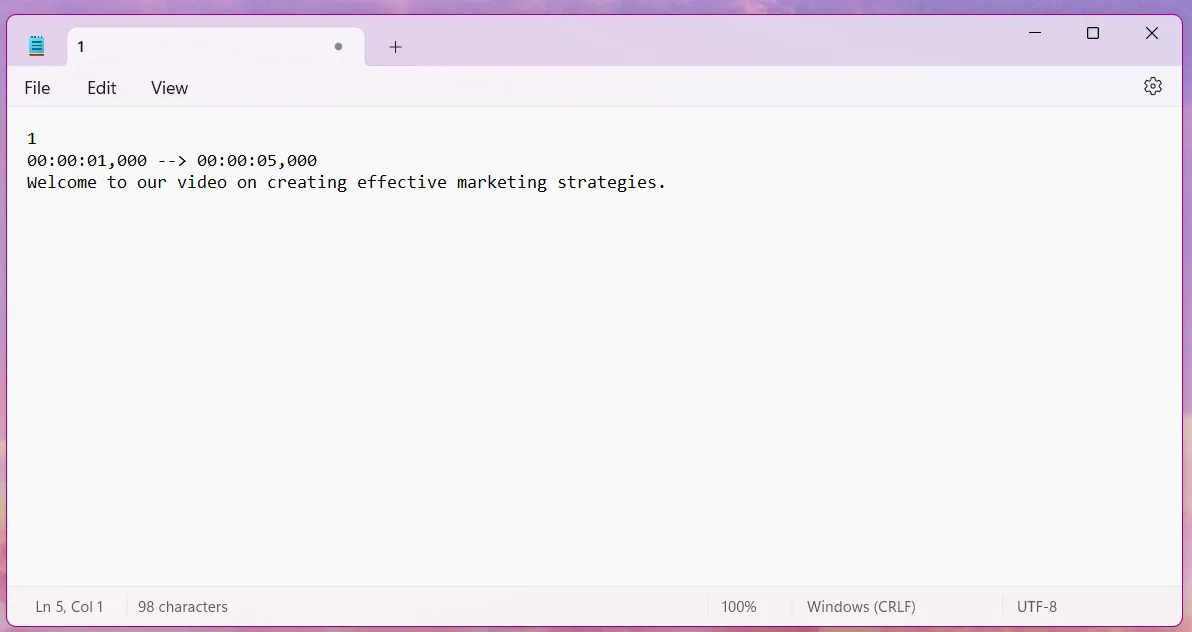
Press “Enter” after the timestamps and and write the text that will appear on the screen.
Follow these formatting guidelines for a good viewing experience:
- Keep the text to 32-40 characters per line (depending on platform guidelines).
- Use 1-2 lines per subtitle block to ensure readability.
- Avoid splitting sentences unnaturally across blocks or lines.
Step 4: Repeat for additional subtitles
Number each subtitle block in order. Assign appropriate time codes for the appearance and disappearance of each subtitle. Ensure there is no overlap between subtitles.
Step 5: Save your SRT file
Repeat these steps for the entire video. Then, go to “File” and “Save as” to save your subtitle file. Add a file name and save it as a .srt file. Use UTF-8 encoding to ensure compatibility with most platforms.
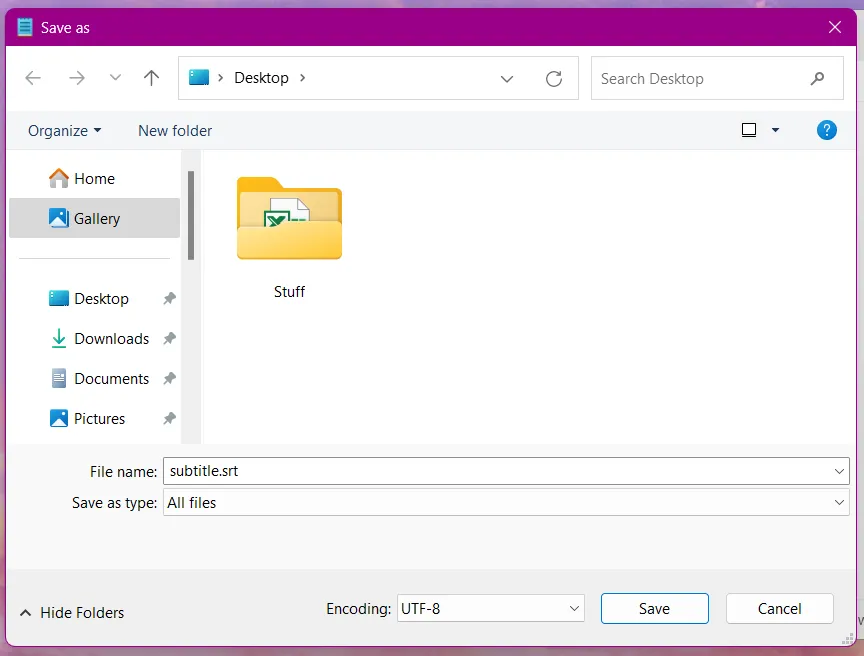
Now you can upload your SRT file with your audio or video to platforms like YouTube, Facebook, Twitter, and LinkedIn.
How to create an SRT File in MS Word
MS Word is another text-based editor that generates SRT subtitle files. Let’s see how.
Step 1: Open a blank document
Create a new blank document in MS Word.
Step 2: Set up the font and formatting
Unlike Notepad, MS Word doesn’t offer minimal formatting for generating subtitles.
You have to choose a monospaced font like Courier New. You can also set the paragraph spacing to 0 to remove any extra space between paragraphs.

Step 3: Start typing each subtitle group
Add these three elements in a sequence:
- Frame number
- Timestamps
- Subtitle text
Leave a blank space after each subtitle block. Follow the same process until the end of the video.
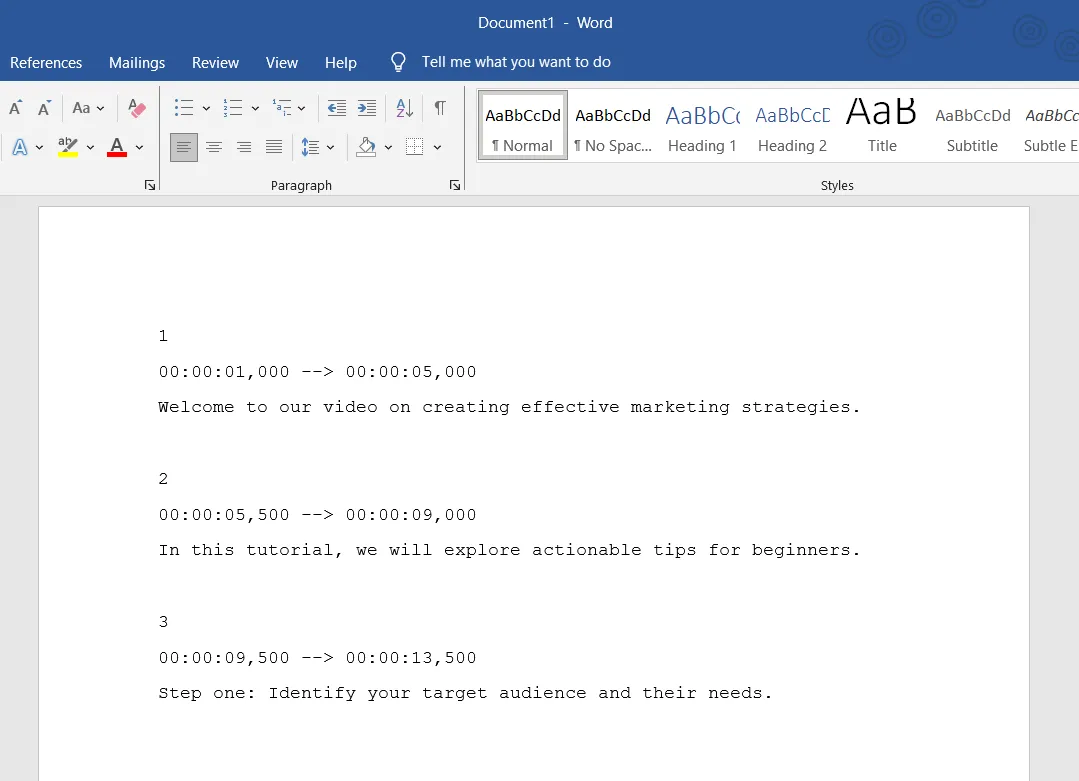
Step 4: Review and save the SRT file
As a final step, review your subtitles for any errors.
Once everything looks good, go to File > Save as to save the file in the Plain Text (.txt) format. Use the .srt extension when naming your file to create an SRT file.
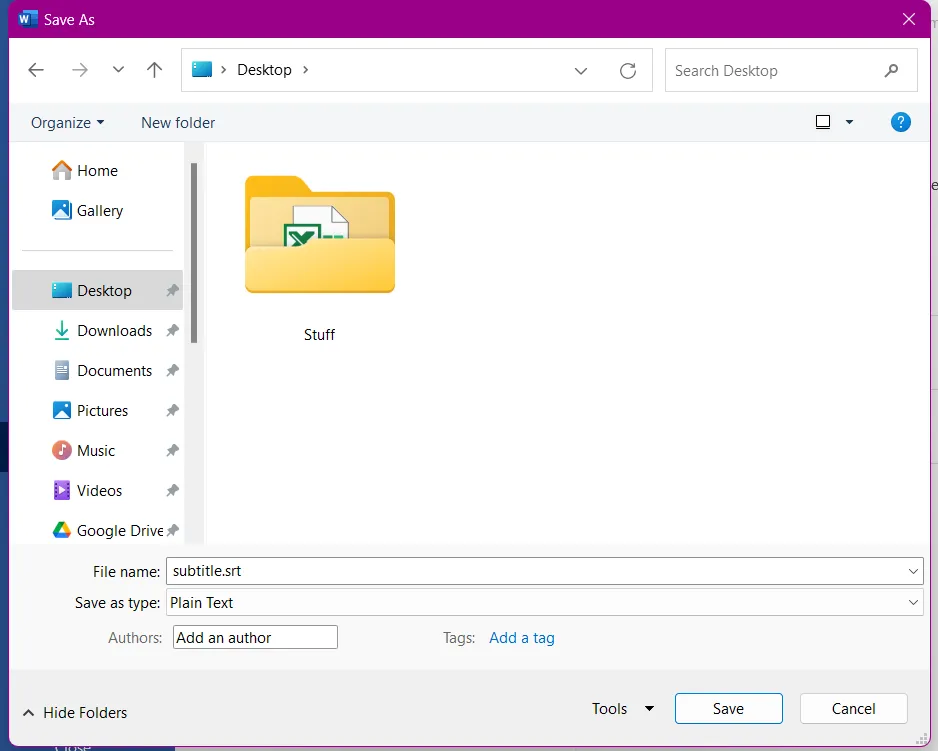
Step 5: Test your SRT file
You can test-run your subtitles file by opening it using a video editing tool or video player. If the file loads the subtitles correctly, that means it has no issues.
How to create an SRT file for YouTube
You can generate an SRT file using any of the above options and use it on YouTube. But you can also make an SRT file using YouTube’s built-in captioning tool to fast-track the process.
YouTube allows you to auto-generate captions with speech recognition and manually edit/add the text for accuracy. Then, you can download the subtitles as an SRT file.
Here’s how to create a subtitles file for YouTube.
Step 1: Go to YouTube Studio
Open YouTube Studio and go to the video where you want to add subtitles.
Step 2: Navigate to the Subtitles tab
Go to the “Subtitles” tab on the left menu and choose your preferred language.

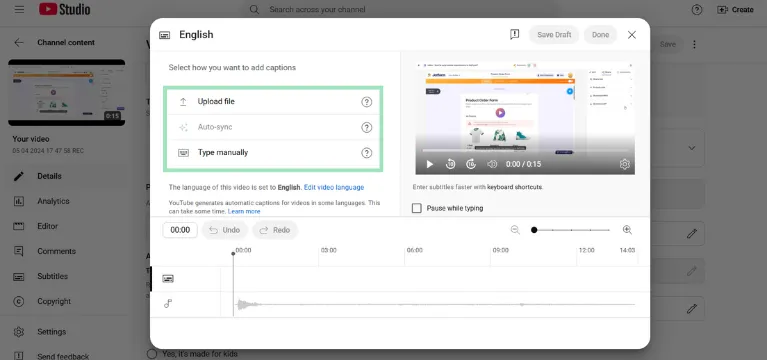
Step 3: Add, generate, or edit subtitles
Now, go to the “Details” tab on the left menu and find the “Subtitles” option.
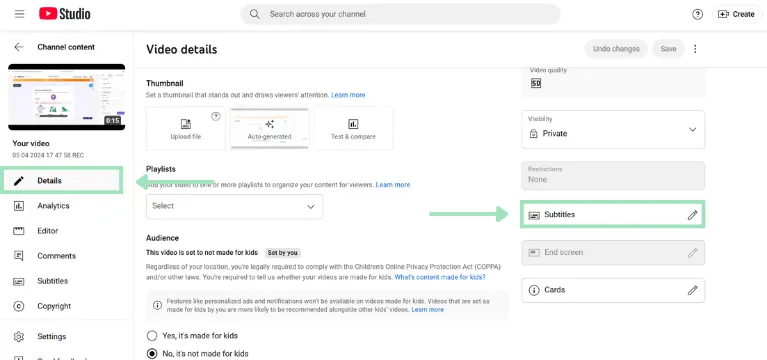
Here, you’ll find three options to add subtitles:
- Add subtitles from scratch: Upload your SRT file with timing. Use this option when you’ve already created subtitles using any of the methods above.
- Manually input subtitles: You can create captions from scratch by manually adding timestamps and text for each frame.
- Edit auto-generated subtitles: Duplicate YouTube’s existing subtitles and edit the transcript for accuracy. You can edit the captions and time codes.
Step 4: Test and save subtitles
Check whether all subtitles are in sync with your video’s pace. Then, click “Save” to save your subtitles.
You can publish the subtitles immediately or save the transcript as a draft to edit later.
Note that YouTube’s transcription accuracy varies, especially in languages other than English. If you are unable to generate quality captions, try Riverside’s transcription tool to create an SRT file.
How to create an SRT file for Facebook
Creating an SRT file for Facebook is slightly different from other platforms.
For starters, you have to be mindful of Facebook’s file naming conventions to ensure compatibility with your SRT file. Here are a few conventions to follow:
- File name: [filename].[language_code]_[country_code].srt
- Language code: ISO 639-1 standard
- Country code: ISO 3166-1 alpha-2 standard
You should also ensure that your subtitle file is saved in the UTF-8 format to prevent display issues. Other than those minor quirks, Facebook SRT files follow all the basic standards you’ve already learned.
Let’s look at the steps to create an SRT subtitle file for Facebook.
Step 1: Upload your video to Facebook
First, upload the video where you want to add subtitles. You can create a new post or use the “Video Library” option to post this video.
Step 2: Access the video editor
Navigate to the “Edit Video” option and open the video editor to find the option to add subtitles.
.webp)
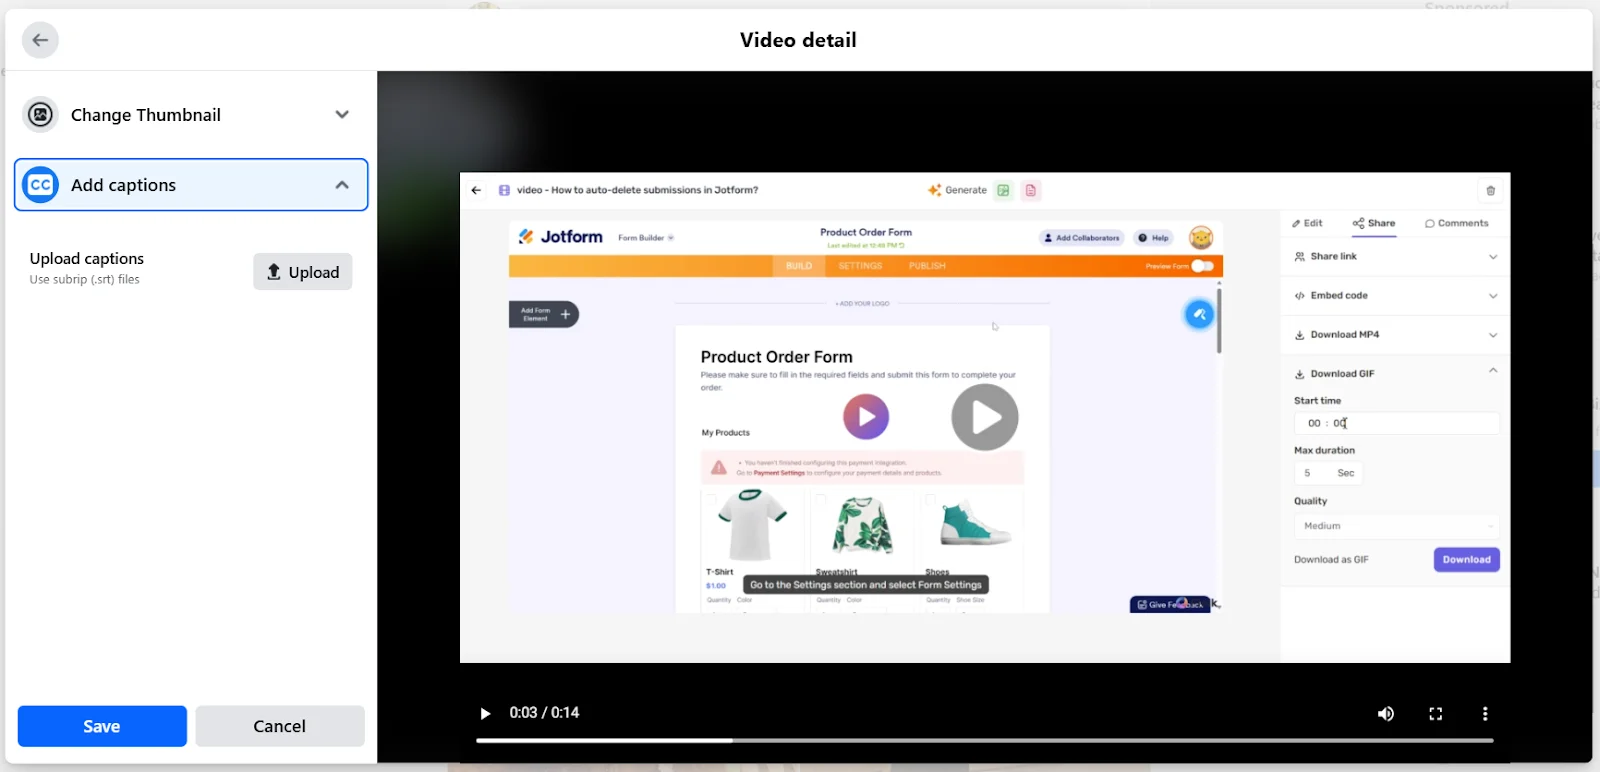
Step 3: Upload the file in the captions tab
Go to the “Add captions” tab and find the option to “Upload SRT File.” Here, you can upload the .srt subtitle file saved on your computer.
Hit “Save” to add your subtitles to the video.
Step 4: Specify the language and publish
Once the file is uploaded, specify the language of your subtitles and publish the video. You can also preview the video before publishing.
FAQs about SRT Files
Still looking for more information? Here are the answers to some frequently asked questions.
Is it possible to embed SRT files directly into video files?
Yes, you can embed SRT files directly into a video file by burning subtitles. To permanently add subtitles to your videos, you can use apps like iMovie, VLC player, and Riverside. Riverside makes adding captions easy and provides lots of customizability for embedded captions, including style, font, color, and placement.
Which player can play SRT files?
Most media players, including VLC, Windows Media Player, and QuickTime Player, support SRT files. You can also play SRT files with video on video editing software like Riverside or Adobe Premiere Pro.
What software is used to make SRT files?
You can manually create subtitle files using any text editor app, such as Notepad for Windows and TextEdit for Mac. Alternatively, free SRT file generator tools like Riverside, Otter.ai, and Happy Scribe can auto-generate transcription files.
How do I convert audio to SRT files for free?
You can convert audio to SRT files for free with Riverside’s transcription tool. Upload your file, choose your preferred language and content format, and hit “Transcribe.” The tool will generate an SRT file within a few minutes.


_002.webp)


