


Table of contents:
A simulated live webinar can sound like a bit of an oxymoron. How can a live broadcast that’s actually pre-recorded be effective or successful?
But actually, simulives give you the best of both worlds. You can benefit from the live engagement of a livestream, while still broadcasting a high-quality, well-produced recording.
In this article, you’ll find everything that you need to record a high-quality simulive, as well as why you should definitely incorporate them into your content output.
What is a simulive?
Simulive stands for “simulated live”. It’s a webinar that seems like it is being broadcast live but is actually pre-recorded.
Don’t worry though, you can still offer your simulive audience similar levels of interactivity. Some brands and creators include a “hybrid” element such as a live host or in-person introduction that precedes the pre-recorded segment.
How does a simulive work?
Everything in a simulive is pre-recorded. This includes the audio and video, as well as any other media (presentations etc) that you might include.
A simulive recording is broadcast to a live audience at a pre-scheduled date and time via a webinar or live broadcast platform.
Why should you host a simulive webinar?
It’s understandable if you’re a bit skeptical about hosting a pre-recorded simulated live webinar. Here are just a few reasons why you should consider it:
6 Benefits for simulated live webinars
Work around busy schedules
Firstly, you have the flexibility to work around your remote guests’ schedules. You’re not tied to a one-time-only live broadcast, but have the freedom to reschedule and find a time that works for everybody.
You also don't have to record content at the exact same time with your speakers. You'll now be able to record asynchronously.
Ability to edit your recording
A huge benefit of doing a simulive over a live broadcast, is that you’re able to record multiple takes and do-overs without worrying. You can also edit out irrelevant segments and mistakes and spend time putting a professional recording together.
With a live webinar, you don’t have the ability to re-record if something goes wrong.
Fewer technical issues to contend with
A simulive reduces your stress around how technical issues might affect your webinar. Since it’s all pre-recorded, there are far fewer potential hiccups that may disrupt your broadcast.
Reap all the benefits of a “live” event
You get to reach a live audience who can engage and interact directly with your content. But, you can also be confident in the quality of the recording you’re broadcasting.
Reach different audiences
With a live webinar, it’s impossible to capture all audiences and timezones with a single broadcast.
On the other hand, with simulives, you can schedule your recording to catch international viewers at their optimal time.
Evergreen content
Lastly, simulives create evergreen content that you can continue to reuse and repurpose.
Of course, it is possible to transform live webinars into recordings that you can continue to use. However, as we explained earlier in this section, simulives benefit from being edited and properly produced.
Live webinar recordings will still include any slip-ups or mishaps that happened during the live broadcast.
What do you need to stream a simulated webinar?
Here’s a quick look at what you need to stream a simulated webinar:
Equipment
If you’ve got the budget, it’s worth buying multiples of whatever webinar equipment you have. You can then send a kit to your remote guests too. This ensures that their recording quality is on par with yours.
You can get away with recording webinar using a computer alone. But for the best quality, we recommend getting:
- Camera s). Get a camera that can record in HD. If you can’t stretch your budget, you can always use your phone. Take a look at the Microsoft Life Cam.
- Microphone. An external mic is absolutely essential for recording high-quality audio. The Shure SM7B is a good choice.
- Headphones. Wearing headphones is important for optimizing the quality of your audio. Try the Sennheiser HD 400S headphones.
Recording Software
Your choice of recording webinar software is vital. When it comes to simulives, you cannot compromise on the recording quality. Simulives need to be professional and well-produced to feel worthwhile even when they’re not really broadcast “live”.
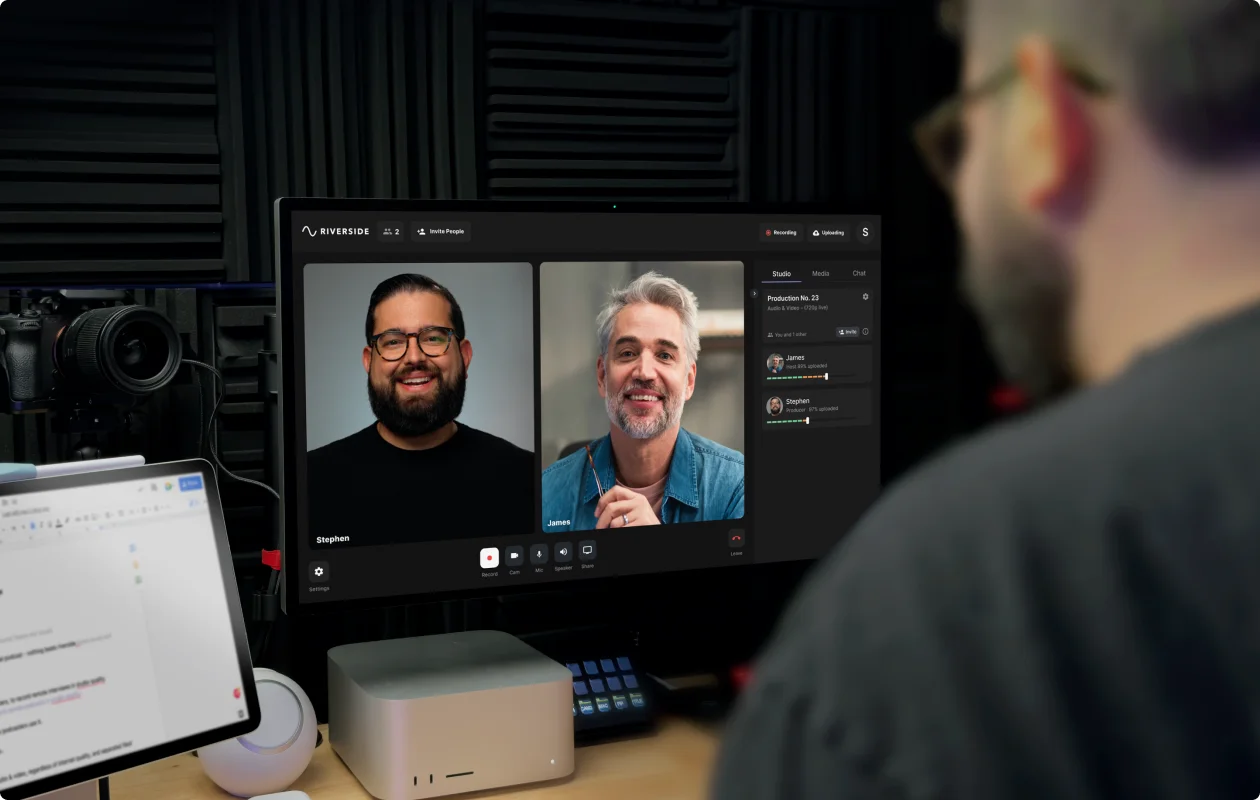
Riverside is a great choice for recording your simulive. The platform is easy to use, and you’ll get studio-quality recordings. You can also polish up your live using our AI-powered video editor.
With Riverside you can expect:
- High-quality local recordings: Record in up to 4K video and 48kHz audio.
- Multitrack recording: Capture each participant’s audio and video on a separate track for more editing flexibility.
- Presentation recorder: Upload and record presentation slides in top-quality.
- Progressive uploads: Tracks upload as you’re recording to minimize risk of data loss.
- Teleprompter: Upload a pre-prepared script to follow in your live.
- Media board. Add music and other media live while recording.
- Compatible: Join online on desktop or download the iOS or Android app to join from your mobile device.
- Seamless editor: Polish your recordings seamlessly with text-based editing, a color-coded video editing timeline and a variety of AI tools.
- Automatic transcriptions: Download highly-accurate AI transcripts straight after recording.
- AI highlights: Let AI turn your simulive’s key moment’s into shareable videos for social media.
Read more: 6 Best Pre-Recorded Webinar Platforms for High-Quality Video

Broadcasting Software
The last thing you need is a software to broadcast your simulive with. Most webinar broadcasting software will include a feature that lets you broadcast pre-recorded content. It’s important to look for platforms that also include interactivity features that help you enhance the audience’s experience, even though it’s not a truly “live” event.
Here are some recommendations for webinar software:
- Demio features an “on-demand” webinar feature that lets you put your content on “auto-pilot” so your audience can watch it when it suits them best.
- Workcast makes it easy to enhance your simulive with a live introduction, polls or discussions.
- Webex Events offers seamless simulive webinars alongside regular webinars.
- You can also host simulives using Zoom.
How to record a simulive with Riverside:
Creating a simulive is much the same as doing a standard livestream.
You just have to be conscious that you’re recording the session with the intention for it to be evergreen content. You should therefore avoid making references to specific events or details that may make the content feel outdated.
Here’s a quick guide to setting up your livestream and then editing your recording:
Step 1: Log into your Riverside account and create your studio. Do this by navigating to the left hand panel and clicking the ‘+’ button.
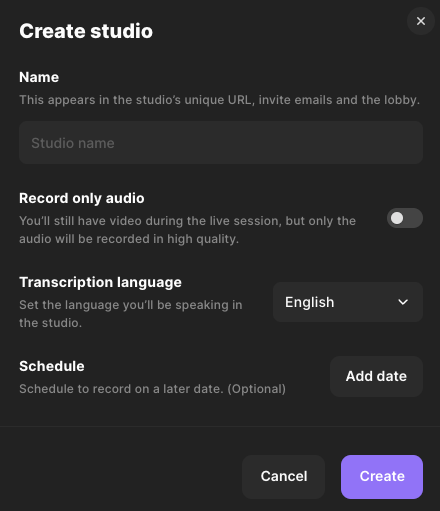
Step 2: In the pop-up, give your new studio a name and set the transcription language. Then click ‘create’.
Step 3: Hover over your newly created studio in the left-hand panel and click on the three-dotted menu. Then click on "Invite to record". You can now invite your guest speakers (and even a live audience should you wish to).
You can also get access to async recording if you're on a Business plan. This means you can invite guests to record their segment of your simulive at a time convenient for them.
Step 4: Click the video camera icon next to your studio title on the left-side panel to go to your recording studio directly.
You’ll land in the lobby where you can check your appearance and ensure the correct equipment is hooked up. When you’re ready click ‘Join Studio’.

Step 5: If you want to, you can upload a script using the teleprompter feature. Simply click on the "Script" tool in the bottom toolbar and then select "Teleprompter".
It's also possible to upload a presentation by selecting the "Share" button, then "Presentation".
.webp)
Step 6: When you’re ready to go, hit the red record button to start your livestream recording.
Step 7: When you’ve wrapped your session, click the red button to end the session for all. You’ll land back in your dashboard where you’ll see your recordings.
Step 8: From here, you can either download your recording as is. Or, you can go to the video editor to edit your live effortlessly.
In the video editor, you can:
- Trim your recording using text-based editing or our color-coded video editing timeline.
- Customize your layout with backgrounds, images, and text.
- Add captions and style the font, size, and colors.
- Touch up your audio with our AI audio enhancement tools.
- Create short clips at the touch of a button using Magic Clips.
You can also download AI transcripts or AI summaries which include key takeaways, SEO keywords, and title suggestions.
Step 10: When you've finished editing your simulive recording, upload it to a video hosting platform of your choice. Schedule your live event and you're good to go.
Tips for hosting a successful simulive webinar event
Here are some tips for hosting a successful and effective simulive:
Prioritize recording quality
Recording quality is non-negotiable for your simulive. Since you’re not offering your audience a live broadcast, you need to strengthen your value proposition by broadcasting professional and high-quality content.
Good editing
The way you edit your simulive together also matters. You should take advantage of the fact that you’re able to edit your recording before broadcasting it to your audience. You can enhance the production quality of your simulive by adding captions, sound effects, transitions, and other media.
Include interactivity
Even though the bulk of your webinar isn’t live, you can still include elements of interactivity. Depending on the platform you’re using to broadcast your simulive, you’ll have access to different features. If your chosen platform doesn’t give you the ability to add polls or surveys, you could consider doing a “hybrid” even that includes a live host or, at the very least, a live introduction.
Promote & market your simulive
There’s no point recording and editing a webinar if you don’t promote it and maximize its reach. Since you’re able to broadcast to audiences in different locations, it’s worth localizing your promotional strategy to attract as many people as you can. We've got a whole guide on webinar promotion, but some ideas to start include:
- Posting social media highlights of your event.
- Starting an email campaign.
- Cross promotion where you can ask your speakers to share the event.
FAQs on Simulive Webinars
How do I host a pre-recorded webinar?
In many ways, hosting a pre-recorded webinar is easier than a traditional webinar. All you need to do is upload your pre-recorded webinar and schedule it to go out. If you’re including a live aspect, then you’ll need to get your host lined up too.
Can you host a simulive on Zoom?
Yes, you can host a simulive on Zoom. But it’s worth noting that the simulive feature is still a little limited: you need to have either a Zoom Events unlimited license or Zoom Sessions Unlimited license. You also need at least a Pro subscription.


.webp)
.webp)
-Event.png)
.png)
.webp)

