


Table of contents:
How to plan a webinar: Full Step-by-step
Step 1: Define the webinar’s purpose
Step 2: Explore your webinar goals
Step 5: Create a webinar landing page
Step 6: Select quality software and equipment
Step 9: Practice your webinar first
Step 10: Host your webinar event
Step 12: Repurpose your webinar
Tips on planning a webinar successfully
Savvy webinar planning is the secret to your online event’s success.
When you are hosting a webinar, you want to make sure that everything goes without a glitch. If you don’t have a proper plan in place, you could find that the event falls flat and fails to capture the audience’s attention.
If you’ve never planned a webinar before or could use some pointers, you’ve come to the right place. In the following guide, we will take a look at how to structure a webinar plus some adaptable webinar plans that you can use for yourself. Here’s what you need to know.
How to plan a webinar: Full Step-by-step
Before you can create your webinar, you need to understand how to plan it. This process allows you to get to grips with your goals and objectives while also honing in on the purpose of the event. While you might already have a load of ideas in your head, going through the webinar planning process will help you to straighten everything out.
Are you feeling confused about the terminology? You don't have to be. Take a quick look at our comprehensive webinar glossary now.
Step 1: Define the webinar’s purpose
Let’s take a look at setting the stage for a successful webinar. Step one is making sure you have clearly outlined your goals and objectives for your webinar. Once size doesn’t fit all.
This is the time to decide if you are offering an educational experience for your attendees. Or are you looking to generate leads and eventual sales with new prospects? Perhaps you are using this webinar to establish yourself as an expert in your field.
In order to be successful, you must be clear on your purpose, i.e. why you have decided to host this event.
Step 2: Explore your webinar goals
While the purpose is an overarching aim, you will likely have micro-goals that you want your webinar to achieve. These will range depending on the primary purpose of your event. However, they may include, the following:
- Increasing your followers on social media
- Selling a product or a service
- Boosting the audience awareness of your brand
Define a set of objectives that are measurable. At this point, you should also make sure that you are clear on how you plan to track them. Will you be looking at click-throughs on your website? Will you be conducting your own research after the event has taken place? Whatever the case, you need to outline the format and structure within your webinar planning.
Step 3: Get the topic right
Now that you know what your goals and objectives are, it’s time to nail that topic. The subject that you cover has to be pertinent to your audience while also allowing you to deliver your objectives. Start by asking a question: What is your target market's biggest pain point?
Knowing exactly what the needs of your audience are is critical here. This is where we get to propose a solution. This can be even more attractive for your audience if you bring in guest speakers and experts on your topic.
When you have a subject in mind, be sure to stress test it. See whether there are similar webinars out there that cover the subject, and how they perform.
Step 4: Schedule your webinar
When you are scheduling your webinar event, you should keep your audience’s time zone in mind. Consider not only where in the world they are but what time of day works best for them.
For example, if you are targeting professionals, you might want to choose a time outside of office hours. That means that more people will be able to attend your online event with ease.
Step 5: Create a webinar landing page
Once you have your date and time, consider setting up a landing page or adding a page to your website for your webinar. Be sure to include all the important details, features and benefits along with a simple way that attendees can sign up. For example, you may have them input their email address on the page to get a reminder about the event plus a link closer to the time.
Besides the above, you should definitely add a Call to Action (CTA) encouraging viewers to sign up to the event. These one-liners quickly and easily tell the reader what the value of the event is. Check out our webinar page if you need some creative inspiration to get things moving.

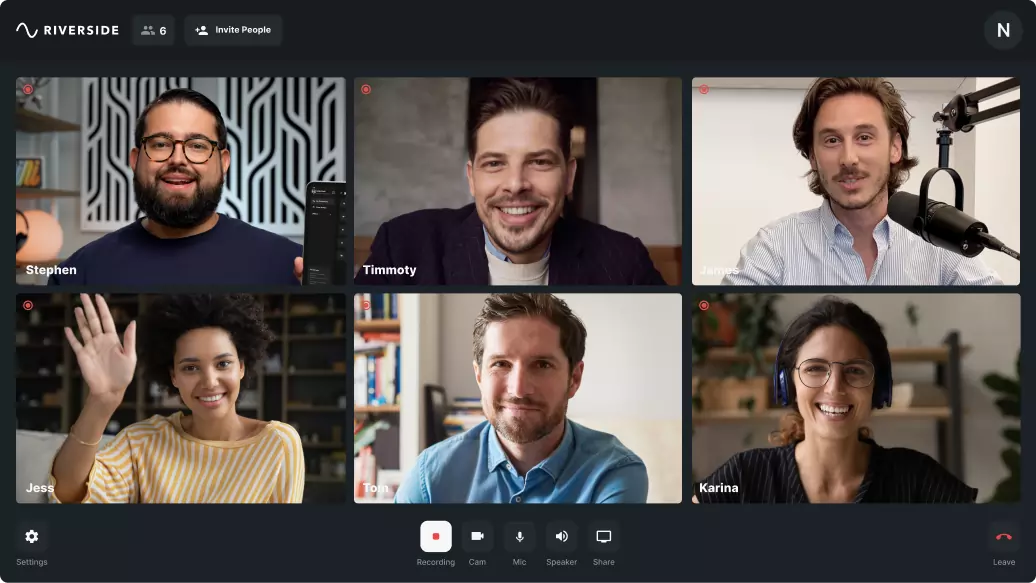
Step 6: Select quality software and equipment
When you host a webinar for your audience, it’s important that everything runs smoothly. Minor hiccups will happen but your attendees expect a high level of quality from you. Keep in mind that you are representing your brand — whether you are a content creator or business owner.
Webinar software:
When choosing webinar software, you need an accessible platform that works for both you and your audience. Look out for software that has a variety of features which will help you to engage your audience members. For example, you may want a platform that allows you to interact with viewers in real-time or take their questions. You’ll want to make sure your software offers reliable streaming and if you’d like to repurpose your webinar then it’s best to check out recording features as well.
For a seamless webinar experience, you can take a look at Riverside. You can host live webinars and invite up to 1000 audience members to join you via a secure link. Plus, you can push your stream to multiple online platforms, including YouTube, LinkedIn, and more.
To keep on track, try our built-in teleprompter, where you can have your webinar planning and script live throughout the event. Better yet, with our Producer mode you assign someone else to take care of the behind-the-scenes controls while you focus on the event.
And to engage with your audience, invite them to join the webinar by calling in live to ask their questions. You can also share your screen or upload slides for a smooth presentation.
Record everything in up to 4K video so you can repurpose your event as a recorded webinar. When you finish your session, download AI transcripts to repurpose your event, polish up your video with our effortless editor or even download key takeaways with our AI summary generator.
Equipment:
Aside from making sure that you have the right software for the job, you also need to think about equipment. So that you can create the highest quality content for your audience, you will need the following:
- An external microphone. Make sure you invest in a microphone that uses the right polar pattern for your needs. That way, you can ensure high-quality sound.
- Webcam or camera. Don’t just rely on the built-in camera in your computer. Instead, take the time to look for various options that suit your personal budget.
- Lighting. While natural lighting tends to be the best option, we can’t always control this. You might want to invest in a ring light or other lighting accessories to perfect the look.
When you are doing your webinar planning, make sure that you have all of the above or plan to invest in them soon.
Step 7: Create your materials
One of the most important parts of webinar planning is creating your materials.
Will you be sharing a webinar presentation? Will you be simply delivering an inspiring talk?
Consider what format your webinar will take and how that will look. Learning how to structure a webinar is the main goal here. You should write down a comprehensive itinerary for your webinar event first.
We'd also suggest keeping your webinar branding in mind here. Stay consistent with the designs of your materials and follow your business' brand guidelines.
Step 8: Market your webinar
Every successful webinar needs a good marketing plan in place. It’s time to tap into all of your platforms to reach your audience and let them know about this exciting event you’re offering.
Social media is the obvious starting point here. However, be sure to utilize your email list, too. Setting up a branded email, outlining the features and benefits of your webinar, along with highlights on special guest speakers is a sure way to attract your audience. Make sure to include your call to action button so that it’s easy and seamless to sign-up.
Looking for specific advice on promoting your next webinar? Read our guide about how you can market your online event like a pro.
Step 9: Practice your webinar first
The more you practice and fine tune your content, the more relaxed you’ll be in your webinar. This will allow you to come across as confident and authentic. It will also allow you to be more open to the flow of the webinar, addressing the audience easily from the chat questions and inquiries. Make sure you have some highlighted points written out to stay on track, otherwise enjoy yourself and share your expertise.
Step 10: Host your webinar event
All that webinar planning is about to pay off, it’s time for your event. Greet your audience with a big smile, and play some music while your attendees are entering. This sets the stage for a positive and uplifting experience for your attendees.
During your webinar, try to incorporate some interactive aspects to really engage with your attendees. This can include Q&A sessions and replying to live comments. The more you engage your audience, the more likely you are to reach your goals and objectives.

Step 11: Ride the momentum
It’s time to keep that momentum going! Be sure to have a follow-up plan in place. It’s important to follow-up with your attendees within a day or two while you are still fresh on their mind.
Consider your key messages and share it with your audience through email and social media. This will help you reach a larger audience and maximize your content beyond the webinar.
Use the feedback you gain to your advantage. If you plan to create more webinars in the future, you can include any criticisms in your next round of webinar planning.
Step 12: Repurpose your webinar
As we have already mentioned, you can record your webinar to repurpose later. That may mean allowing your audience to return and watch the entire webinar at a later date. To do that, you will need to host the video on a website, such as YouTube or your own page.
You can use Riverside to edit your webinar recording and customize it by adding subtitles or your branding. When you are happy, you can download the video and post it somewhere online.
Bonus: If you want to share snippets of your webinar on social media, use the Magic Clips feature on Riverside. The tool uses AI to isolate the most interesting parts of your content for you to download as a short clip. You can then share these on YouTube Shorts, Reels, or TikTok.

Tips on planning a webinar successfully
By this point, you should be feeling confident about your webinar planning. However, before you go any further, there are some additional tips that can help you along the way.
Tip #1: Know your audience
Getting to know your audience is your number one priority. Before you start planning your webinar, do some market research. Understanding who, what, where your audience is what you need to know in order to create effective and useful content for your attendees.
Tip #2: Test and test again
Technology can cause a lot of stress if you haven’t done a run through prior to starting your webinar. That’s where testing comes into play. Make sure to check your internet connection, video camera and screen sharing settings before your webinar event. This will give you peace of mind in your presentation and prevent any mishaps.
Tip #3: Create a back-up plan
Consider a back-up plan for potential circumstances that could prove to be challenging if you have to deal with them on the spot. The idea is to be able to maintain a professional presentation, even if your guest speaker doesn’t show up or your headset isn’t working. Think through these possibilities and have a back-up plan in place.
Tip #4: Keep the conversation going
When the webinar is over, you need to keep an open dialogue with your audience. There are lots of different ways to follow up with your audience and keep the momentum going. This includes creating some hype about your event for people who missed your webinar.
Bonus: 3 Webinar planning templates to keep organized
1: Standard webinar planning template
Define Objectives
- Goals:
- Write down your goals…
- Target audience:
- Demographics:
- Pain points:
- Platforms they’re on:
- Other:
Topic:
- Select relevant and engaging topics. Write down a few and select the one that best matches what you offer that solves your target audience’s problems.
Schedule:
- Date:
- Time:
- Format:
Platform:
- Webinar platform:
- Editing software:
- Other
Develop Content:
- Create outline:
- Introduction:
- Segment 1:
- Segment 2: etc
- Q&A
- Conclusion
- Slides:
- Interactive elements:
Promote:
- Email:
- Landing page:
- Social media:
Host and Engage:
- Engagement elements:
- Feedback:
What it’s best for:
Use the standard webinar planning template when you first start out. You can fill out and adjust the above form to best understand the basics of your event.
2: Webinar technology checklist
Internet Connection:
- Test internet speed and stability:
- Wired connection:
- Back-up internet:
Audio Quality:
- Microphone tested:
- Headset tested:
Video Quality:
- Webcam tested:
- Lighting tested:
- Positioning tested:
- Distractions tested:
Webinar Platform:
- Login tested:
- Screen sharing tested:
- Materials uploaded:
Interactive Features:
- Polls, Q&A, and chat functions tested:
- Attendee interactivity tested:
Backup Plan:
- Roles assigned to other hosts:
- Backup internet ready:
- Contact info available:
What it’s best for:
Before starting your webinar, run through this checklist to ensure that all technology aspects are in place and functioning correctly.
3: Webinar follow-up checklist
Express Gratitude
- Thank attendees, speakers, and sponsors:
- Collect Feedback:
Repurpose Content
- Review and edit recording:
- Identify short slips to share on social media:
- Create additional content:
Maintain Engagement
- Send links to recorded content and resources:
- Share highlights on social media:
What it’s best for:
When your webinar is over, you don’t want to lose momentum. Use this webinar planning template to make sure that you stay on track. You can check off different tasks as you do them.
FAQs on Webinar Planning
How do you structure a webinar?
When you are structuring a webinar, it’s smart to follow the best webinar practices. That means ensuring that you know what your goals are, setting an agenda, and creating an informative slideshow. Here’s a quick structure example:
- Intro: Start off by introducing yourself and your expertise. You should also thank attendees for coming to your event.
- Teasing problem: Explain what the main problem is that attendees have in common, and how it can hinder their work or life.
- How to solve: Share information that solves the problem for the attendees. That may be a piece of software or a tutorial that you have experience in.
- Q&A: Conclude with a quick Q&A, allowing the audience members to ask you questions.
Your presentation has to have a natural flow to it. Don’t make the mistake of presuming that your audience already understands the topic you are discussing. Take the time to introduce the subject matter in a couple of slides at the start. When you have done that, you can zero in on the fundamentals of the topic. Try to break each subject down into bite-sized chunks.
How do you create a webinar strategy?
You can use our webinar strategy template above if you are finding this part of the process hard. However, on a base level, your strategy should clearly define the goals of your webinar and how you plan to reach them. For example, you need to cover how you will define the success of the event, how you will measure that, and the actions you will take to facilitate those results.
How do I organize an online webinar?
Organizing an online webinar takes time, dedication, and energy. You will need to determine when your event will be, how you will host it, and what the subject matter is. You should also be clear on the goals that you hope to achieve before you create your presentation.
When you have identified the above, you will need to create an engaging slideshow or presentation that shares the information well. You can use a recording platform, such as Riverside, to host and record your webinar.
Next, you will need to promote your webinar event on social media and other websites. You can also invite audience members to watch your webinar by sending them a direct link to the event ahead of time. Make sure that you cover all bases when marketing your webinar.


.webp)

