


Table of contents:
Key takeaways:
- Record live stream the easy way with Riverside. It allows you to multi-stream to major platforms, and record and edit your work. You can use it on any device.
- To record streaming video on Windows or Mac, try OBS Studio, Crowdcast, Streamlabs, or OneStream.
- To record a live stream on Android, try the Riverside app or PRISM.
- To record a live stream on iOS, Riverside, OBS, Streamlabs, and OneStream are all options.
Want to know how to record your own live streams?
We’ll show you exactly how to record your streams on Windows, Mac, iOS, or Android — step by step.
How to record streaming video using Riverside (the easy way!)
Price: Free plan available. Paid plans start at $15/month.
Compatibility: Windows, Mac, iOS, and Android
Riverside is an all-in-one platform for live streaming and recording in studio quality. Whether you’re hosting a live podcast, webinar, or event, Riverside lets you stream directly to platforms like YouTube, Facebook, and Twitch — while automatically recording in up to 4K video and 48kHz audio.
Here’s how to record streaming videos with Riverside:
Step 1: Log in to your Riverside account and select the studio you want to live stream from. You can also create a new studio by going to the top of the “Studios list” and then clicking “+ New studio.”
Pro tip: You can choose your live stream settings in your studio or set them up beforehand. To do it in advance, head to “Settings” located in the bottom left-hand side of the screen, then choose the “Live stream” tab.
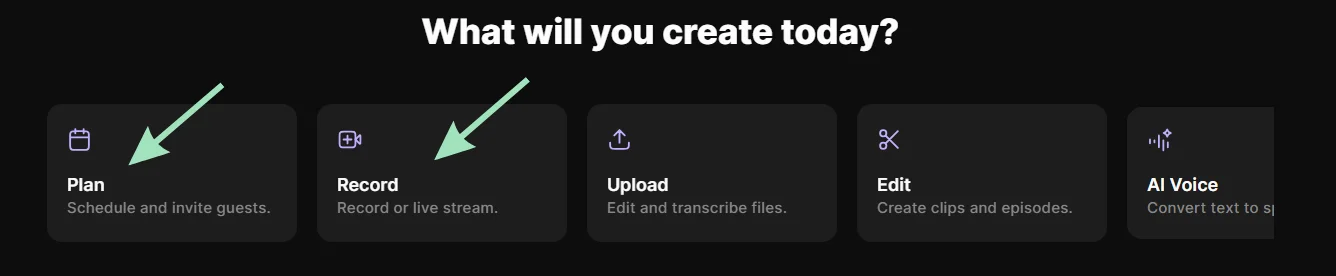
Step 2: Start or plan your recording by clicking “Record” to enter your studio immediately, or “Plan” to schedule your live video stream at a later date.
Step 3: Join your studio. Here, you can check your microphone, headphone, and video settings, along with specifying your name. Press “Join Studio”.

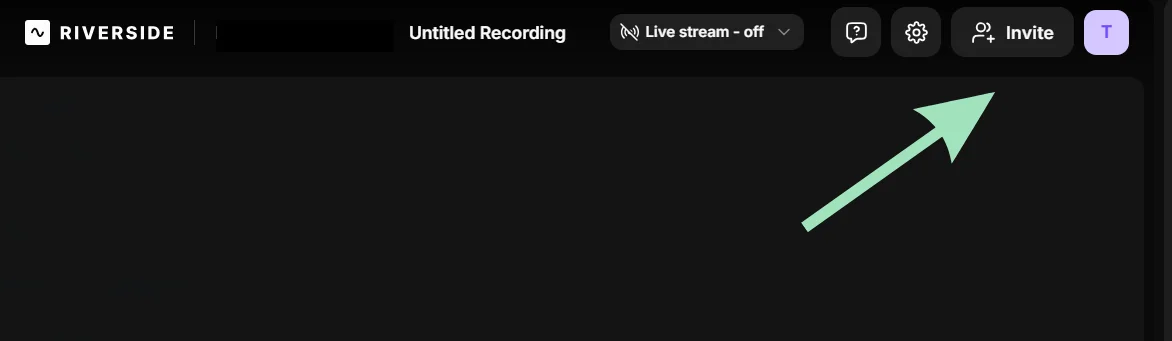
Step 4: Invite guests to join the live video stream by clicking the “Invite” icon. A screen will pop up with a link you can then share with your guests.
Your guests will be able to click the link from their desktop or mobile, and join you in the remote studio.
Pro tip: Use the “People” tab on the right-hand menu to view your guests, see their recording settings, and turn “Echo cancellation” on or off.
Step 5: To brand your studio, select the “Brand” icon from the right-hand menu. Here, you can add your logo, choose your theme colors, and choose the formatting of your text.
Hover over your name (or lower third) in the bottom left of your screen to make any changes and add a title. Your guests can do this too. You can also choose a color and text size here.
Step 6: Set up your live video streaming destinations by clicking the“Live stream” tab at the top of your screen to connect your preferred platforms.
Scroll through the list of platforms, and click the “...” icon to add more platforms. Each platform that is connected can be toggled on or off.
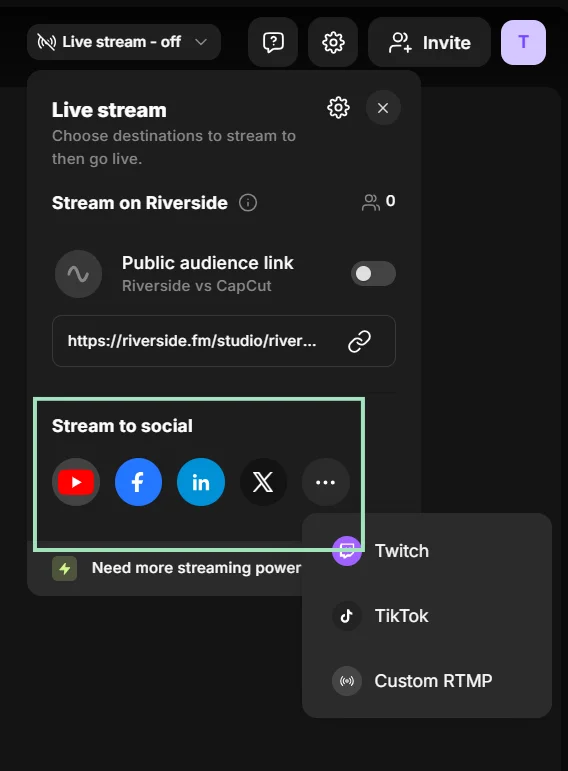
Pro tip: Select the “Live stream audience mode” to run your live stream more like a webinar. With this setting, you can invite audience members, have them register before the event, and accept live audience call-ins. It’ll also give your event a more polished, professional feel.
Live Stream on Riverside with Audience Mode
Pro tip: Click the “Script” icon in the toolbar at the bottom of your screen. This will give you the option to use a teleprompter when streaming.
Step 7: Start your live stream by pressing “Go live.” After a 5-second countdown, you will be live streaming to the platforms you selected - and recorded at the same time.

You can engage your audience using the “Chat” feature. Here you can easily chat with guests across multiple streaming platforms from one place.
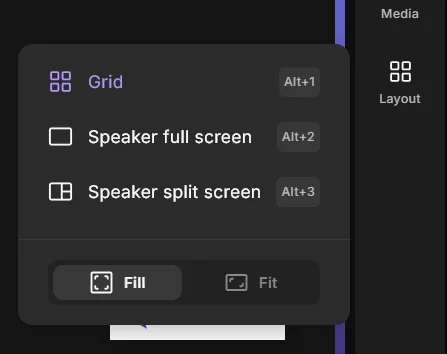
You can also choose how you and your guests are displayed on screen during the live stream using the layout tab.
Step 8: When you’re ready, stop your recording by clicking “Stop.”
Make sure you and your guests are 100% recorded and uploaded to Riverside’s gallery before leaving and ending the call.
Why use Riverside for recording live video streams?
Riverside is easy to use and has lots of features to help ensure your live stream runs smoothly (and that you have more fun!) With Riverside, you can:
- Get top-quality audio and video: Stream and record in up to 4K video and 48 kHz audio. With local recording you don’t need to worry about your internet connection ruining resolution.
- Multistream to different platforms: Push your stream to platforms like Twitch, YouTube, and Facebook at the same time.
- Screen share: Share, capture, and record any part of your screen whether that’s your full screen or a partial section. You can also upload presentation slides.
- Customize your studio: Switch up your layout, customize our background, and showcase your logo.
- Monitor comments from all platforms: Monitor and reply to comments on all the live stream platforms from right within the Riverside dashboard.
- Share audio and video clips when live: Upload video and audio clips and share them during your live session.
- Easily repurpose content: Use our AI clip creator to turn your live stream recording’s key moments into short shareable clips for social media.
5 other ways to record streaming video
Still looking for other options for how to record streaming video? Here are various programs you can use for Mac, Windows, and mobile devices.
How to record streaming video on Windows or Mac
OBS Studio
Price: Free
Compatibility: Windows and Mac
OBS Studio is a free, open-source live video streaming and recording tool. Stream and record through webcams, share your screen, or use a capture card. Here’s how to use it to record streaming video.
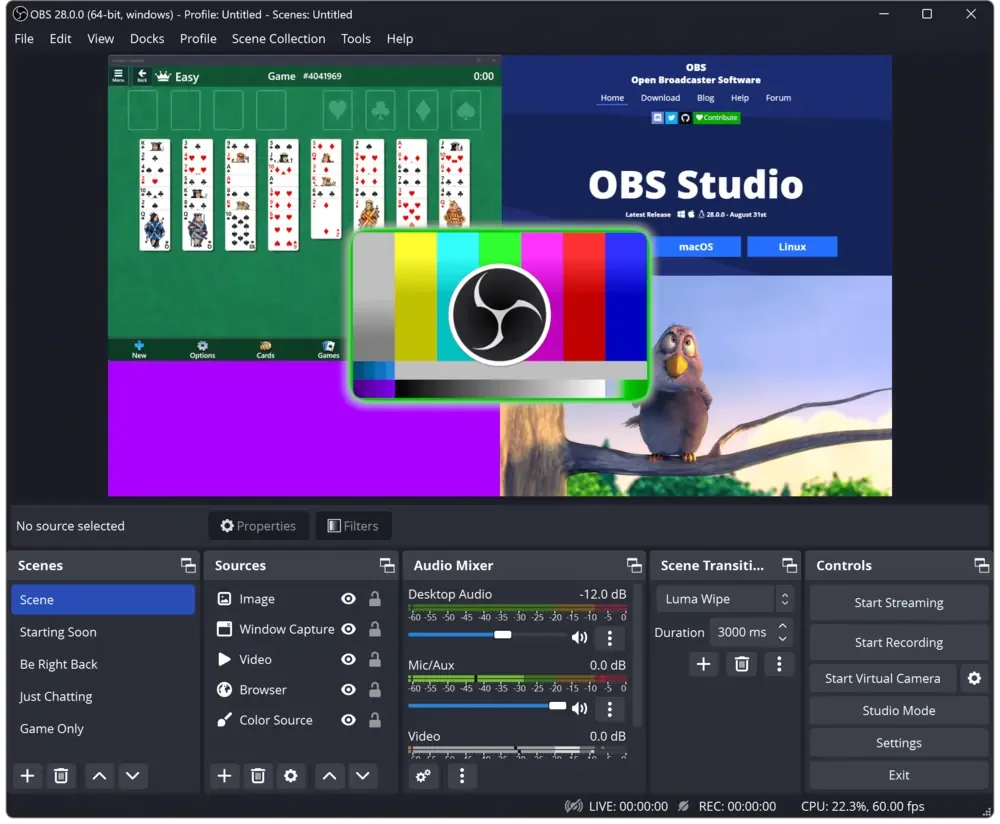
Step 1: Install and set up OBS Studio.
Step 2: Create a scene to select the video and visual sources you want the tool to capture.
Step 3: Go to “Settings” and then the “Audio” tab to choose your inputs.
Step 4: In OBS, each source has its own layer, allowing you to create different combinations on the screen.
Step 5: Right-click on each source and choose “Filters” to apply visual and audio effects.
Step 6: Go to “Settings” and click on the “Stream” tab. Choose the platform (“Service”) you want to stream to, and paste in your stream key. Apply any changes and click “OK.”
Step 7: In “General” settings, under “Output” make sure “Automatically record when streaming” is checked. Live stream recordings will be saved locally to your computer.
Step 8: Click the “Start Streaming” button on the bottom right.
If you want to live video stream on multiple platforms you’ll need to use an RTMP server - there’s plugins that you can use to do this.
Crowdcast
Price: Paid plans start at $49/month
Compatibility: Windows and Mac
Crowdcast lets you live video stream in HD, give private workshops, and host virtual events. The tool also offers monetization tools with membership plans, recurring subscriptions, and more. Here’s how to record streaming video using Crowdcast:
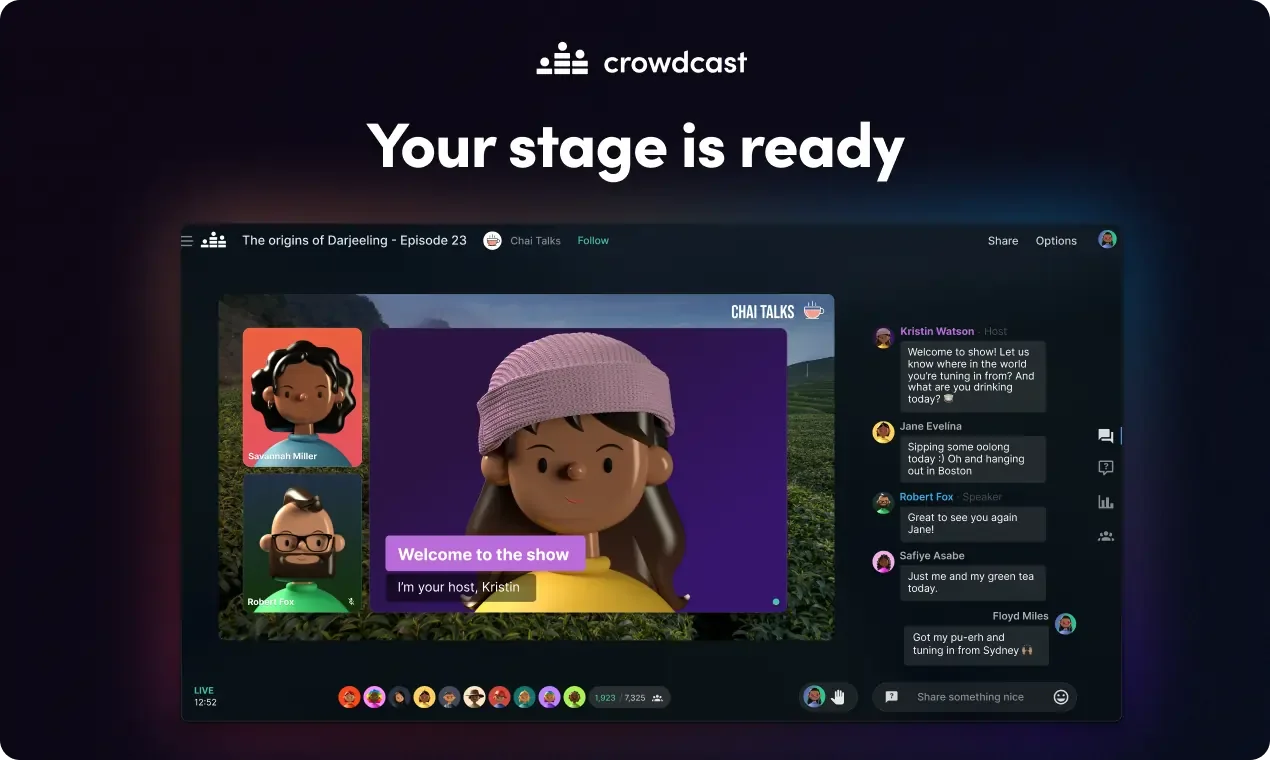
Step 1: Log in to your Crowdcast account.
Step 2: Enter the Green Room.
Step 3: Select your microphone, speaker, and camera inputs.
Step 4: Click “Confirm & join.”
Step 5: The stage will be outlined in green. When you’re ready, click “Go Live.”
Step 6: Choose “Go Live & Record” if you want to save the event for later.
Step 7: Click the red X to end the broadcast.
Streamlabs OBS (SLOBS)
Price: Free
Compatibility: Windows and Mac
Like OBS Studio, Streamlabs OBS is another free, open-source video streaming platform. It offers a clean interface and has integrated tools for creating subscriptions, receiving donations, and selling merch. Here’s how to record streaming video with Streamlabs OBS:
.webp)
Step 1: Launch Streamlabs Desktop.
Step 2: Go to the “General” tab under “Settings” in the top right-hand side of the screen. Check the box “Automatically record when streaming.”
Step 3: Also in “Settings,” select the “Stream Type.” This is where you can choose the service you will stream to, or insert your stream key.
Step 4: Under the “Output” tab, you can also choose details about your recording format, quality, and where your video will be saved.
Step 5: Use the “Audio” tab to adjust your audio settings and the “Video” tab to configure video settings.
Step 6: In the main Streamlabs dashboard under “Scenes” select “Sources” to choose whether to stream “Game Capture” or “Video Device Capture” (your webcam).
Step 7: Start streaming and recording by clicking “Go Live.”
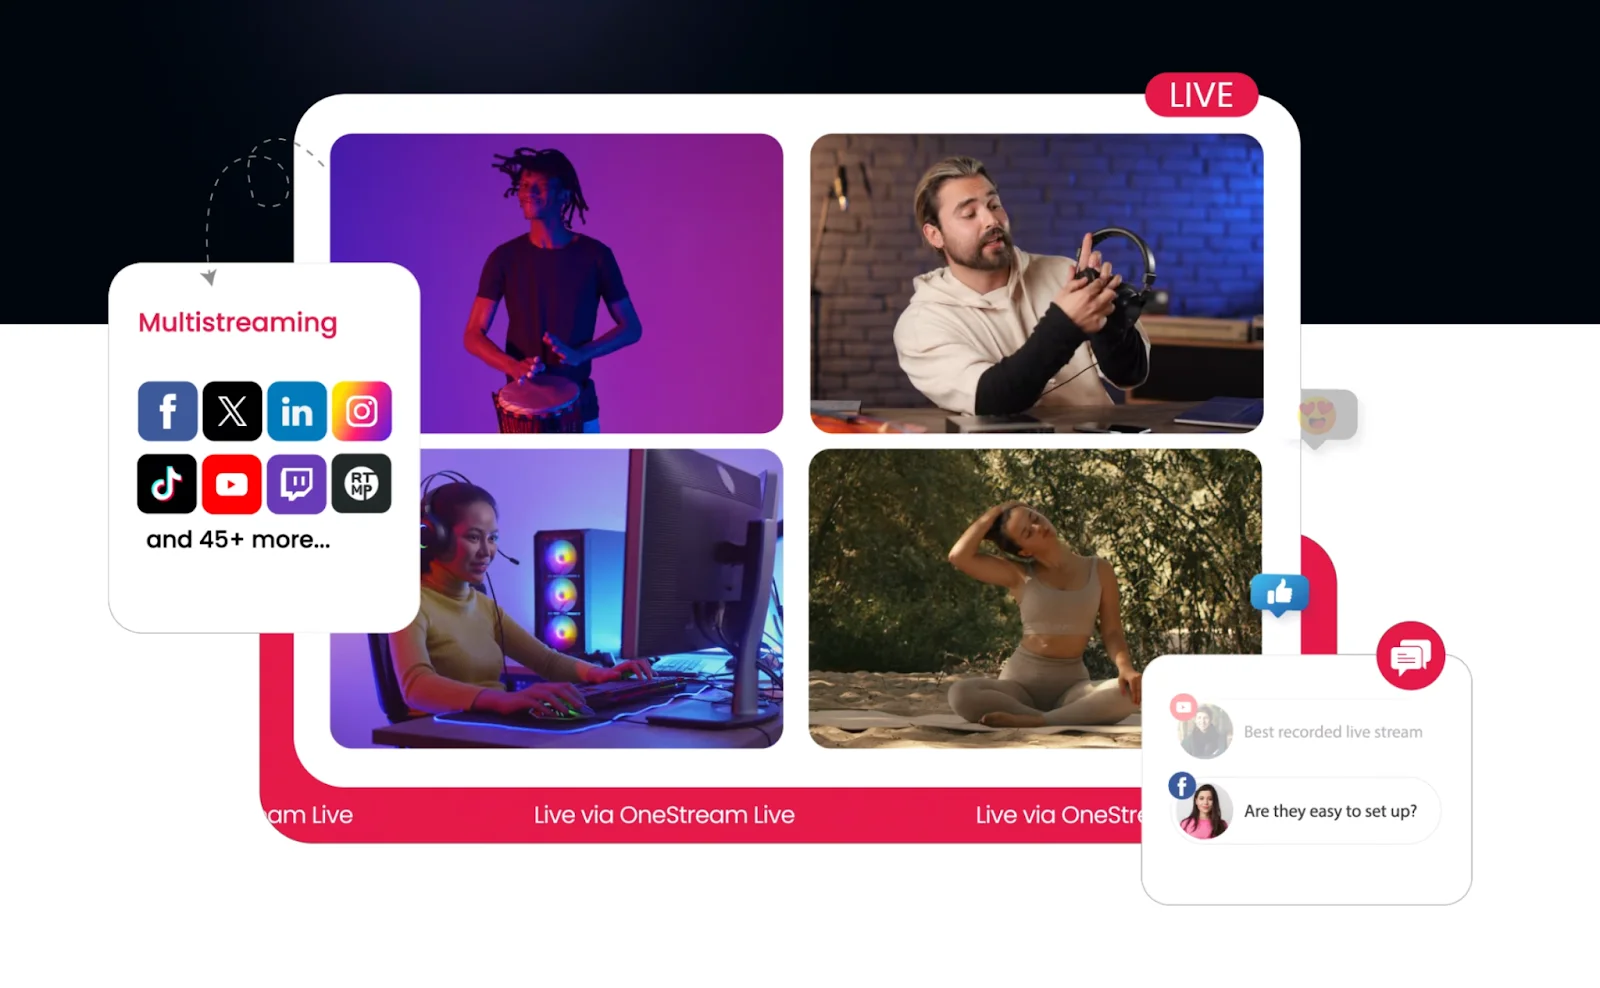
OneStream Live
Price: Free
Compatibility: Windows and Mac
OneStream is a cloud-based multistreaming software that allows you to create customized live streams directly from your browser. Multistream to 45+ social media platforms and the web all at once. Here’s how to record streaming video with OneStream.
Step 1: Log in to your OneStream account.
Step 2: Click “+ Create Stream” and select “Studio.”
Step 3: Fill in the “Stream Details” (title, description and tags).
Step 4: Choose your preferred social media channels and create an “Event Thumbnail.”
Step 5: Click “Enter Studio.”
Step 6: You’ll then enter the Green Room where you can select your audio and visual settings, along with your display name and title.
Step 7: Click “Record” in the top right corner.
Step 8: Click “Go Live” which is next to “Record.”
Step 10: When you’re done, click on “Record” then “Stop Recording” and “End Stream.”
How to record streaming video on Android
Many desktop streaming software have apps that you can use to stream record from your Android device. Alternatively, PRISM is a dedicated live streaming app compatible with Android devices.
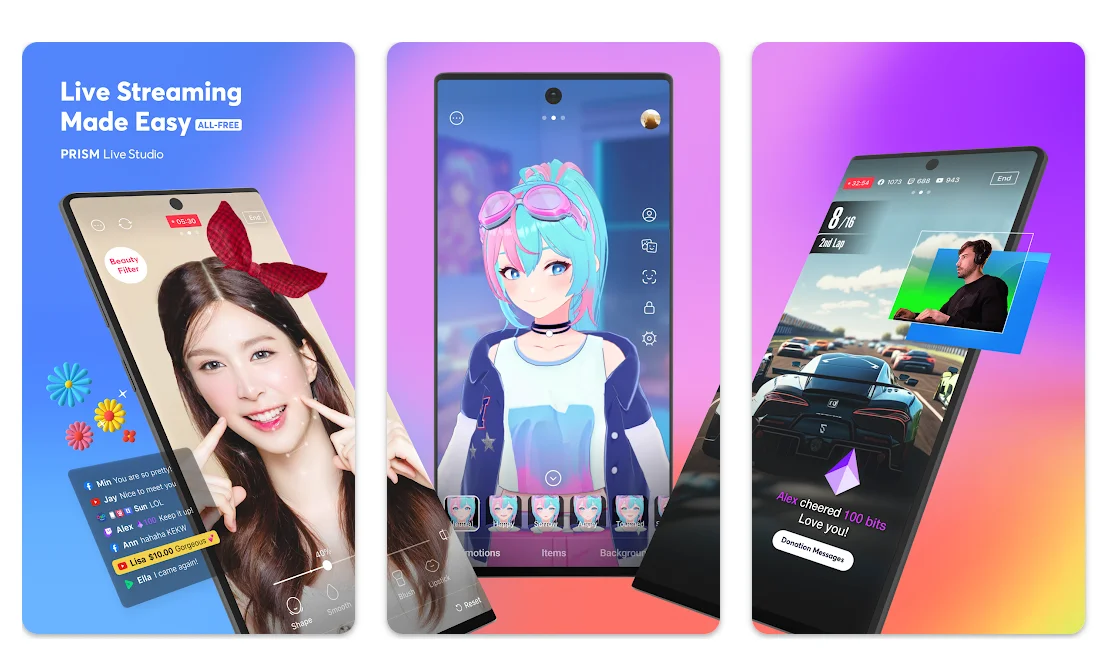
PRISM: Live Streaming App
Price: Free
Compatibility: Android and also iOS
PRISM: Live Streaming App supports camera lives, game-casting, and VTubing broadcasts. Here, you can deliver an engaging experience to your live audience with various effects, videos, images, and more. Let's walk through the steps for how to screen record streaming video using PRISM.
Step 1: Launch the app on your device and log in.
Step 2: Click on your avatar in the top right-hand corner to open “Settings.”
Step 3: Connect your preferred platforms in “Stream destinations.”
Step 4: Select the correct video resolution, e.g. 1080p.
Step 5: Toggle “Conceal watermark” on or off.
Step 5: Add special effects in the bottom left of the screen.
Step 6: Choose a filter in the bottom right of the screen.
Step 7: Switch your microphone on or off, and choose between front-facing or back-facing camera by clicking the three dots in the top left of the screen.
Step 8: To record make sure “Save video after streaming” is toggled on.
Step 9: Click “Start your stream” and then “Ready.”
Step 10: Press “Go live” to start your live stream and recording.
How to record streaming video on iPhone and iPad
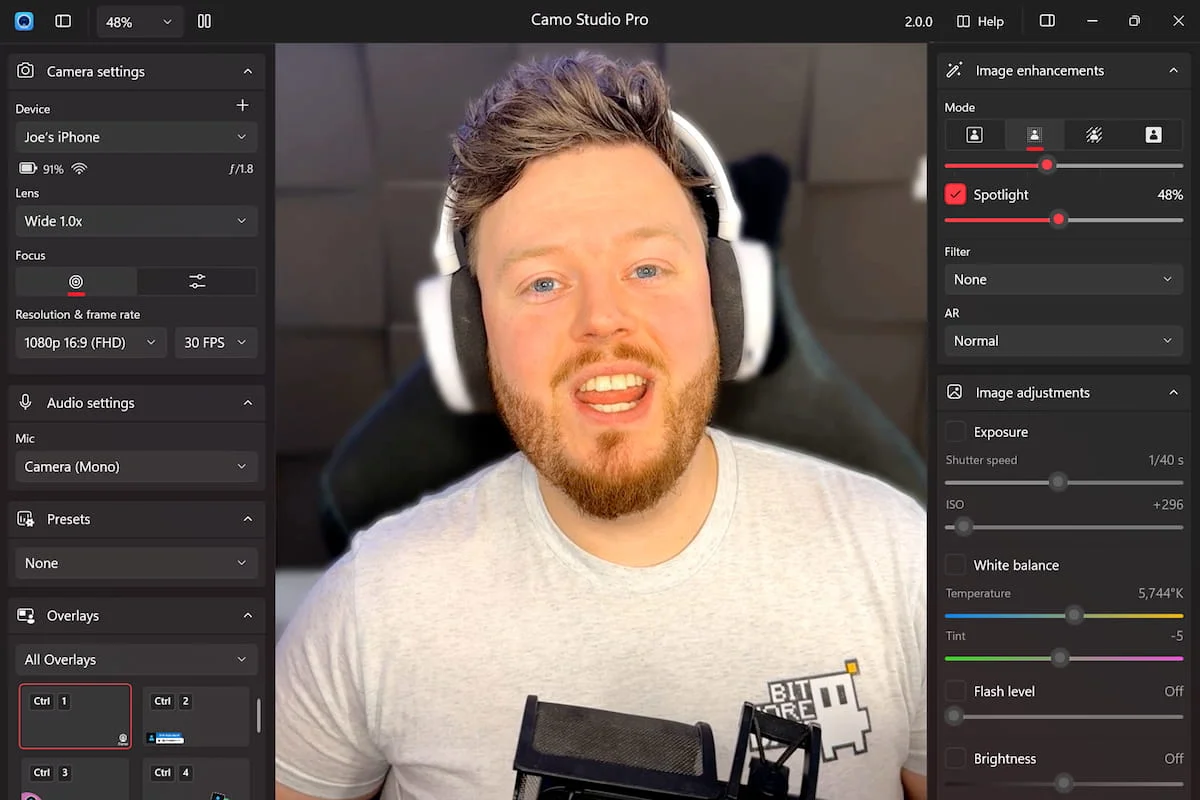
If you’re looking for a dedicated app to stream record from your iPhone or iPad device, then Cammo Studio with eCamm is a solid option.
Camo Studio in Ecamm
Price: Free
Compatibility: iOS only
Camo Studio allows you to transform your iPhone or iPad into a high-quality webcam for your computer. By connecting your iOS device to your desktop, you can seamlessly integrate its camera into applications like OBS, Streamlabs or Ecamm Live.
Here’s how to record with Camo using Ecamm.
Step 1: Install and open Camo on your iOS device and on your computer.
Step 2: Connect your iOS device to your computer using a USB cable. Your iPhone should automatically connect to Camo.
You can also pair your iPhone wirelessly. Click the “+” button next to the Device dropdown in the Camo desktop app. Tap “Pair a device” and then switch to your phone.
On the phone app, tap the wireless connection button in the top-right. Scan the QR code on your desktop to connect.
Step 3: Launch Ecamm Live on your computer.
Step 4: In Ecamm Live, go to the “Camera Switcher” panel and select “Camo” as your camera source. If you don't see “Camo” listed, ensure it's enabled in the “Camera” menu under “Switcher”.
Step 5: Once selected, you'll see the video feed from your iOS device in Ecamm Live.
Step 6: When you're ready to start, click “Go Live” to begin streaming and recording.
By following these steps, you can effectively utilize your iOS device's camera for high-quality streaming and recording through Ecamm Live.
How to record streaming video using external hardware
Physical external hardware for live stream recording is more of an investment. Let’s talk you through this as an option.
Popular hardware options for video streaming recording include:
- AJA HELO Plus ($1,869)
- TriCaster Mini ($9,495)
- LiveU Solo Pro ($2,195)
All options are portable video streaming and recording encoders, supporting multiple input sources and enabling live streaming with high-quality video.
The main differences are the price, video quality, functionality and use case.
AJA HELO Plus, is the cheapest option, supporting streams in 1080p and picture-in-picture overlays. It is highly portable, and records to SD cards, USB, or SMB network storage.
LiveU Solo Pro will cost you slightly more. It is highly portable, offers streaming in HD or 4K, and supports mobile streaming with up to 6 input sources. Storage is cloud-focused with RTMP streaming, and requires subscriptions to access all features.
TriCaster Mini is the most expensive option. It is a studio-in-a-box designed for professional live production. It supports 4K UHD and supports up to 8 video inputs with advanced production tools.
What to consider when recording streaming video
When recording live video streams you need to consider legalities, necessary equipment, and optimization techniques to optimize audio and video quality. Let’s take a look.
Legal considerations (when is it OK to record?)
It’s important to consider the following legal considerations when recording a live stream.
- Saying something offensive or improper: Brief your guests about offensive or improper language before the live recording. You can edit or censor the recording, but not the live stream!
- Being in breach of GDPR: Make sure to inform and get permission to process or display participants’ personal data on your live stream recording.
- Thinking about intellectual property rights: Understand the implications of copyright and trademark laws to avoid using intellectual property not owned by you.
- Considering licensing and royalties: Ensure you have the necessary licenses when recording video that includes content that is not owned by you.
- Adhering to “Terms of Service”: Make sure you understand and comply with the platform's “Terms of Service” that you’re using for live video streaming and recording.
Equipment needed for recording streaming video
To record a live video stream, all you need is a camera or webcam, your chosen streaming and recording software, and a stable internet connection. Once you’re more confident and ready to enhance your setup, experiment by adding a microphone, lighting, and other accessories.
Optimizing video and audio quality for live streaming
Here are some quick and easy tips to improve the quality of your live stream when recording.
- Use an encoder: A video encoder converts raw video into a format that’s compatible with streaming, enhancing your quality and stability.
- Check your internet connection: Test your internet speed before going live, and ensure you have plenty of bandwidth.
- Close unnecessary tabs: Close any unnecessary tabs, windows, or applications that could be slowing down our device.
- Set the best video bitrate: In general, 1080p will provide a clear, unpixelated image during your live stream but you can check out some of our other tips on how to choose the ideal bitrate for your video.
- Improve lighting and reduce background noise: Enhance the experience for your live audience by using lighting and reducing and removing any distracting background noise.
- Do a trial run: Do a trial run before the big day to make sure everything runs smoothly, and to give you time to fix any issues.
- Make sure you have enough space: Ensure you have enough space available on your chosen device when saving and recording your live stream.

Final thoughts
Recording your live video stream is straightforward. Browser-based tools are more affordable and easier to use than external hardware. Once you’ve had a couple of practice runs, you’ll be a pro in no time at all. If you're looking for an easy and reliable solution for high-quality audio and video streaming and recording, look no further than Riverside. You’ll get a simple, streamlined solution that allows you to stream to multiple platforms, record your streaming videos, and edit them for other uses. You can even try it for free!
FAQs on recording streaming video
What is the best software for recording streaming video?
The best software for recording streaming video depends on you and your needs. With Riverside, you can stream and record from multiple platforms, get high-quality audio and video, plus loads of tools to help you engage with your audience. Plus, once the recording is over, you can use our video editor to edit your recording for other uses.
Can I record my own live stream for free?
Yes, most of the options mentioned above allow you to stream and record for free. Just be aware of the limitations such as video quality, watermarks on your live stream and recording, and the number of platforms you can stream to and record from. You can check out our list of top live streaming software - it includes a number of free options.


