


Table of contents:
Key takeaways:
- Clipchamp is the built-in editor on Windows.
- To edit a video on Windows, open Clipchamp and import your files.
- You can trim your video by dragging its edges on the video timeline.
- You can also use the toolbar to add effects, music, or text.
Both Windows 10 and 11 have their own built-in video editors. But how do you use these platforms, and are they worth it?
Below we’ll show you exactly how to edit videos on Windows. We’ll start with Clipchamp, then cover Windows Media Player and a faster online alternative.
Let’s get started.
Table of contents:
How to edit videos on Windows 11 with Clipchamp: step-by-step
As the built-in video editor for Windows 11, Clipchamp is a great, user-friendly solution for Windows 11 users. Follow these steps to edit your next video project with ease.
Step 1: Import your files
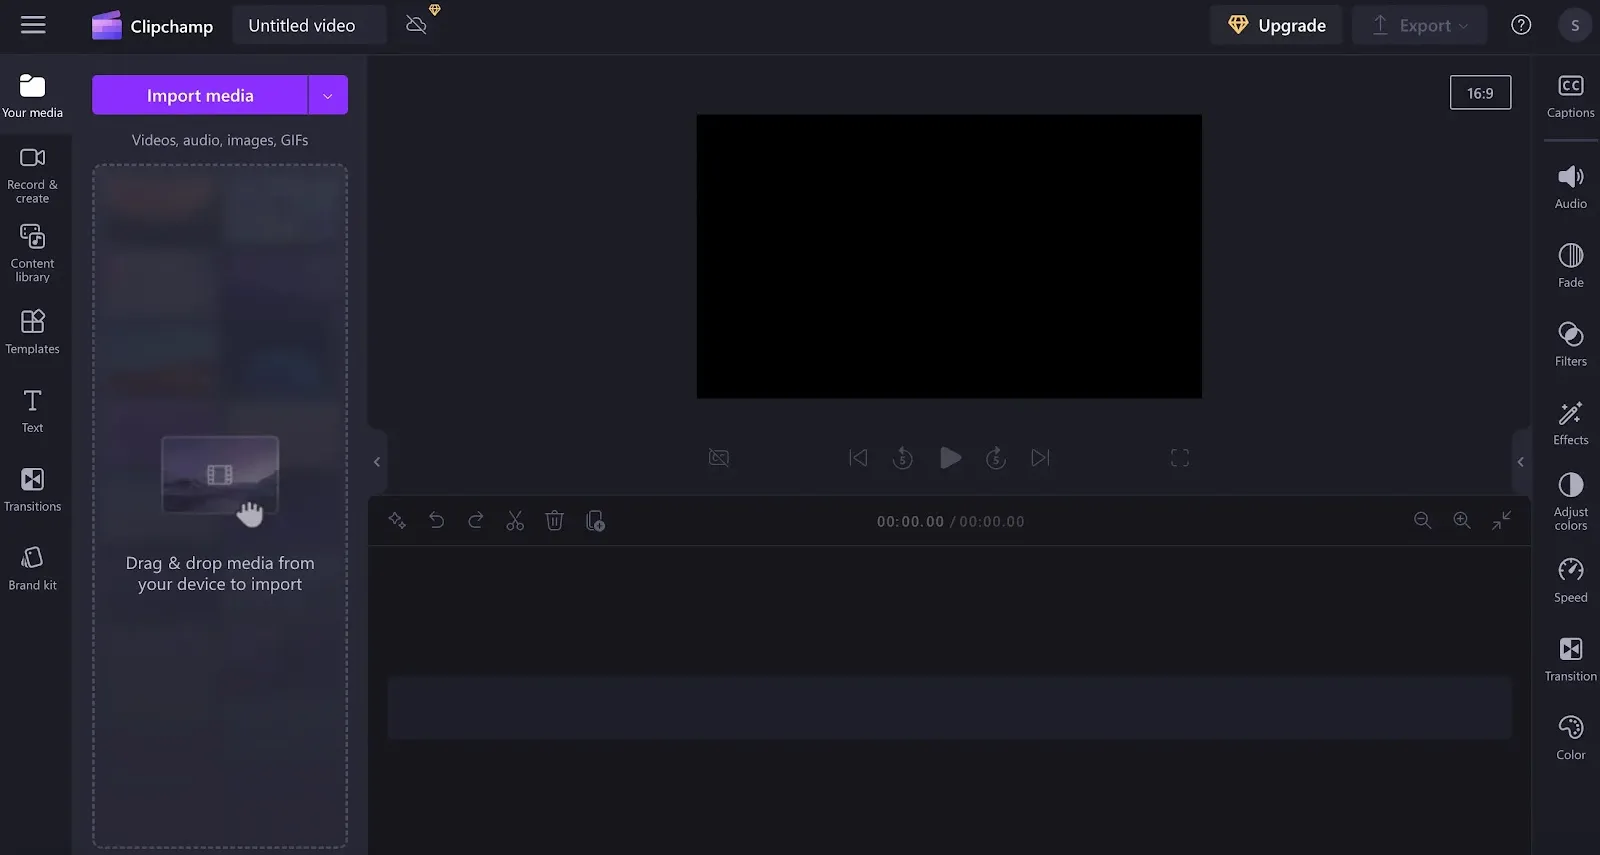
To begin, open your Clipchamp account, and start a new video project from the home screen.
Within your new project, click “Import media” to upload video files. Alternatively, drag and drop video media to the bar on the left side of your screen.
Step 2: Trim your video
In order to start editing your video, drag and drop the file into the timeline at the bottom of your screen. Then adjust the timeline slider to trim the video, or press the “scissors” icon to split content.
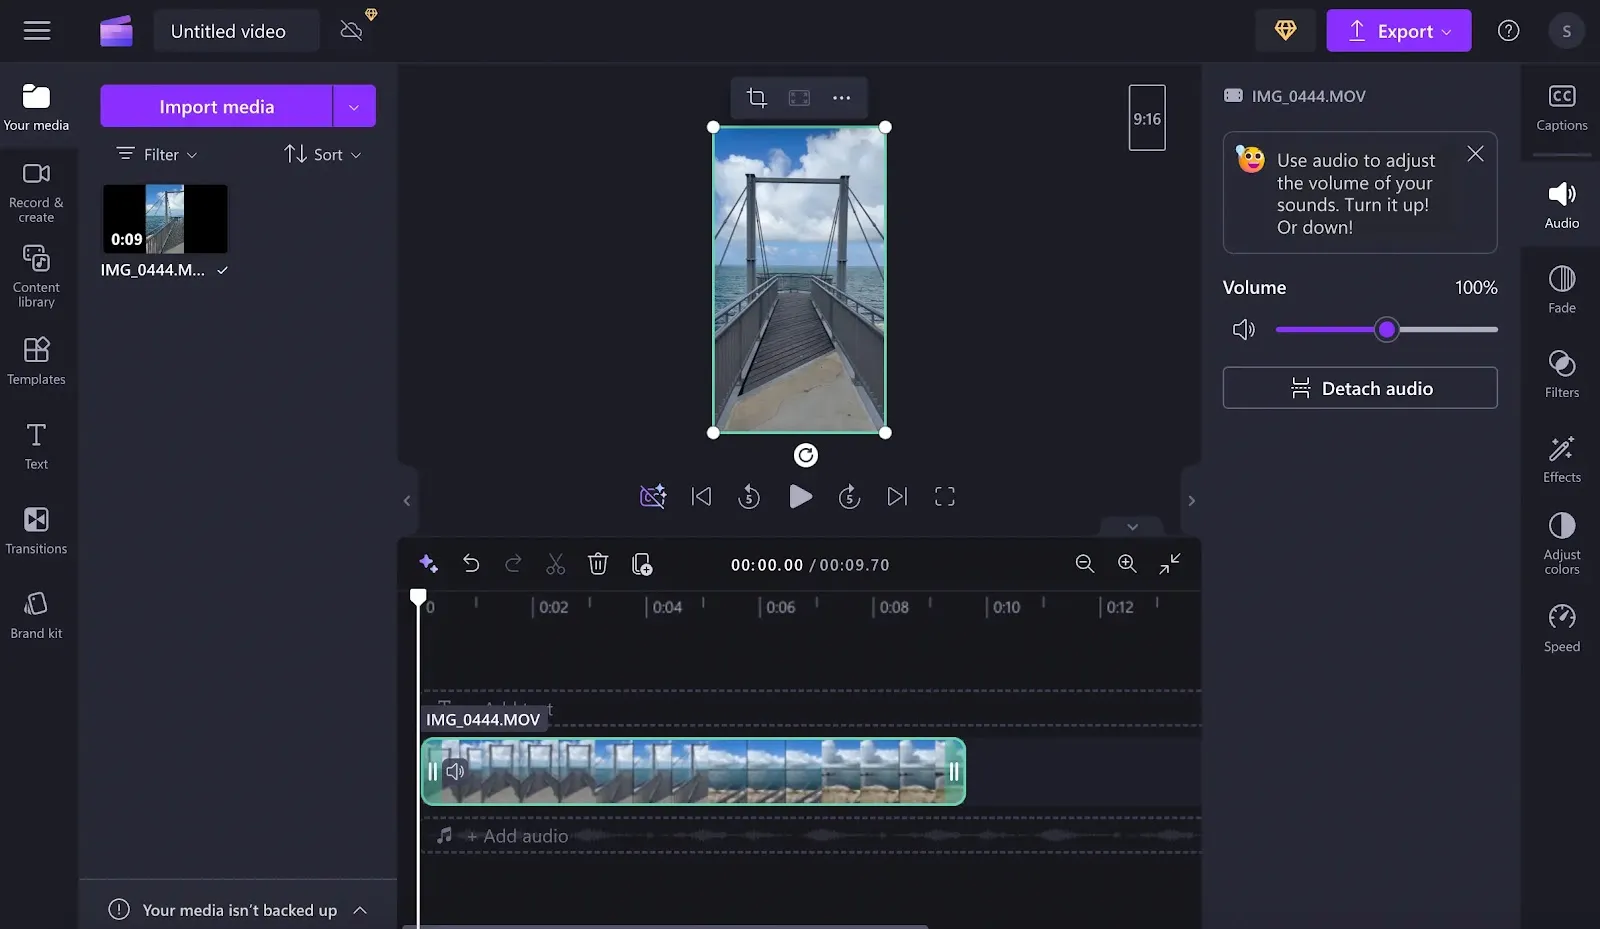
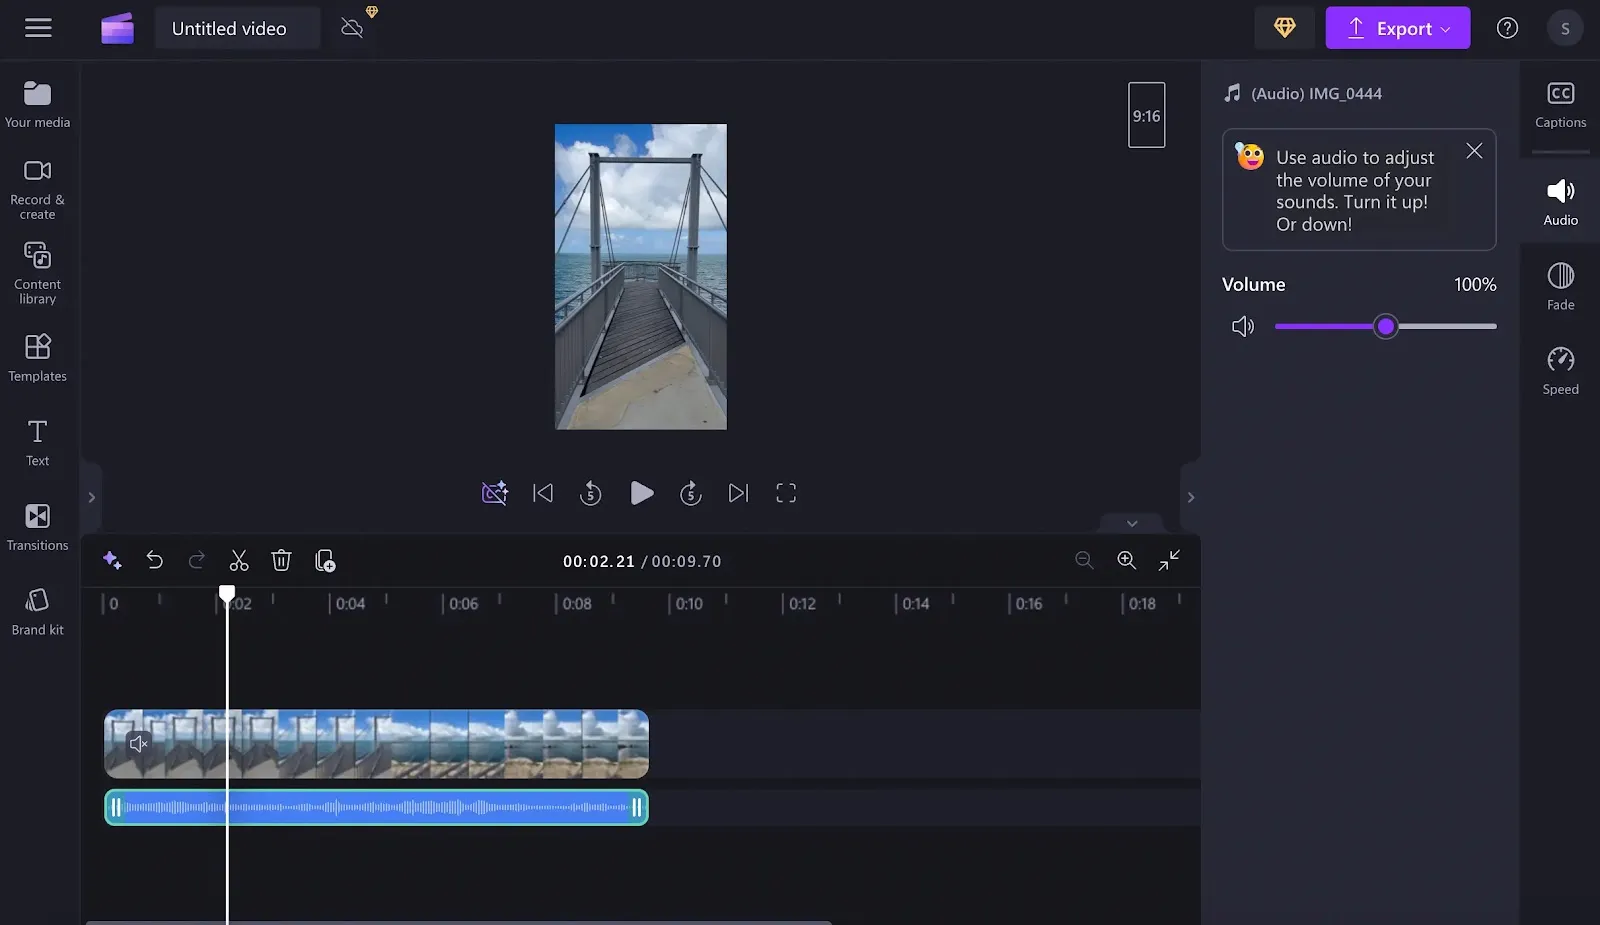
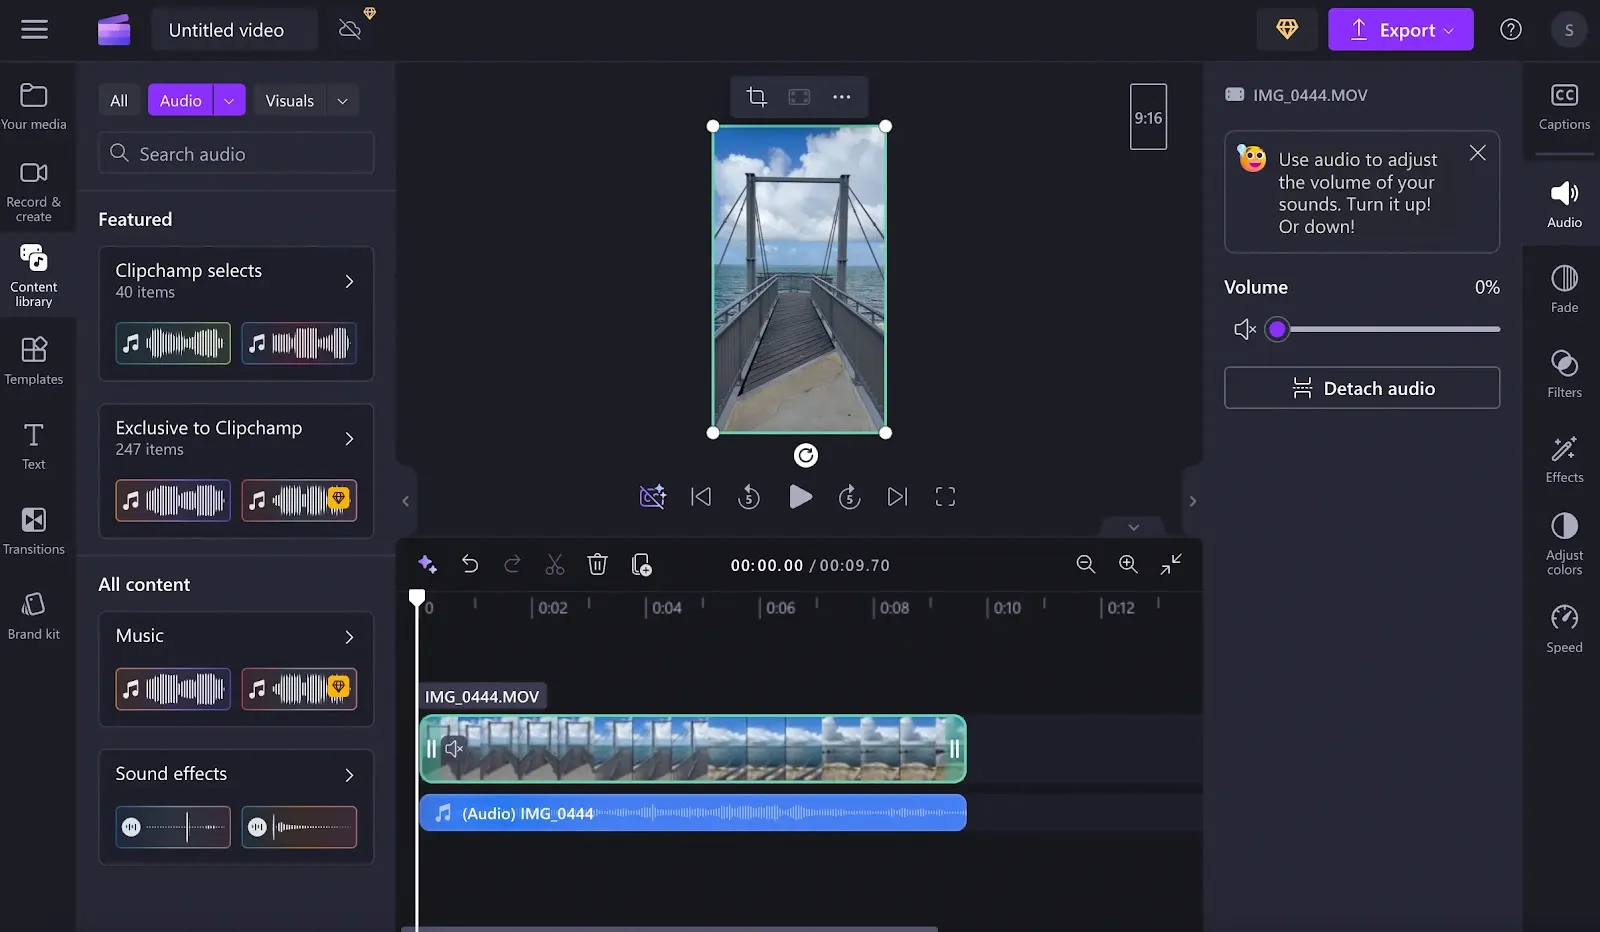
Step 3: Audio syncing and mixing
Using the control panel on the right side of your screen, adjust audio volume.
Alternatively, select “Detach audio” to download an audio-only version of your project. This will also allow you to edit audio content independently in the editing timeline, using the same mechanisms as those that apply for video production. Clipchamp also offers innovative silence remover and AI voice over features.
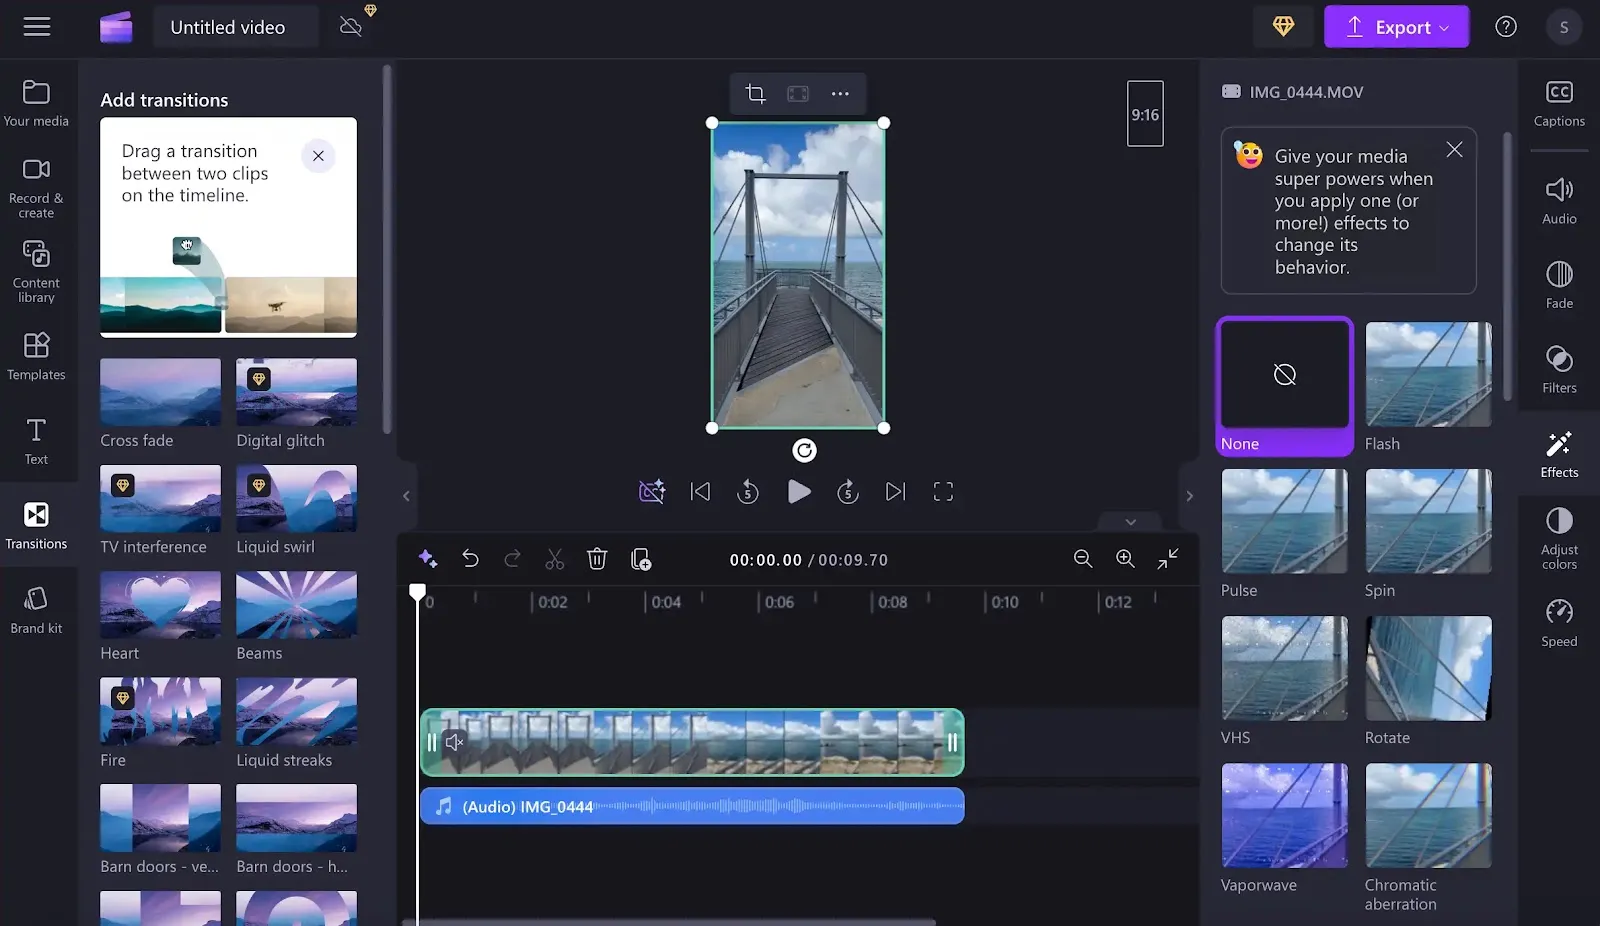
Step 4: Add transitions and effects
To apply transitions, navigate to the menu at the left side of your screen.
Here, select “Transitions,” and drag and drop your chosen effects to place them between clips in the editing timeline. Transitions allow you to smoothly move from one clip to another, using a tailored video design style.
To apply effects, navigate to the menu on the right side of your screen, and choose “Effects.” Click on your chosen effects to apply them across the project. Effects allow you to add special visual effects within your clips, livening up your video content.
Step 5: Add text
To add text to your video, select “Text” from the menu at the left side of your screen.
Here, you can choose from a range of fonts and apply your chosen text edits.
On the right side of your screen, you can also choose the “Captions” option to add automatic text captions for your video.

Step 6: Add music and sound effects
If you want to add additional audio or music tracks to your content, you can do this by accessing the “Content Library” from the left side of your screen.
Here, you can add sound effects and royalty-free music. Plus, you can also explore clip art and other design add-ons.
Step 7: Export and share you video
When you’re happy with your final video project, press the purple ‘Export” button at the top right of your screen.
Here, you can choose your video’s final resolution. Ideally, choose the highest possible quality for the clearest, most professional results.
Advanced features on Windows 11’s built-in editor
As the latest Windows video editor, Clipchamp offers a number of advanced features.
- Text-to-speech: Automatically produce AI voice overs for your content.
- Branding: Easily apply brand kits to enhance content recognition.
- Color grading: Adjust color and other visual effects with ease.
- Recording: Access intuitive recording and editing tools.
How to edit videos on Windows 10 with Windows Media Player
Are you a Windows 10 user? While you won’t have access to Clipchamp’s editing suite, you can use the Windows Media Player instead. Follow these steps!
Step 1: Using your Windows device, right-click on your video file, and choose “Open with,” followed by “Photos.”
Step 2: Select “Edit & Create” from the toolbar in the photos app.
Step 3: From the menu that appears, select the edits you want to apply.
Step 4: Choose “Trim” to trim and alter video length. This will prompt a playback bar to appear. Click and and drag the sides of this bar to adjust.
Step 5: When you’re satisfied, press “Save a Copy” to save a copy of your trimmed project.
Step 6: This will automatically save an updated version of your edited video file to the same folder where the original video is stored.
Step 7: If you want to apply other edits, navigate back to the “Edit & Create” menu. Here, you can save photos, draw on-screen, add text, add 3D effects, or set video sections to slow motion.
Bonus: How to edit videos online on Windows
As a Windows user, you can access Riverside’s studio-quality video production tools!
With a Riverside account, you can record content in up to 4K resolution and 48kHz sound quality.
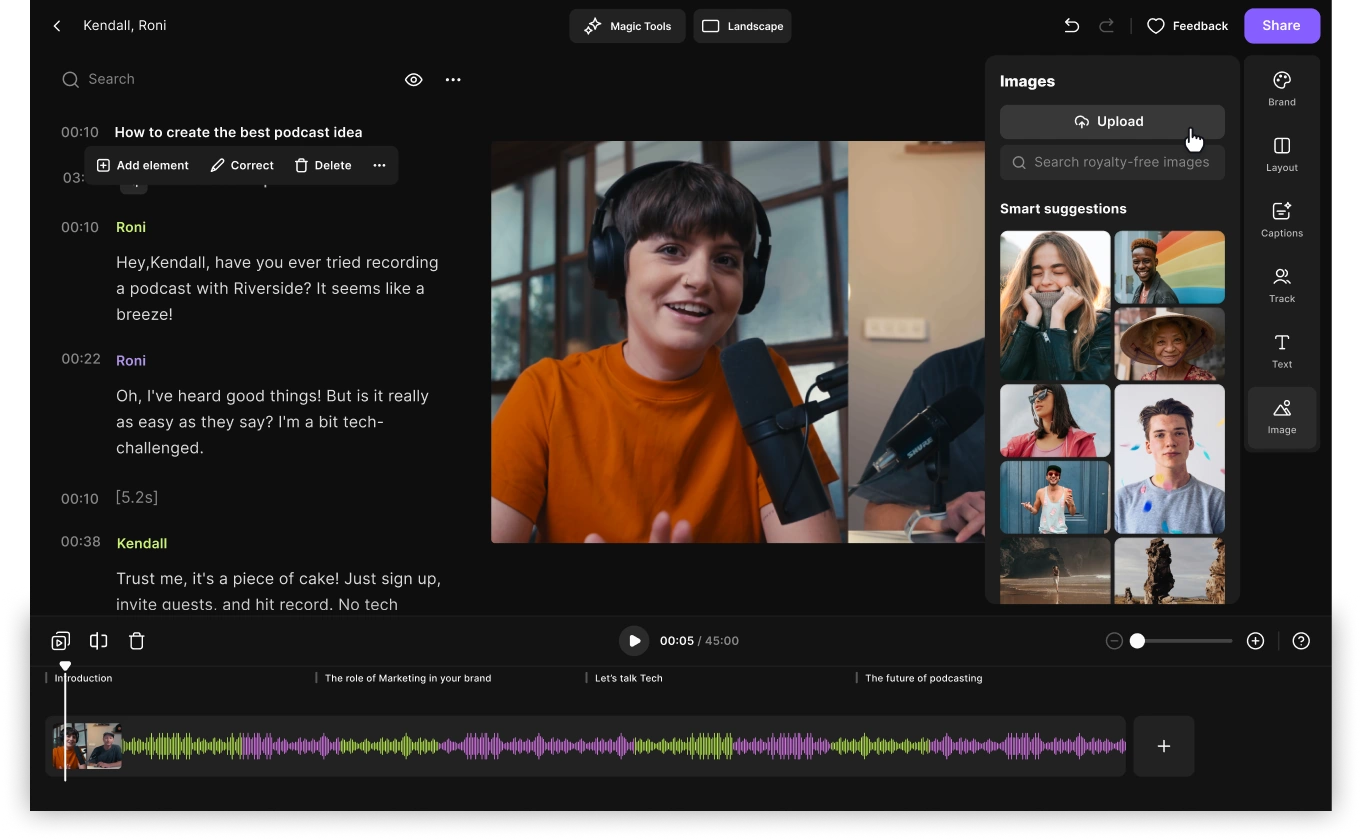
In the editing suite, you can easily apply high-level edits, including noise reduction, text-based editing, and captions in more than 100 languages. You can even access Magic Clips AI, which automatically extracts short-form clips from long-form content for social media repurposing.
Nervous about how to navigate the editing process? Riverside also offers text-based editing, allowing you to make changes to the video via the transcript.
Riverside’s key features:
- High resolution: Up to 4K video resolution and 48kHz sound quality
- Local recording: Record on each person’s device instead of relying on faulty internet connection.
- Text-based editing: Edit videos by simply editing its recording transcript.
- Audio enhancement: Remove background noise and silences, plus touch up your audio in a single click.
- Color-coded timeline: Organize your video by chapters with a color-coded timeline by speaker.
- Text and image overlays: Add lower thirds or style your video with image overlays.
- Captions: Create customizable dynamic captions all in a few clicks.
- Customization tools: Upload your own logo or background to keep your videos on brand.
- Clips creator: Turn your long-form recordings into multiple short shareable clips.

5 tips for effective video editing
Wondering how you can improve your video editing approach? Here are our 5 top tips!
P.S. If some of these terms are new to you, visit our video editing glossary to learn about key terminology and concepts.
Condense your footage
As a video creator, you need to create content that captures the audience’s attention and maintains it. As much as possible, try to trim your content down and eliminate extraneous details. Focus on the key points of your video, and cut out content that doesn’t match your mission.
Reduce background noise
Reducing background noise is an important part of improving quality and professionalism. During the editing process, make the most of noise reduction technologies, including AI tools. Try to ensure that the focus remains on the spoken content of your video.
Use music tracks wisely
Many video projects can benefit from the addition of musical backing tracks. If you want to add music to your video, choose a track that aligns well with the overall tone of your content. Select tracks from royalty-free sources, and make sure you have the licenses to use them. When editing, ensure that music plays in the background instead of drowning out speech.
Harness the power of transitions
Effective transitions are a video editing effect that can improve the flow of your video content. Apply transitions to ensure that separate clips run smoothly and naturally lead into one another. Aim to ensure that your transitions are clear and consistent throughout your project.
Enhance content quality
When creating video content, quality should always be a top priority. As you edit, make decisions to enhance video and audio quality as much as possible. Curate your video for professionalism, and remove elements that do not contribute to this goal.
Final thoughts
Effective Windows video editing can make a big difference to your production experience and outcomes.
By learning how to edit your videos well, you can take control of your content and deliver higher-quality projects. This can help you build your impact, grow your brand, and optimize the power of video materials.
Ready to edit? Get started with your video editing journey. Sign up for a Riverside account.
FAQs on how to edit videos on Windows
Still unsure about editing videos on a Windows device? Here are our answers to a few frequently asked questions.
How do I import and organize video footage in Windows?
Importing and organizing video footage is easy using a Windows device. Simply upload your media files to your chosen software application, following the guidelines listed above. Name files appropriately so that they are easy to search and find when you need them.
How can I add transitions and effects to my videos in Windows?
You can easily add transitions and effects to your video content. The process for this will depend on the editing software program you use.
For example, with Clipchamp, available for Windows 11, you can apply these elements using the menu bars on the sides of your screen.
With Riverside, you can access smooth transitions and other effects in the editing suite.
What are the recommended export settings for saving videos on Windows?
Whenever possible, it’s best to export your video files using the highest quality settings. This will ensure that you don't lose resolution or sound quality.
For publishing across social networks, your content will need to achieve a minimum of 720p resolution. You should choose an MP4 file with a minimum bitrate of 300 kbits/second.
Are there keyboard shortcuts that can speed up video editing on Windows?
Some keyboard shortcuts can speed up the video editing process on Windows devices. For example:
- “Ctrl/Cmd + C” equates to “copy”.
- “Ctrl/Cmd + V” equates to “paste”.
- “Ctrl/Cmd + Z” can be used to undo your last action.
Where can I find additional resources and tutorials to improve my video editing skills on Windows?
If you want to learn more about how to improve your video editing skills, access how-to guides and helpful recommendations via Microsoft Support. Alternatively, check out the latest insights on the Riverside blog.


.webp)

