


Table of contents:
Google Slides is the perfect place to create your next presentation.
This online slideshow software has a range of features to make your content more interesting with audio. You can add pre-recorded audio to Google Slides to take your slide show to the next level. Whether you add music or voiceovers to your slides, this is a great way to captivate your audience.
Wondering where to start?
Read on for a step-by-step on how to record audio for Google Slides. We’ll cover everything you need, including recording software and tips for elevating your Google slides with audio.
Can you record audio from Google Slides?
There is currently no way to record audio from a presentation using only Google Slides. If you want to record a presentation, you must use another piece of software to capture the audio.
You can use software such as Riverside for top-notch audio recording. Riverside has a presentation recorder which is ideal for sharing presentations while recording high-quality audio and video. You can also try built-in software such as Windows Sound Recorder to record your desktop audio.
After you record on your choice of recording software, you can upload your audio to your Google Slides presentation in just a few steps. Putting audio into your presentation is a great way to make your explanations clearer and more attention-grabbing.
How to record audio for Google Slides
Recording audio for Google Slides might seem like a confusing process. In fact, it’s something anyone can do. By following the right steps, you’ll be able to elevate your presentations with audio content. Using the process below you can learn how to record audio for Google Slides from start to finish.
Step 1. Write a script
You should prepare a script for each slide you will add audio to. This will make recording your audio quicker and easier, as you’ll know exactly what to say.
You can create a script by breaking down your presentation into key points. You will need an introduction to let listeners know about the big-picture idea you will be discussing. Then describe each step, point, or sub-idea involved in your plan.
A script should have the right tone for its environment. For example, use formal language for a boardroom meeting and more casual speech for a discussion between friends. Try to be concise and not go off-topic in your script. You should have your script to hand while you record, either typed on screen or written by hand.
Step 2. Choose a recording platform.
There’s plenty of recording software out there, so take your own preferences into account.
When you’re choosing a recording platform, keep in mind the key features that matter most to you. These might be cost, ease of use, recording tools, virtual guest capabilities and more. It’s essential to pick a recording platform compatible with your device. You’ll also want to check that the platform offers high quality recording so you can get the clearest audio.
We’d suggest starting with Riverside, where you can easily record and edit high quality audio in one place. Riverside offers up to 48kHz audio resolution and has built in background noise removal so you get crystal clear audio each time.
Step 3. Record your audio.
The specific recording process varies depending on the software you choose. You can find out step-by-step processes for individual software below.
Step 4. Edit your recording.
If you want to clear up any distortion, or cut misspoken words and awkward silences, then a simple edit can spruce up your audio. Some recording platforms have built-in editing tools. Otherwise, you could use editing software for post-production.
Step 5. Upload your recording to Google Drive.
To do this, first download your recording from the software you have used. Then head over to Google Drive. Select New from the menu on your left. Click File Upload, and select your audio file.
.webp)
Step 6. Add your audio to Google Slides.
Open your presentation in Google slides and click on the slide you’d like to add audio to.
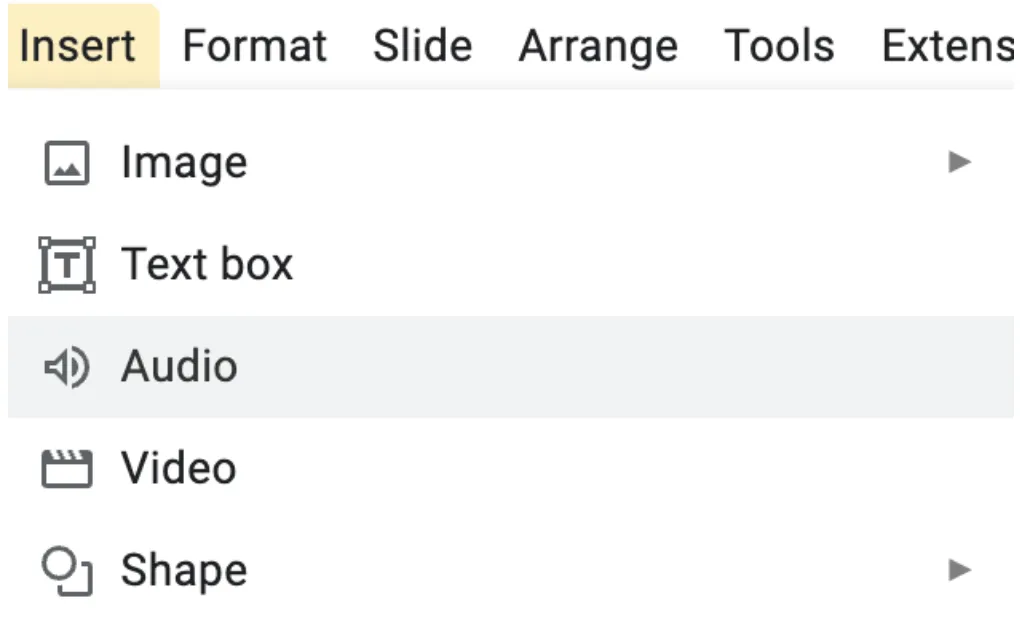
In the toolbar at the top of the app, select Insert, then Audio.
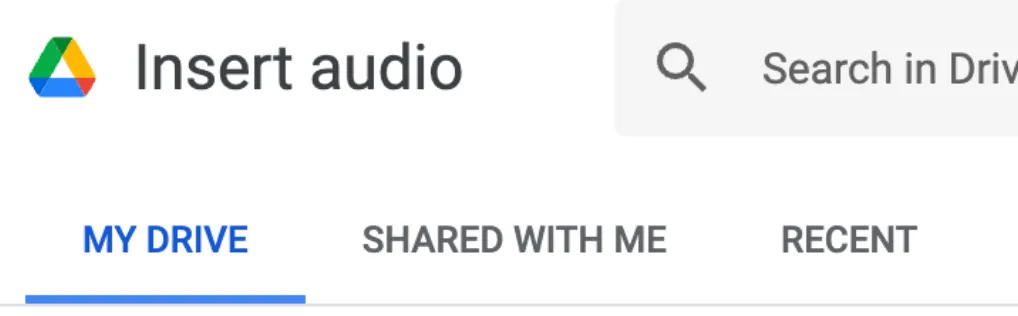
A pop-up window will appear. Go to the My Drive tab. Choose the audio file you want to add, and press Insert.
Your audio will now appear in the slide.
Step 7. Adjust the audio settings.
Select the audio player button that has now appeared on your slide. Click Format options in the toolbar and you’ll see a variety of options you can toggle. Here you can adjust the volume of your audio, and select it to play automatically or when you click.
Best software for recording audio on Google Slides
There’s plenty of recording software to choose from when creating your Google Slides audio. However, with such a variety of platforms, there is also a difference in quality. That’s why we’ve listed some of the best audio recording software for Google Slides. Read on to discover the recording process for these high-quality platforms.
ChromeMP3 Recorder
Price: Free
Compatibility: Chrome OS devices (Chromebooks)
ChromeMP3 Recorder is a free audio recording app. This simple software is perfect for making a quick audio recording. Your audio files will be saved as compact MP3s. Within the app, you can stop, start, rewind and playback a recording and more. You can even save recordings directly to Google Drive for easy uploads to Google Slides.
How to record audio for Google Slides with ChromeMP3 Recorder
Step 1: Download ChromeMP3 Recorder from the Chrome web store.
Step 2: Launch the app and you’ll see a window appear with a timer and recording buttons.
Step 3: Press the button with the circle to begin your recording.
Step 4: Press the button with the square to end your recording. A window will now appear to allow you to save your file.
Step 5: Under the Google Drive tab, select My Drive, name and save your recording.
Step 6: In Google Slides, select Insert, then Audio.
Step 7: Under the My Drive tab, click on the audio file you want to add to your slide.
Riverside
Price: Free; Paid plans from $15/mo
Compatibility: PC, Mac, iOS & Android
Riverside is a top-quality virtual recording studio. This software is ideal for capturing high-quality audio (and video). You can access Riverside directly from your browser or record on the go with our mobile app. The user-friendly interface lets you record locally, meaning the recording will take place on your computer instead of over the web. Even if your internet connection dips, you’ll still come away with a high quality recording.
You can invite guests to join your studio, and easily edit your recording with our built-in automatic editor. Get crystal clear 48kHz WAV audio to impress in your next presentation.
How to record audio for Google Slides with Riverside
Step 1: Head to Riverside.fm on your desktop or open the Riverside app.
Step 2: Create an account by clicking Get Started.
Step 3: Make a recording studio by clicking the Create New button on your dashboard. Name your studio and select whether you want to record audio only, or video as well.
Step 4: You can adjust your recording settings or select Enter Studio to start recording straight away. Note that you can invite guests while setting up, or directly in the studio.
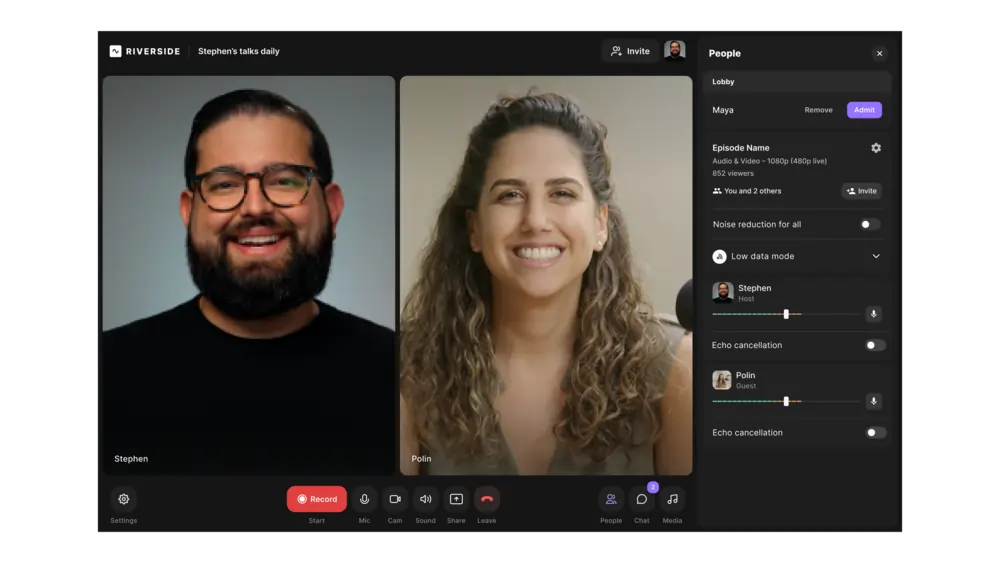
Step 5: Test your equipment in the lobby and when you are set, press Join Studio.
.webp)
Step 5: Begin and end your recording by pressing the red record button.
Step 6: After all your recordings upload, select view recordings. Here you can view and download the recording of your choice.
Step 7: Follow the usual steps to upload your recording to Google Slides.
Audacity
Price: Free
Compatibility: Windows, macOS, GNU/Linux
Audacity is a multi-track audio recording tool available for free. You can use Audacity to capture live audio as well as edit your recordings. Effects such as speed and tempo changes are available to tweak your audio. This software is a great option for fast, hands-on recording sessions. It supports popular audio files including mp3 and WAV.
How to record audio for Google Slides with Audacity
Step 1: Download Audacity from your browser and follow the install process.
Step 2: Launch the application.
Step 3: Audacity has many adjustable features including sample rate and audio drivers that you can personalize if you like.
Step 4: Select your speaker and microphone using the drop-down features in the toolbar header.
Step 5: Record your audio using the red circle button in the toolbar to begin, and click the black square button beside it to end.
Step 6: If you’d like to edit your recording, use Audacity’s tools, including the copy, paste and cut tools.
Step 7: Select File, then Export, and choose a file type such as WAV to export your audio.
Step 8: Name and save your file.
Step 9: Follow the usual steps to upload your recording to Google Slides
Recording top-quality audio for Google Slides with Riverside
High quality audio is crisp, clear, and memorable. It helps your audience understand and engage with your presentation. With Riverside, you can record top-quality audio for Google Slides no matter if you’re a professional or beginner.
Riverside is a user-friendly recording platform with helpful tools to kickstart your content creation. With Riverside you can record uncompressed 48kHz WAV audio for crystal-clear sound quality. There are no downloads necessary - simply access Riverside straight from your browser to get started.
Riverside’s Key Features include:
- Uncompressed, crystal clear 48kHz audio in high-quality WAV files.
- Up to 4K video resolution for sharp video recordings.
- Local recording to ensure a smooth take even if your internet connection dips.
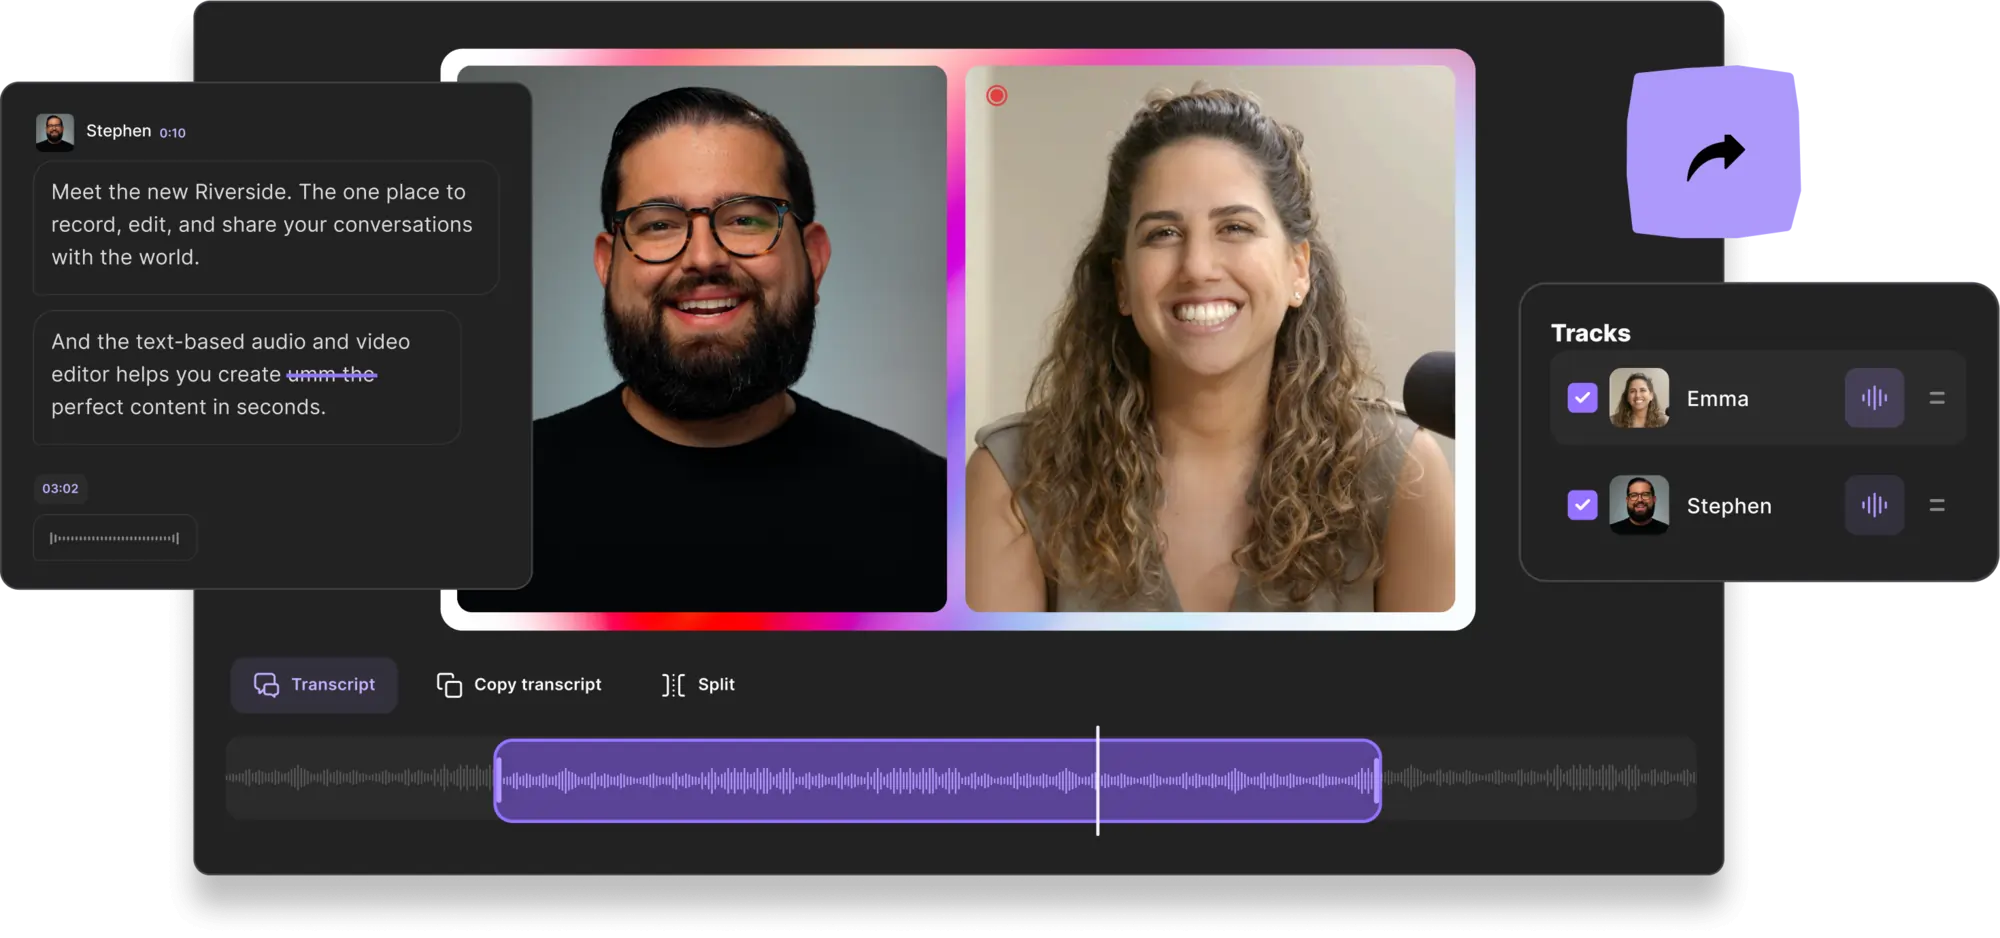
- Text-based audio and video editor so you can make precise edits as easily as editing a text document
- Automated tools for fine-tuning your recording, adding a logo, and more.
- Presentation recorder to capture meetings and Google Slides presentations in HD.
- Separate track recording to give you greater control in post-production.
- Ai transcriptions available in over 100 languages straight after recording
Riverside offers a whole lot more! Learn about us here, or start recording professional audio seamlessly.
FAQs on How to Record Audio on Google Slides
How do you record your voice on Google Slides?
Google Slides does not have a recording tool. However, it’s absolutely possible to add audio into your slideshow. All you need to do is use separate recording software to capture your audio. Afterwards, you can add your recording to the presentation using the Google Slides Audio tool.
Find out more about the process by reading our step-by-step guide above.
How do you record voice over for slides?
You'll need to use recording software to record a voice-over for Google Slides. Each type of software has a different process for recording audio, but typically this is very straightforward. We’ve outlined how you can record audio for Google Slides within this article so you can find out all about the steps involved.
Can you record audio slide by slide?
You can upload audio to the individual slides of your Google Slides presentation. Depending on your preferences, you could use separate audio for each slide, or only add audio to some slides.
You cannot record audio directly on Google Slides. However, you can upload audio files you’ve already created and saved to your Google Drive. To upload audio to a specific slide, simply select that slide. In the toolbar, select Insert, then Audio. From there you can choose an audio file from your Google Drive to add to the slide.


.webp)
.webp)


