Table of contents:
For some people, recording on the fly comes naturally, and using a script can disrupt their natural flow. For others, a script is essential for getting that perfect take without hesitation.
Though there’s no right answer when it comes to the scripted vs unscripted content debate, there are definitely pros and cons to consider.
In this article, we examine the advantages and disadvantages of creating scripted recordings versus unscripted content.
What is a scripted recording?
Scripted recordings are audio or video recordings that someone produced using a pre-prepared written script.
What is unscripted content?
In contrast, unscripted content is created without the help of a written script. In other words, the dialogue in unscripted content is spontaneous and of the moment. But this can also include content where everything is loosely structured and guided by a pre-planned broad overview of the topics or themes to be covered.
Scripted content vs non-scripted content: Which is best?
If you’re on the fence about whether or not to record with or without a script, here’s a breakdown of the various pros and cons:
Scripted content
Using a script to record your content can be very effective for a lot of creators. But for others, it can be detrimental to the overall flow and feel of your recordings:
Pros
Pre-approve specific phrasing and tone of voice.
For professional or branded video content, it can be valuable to pre-approve the specific phrasing you or your guests will use in the recording.
By writing your script, you’ll be able to craft an appropriate tone of voice and phrasing that aligns with your brand.
Fewer takes
You’ll likely get usable shots in fewer takes since all you need to do is follow the script.
Plan the structure of your content
From a broader perspective, writing a script allows you to consider the structure of your recording. This should lead to a well-structured video or audio recording that offers a logical flow of information.

Cons
Less natural
Opting for a scripted recording might mean sacrificing a “natural” flow during the recording. Sometimes, scripts result in stunted and unnatural dialogue that sounds overproduced.
No room for spontaneity
When you have a script, you’re probably limiting the amount of spontaneity or organic additions that can be easily added on the day.
Need time for preparation
Lastly, you’ll need additional time to draft and write your script ahead of your recording session.
Non-scripted content
Non-scripted content is by no means “worse” or less professional. There are a number of advantages to recording without a script:
Pros
More natural & relatable
If you’re striving for a more natural or organic tone, leaving the script behind can often produce the results you want. Leaving yourself to record without prescribed phrasing creates space to go with what comes naturally to you.
Agility and flexibility
Another huge plus of non-scripted content is your ability to pivot and adapt your recording plan on the day. If you want to make spontaneous changes or additions, there’s no need to do this within the constraints of your existing script.
Cons
Potentially more time-consuming
Without a script, you may find that you spend more time overall getting the perfect take. This is because you’re workshopping the phrasing and flow in real-time rather than before you jump into your recording session.
A mix of scripted vs unscripted
It doesn’t have to be a firm binary between scripted and non-scripted content. It’s possible to go for a mix of the two – you could write yourself a loose plan that’s not “word-for-word”. For some creators, this is a happy medium that gives you the best part of both kinds of content.
How to create a well-crafted scripted video: 3 easy steps
Step 1: Sketch out a plan
Before you jump into writing your script, you need to have a good idea of the general structure and flow of your recording.
Starting with a loose structure or main section titles will make the script-writing process far smoother. To do this think about the topic you’re covering and what subtopics you’ll need to cover to explain everything fully.
If you’re not sure where to start, you can always do some keyword research online or on the social media platform you’re posting. Not only can this give you an idea as to what people are looking for around your topic, but it’ll also help optimize your content for SEO.
For example, if you’re creating content on “How to grow on TikTok”, you’ll notice that some topics you could include are:
- How often you should post on TikTok
- How to get more followers
- The best times to post on TikTok
And so on.
Step 2: Create your first script draft
Next, you need to write a rough draft.
Here you’ll flesh out the subtopics. You’ll do this based on your own expert knowledge, or you may need to research things online. Make sure to give credit where it’s needed.
We suggest you keep sentences short and to keep in mind that you’re writing a dialogue. You’ll want to use the same language you use when you talk.
If you’re creating a script for more than one person, make sure you indicate who’s saying what for example:
“Jamie: Today, we're going to show you how to create a stylish and functional wooden bookshelf.
Alex: This project is perfect for beginners and can be completed in just a few hours with some basic tools and materials.”
Don’t expect to get it right the first time around. It’s also important not to underestimate the importance of getting everything down on paper before editing and iterating it.
Step 3: Polish up your script
Once you have a rough draft, you can start workshopping and editing it.
You may want to ask a colleague or friend to proofread it and give you feedback.
Overall we’d suggest focusing on:
- Cutting out any irrelevant information or tangents.
- Time yourself reading your script and make sure it’s a suitable length.
- Bold or format your script to increase it’s readability.
Step 4: Upload to your recording software
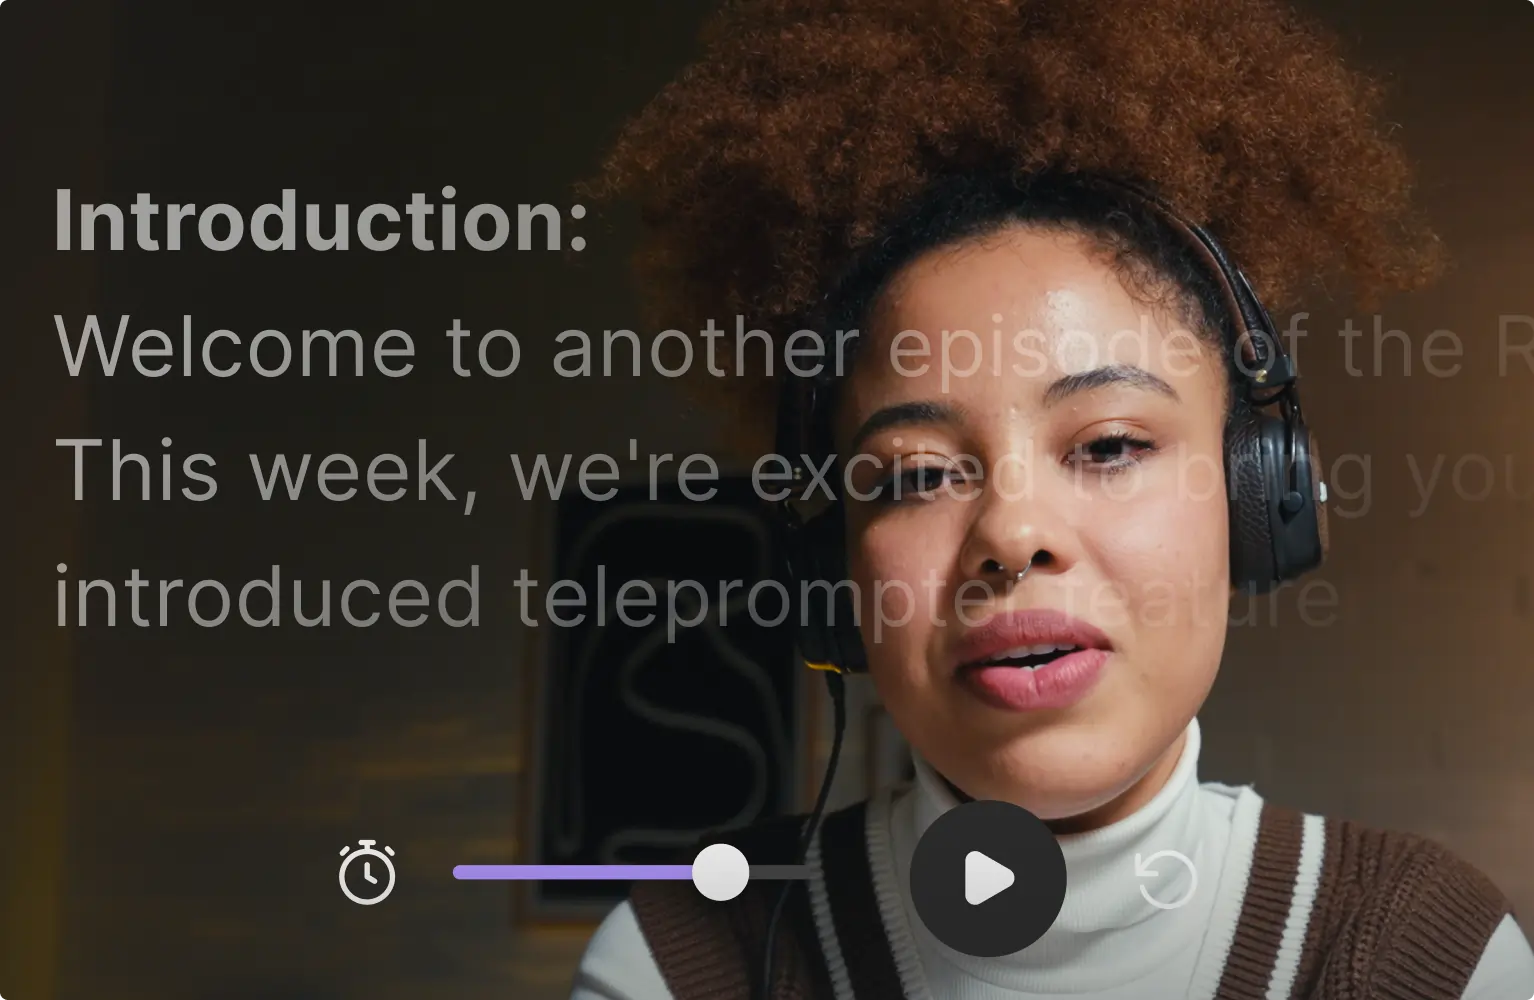
Ideally, use video recording software with built-in teleprompter software like Riverside. This eliminates the need to print out your script or have multiple tabs open while you’re recording so that you can follow your script.
With your script in the same window as your recording session, you’ll be able to keep eye contact with your guests or camera. You can also share it with your remote guests so that everyone is on the same page.
Recording scripted (and nonscripted) videos with Riverside
Whether you choose to record with a script or without, Riverside will help you produce a professional video that lives up to your expectations.
Riverside is a browser-based remote recording studio where quality is a given. You can record up to 4K video and 48KhZ audio with up to 9 remote guests. As we mentioned, the teleprompter gives you the flexibility to upload a script or loose text prompts.
Our AI-powered features also make it easy to quickly edit your recording, repurpose it using a transcript, and create short-form clips perfect for social media.
Here’s a quick look at Riverside’s main features:
- High-quality recording. Record in up to 4K video and 48kHz audio.
- Local recording. Each participant is recorded locally on their own device, so bad wifi won’t impact the quality of your recording.
- Multitrack recording. Record each participant’s audio and video on their own individual tracks for more control during post-production.
- Teleprompter. Upload your content script, and Riverside will scroll through it line-by-line at a pace that you set.
- Media board. Live mix your recording session with sound effects and music.
- Seamless Editor. Edit using your transcript, or effortlessly trim and merge recording with the color-coded timeline.
- Audio enhancing tools. Remove background noise and normalize audio levels at the click of a button.
- Producer mode. Your technical or production team can join the recording without being part of it.
- Ability to livestream. Broadcast your recording session to a live audience on major platforms like LinkedIn and Twitch.
- AI-generated transcript. 99% accuracy in producing transcripts in over 100 languages.
- Magic clips. Riverside’s AI automatically identifies key moments from your full-length recording and turns them into short-form clips perfect for social media.
How to record on Riverside with a script
Here’s a quick guide on how to start recording scripted content with Riverside:
Step 1: Create a Riverside account if you haven’t already. Once you’ve logged in, you’ll land in your dashboard.
On the left-hand panel next to “Studios”, click the “+” button.
Step 2: In the “Create Studio” pop-up, add your studio name and set the transcription language.
If you want to schedule your studio for a later date, you can add it in at the bottom. When you’re done, click “Create”.
.webp)
Step 3: Your newly created studio will appear on the left-hand panel. When you’re ready to record, hover over the studio and click the camera icon to enter the studio.
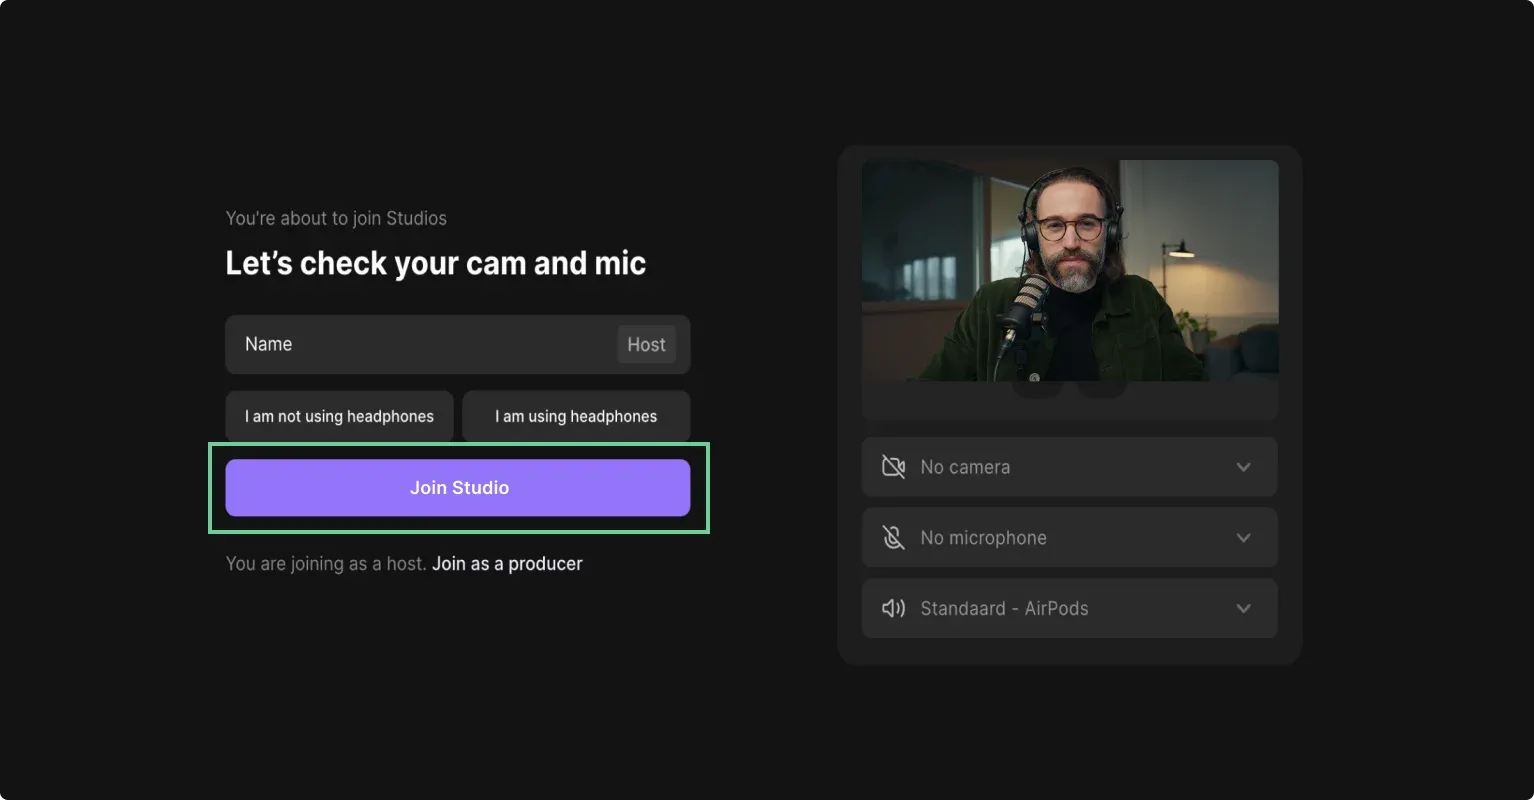
Step 4: You’ll land in the Lobby. Here, you can adjust your display name and check that your mic and camera are properly connected. When you’re happy, click “Join Studio”.

Step 5: Once you’re in the studio, you can adjust your settings by clicking the “cog” icon at the top of your screen. Here you can toggle the video layout (centered vs full frame), add a studio logo, and turn on noise reduction.
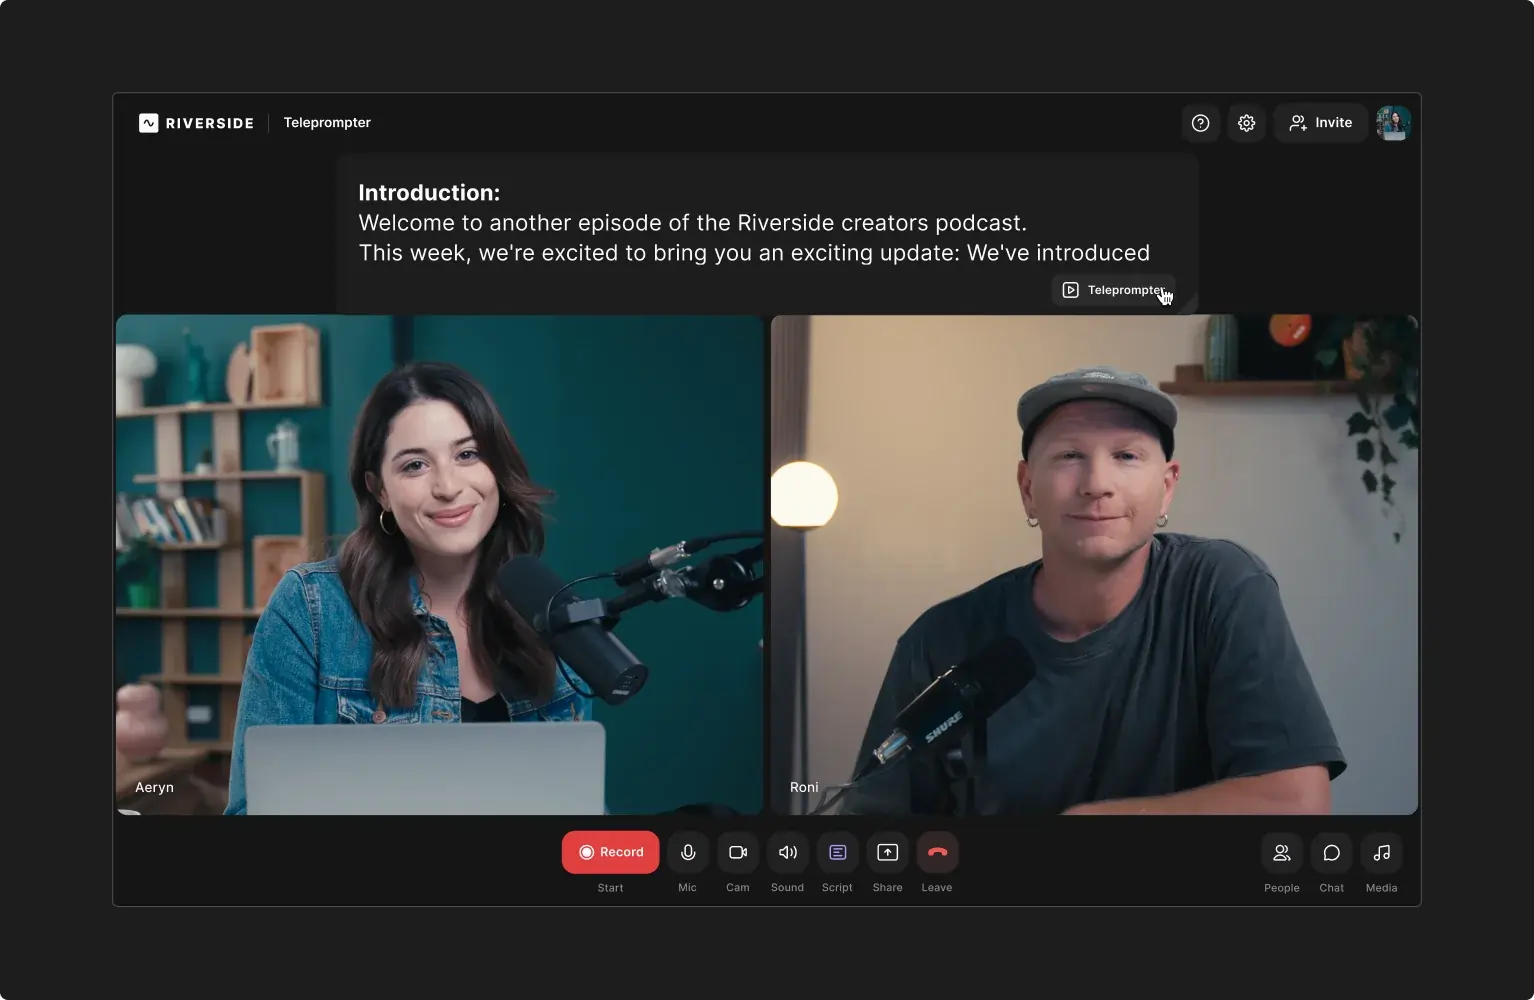
Step 6: If you haven’t yet written your script, you can click the “Script” button at the bottom of your screen then click “Script” again. This will open a box where you can either type a script from scratch or copy and paste your pre-prepared script.

From there, you can adjust the font size to your liking, add italics or bolding for emphasis.
When you’re ready to record with your script, click the “Teleprompter” button so that your script will automatically scroll as you talk.
Step 7: When you’ve finished recording, click the red hang up button then end the session for all.
Step 8: You’ll land back in your dashboard where you’ll be able to look over all your recordings. Click on the recording you want to edit, then click the “edit”>”Create new edit” buttons. This will take you to the Editor where you can edit your recording for publication.
FAQs on Scripted Content
When should you use a script for your content?
Whether or not you use a script for your content depends on your workflow and recording style. What works for one creator may not work for you. It’s worth using a script for recording your content if you want to achieve a certain tone quickly. Or if you’re tied to specific brand phrasing. Non-scripted content works better for organic and natural flow during your recording.
Do YouTubers use scripts?
Most YouTubers probably use some semblance of a script. If they haven’t got a word-for-word script, they will – at the very least – have a rough outline or structure planned.
Why do YouTubers script their videos?
YouTubers use scripts to achieve sleek videos with clean and professional dialogue. Scripts are also important for structuring videos in a logical and easy-to-follow way that keeps the viewer engaged.


%20(1).webp)


.webp)


