Table of contents:
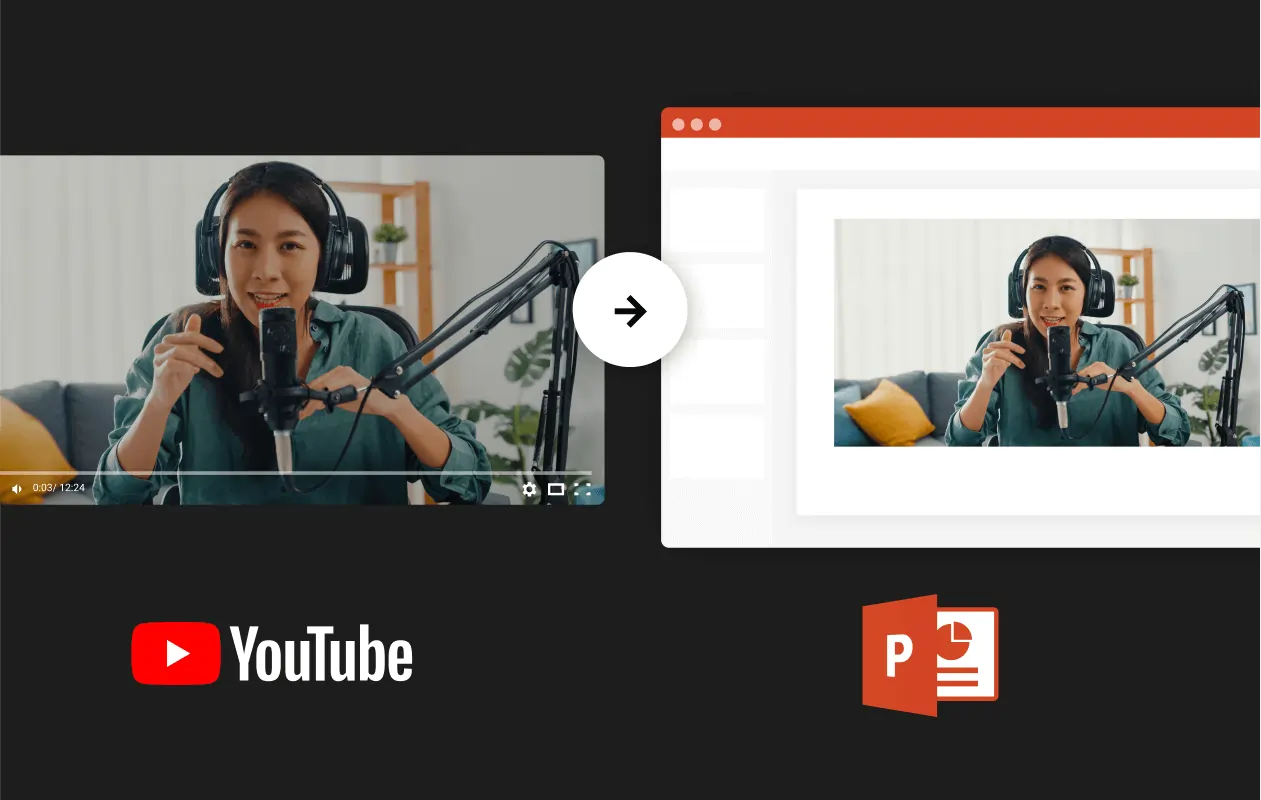
Can you embed a YouTube video in PowerPoint?
Why should you use video in your PowerPoint presentation?
How to Embed a YouTube Video in PowerPoint: 5 Easy Steps
How to embed a YouTube video in PowerPoint to play without internet
How to embed only part of a YouTube video in PowerPoint
Bonus: Software for presenting and recording PowerPoint video presentations
While there are plenty of ways to make your PowerPoint slideshow stand out from the crowd, one of the most effective is to include some video.
So, where should you start?
In the following guide, we will look at straightforward methods to add a video — or even just a clip — to a PowerPoint presentation.
Can you embed a YouTube video in PowerPoint?
Yes. If you want to give your PowerPoint presentation some extra pizazz, including a video clip is a surefire solution. You can do this in two ways: by embedding or linking the video. You will need to select the original YouTube video before you get started.
As we will explain later, you can generate an HTML code and use it to embed the video. The entire process is more straightforward than you might expect. You don’t need to be an IT whizz to get it right.
Why should you use video in your PowerPoint presentation?
Before we dive into how you can include a video in your PowerPoint presentation, let’s discuss the benefits of doing so. Here are some of the reasons you may want to do it:
Stand out from the crowd
PowerPoint presentations are an excellent tool to get your message across. However, if you’re confronting your audience with too much information at once, they may find it overwhelming. Nobody wants to read slides that include a wall of text.
Including a video — or even just a clip — in your presentation helps you stand out from the crowd. Since most people don’t consider including multimedia assets in their presentations, this move will quickly set your slideshow apart from other presentations.
Increase audience engagement
Looking for ways to engage your audience? Historically, experts believed that the average attention span was between 10 and 15 minutes. However, more recent studies suggest that a person’s attention span may be as small as eight seconds. Simply put, you need to work hard to engage your audience when delivering any type of talk.
Including a video in your PowerPoint presentation could be the answer. The introduction of a new media form breaks up the slideshow's monotony. Show your audience a short movie clip, an interview, or even a different talk. The change in pace and media form is a quick way to bring their attention back to the presentation.
Share a lot of information quickly
Want to convey a lot of information quickly? A video may be the answer if you cannot describe a concept or theory with mere words. This method allows you to share a wealth of complex ideas quickly and easily. Why not include a video?
How to Embed a YouTube Video in PowerPoint: 5 Easy Steps
Ready to get started? We’ve got you covered. If you want to include a YouTube video in your PowerPoint presentation, it may be easier than you imagine.
As we will cover next, there are two simple options that you can use to place the video or clip in your slideshow quickly. You can embed or link the YouTube video into the PowerPoint presentation. Both of these options follow a similar process, detailed below.
Keep in mind that you will need one of the latest versions of the software — Microsoft 365, PowerPoint 2021, or PowerPoint 2019 — to do the following.
Step 1: Choose the video you want to
First, you should head to YouTube and find the video you want to include in your PowerPoint presentation.
Step 2: Get the URL or embed code
Press the “Share” button below the video.

You have two choices here:
- You will see a URL link that you can copy
- Alternatively, you can click the “Embed” button and copy the full HTML code
It doesn’t matter which option you choose. You can use either of these to insert the YouTube video into your PowerPoint presentation.

Step 3: Go to PowerPoint and find the slide
First up, open the presentation you want to work on in PowerPoint. Choose the slide where you want to insert the video. This is where the video box will appear when you have inserted it.
Step 4: Insert the video
To insert the YouTube video, click “Insert” and then “Video” and “Online Film”. You will see a box where you can paste either the link or the full embed code — don’t worry, both work the exact same way! Paste either in and then press “Insert”.

Step 5: Adjust the size and position
When you have done that, the video will appear on the slide. You can move it around and change the size as needed.
How to embed a YouTube video in PowerPoint to play without internet
When you embed or link to a YouTube video in your PowerPoint presentation, it plays using the internet. That is because the video doesn’t store as part of the presentation.
Of course, if you plan to present your slideshow without being online, you need to look into alternatives. Let’s look at how you can embed your YouTube video without the internet.
If you want to play a YouTube video in your presentation without using the internet, you will need to download it first. Follow the steps we have outlined below.
Note: YouTube does not let you download the file from the site or app. In addition, you should be in line with the copyright of the video before you download it.
Step 1: Download the video as an mp4
You can download videos from YouTube — both in the app and using third-party software. You will need to be signed into the app to download content. However, the videos will only be saved within the app, not as separate mp3 files on your device.
If you want to be able to upload the video to PowerPoint, you will need to use a third-party downloader. 4K Downloader app, which is available for both Mac and Windows systems, is one option.
Download and open the app. You will see a small box and a button that says “Paste link”. Get the URL link from the YouTube video and paste it using that button.
Choose the resolution you want from the options menu and click “Download”. The video will then download to your computer as an mp4 file.
You will be able to find it either in your Downloads folder or a temporary folder called 4K Video Downloader.
Step 2: Find the slide in PowerPoint
Now that you have downloaded the video open up Microsoft PowerPoint. Find the slide where you want to insert the YouTube video.
Step 3: Insert the video from your files
Click “Insert” and then “Video” and “Video from file”. This will open up your documents. Navigate to find your video and double-click it.

Step 4: Adjust your video
The video box will pop up on your slide. You can adjust the size of it and move it to wherever you want on the slide. The video will play without the internet (as it is saved as a local file on your computer — not streaming from the internet).
How to embed only part of a YouTube video in PowerPoint
Okay, so far, so good. But what if you don’t want to show the whole video as part of your PowerPoint presentation? You can use the YouTube clip feature to create a snippet of the original video that is between five and 60 seconds long.
You will need a YouTube account to use this feature. If you haven’t already got one, take a few moments to sign up here. You will need to sign in first and follow these steps.
Step 1: Make your clip using YouTube
Find the video you want to use. Under it, click the “Clip” button.
You will see a new box. Choose a title for your clip and then enter the start and finish times. (You can also click-drag the blue box on the video to create your custom clip.)

Step 2: Copy the YouTube clip URL
When you are happy with the snippet you want to use, click “Share clip”. You will then see the share box where you can copy the video clip URL.

Step 3: Go to PowerPoint and find the slide you want to use
Head back to Microsoft PowerPoint. You should find the slide that you want to use once again.
Step 4: Insert the video clip
Next, click “Insert” and then “Video” and “Online film”. Paste the video clip link into the box that appears on the screen and click “Insert”.
Step 5: Adjust and move the video
As before, you can adjust the size of the video and move it around on the slide. Only the selected clip will play when you click the “Play” button.
Bonus: Software for presenting and recording PowerPoint video presentations
Once you’ve created an engaging PowerPoint presentation, it’s time to share it with your audience. If you are doing that remotely, using Riverside makes it super easy. Not only can you present your slideshow online, but you can also record and save it too.
If you’re on a Business account, you can upload a PowerPoint to capture with local recording instead of recording it as a screen share. With this, your presentation records directly on your device instead of relying on any internet connection that could negatively impact your presentation’s quality. On top of that, our presentation recorder gives you flexibility to switch control as to who is presenting and controlling the slides.
To record a presentation on Riverside follow these steps. If you’re not on a Business plan, we’ll also cover how to use your screen sharing recorder to capture a presentation online. The first three steps will be the same no matter what account you’re on:
Step 1: Sign up on Riverside and create a studio, or select an existing studio. If you’re creating a studio choose whether you want it to be audio only, or audio and video. You can also adjust settings as necessary.
When you are ready press ‘Enter Studio’.

Step 2: You will see the Lobby where you can test your equipment and adjust anything before recording. Press ‘Join Studio’ once you’re done.
Step 3: In the studio you can invite other participants, if you haven’t already. Otherwise, you’re set to upload your presentation.
Using the Business plan Presentation Recorder:
Step 4: Click the “Share” button at the bottom of the screen and select ‘Presentation’. Choose a presentation and wait for it to upload.
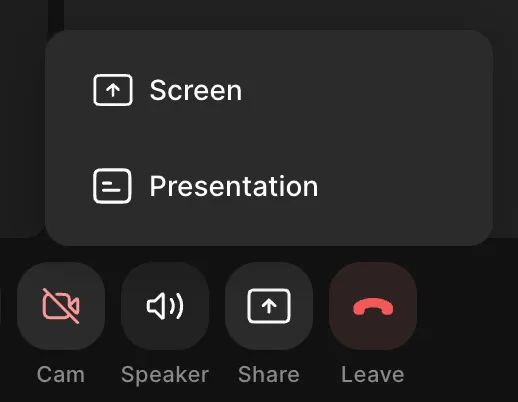
Using the Screen Share feature:
Step 4: Click the “Share” button at the bottom of the screen and make sure you have your PowerPoint presentation open.
Step 5: You will see a pop-up where you can choose to share your Entire Screen, a specific Window, or a browser tab. You should select the Window with your slideshow in it.
When you have followed these steps, you will be able to share your presentation with your online audience while also recording it. You can edit the video afterward using our Editor.
Share your Riverside videos in PowerPoint
Riverside is an easy-to-use platform where you can create, edit, and share video content. Create your own studio to film your videos and head to our Editor to finalize the content. You can then download and save your videos in high resolution. The straightforward platform’s features include the following:
- High-quality video (4K) and audio (48kHZ) recording
- Text-based video editor so anyone can make professional content as easily as editing a text document
- Local recording so all files are captured directly on your device and your internet connection does not affect resolution.
- Separate audio and video tracks for each participant for more editing flexibility
- Effortless recording for up to 10 participants in one remote session
- Automatic transcriptions straight after recording in either txt or srt. formats
- Clips feature to make and share snippets of your video content online
When you have created your video, you can download it to your device. Riverside also integrates with Descript and Premiere Pro so you can polish it off. You can then upload the content to your YouTube channel or elsewhere.
Want to share your Riverside video in a PowerPoint presentation? There are two approaches to try: If you have uploaded the video to YouTube, you can use the link or HTML code to insert it onto a slide (as described above). Alternatively, you can insert the video from the local file on your device.
FAQs on How to Embed a YouTube Video in PowerPoint
Why can't I embed a YouTube video in PowerPoint?
It is easy to embed a YouTube video into your presentation. Start by copying the HTML code from the original source video. Next, find the slide you want to use in PowerPoint.
Click “Insert,” then “Video,” and then “Online film”. A pop-up will open containing a box and you will be prompted to insert the URL. However, you can insert the HTML code here and click “Insert”. The video will appear on the slide you have chosen.
Need to do some troubleshooting? If you find the above process isn’t working, you should check that you have the latest version of Microsoft PowerPoint. You also need to ensure that the link is valid and that the YouTube video is still active.
Why won't my embedded video play in PowerPoint?
Check that you have a stable internet connection. If the video is streaming from the original source — i.e. YouTube — you will need access to the internet.
If you have embedded your video from a file on your computer, check the original file and its location. If the location changes, you may need to delete the video and insert it into the slide again.
How do I embed a video in a PowerPoint without a link?
If you have the video saved on your computer, you can insert it onto a slide. Click “Insert,” “Video” and then “Video from file” to get started.
When inserting a YouTube video, you can also use the HTML code instead of the URL. Copy the code and then insert it by pressing “Insert,” “Video,” and “Online film”.
What is the difference between linking and embedding in PowerPoint?
When you embed a video file stored locally on your device into PowerPoint, it becomes part of the presentation and plays within it. You do not need the internet for this.
However, when you link (or use the embed code to link) a YouTube video in your presentation, it uses the original source to stream the video content. You will need the internet to make sure that your video content plays.




.webp)
.webp)


