-(1)-(1).webp)


Table of contents:
How to live stream: 6 Steps for a streaming setup
2. Choose your live stream platform
3. Prepare your live stream equipment and setup
4. Setting up your live stream
How to live stream on different channels
Troubleshooting common live streaming issues
5 Bonus tips on how to go live like a pro
Key takeaways:
Follow these steps to live stream:
- Plan your stream, invite guests and decide what you’d like to goals achieve.
- Choose your streaming software, platforms and equipment.
- Setup your live stream online and run through a trial run.
- Go live and interact with your audience. We also suggest recording your stream.
- Check your live stream analytics and repurpose your stream recording.
Hosting a live session isn’t as simple as hitting the ‘Go Live’ button.
You need a full-fledged live-streaming setup and strategy to make your stream a hit. From selecting the right platform to choosing your equipment, every detail matters.
In this guide, we’ll share a full step-by-step on how to live stream. We’ll cover various platforms and share best practices to maximize your success.
Table of contents
- How to live stream: 6 Steps for a streaming setup
- 1. Plan your live stream
- 2. Choose your live stream platform
- 3. Prepare your live stream equipment and setup
- 4. Setting up your live stream
- 5. Perform a test run
- 6. Go live
- 7. Post-streaming activities
- How to live stream on different channels
- Troubleshooting common live streaming issues
- 5 Bonus tips on how to go live like a pro
- Over to you: Create live stream events effortlessly
- FAQs on How to Live Stream
How to live stream: 6 Steps for a streaming setup
New to the world of live streaming?
Here are our tried-and-tested steps to help you build an airtight video streaming strategy and setup. We’ll also cover what to do before and after a live stream session.
1. Plan your live stream
Before you go to Amazon to find the best live streaming equipment, take a step back and plan your live-streaming efforts.
Brainstorm your goals and topics
Zero in on your goals to understand what you want to achieve through these sessions.
For example, you could be a brand hosting live streams to launch new products. Or a creator hosting AMA (ask me anything) sessions with your followers.
Once you have a clear objective, consider some of these questions to better prepare for the live event:
- Who’s the target audience for this live stream?
- How many participants are expected to attend?
- What time would be ideal for your audience?
- Will the event be completely virtual or hybrid?
Now, you’re all set to brainstorm topics and themes for each session. Ensure the topics you cover meets your audience's needs.
It’s a good idea to create a visual storyboard with tools like Canva or Miro for brainstorming.
A storyboard visualizes the sequence of points you want to cover in your stream. You can add engagement cues—like a question, activities, or polls—to actively interact with your audience. These cues will keep your viewers engaged till the end.
Document these details to keep your team on the same page.
Schedule the event and invite guests
If you have any guests, it's best to book them upfront. In this case we suggest you block off a time and date in your calendar. This will also help you know when to start promoting your live stream.
2. Choose your live stream platform
The key to successful live streaming is choosing the platform where your audience is most active.
For example, gamers can maximize their viewership by streaming on Twitch. And, business professionals can attract a good audience through LinkedIn Live events.
Sounds easy, right?
Here comes the tricky part: how do you choose the right live-streaming platform when you have multiple options to explore and so many features to consider?
Let’s break down some key factors to pick the best video streaming platform for your needs:
- Interaction tools: Look for interactive features like live chat, polls, breakout rooms, and similar to make viewers feel more involved in the session. This is essential for maintaining audience engagement throughout the session.
- Mobile compatibility: Ensure the platform allows people to join your live stream from mobile phones or tablets. This will give your audience more convenience in attending your sessions anytime, anywhere.
- Monetization options: Evaluate features such as subscription events, pay-per-view, and advertising integrations to monetize your content. These features will let you stream live to an exclusive audience of people willing to pay for the sessions.
- Analytics and reporting: Check whether the platform offers detailed insights about your live stream with metrics like number of viewers, engagement rates, average watch time, and more.
- Recording and playback: Assess options to record a live stream and save it for distribution later. You should also look for the file formats of these recordings.
In addition to these factors, find specific features that align with your audience’s preferences to enhance your live stream experience.
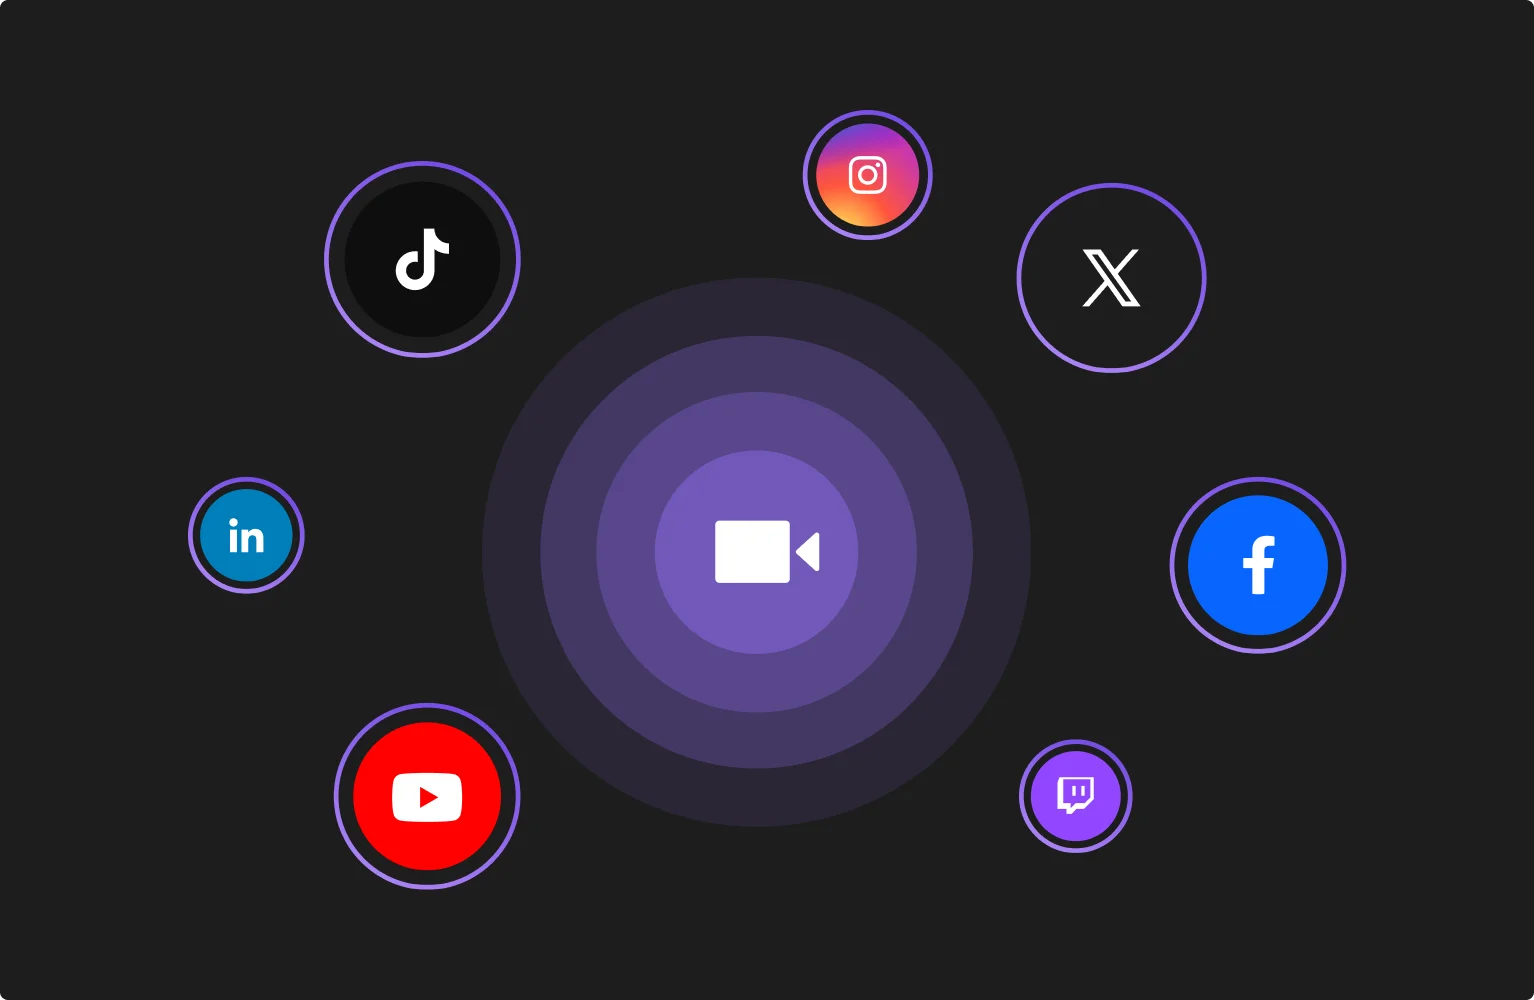
If you’d like to stream to multiple platforms at the same time then we suggest trying a multistreaming software like Riverside. You can push your stream to YouTube, Twitter, Twitch and any custom RTMP. Invite your audience to chat in one omnichat, or they can call in live. This way, you can maximize your reach seamlessly.
Learn more, or start live streaming seamlessly on Riverside today!
3. Prepare your live stream equipment and setup
Now, it’s time to build your live streaming setup with the right equipment for your needs.
Here are a few essential tools to add to your stack:
Camera
You can explore several options for streaming webcams based on your skills and budget.
Evaluate the camera’s resolution—1080p for standard and 4k for high-definition recording. You also have to consider the frame rate (at least 30 FPS) and system requirements.
- For a low-budget try the Microsoft Lifecam HD-3000.
- For a high budget try the Dell Ultrasharp Webcam.
Check out more in our top 8 streaming webcam list!
Microphone
A good microphone can elevate your live streaming experience with high-quality audio.
Here are some mic options to choose from:
- Lavalier mics are best for portability.
- Cardioid or shotgun mics are best for directional audio and voice recording.
- USB mics are best for an easy setup whereas XLR mics offer better audio..
- Condenser mics are best for controlled environments.
We’ve got a full guide on the best microphones for streaming to help you find the right one.
- For a low budget try the Audio-Technica AT2020.
- For a high budget try the Shure SM7B.
Headphones
A headphone is just as important as the mic to create a good audio experience.
A closed-back headphone prevents audio leakage, producing clearer recordings and reducing unwanted background noise. When buying headphones, you should also consider your comfort level and frequency response.
A good choice is the Audio-Technica ATH-M50x. But you can even make do with simple airpods.
Accessories
You can level up your video streaming setup with a few accessories, such as a wire organizer to clean up your desk.
Add a green screen to use different backdrops during live sessions or video recordings. You can also get a tripod or mic stand to make your streaming environment more comfortable.
Advanced live stream equipment
Check out these tools if you want to create a more professional-grade setup:
- Encoder: An encoder converts your live video into a format compatible with online streaming. You can get a hardware encoder to free up your system’s resources and do other tasks simultaneously as your stream. Software encoders are ideal for beginners.
- Lighting: Build your lighting system with LED panels, ambient lights, or ring lights. You can pick the colors and color temperature in your light setup to match your vibe as a brand or creator.
- Capture card: A capture card can make your live events more seamless and lag-free. Check your system’s compatibility with the capture card to ensure it supports your camera’s resolution and frame rate.
- Mixing equipment: Control multiple audio sources with a complete soundboard. You can mix different inputs in real time with a good mixing audio mixer.
Find our top recommendations for live stream equipment for every budget before investing in your stack.
4. Setting up your live stream
Planning your live stream, check. Choosing a live stream platform, check. Building your setup, check. What next?
It’s time to complete your streaming software setup and configure it to your streaming destination.

Here’s how you can do it on Riverside as an example:
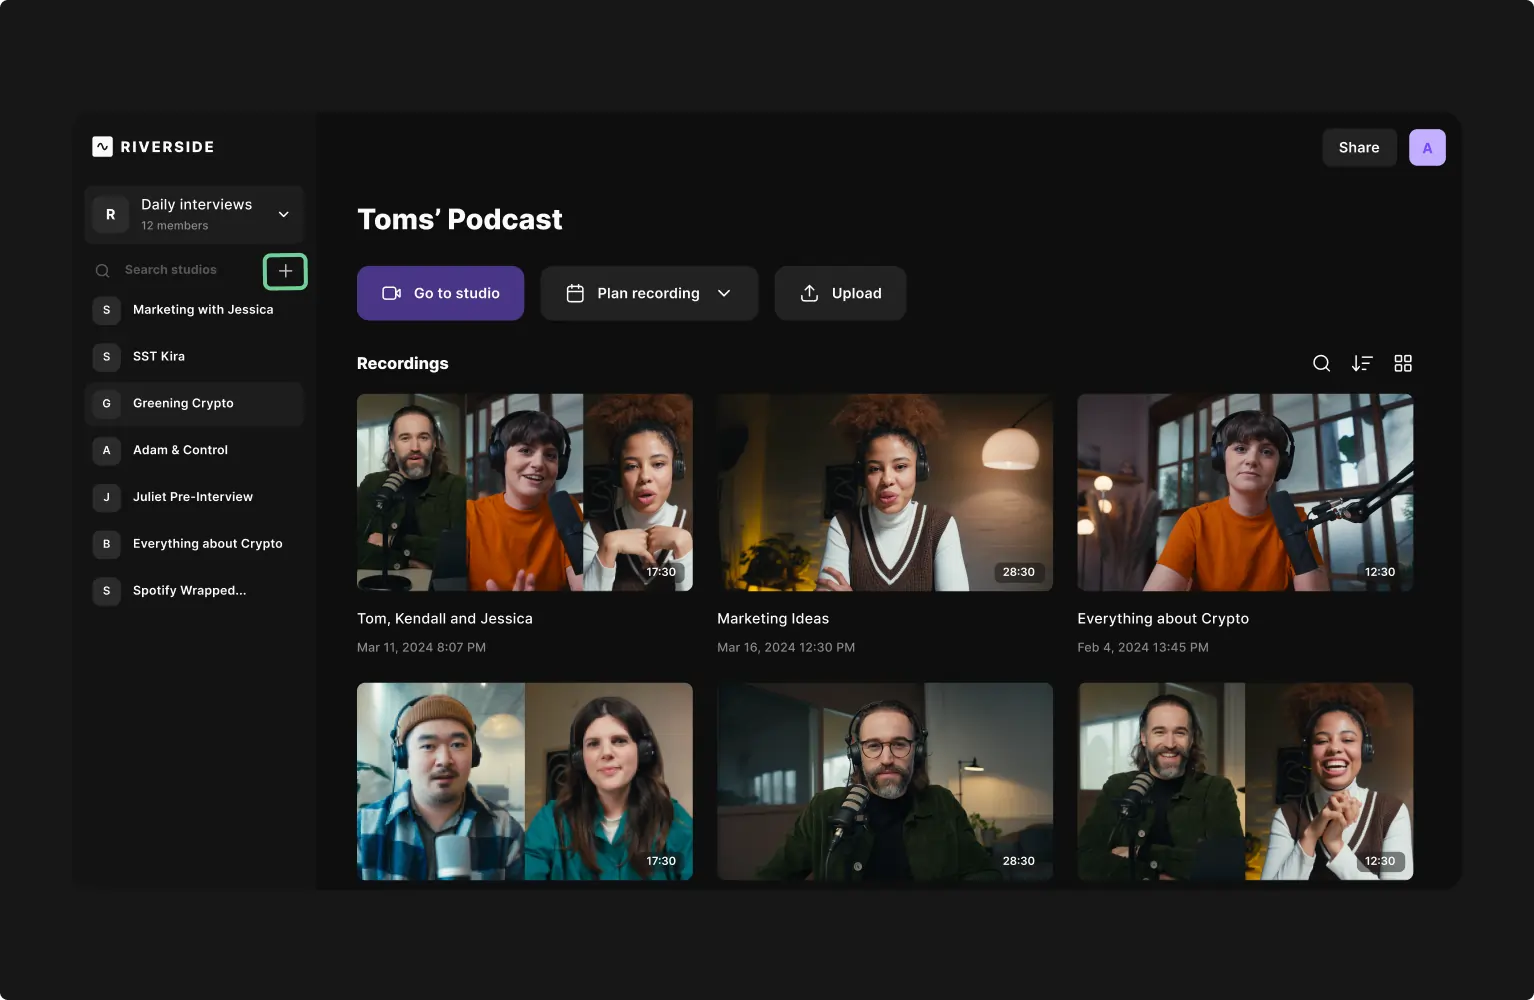
Step 1: Create a new studio
Click on the + icon to create a new studio and get started. You can also visit your existing studios to start a new live stream.
Step 2: Name your studio and invite guests
Add a relevant title for your studio and tweak a few settings, such as transcription language and audio-only event.
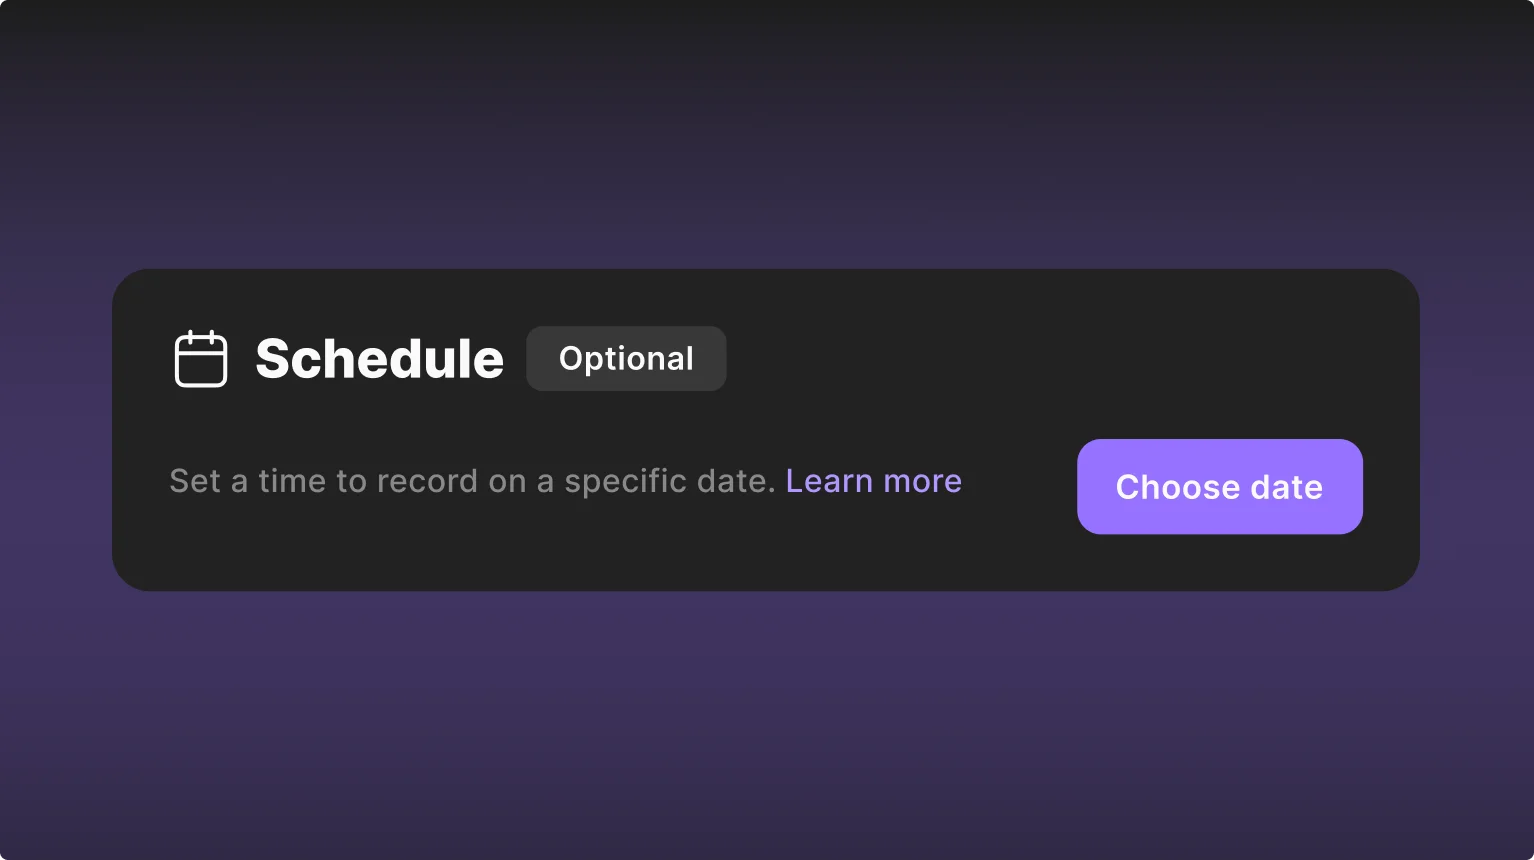
Then, find the “Plan recording” button to schedule a live stream, where you can invite guests via email or an invite link.
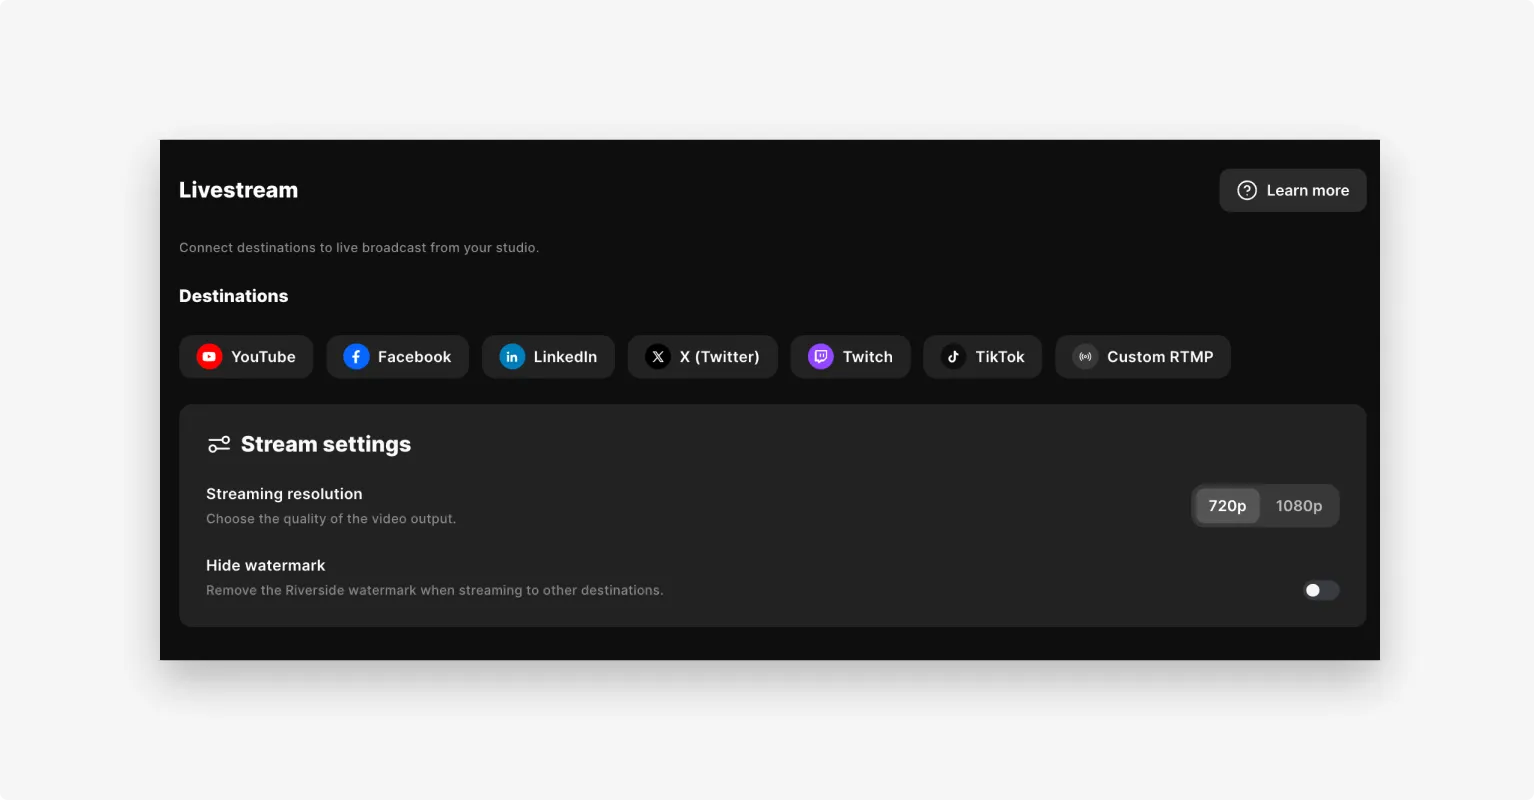
Step 3: Optimize live stream settings
Before you start your live session, adjust the settings to optimize your live streaming setup. To do this, go to the left meny and click the three dotes next to your studio title. You’ll see an option for “Settings here”.
When adjusting settings you can:
- Transcribe the stream in any language.
- Pick the optimal video quality, frame rate, layout, etc.
- Enable automatic noise reduction and echo cancellation.
- Add a branded background and logo.*
Note that some of these features are only available on certain paid plans.
Step 4: Connect and configure your streaming destination
Within the settings tab, you’ll find the option to connect several integrated streaming destinations, such as YouTube, Facebook, LinkedIn, etc. Riverside also lets you set up a custom RTMP destination.
Click on the platform you’d like to connect to and follow the prompts. In some cases you may need to find your stream URL and stream key on the destination platform. and, add it to Riverside.
Note that you can also add these platforms directly in the studio:
When your settings are all set, go back to the studio dashboard and click “Go to studio”. This takes you to the lobby for you to check your equipment. Click “Join studio” when you are ready.
In the studio, you can set up a stream by clicking on the Live stream-Off button. Here you’ll see the same options as in your settings. (For more, check out our help site on setting up a stream on other platforms.)
5. Perform a test run
Things can go south anytime when you’re hosting a live stream.
That’s why you need a test run to discover and fix any loose ends in your streaming setup. For example, a test run would reveal any errors in your audio and video input sources.
This test run also ensures you’re not caught off-guard when a glitch occurs during the live stream. You would likely be more prepared to troubleshoot issues you’ve already faced.
6. Go live
We suggest logging on at least 30 to 15 minutes before you go live. You’ll be able to do last-minute checkups and make sure everything is ready.
If you’re using Riverside. Enter your studio, set up your stream as outlined above, and then simply hit the “Record” button to start streaming.
.webp)
This streams directly on Riverside, but also to the platforms you’ve set up.
You can stream with up to 10 participants, no matter where they are. We also record each participant’s audio and video track for easy repurposing.
To keep engagement going, your audience can send messages in the chat or you can invite them to call you live.
Also, check out the media board on the right toolbar. Here you can add live background music or sound effects.
7. Post-streaming activities
You just completed an amazing live stream session. How do you make the best out of it to continue this success?
Here are some crucial tasks to complete after a streaming session:
Review performance metrics
Almost every social media platform offers analytics to monitor your live stream performance. Access this data to identify moments with peak engagement and significant drop-offs.
You can also track metrics like:
- View count: How many people watched the live stream?
- Watch time: Amount of time viewers spent watching your stream.
- Retention rate: What percentage of viewers were retained till the end?
- Engagement rate: Likes, shares, comments, and other user interactions.
- Demographics: Information about the viewers’ age, location, and gender.
Compare and contrast these numbers for each live session to assess your progress.
Repurpose live stream content
Don’t limit your live stream only to the folks who joined the session.
Pick the big highlights from the session and create several short clips. You can distribute these clips as social media posts, add them to blog posts, or reuse them on your website.
It’s also a good idea to download the audio file of your live stream and upload it as a podcast episode.
Pro tip: If you’re using Riverside, our Magic Clips tool automatically discovers the best moments in your stream and creates snippets. Add captions in a click and customize them easily before distributing them anywhere.
Collect audience feedback
Getting direct feedback from your viewers will tell you what to improve and how to make your sessions more engaging.
You can add a short survey at the end of the live stream to get quick feedback. Or send follow-up emails with a recording of the stream and specific questions to hear from viewers.
Analyze this feedback and bake it into your process to create new sessions.
How to live stream on different channels
Whether you’re broadcasting your gameplay, sharing insights, or connecting with followers in real-time, knowing multi-platform live streaming is the key. It expands your reach and boosts engagement across diverse audiences.
Here’s a quick guide to going live on different channels:
How to live stream on Twitch
Originally a gaming-focused platform, Twitch now hosts a variety of live entertainment, including e-sports, cooking shows, and music performances.
But unlike some platforms, there's no need to meet specific requirements to get started. Just create your account for free and start streaming.
Let’s check out two ways to live stream on Twitch through computer and mobile devices.
From computer
Step 1: Log into your Twitch account. Click on the profile icon on the top-right corner and go to “Creator Dashboard.”
Step 2: Go to “Streaming Tools” to access multiple broadcasting apps.
You can choose from various streaming platforms, including Twitch Studio, StreamElements, OBS, and more. For this example, we’ll use Twitch Studio.
Step 3: Download the Twitch Studio app and authorize your device for streaming. It’ll require an activation code.
Step 4: Complete your account setup and customize the settings for your live stream.
You can modify the background, add multiple scenes, create a Be Right Back screen, and more. Once your setup is complete, hit the “Start Stream” button.
.webp)
From mobile
Step 1: Download the Twitch app on Android or iOS devices and log in to your account. Then, click the “Create” button at the top right corner.
Step 2: Select the "+" icon at the bottom center and choose between "Stream Games" or "Stream IRL.”
Streaming games is specifically for broadcasting the gameplay with a talking head video on your screen. You can choose the Stream IRL option to go live with your video camera.
Step 3: Customize your stream setup according to your preferences and click "Start Stream” to go live on Twitch from mobile.
Learn more and check out our full guide on How to stream on Twitch.
How to live stream on YouTube
You need a verified channel to live stream on YouTube. This process takes 24 hours to set up. So, plan ahead to avoid last-minute issues when going live.
You can start the live video from a computer or mobile device. There’s no minimum subscriber count to go live from your PC. But, you need at least 50 subscribers to live stream from your phone or tablet.
From computer
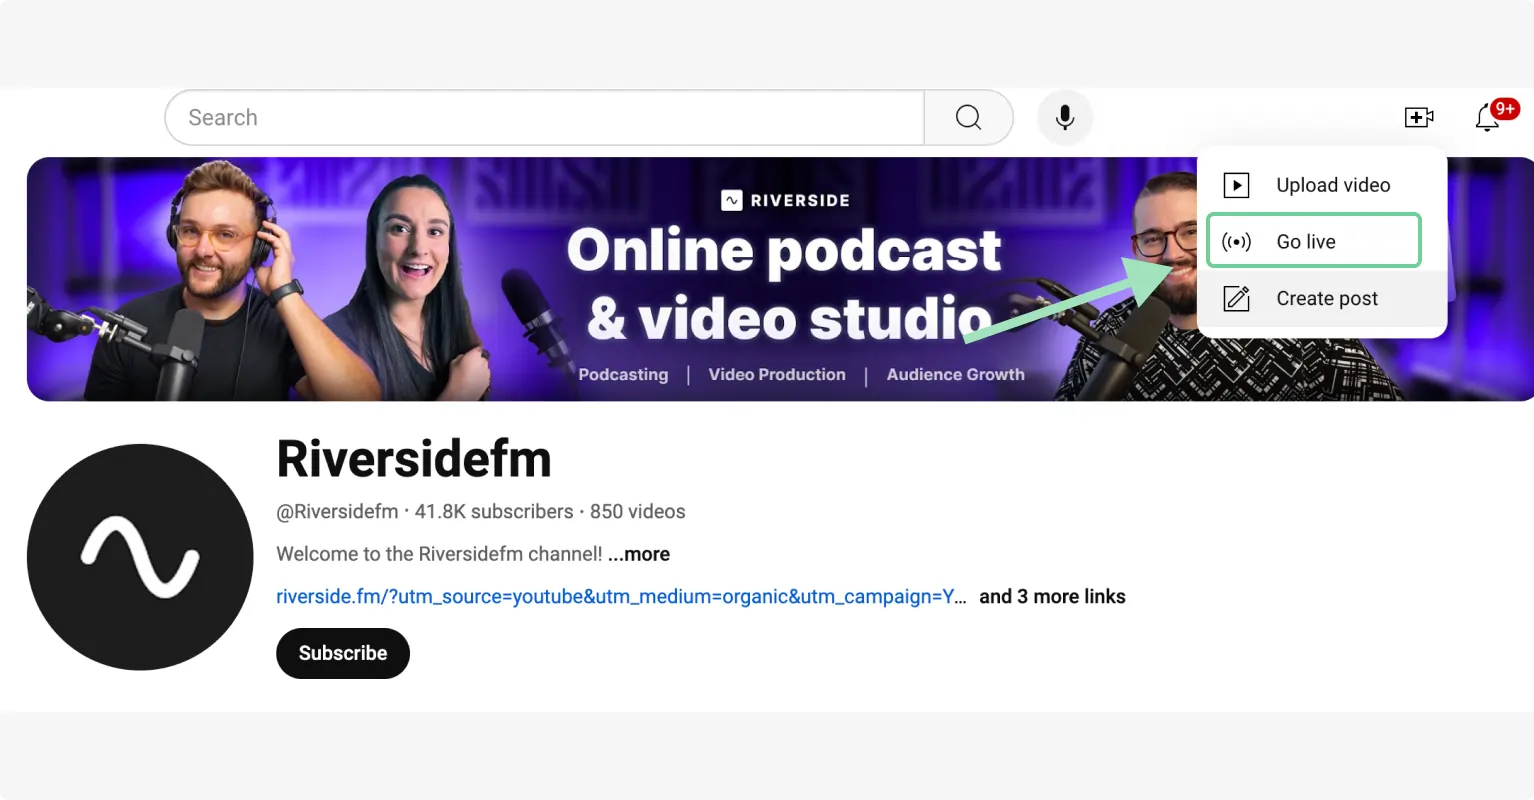
Step 1: Open YouTube and click “Create” (the camera icon). Press “Go Live” to get started.
You can also open account settings and select “YouTube Studio” from the drop-down menu.
Then, find the “Go Live” button on your Channel Dashboard.
Step 2: This will take you to a page where you can manage everything related to live streams.
You can start a stream right away or schedule one for a later date.
Step 3: You’ll be prompted to share details about your stream, such as a title, description, thumbnail, category, etc. You can also go to the advanced settings to customize your stream setup.
Once you fill in all the details, click “Done.” Your stream is now created. You can review its details in the stream menu and make changes by clicking 'Edit' before going live.
From mobile
Step 1: Open the YouTube app on your mobile device and tap the “+” icon” located at the bottom center.
Step 2: Select the "Live" option to begin the live stream setup. Note that you need to have at least 50 subscribers to have access to the live-stream feature. You also need a verified channel to go live.
Step 3: Add all relevant details about your stream—title, description, thumbnail, and more—to complete the setup and start your stream.
Step 4: Tap "Finish" to launch your stream on your channel.
For a full in-depth step-by-step check out our guide on How to live stream on YouTube!
How to live stream on Instagram
Live streaming on Instagram doesn’t have any rigorous eligibility criteria. If your account is 30 days old, you’re good to go live (even with zero followers).
This makes it ideal for beginners and established creators to leverage live content.
However, this feature is available only on mobile devices. You can’t go live from a laptop or computer.
Here’s how you start it:
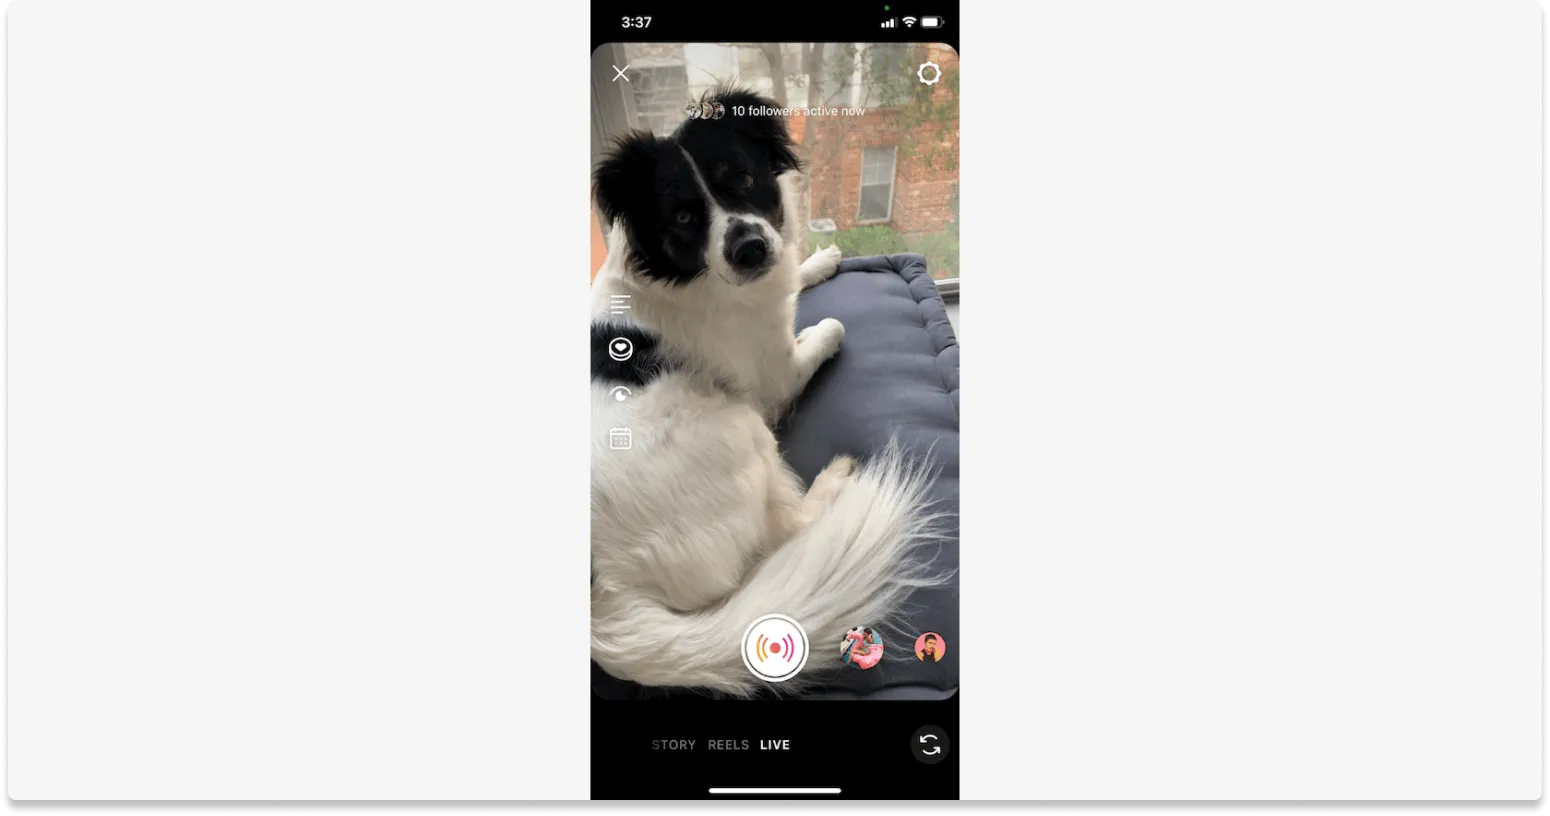
Step 1: Locate the "+" icon on your Instagram profile at the bottom center and the top right of the screen. Once clicked, select the “Live” option to go live.
Step 2: You can stream to your followers or close friends. Instagram also allows you to create a practice stream without any viewers.
Step 3: Add basic details about your stream, like the title, start time, and brand partners (if you’re collaborating with a brand).
Here are some more settings for your Instagram live stream. You can decide on the camera toolbar placement or visibility for your stream.
When you’re ready, click on the center button, and your stream will start after a 3-second timer.
How to live stream on Facebook
Facebook Live is the second-most popular live-streaming service in the US. It started as a mobile-only broadcasting feature, but now users can broadcast from computers or mobile devices via their profile, a Page, a group, or an event.
From computer
Step 1: On your Facebook homepage, press the “Live Video” button.
Step 2: Select whether you want to “Go Live” or “Create live video content”.
Step 3: Now, you can add specific details about your live video, like the video source, camera, audio device, title and description, and similar.
You can also add interactive elements like polls and questions. The dashboard will show relevant metrics related to your stream.
Step 4: Click "Go Live" in the bottom-left corner to start the stream.
From mobile
Step 1: After logging in, tap the “+” icon on the top right corner and select the “Live” option.
Step 2: Go to "Tap to add a description" to include details about the video. You can also:
- Invite guests or other pages
- Add a poll and location
- Use stickers and other filters
Step 3: Finally, tap “Go Live” once you’re ready.
For a full guide check out blog on How to Go Live on Facebook.
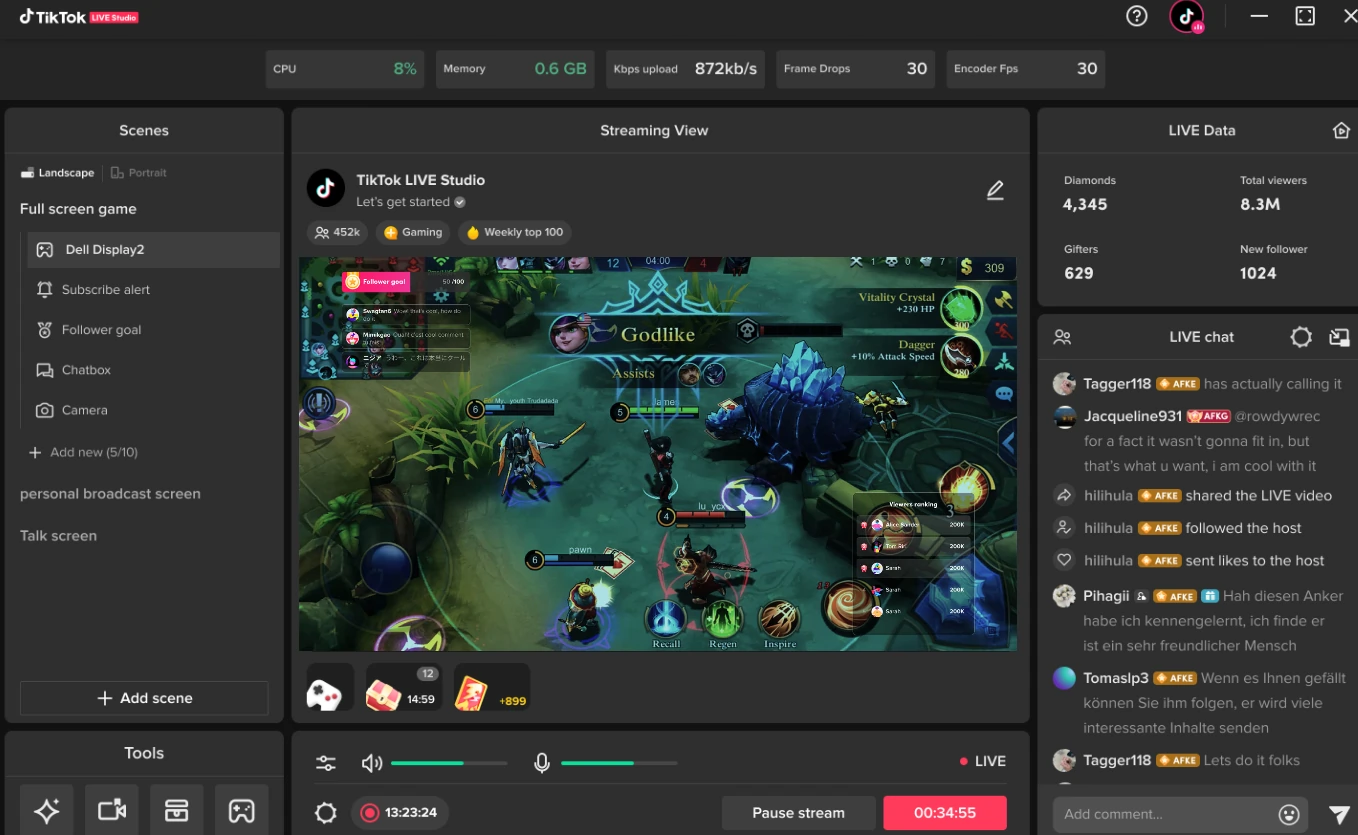
How to live stream on TikTok
TikTok has a few eligibility criteria for live streaming, such as:
- You need at least 1,000 followers
- You must be at least 16 years old.
Provided you meet these conditions, follow these steps to live stream:
Step 1: After logging in to your account, click on your profile in the top-right corner of your home screen. Then, find the “Creator tools” option to access the live stream feature.
Step 2: When you click “LIVE Studio,” you’ll be prompted to download the TikTok Live Studio app for your desktop and mobile. Once you download the app, you have to meet the platform’s eligibility requirements to access the live stream feature.
Step 3: If you meet all the requirements, click “Get Access” to submit your application.
Once your application is accepted, you can sign into the Live Studio app and complete the onboarding process. Then, customize your setup and start streaming on TikTok.
How to live stream on LinkedIn
On LinkedIn, you can live stream from your personal profile or a company page. Given that you meet these eligibility criteria:
- More than 150 followers or connections.
- Located outside of mainland China.
- At least 30 days old accounts or pages.
- Adhering to LinkedIn's Professional Community Policies.
When you meet all of these conditions, follow these steps to get started:
Step 1: Start a new post and find the calendar icon to create a new event.
Step 2: Choose the LinkedIn Live option in the event format. Then, add all necessary details, such as the event name, start date and time, description, speakers, etc.
Step 3: Since LinkedIn doesn’t let you go live natively, you have to connect to a third-party streaming platform like Riverside. To configure a live stream platform, get the URL and stream key from the settings. Then, add these to your streaming platform.
Step 4: Post about your live event with a caption and event title. You can also schedule this for a later date and time.
Once everything is ready, click “Go Live” in the top right corner to start your event.
Troubleshooting common live streaming issues
Unexpected issues can compromise the quality of your live stream. It’s best to prepare for all worst-case scenarios to avoid any last-minute panic during your session.
Let’s break down some of the most common challenges you can face in live streaming and effective ways to tackle them.
- Addressing internet connection problems
Nothing spoils the viewing experience of a live stream than constant buffering, lags, or frequent disconnects.
You should run a speed test and check your upload bandwidth to avoid interruptions in your live streams. Aim for a speed of at least 3-6 Mbps.
You can also connect your streaming device directly to your router via Ethernet. This provides a more stable connection than Wi-Fi.
- Improving live stream video quality
A blurry live video can be a big turn-off for many. Most people won’t stick around to see a pixelated or shaky video.
Setting your streaming software to broadcast at 720p or higher and increasing the bitrate can ensure top-notch video quality for all your live streams.
Investing in an HD webcam and a tripod is also a good idea. You can also create a lighting setup for an optimum video experience.
- Resolving audio quality issues
Clear, crisp audio can make a difference to your live stream.
While viewers might still be okay watching a low-resolution video, they'll quickly tune out if they constantly hear background noises, choppy audio, and jarring sounds.
The best way to avoid this is by using a good microphone instead of your laptop’s built-in mic. You can also optimize the audio settings in your streaming platform to apply noise suppression or gain control.
6 Bonus tips on how to go live like a pro
Want to take your live streams to the next level? Try these five best practices to keep your viewers coming back for more sessions.
- Add branded elements: Include your logo and brand colors as watermarks in your stream to make it more recognizable.
- Use multiple camera angles: Instead of a single, static shot, you can switch up your camera views to keep the stream engaging.
- Enhance interactivity with polls: Make viewers feel more involved in your session with interactive elements. For example, in a live tutorial, ask your audience, "Which step would you like to see in detail?" Or, use a simple poll like "How are you finding today's stream so far?". It makes the audience feel seen and heard.
- Use a high-quality audio source: Good audio can be a game-changer for live streaming. When you invest in a decent microphone, you can deliver clear, professional audio that keeps viewers hooked.
- Actively engage with your audience: Monitor the chat and respond to viewers’ comments. This is a proven way to understand their preferences, gather real-time feedback, and adjust your content accordingly.
- Read our guide: You can also check our brief guide for extra tips on how to maximize engagement during your livestreams.
Over to you: Create live stream events effortlessly
Live streaming can seem like rocket science until you build a well-structured strategy for your streams.
The key to success is taking a step-by-step approach to live streaming. Start by documenting your big-picture ideas. Then, choose your streaming software and buy products for your setup.
It’s equally important to test your live stream setup and find potential issues that can derail your session.
Our complete guide will make live streaming a breeze—whether you’re a beginner or an experienced streamer.
FAQs on How to Live Stream
Can I schedule my live streams in advance?
Yes, it’s possible to schedule a live stream for a later date on every streaming channel, such as Instagram, LinkedIn, YouTube, etc. When you use a streaming platform like Riverside, you can add the stream URL and key beforehand, and then simply schedule your live stream for later.
Is it possible to collaborate with others during a live stream?
Yes, you can invite guests to collaborate with you at a live event. Most channels let you add collaborators when setting up the stream.
Using Riverside as your streaming platform, you can invite up to 9 guest speakers before going live.
Can I live stream on multiple platforms simultaneously?
Yes, multi-streaming platforms allow you to share your live streams on several channels simultaneously. You can do this by adding the stream key and URL from all channels to your streaming platform.


.webp)


.webp)


