Table of contents:
Tired of waiting around for your videos to process? Or dealing with losing your precious footage because your internet cuts out? Sounds like you need to switch to a platform that offers progressive video uploads.
This is a feature you’ll barely notice but will make a huge difference to your entire workflow. You’ll no longer need to wait around or risk of losing your recordings. In this article, we’re focussing on all things progressive uploads: how it works, why it’s more than worth it, and how to start making the most of it.
What is progressive video uploading?
Progressive video uploading is where your video recording uploads during your live recording session. In other words, while you’re recording your video, your footage simultaneously uploads to the cloud.
Why should you use progressive uploading for your videos
Once you’ve understood the benefits of progressive uploads, you won’t want to go back. Let’s take a look at just some of the advantages.
Benefits of progressive uploading for video
If you’re confused about how progressive uploading benefits your workflow, here are a few reasons:
Saves time
With progressive uploading, you don’t have to wait around for your video footage to process and upload at the end. This is a big-time saver, especially for larger video files. And you can get straight to editing, with no time wasted waiting around.
Easier for your guests
Local recording is the best way to get maximum-quality video when you’re remote recording. But this can sometimes mean your guests have to download, process and then send you their footage at the end of the session. With platforms like Riverside that offer progressive upload, this isn’t something you have to think about.
Lower risk of data loss
With progressive uploads, your video is uploaded incrementally. This substantially reduces the risk of losing all your precious recordings if your platform crashes or your internet cuts.
How to set up progressive video uploading
The easiest way to set up progressive video uploading in your workflow is to use software like Riverside that does it automatically.
Another thing to bear in mind is your internet speed. Generally speaking, you’re looking for an absolute minimum of 5Mbps upload and download speed to ensure you’re able to effectively progressively upload your content.
If you’re using Riverside your process will be as simple as the following steps:
Step 1: Log in to your Riverside account.
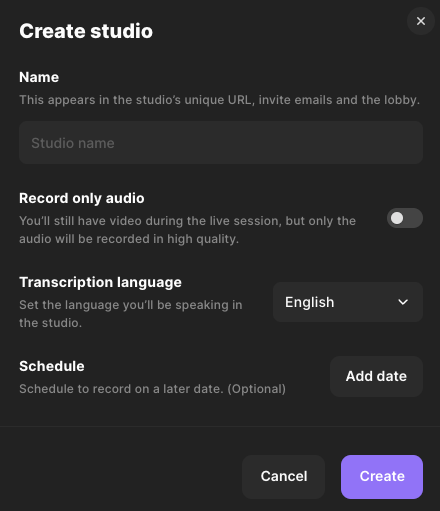
Step 2: Create a new studio if you don’t have an existing one already. (Select the “+” button from the left menu-bar to do this.)
Set up your studio and click “Create”.

Step 3: Click “Go to your studio” and you’ll get redirected to the lobby. Here you can test your microphone and camera.
When you are ready, select “Join studio”.
Step 4: If you haven’t already, you can invite guests to join you by selecting “Invite” on the top right.
Step 5: Whenever you are all set, click the big red “record” button. Everything automatically should start uploading progressively.
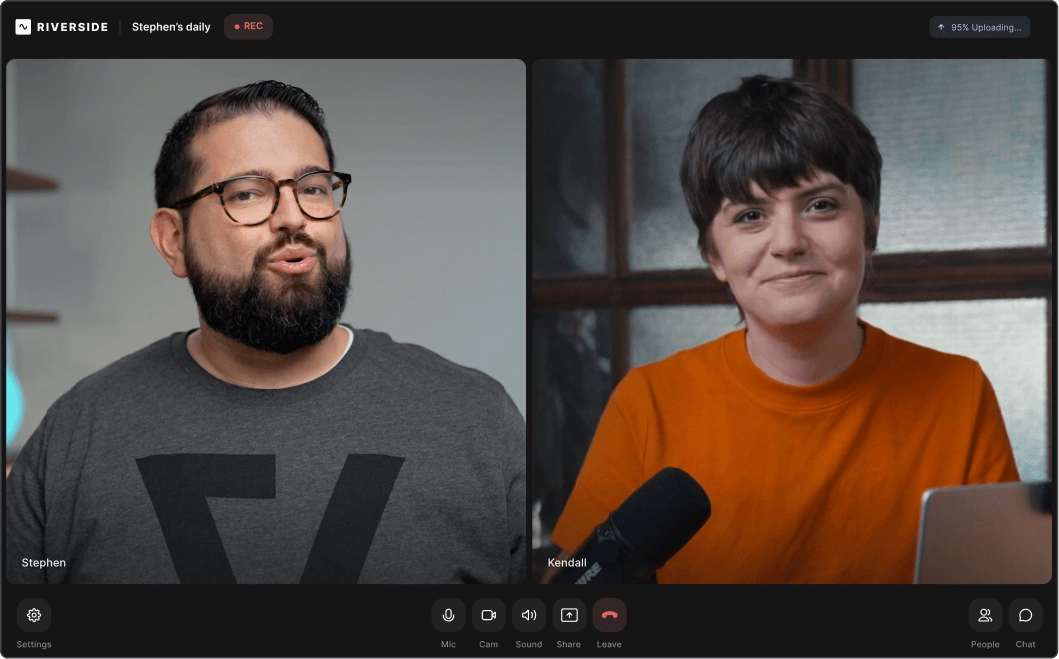
You can look at the status bar on the top right of your screen to keep track of your recordings’ uploading progress.

Step 6: Select the stop button to end your recording. A popup will appear on your bottom left indicating how much of your recording stil needs to upload.

Since everything uploads as you record, this should be quick. Once everything uploads, click on “View recordings”.
Step 7: You’ll now see your recordings dashboard whee you can either edit or directly download your recordings as they are.
How progressive uploading works automatically with Riverside
Riverside is a browser-based recording studio that makes it easy to record high-quality remote audio and video.
With Riverside, progressive uploading is a given. This means that whenever you record with Riverside, it automatically starts uploading you and your remote guests’ video during your recording session.
During your recording session, the host and any producers are able to track each participant’s upload status. In the sidebar, you’ll be able to see an upload percentage next to each remote guest’s name. It will say ‘Upload Complete’ when their whole recording track has been uploaded.
You also have the power to manually pause or resume a guest’s upload. You might want to do this to redirect bandwidth and processing power to your live call.
Let’s take a look at some of Riverside’s other key features:
- Automatic local recording: Riverside records each participant locally on their own device instead of over the internet.
- High quality recordings: 4K video & 48kHz audio recording resolution.
- Separate track recording: Riverside records each person’s audio and video onto different high-quality tracks.
- Live streaming: Stream to major platforms and invite audiences to call in live.
- AI transcripts: Ultra-accurate transcription in over 100 languages.
- Seamless video editor: Edit your recording bu editing text or use our intuitive color-coded timeline for easy trimming, splitting and mixing.
- Mobile app or browser: Record from any iOS, Android, Mac or Windows device.
- Async recording: Invite your guests to record a a time that best suits them.
- Teleprompter: Upload a script to follow and stay on track when recording.
FAQs on Progressive Video Uploading:
Does your internet connection affect progressive uploading?
Yes, your internet connection will affect your upload speed. As we mentioned earlier, if you or your guests have low bandwidth, then you might want to pause the progressive upload until after you’ve finished recording.
How long does it take to upload videos progressively?
This depends on the length of your video, its resolution and the available bandwidth.
Generally speaking if you’re using a reliable platform with good internet, this should only take up a few extra moments after your recording.


.webp)


