.webp)


Table of contents:
Can I record top-quality audio on my phone?
How to record on your phone: 7 steps for quality audio recordings on Android & iPhone
How to record with your phone’s built-in recorder
4 Alternative apps for recording on your phone in high-resolution
Bonus: How to record studio-quality video and audio on Riverside
Wondering how to record audio and video on your phone?
Recording quality content on-the-go doesn’t have to be hard. Modern-day smartphones have a selection of features that you can use.
In the following guide, we will look at how you can record in top-quality using your phone —no matter if you’re using an Android or iPhone.
Can I record top-quality audio on my phone?
Yes, you can record top-quality audio on your phone, but achieving the highest-quality audio depends on several factors. This includes your phone's hardware, the recording environment, and your recording technique.
Most smartphones have capable microphones and recording software. But, if you’re after crystal clear audio, at the very least, we’d suggest investing in an external microphone. With a quality mic, you can produce professional-grade audio recordings on your phone, suitable for various applications like podcasts, music, and voiceovers.
How to record on your phone: 7 steps for quality audio recordings on Android & iPhone
Want to get started and record on your phone? Whether you have an Android or an iPhone, here are some of the steps you can take:
Step 1: Get to know your phone's features
Before you start recording, learn about the different recording options available on your phone, such as the different microphone settings, recording formats, and audio levels. You can find this information in your phone's user manual or by searching online.
Step 2: Prepare your device for recording
Make sure you have enough storage space on your phone for your recordings. Connect your phone to a power source to avoid running out of battery during recording.
Step 3: Choose the right recording software
Although Android and iOS devices have built-in voice recording apps, third-party apps offer more features and customization options. Some popular choices include Voice Memos (iOS), Voice Recorder (Android), and third-party apps like Riverside or Voice Record Pro.
Step 4: Choose a quiet space in your home
Background noise can ruin an audio recording, so choosing a quiet place to record is essential. If you cannot find a quiet space, try minimizing distractions by closing windows and doors or using soundproofing materials to reduce echo and ambient noise.
Step 5: Position your phone correctly
Since proper microphone placement is crucial for quality audio recordings, ensure your phone's microphones are facing the sound source. If recording yourself, hold the phone at a consistent distance from your mouth (approximately six inches from your mouth) to maintain an ideal audio level.
Step 6: Start recording your content
When you are ready to start recording, press the record button on your phone or in the recording app. Speak clearly and evenly into the microphone and minimize your movement and handling of the phone during recording to avoid unwanted noise.
Step 7: Edit and finish your content
After recording, you may need to edit and refine your audio content. Common editing tasks include removing background noise, adjusting volume levels, adding effects, and trimming unnecessary parts of the recording. Once you're satisfied with the edited content, save it in the desired format and share it as needed.
How to record with your phone’s built-in recorder
Chances are, your phone already has a built-in recorder. If you want to use it to create your content, it couldn’t be easier. Take a look at our simple step-by-step guides here.
How to Record Audio on Android's Voice Recorder
Step 1: Open the Voice Recorder app. You can usually find it in the app drawer or by searching for "Voice Recorder" in your apps menu.
Step 2: Access recording options. Tap on the app to open it, and you'll typically see options for recording, playing, and managing your recordings.
Step 3: Start a new recording: Click on the "Record" button, which often looks like a red circle or microphone icon.
Step 4: Record your audio. Speak into your phone's microphone or place it near the sound source you want to record.
Step 5: Save your recording. After recording, tap the "Stop" button. You'll be prompted to save the recording with a name of your choice. Enter any name and tap "Save" or "Done."
How to Record Audio on iPhone with Voice Memos
Step 1: Open the Voice Memos app. Locate the Voice Memos app on your iPhone. It's a pre-installed app, so you should find it on your home screen.
Step 2: Access recording options. Tap on the app to open it, and you'll see a big red record button at the bottom center of the screen.
Step 3: Start a new recording. Tap the red record button to start recording. The app will begin capturing audio from your device's microphone.
Step 4: Record your audio. Speak into your microphone or place it near the sound source you want to record. The app will continue recording until you stop it.
Step 5: Save your recording. After stopping the recording, you'll be prompted to save it with a name. Enter a name for your recording and tap "Save".
4 Alternative apps for recording on your phone in high-resolution
While a built-in recorder is easily accessible, this isn’t always your best choice for high-quality recordings. They don’t come with many additional features and they aren’t built for studio-level recordings. In this case, it may be better you choose a recording app dedicated to quality.
If you’re looking for more capabilities and features, there are plenty of pro-level apps you can use. Here are four that you may want to consider.
1. Riverside
Price: Free, with paid plans starting at:
- $15/month for the Standard Plan
- $24/month for the Pro Plan
- Business plan on request
Compatibility: Android, iOS
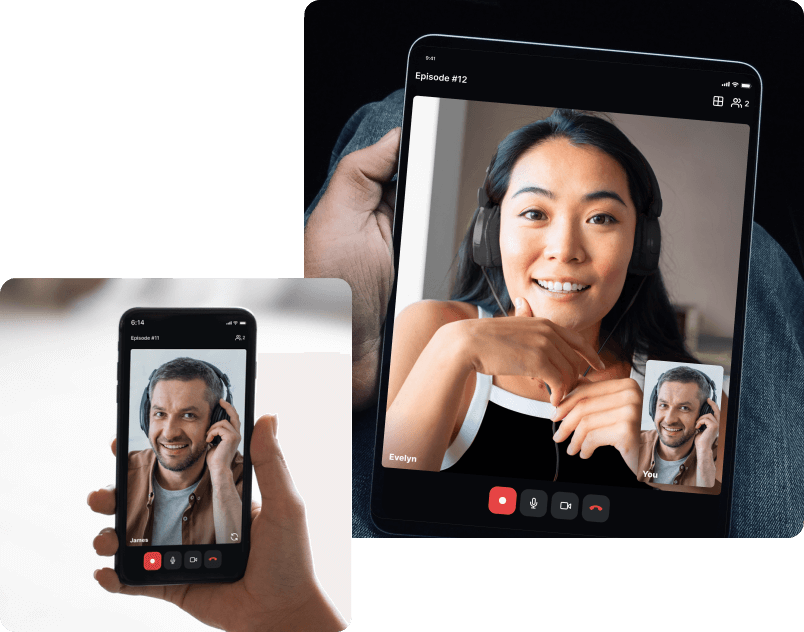
Riverside is an affordable and easy-to-use audio and video recording app. Create your own virtual studio where you can record content quickly and smoothly. You can remotely record top-quality content in up to 48kHz audio resolution without having to worry about an internet connection. This is because Riverside uses local recording. Everything records directly on your and your participants' devices, then automatically uploads to the cloud while recording.
You’ll be able to access your files from your desktop straight after recording. Here you can download AI transcriptions of your recording, or you can use the Editor to polish off recordings. The Editor has text-based editing so you can trim your recording by simply deleting text in your transcript. You can also add and style captions, customize your video background or layout, and automatically perfect your audio with background noise removal, audio level normalization, and our silence remover.
Simple as that, Riverside offers you an all-in-one experience for recording and editing superior-quality audio and video from anywhere, on any device.

2. Smart Recorder

Price: Free to download and use. In-app purchases:
- High-resolution recording at $1.49
- External microphone support at $0.99
- Background noise removal at $0.99
- Ads removal at $1.99.
You can purchase a lifetime subscription for $8.33 to access all these features.
Compatibility: Android
Smart Recorder is an app for Android devices offering high-quality audio recording in various formats, including MP3 and WAV. The app features automatic silence removal, background noise reduction, and the ability to adjust recording quality for optimal results.
3. RecForge II
Price: Free to download and use with in-app purchases:
- High-resolution recording function at $2.99
- External microphone support at $1.99
- Background noise removal at $1.99
- Ads removal at $4.99.
You can purchase a lifetime subscription to RecForge II for $19.99.
Compatibility: Android, iOS
RecForge II is a powerful audio recorder for Android and iOS devices with a wide range of features, including adjustable recording quality, noise cancellation, and the ability to export recordings to various formats, including MP3, WAV, and FLAC.
4. Otter

Price: The basic package is free, and paid plans start at:
- $10/month per user for the Pro account
- $20/month per user for the Business account.
Compatibility: Android, iOS
Otter is an AI-powered transcription and note-taking app that excels at recording and transcribing audio in real-time. It offers high-quality audio recording, automatic speech recognition, and the ability to create searchable transcripts of your recordings.
Bonus: How to record studio-quality video and audio on Riverside
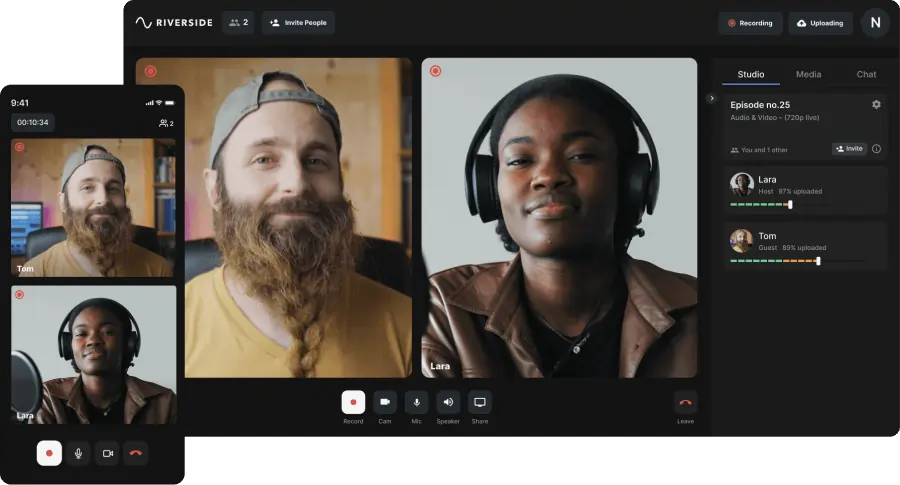
Riverside is a simple solution to your recording needs. Capture high-quality 48kH audio and 4K resolution video in your own virtual studio. You can invite multiple guests to your studio and interview them remotely. Download separate audio or video tracks for each speaker. The platform’s AI automatically generates a text transcription when you finish, and the Editor offers you a seamless way to polish any recording.
Key features:
- Record in 4K video and 48kHz audio resolution
- Polish audio in a few quick clicks with automatic background noise removal and level normalization
- Highly accurate AI Transcriptions in 100+ languages, straight after recording
- Speaker detection in transcripts so you can easily navigate through your recording
- Record with up to 9 guests at the same time, and from any mobile or PC device
- Separate audio and video tracks for each participant so you have more control when editing
- Turn your phone into a secondary webcam so you can capture two angles at once
- Use Producer Mode to assign someone to look after controls behind the scenes
- Edit with text-based editing where you can trim audio and video but deleting text your recording transcript
- Turn your recordings into short shareable clips, at the tap of an AI button with our Magic Clips tool
- Create content effortlessly no matter your skill level
If you’d like to get started you can sign up and follow the steps below!
Step 1: Join Riverside and launch a studio. Sign up to Riverside and click “+ New Studio” to launch your virtual studio.
Step 2: Set up your studio. Enter the name of the studio in the box provided. Choose between “Audio Only” or a “Audio & Video” recording. Select your transcription language.
Step 3: Either press “Enter Studio” (and skip to step 4) or “Continue set up studio”.
If you choose the latter, scroll down where you can schedule your studio for a certain time. Click “Schedule” and then select a date, time, and your timezone.
You can also add guests or audience members by scrolling to “Invite participants” and clicking “Add participant”. Enter their details in the box that appears and whether they are a guest, audience, or host. When you are ready, click “Create show”.
Step 4: Next, click “Go to studio”. You will see a lobby screen where you can check your microphone. Use the dropdown menus to make sure your microphone and speaker all have the right input or output.
You can also click “I am not using headphones” or “I am using headphones” at this point. When you have done all of the above, click “Join studio”.
Step 5: Click the red Record button to start recording. When you have recorded your content, click Stop and wait for your recording to upload successfully, before selecting ‘View Recordings”.
Step 6: Click on your recording take. You can then either download your content directly or edit your content with the Editor (option 2 below.)
If you choose to Download your content:
Sscroll down and you will see your recording. Press High Quality and select an option to download it. Beneath that, there will be a transcript box. Click either Download or Copy. You can download the transcript as a TXT file.
If you choose to Edit:
Start by trimming and adjusting your recording. You can use the Split or Remove tools to edit your content, or use your recording transcript where you can simply delete text to make changes to your recording.
Polish off your recording with our automated tools for captions, backgrounds and layouts, or audio fine-tuning. When you have finished editing, simply press Export and choose from the options in the drop down. Click Export again to download your audio or video file.
FAQs on How to Record on a Phone
Where is the recorder on my phone?
On iPhone: You can access it by going to your home screen and searching for "Voice Memos" or looking for its icon, which resembles a microphone on a white background.
On Android Phones: On some devices, you may find a built-in app called "Google Recorder" or "Voice Recorder" in your app drawer or by using the search feature.
How can I use my phone as a recorder?
Find the voice recorder app on your phone, which may be pre-installed (e.g., "Voice Memos" on iOS or "Google Recorder" on some Android devices) or download an app from your app store.
Is there a voice recorder on my phone?
iPhones have a pre-installed voice recorder app called "Voice Memos", while the availability of a voice recorder app varies among Android devices.
Some Android phones have a pre-installed app like "Google Recorder" or "Voice Recorder," while others may not. Therefore, to determine if your phone has a voice recorder and where to find it, you can check your device's user manual or do a web search using your phone's make and model for specific information.


.webp)


