Table of contents:
Best Options for Recording 2 or More People
How to Record a Podcast with Multiple Microphones on One Computer - MacOS and Windows
Why Remote Podcasting with Riverside?
How to Record a Podcast with Multiple Mics with Riverside
Hybrid setup: How to record a podcast with in-person and remote guests together?
Tips for Podcasting with Multiple Guests
Podcasting with co-hosts or guests in the studio is a great way to get multiple people gathered together over an exciting topic. But, it does mean you’ll need to adjust your setup.
We recognize that podcasting with multiple guests is a fun way to have great roundtable discussions, but it comes with certain technical challenges. It doens’t have to be complicated, though. Read this article to find out how to record a podcast with multiple mics.
Table of Contents:
- Best Options for Recording 2 or More People
- How to Record a Podcast with Multiple Microphones on One Computer - MacOS and Windows
- Why Remote Podcasting with Riverside?
- How to Record a Podcast with Multiple Mics with Riverside
- Hybrid setup: How to record a podcast with in-person and remote guests together?
- Tips for Podcasting with Multiple Guests
- Record High-Quality Remote Podcasts with Riverside
- FAQs on How to Record a Podcast with Multiple Mics
Best Options for Recording 2 or More People
If you want to record an episode with yourself and a co-host or interview somebody else in the same room, you have several different setups to record a podcast with multiple mics. For the sake of simplicity, we've narrowed down the choices to those that require minimal audio monitoring and let you record on separate tracks for each person or mic.
Of course, standard best practices apply. We always suggest you:
- Perform mic-testing before the session
- Keep some distance between the microphones
- Use quality microphones of the same brand (to ensure audio quality consistency)
- Recording in a quiet area
Once you’ve got your general microphone practices in order, you can consider one of the following options for a podcast mic setup with two or more people.
Use a digital recorder
You can purchase an audio mixer or a digital recorder that lets you plug multiple XLR mics and record individual audio tracks. This setup is excellent for recording both in podcast studios or at home, but it is incredibly versatile in its applications. For example, you can go to a specific location and record high-quality audio without carrying lots of additional equipment. Digital recorders like Zoom H6 and PodTrack P4 have XLR microphone inputs and let you record on separate tracks.
Best for: Recording in person, even on the go
Use a USB audio interface
If you want to go for something simpler, you can purchase a USB audio interface with 2 XLR inputs or more and record sound directly into your computer. With this option, you can also record two people on separate audio tracks, which gives you additional flexibility during post-production. There are many audio interface options in the market, but here are some suggestions. For a 2-person setup, you can use the Focusrite Scarlett 2i2, which offers excellent audio quality and is very portable. If you need 3-4 mics, you can use the Focusrite Scarlett 18i8.
Best for: Recording separate tracks in person, in one setup location
Note: If you're using Riverside, please check out our guidelines on sharing devices and recording in-person with more than one person.
Use an online recording platform.
Of course, the first two options are quite costly and don't give you the flexibility of recording remotely. Finally, an even simpler low-budget solution to record a podcast with multiple guests is to use a web-based recording software like Riverside. This way, you won't have to purchase any additional podcast gear like mixers, converters, dynamic microphones, or USB interfaces. You'll also be able to invite guests for remote podcasting from anywhere around the world.
We do suggest that you consider sending your guests equipment if they don’t have their own. At the very least, you want every guest to record with an external microphone.
Best for: Recording with remote guests
How to Record a Podcast with Multiple Microphones on One Computer - MacOS and Windows
For MacOS
If you have two USB microphones, but only a single laptop without any additional equipment, here is a simple way to run your show and record two separate tracks at the same time using a MacOS computer:
- Plug in the two USB microphones and open the Audio MIDI Setup app.
- Use the Audio MIDI Setup app to add the two USB microphones under “Aggregate Device”. Make sure that both “Use” and “Drift Correction” columns are checked beside your mic names.
- Go to your computer’s sound settings and make sure that the selected input device is “Aggregate Device”, and the selected output device is either “Internal speaker” or your headphones.
- In this tutorial, we are going to use audio editing software called Garageband (but feel free to use a different one). Create an “Empty Project” in Garageband. When selecting an input type, choose an audio track and select “Input 1 + 2” from the dropdown. Make sure that the input device selected is “Aggregate Device”, and the output is “Built-in Output”.
- After you create your project, you will be able to add another audio track by clicking a “plus” sign above your first track. This time, select “Input 3 + 4” as an input option.
- Right click on each of the two audio tracks and select “Record Enable” to make sure the podcast is recorded.
- Click the red “Record” button at the top of the screen and start talking! Your show is now being recorded from the two mics.
For Windows
If you have a Windows computer, you can create a very similar setup by using a virtual mixer. One such mixer is called Voicemeeter Banana, but you can use the one you like the most.
With this setup, you can add more than two mics if you desire. If you are recording with several people in the room, try to space out your microphones as much as possible to avoid additional background noise.
Why Remote Podcasting with Riverside?

Remote podcasting isn't new, but it certainly upped its game after the 2019 pandemic. The good news is that, now, more than ever, you can capture the same studio-quality recordings from the comfort of your own home.
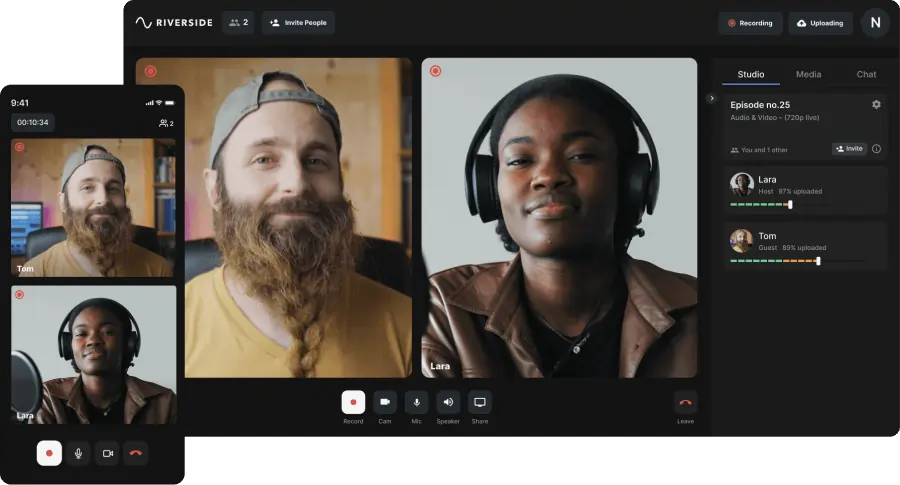
If you are looking to record remote multi-person podcasts without any specialized equipment, using Riverside is a great option. Here's why:
- Record audio and video in high quality. At Riverside, all the audio podcasts record locally. This means that you receive studio-quality output with no interruptions or background noise due to bad internet connections.
- Record with multiple guests and mics. You can run a podcast recording with 10 participants in total - 1 host plus 9 guests. Plus, your guests don't need to sign up. As long as you (or the host) has an account, you can simply send your guests a link to join.
- Capture separate audio and video tracks of all participants. You don’t have to set up anything extra to ensure you receive a separate track for each guest. Separate tracks make editing easier because you can adjust one track without messing up any of the others.
- Create podcasts from beginning to end. Besides recording, Riverside also has a text-based video editor where you can trim and polish your content as easily as going through a text document. Riverside uses AI transcriptions where any text you delete in your transcript automatically removes the matching video and audio in your recording.
- Record directly through your laptop. All you need to record with Riverside is a laptop or a desktop computer with a headphone jack for audio input and the Chrome browser on it. While we recommend an external mic, you need any additional tools like fancy mixers, speakers, drivers and sound cards!
- Fast processing. You don't have to wait for your project to process. Instead, you can download all the recordings as soon as the podcast is done.
- Never lose your recordings. With Riverside, the backup of all your recordings gets saved automatically, so you don't have to worry about losing your work due to poor internet connection or technology malfunction.
How to Record a Podcast with Multiple Mics with Riverside
Watch this video and follow our simple steps to use Riverside to record a podcast with multiple mics without further ado.
#1. Register with Riverside for free
Signing up for Riverside is free! Fill in the boxes and click Sign up to start.
#2. Create a Studio

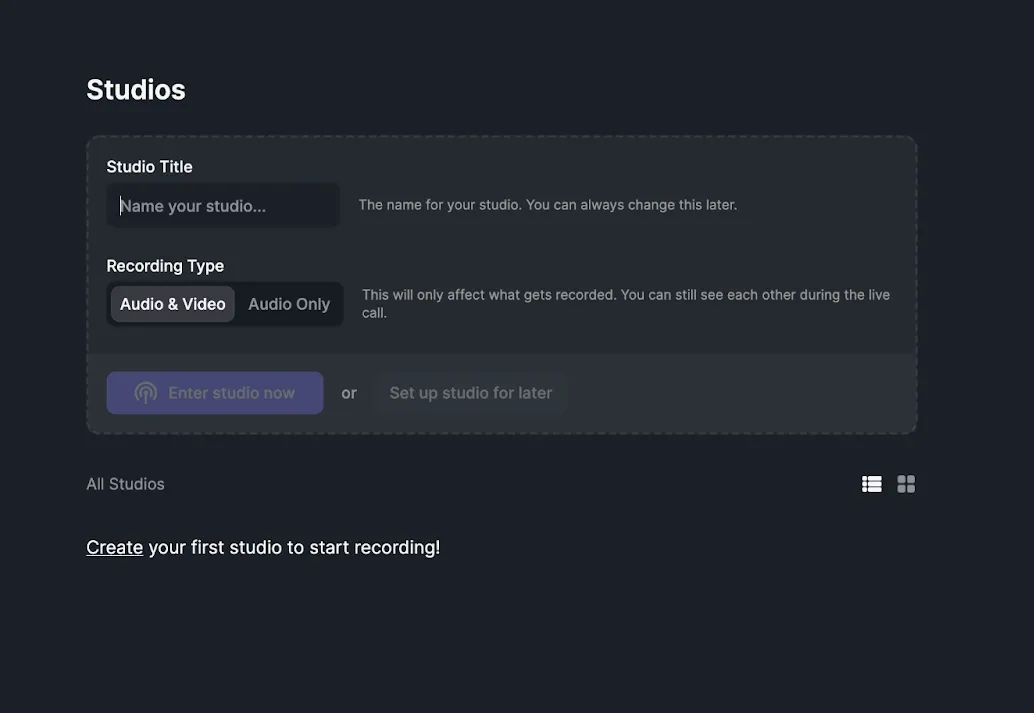
In the dashboard you will be prompted to create your first studio. Fill in the title and choose whether you want a video and audio recording combined or only audio alone.
#3. Studio Settings
You can adjust the studio settings. This includes:
- Setting audio and video resolution
- Enabling live call-ins
- Live streaming settings
- Adjusting studio info

#4. Check Your Camera and Mic
Now is the time to make sure your camera and microphone are working correctly.
When you click Go to Studio you are directed to the lobby. Here, you enter your name and select whether or not you will be using headphones. It is always recommended to use them to reduce potential feedback and ensure the best audio quality possible. In case you aren't using headphones, echo cancellation will be applied to reduce ambient noise levels captured by the microphone.
Click on the Request Camera Permissions button to allow Riverside to access your camera and microphone. You will see a preview of your video on the right side of the screen. Once you have adjusted your camera and microphone settings click on the Join Studio button.

#5. Invite Podcast Participants
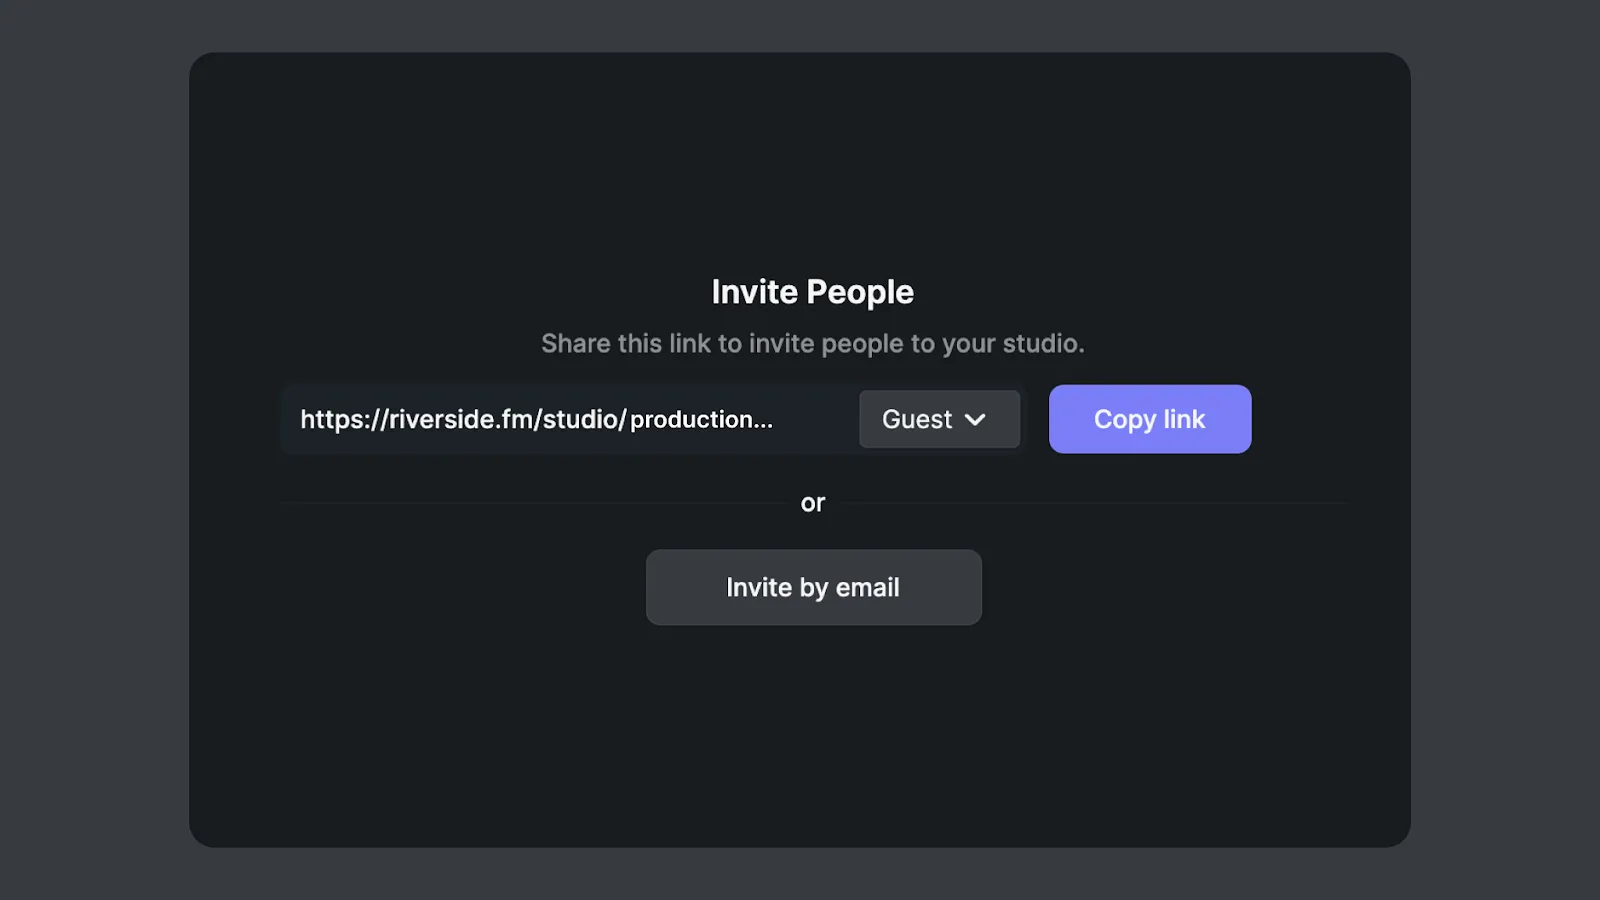
As a host, you can invite up to 9 guests to join the show. You have two options to invite other participants: either by email or by simply sharing a link.
Your guests don't need to register with Riverside themselves. All they need to join is Chrome on their PC devices or the Riverside app on a mobile phone.

You can let your guests know that it is best to use headphones with a microphone for better audio quality, even though it isn't mandatory. They can adjust their headphone volume and explore other features, such as echo cancellation.
#6. Start Recording

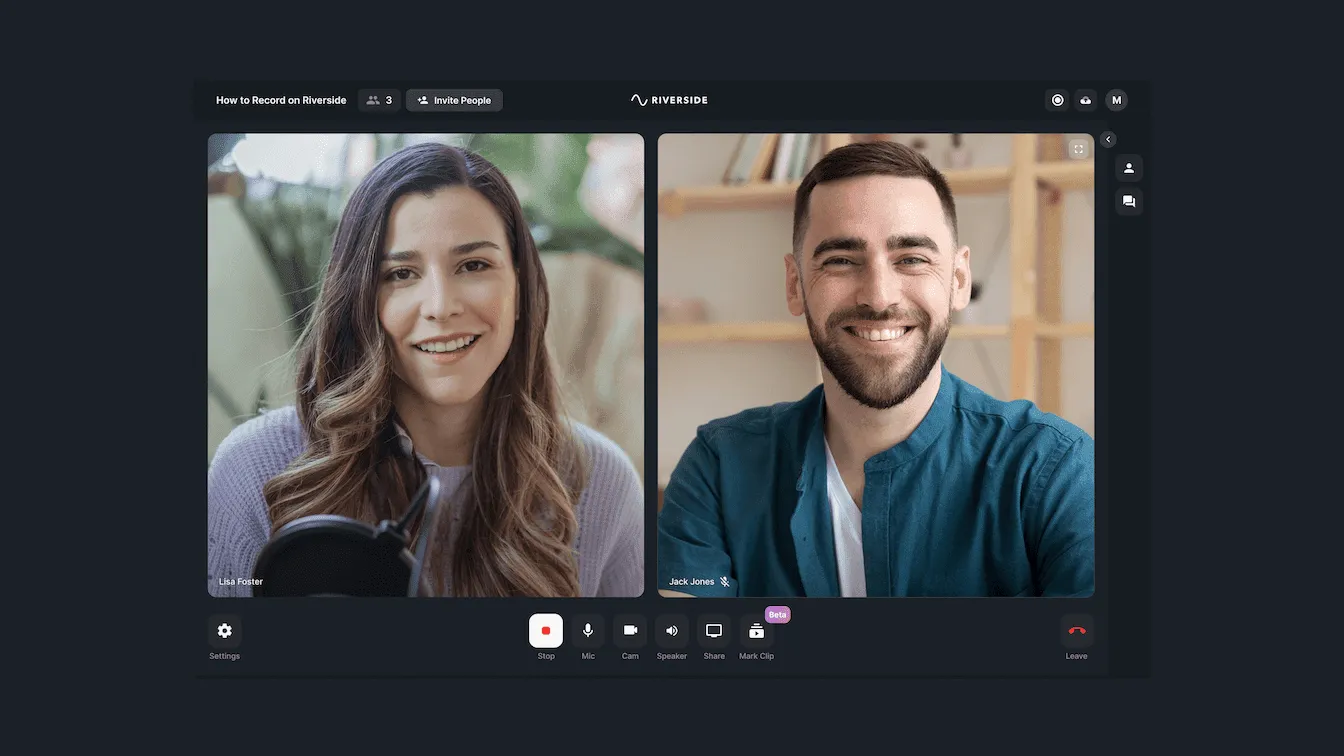
Click Start Recording. You can also stop at any time to take breaks and continue throughout the podcast.
#7. Download the Recordings
Name your recording. Then, click on "Download Tracks" in the top-right corner of the screen. Now, you can download all the video and audio recordings separately from all participants.
You have two options for downloading:
- Local Separate Tracks. With this option, you can download audio files from separate channels to use in post-production editing. Use this option for the best sound quality.
- Combined Track. You can use our editor to customize your recording, create short Clips, and create a podcast that's ready to be posted on YouTube, Spotify or other podcasting platforms.
You are done! Now you can review and edit your separate tracks further or upload your ready-to-go combined track directly to Spotify, Apple Podcasts or anywhere else.
Hybrid setup: How to record a podcast with in-person and remote guests together?
You've learned how to record with multiple guests and mics in person, and you've now also learned how to record remotely with Riverside. What if some of your guests can record with you in person and some you can only reach remotely?
We've got you covered! Watch the video to learn everything you need to know on how to record with multiple mics in a hybrid remote and in-person setup.
Tips for Podcasting with Multiple Guests
Running a podcast with multiple guests or co-hosts can get tricky if you've never done it before. Here are a few specific tips to keep in mind when recording a podcast with multiple mics:
- Have one director. Select a single person in charge of your show's timing, flow, asking questions, and switching from one topic to the next. Usually, it would be one of the podcasters responsible for keeping the conversation going, the energy up, and keeping the episode on track. If you have more than two podcast hosts, then they can take turns in directing.
- Do your prep work. Even the most experienced podcasters can't get away without sufficient prep work. Mic-test. Always prepare the content, plan out the flow of the show, and check your audio settings well before the recording begins.
- Take breaks. Unless you are streaming your podcast live, it never hurts to give yourself and your guests a break to have some water or collect the thoughts together. With Riverside, you can pause the recording at any time and continue exactly from where you left off.
- Give everyone some air time. The director of the podcast needs to make sure everyone on the podcast gets a chance to talk. Some people may be outspoken and passionate, while others will never interrupt another person and patiently wait for their turn. If you are a director, it is your job to encourage your guests to play fair and ensure that everyone gets a share of the air time.
Record High-Quality Remote Podcasts with Riverside
If you are looking for an easy way to record a podcast with multiple mics, it is worth looking into remote podcasting. Riverside lets you record from the comfort of your home and invite multiple guests from anywhere around the world.
FAQs on How to Record a Podcast with Multiple Mics
Can you record multiple USB mics at once?
While it depends on your setup, you generally can record more than one USB microphone at a time. If you're doing this directly from the same computer, you'll likely need to download special software, or adjust settings so your PC can read the two microphones as separate inputs.
How do I keep two mics from picking up the other person's voice?
It all comes to mic placement and the type of microphone you have. Firstly, it's best to record with a unidirectional cardioid microphone. These mics are most sensitive in the front and they're less likely to pick up background noise, making them more ideal for a 2-or-more mic recording setup. You'll also want to position your two mics at a good distance apart and ensure each speaker talks to the mic at an appropriate angle.


.webp)


.webp)
.webp)


