


Table of contents:
Why should you add captions to your YouTube videos?
Open vs closed captions: which one should you choose?
How to add open captions to YouTube videos
How to manually add closed captions to a YouTube video
How to automatically add closed captions to your YouTube videos
Bonus: How to add captions or subtitles to YouTube videos on your phone
Frequently Asked Questions (FAQs) for adding captions and subtitles to YouTube videos
Key takeaways:
- Use captions for better accessibility: Captions make videos more inclusive for people with hearing impairments, non-native speakers, and those in noisy environments.
- Boost SEO with closed captions: Search engines index text-based captions, improving video rankings. Always upload a transcript for better visibility.
- Choose the right caption type: Use open captions for always-visible subtitles and closed captions for flexibility and multilingual support.
- Leverage Riverside's captioning features: Create, customize, and export high-quality captions easily using Riverside's editor.
Imagine you’re at a noisy cafe trying to watch a YouTube video without earphones.
You can’t hear it over the background noise, so you give up.
Now, imagine that video is yours, and you’re losing your audience in moments like this.
Adding captions to your YouTube videos can help. They make your content accessible for people in noisy spaces, those with hearing disabilities, or viewers who speak another language.
In this guide, you’ll find actionable steps to add captions and subtitles to your YouTube videos.
Why should you add captions to your YouTube videos?
Including captions in your YouTube videos can:
- Make your content more accessible: Adding captions to your YouTube videos can help you reach a wider audience, including viewers with hearing impairments, non-native speakers, and those watching without sound.
- Improve user experience: Captions can also enhance everyone's overall viewing experience, as they help address common problems such as unclear audio or challenging accents.
- Increase views and engagement: When your videos offer a great user experience, viewers are likelier to stay engaged, watch longer, and share your content.
- Improve SEO: Search engines can’t "watch" your videos; instead, they rely on text-based elements like titles, descriptions, and closed captions to understand your content. By providing captions, you give search engines a written version of your video’s content, which helps them better understand and rank your videos.
Captions come in two types: open captions and closed captions.
Let’s explore what they are and how they differ.
Open vs closed captions: Which should you choose?
The difference between closed and open captions comes down to how they’re displayed and controlled:
- Open captions: Open captions are permanently embedded in the video and are always visible. They work on any platform since they don’t rely on platform settings. They’re a strong choice if you want captions to always appear, no matter where the video is viewed. However, search engines can’t read them because they aren’t available as a separate file.
- Closed captions: Closed captions are added as a separate file or through YouTube’s tools. Viewers can turn them on or off based on their preferences. They offer flexibility with features like multilingual options and customizable settings. They also help with SEO since search engines can read them.
Which should you choose?
Closed captions offer flexibility and multilingual support, but open captions are often better for YouTube videos. They’re permanently embedded, always visible, and customizable.
For SEO, closed captions are more effective as search engines can read them.
A clever workaround: Use open captions for visibility and style, and parallelly add closed captions for SEO. This way, viewers see the open captions, while closed captions help search engines understand and rank your video.
How to add open captions to YouTube videos
If you want a quick solution, YouTube’s built-in captioning feature (closed captions) lets viewers toggle captions on or off. However, it offers limited customization and styling options.
Additionally, since these automatic captions are often inaccurate, they may not fully reflect your video’s content or help search engines understand your video.
A better approach is to embed open captions into your video using Riverside, then use the tool to generate a transcription and add closed captions to your YouTube video.
This way, your captions are both visible to viewers and fully optimized for search engines.
To add open captions to your videos, use Riverside’s video editor.
You can:
- Adjust the font size, style, and color
- Control where captions appear on your video
- Choose animations and presets.
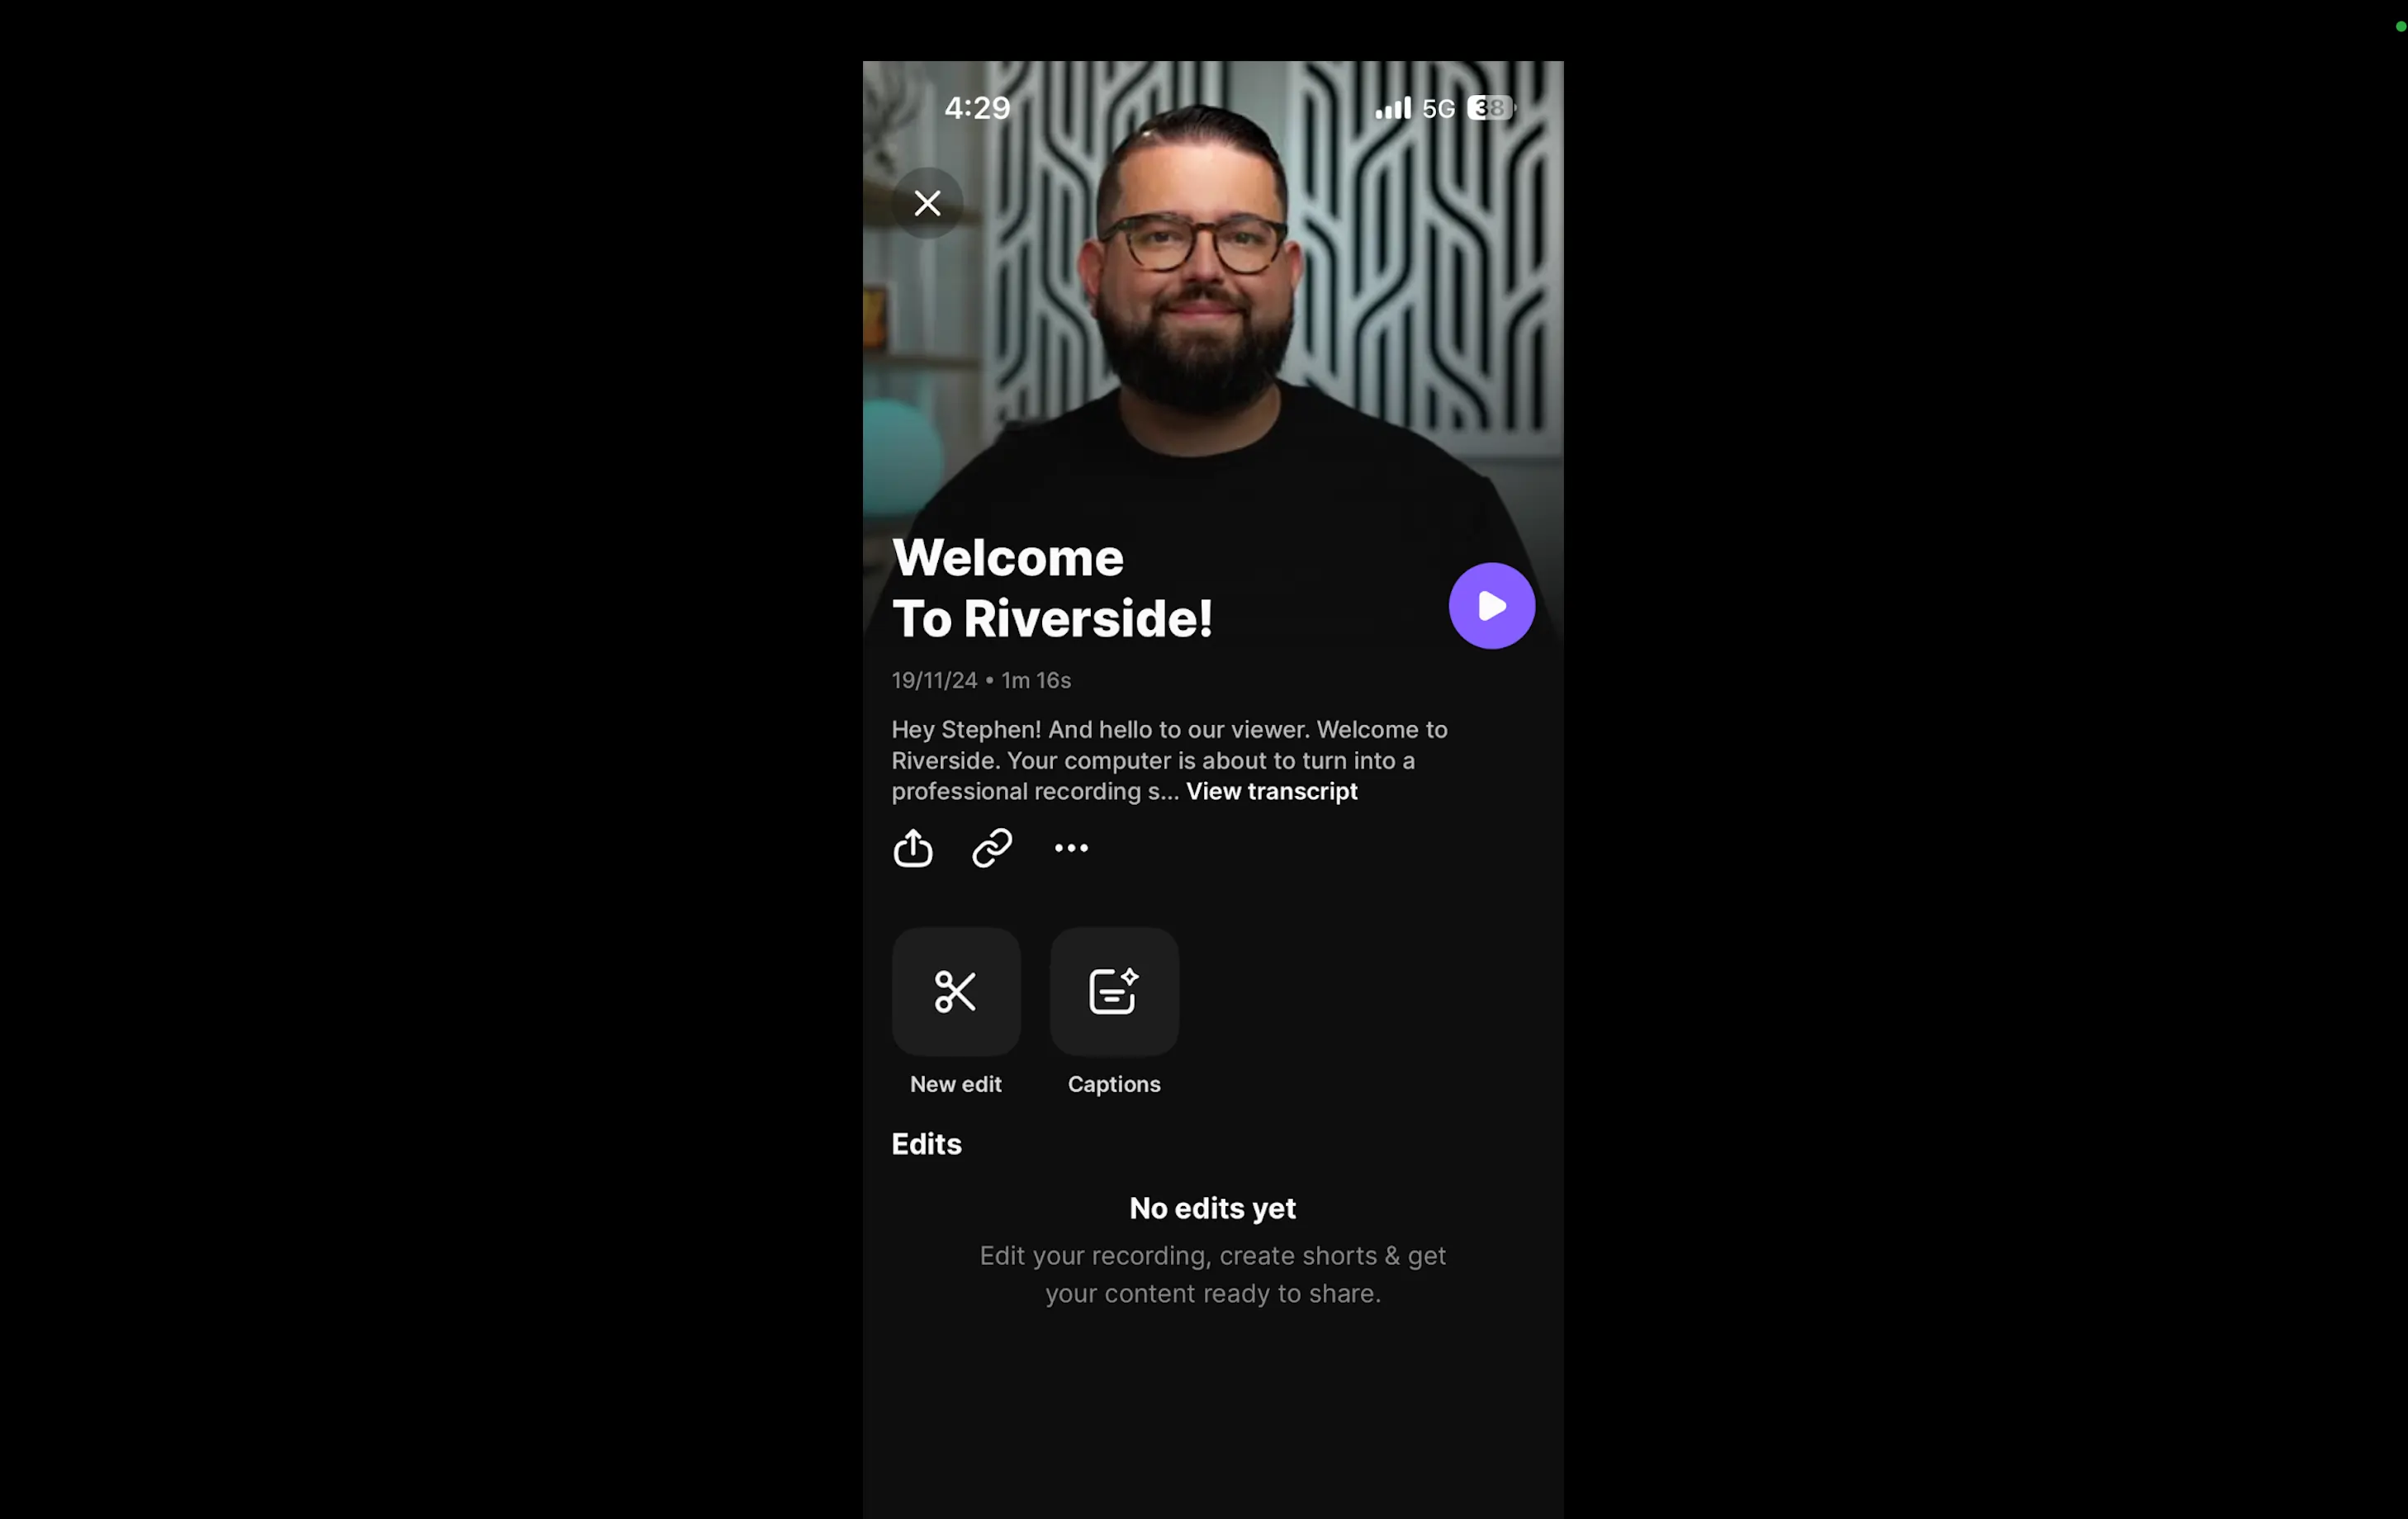
Step 1: Log in (or sign up) to Riverside and upload your video to get started by clicking the “Upload” button. You can also record a video directly inside Riverside.
.webp)
Step 2: Select (or drag and drop) the video from your device. After selecting, click “Upload” again to confirm. The platform will process your video, which may take a few minutes.
Step 3: Once it's processed, hover over the video and click “Edit” to open it in Riverside’s editor.
If you want to make sure that your video's dialogue is perfect before creating captions, you can easily edit it either on the timeline or with text-based editing. With text-based editing, deleting any part of the transcript automatically removes the matching video segment from your timeline.
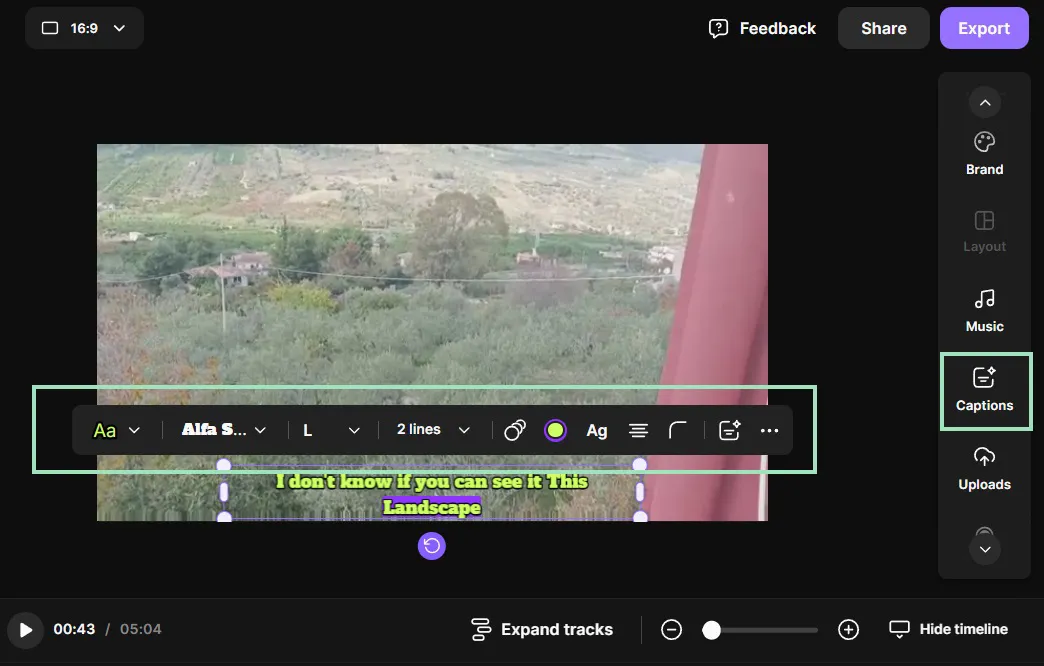
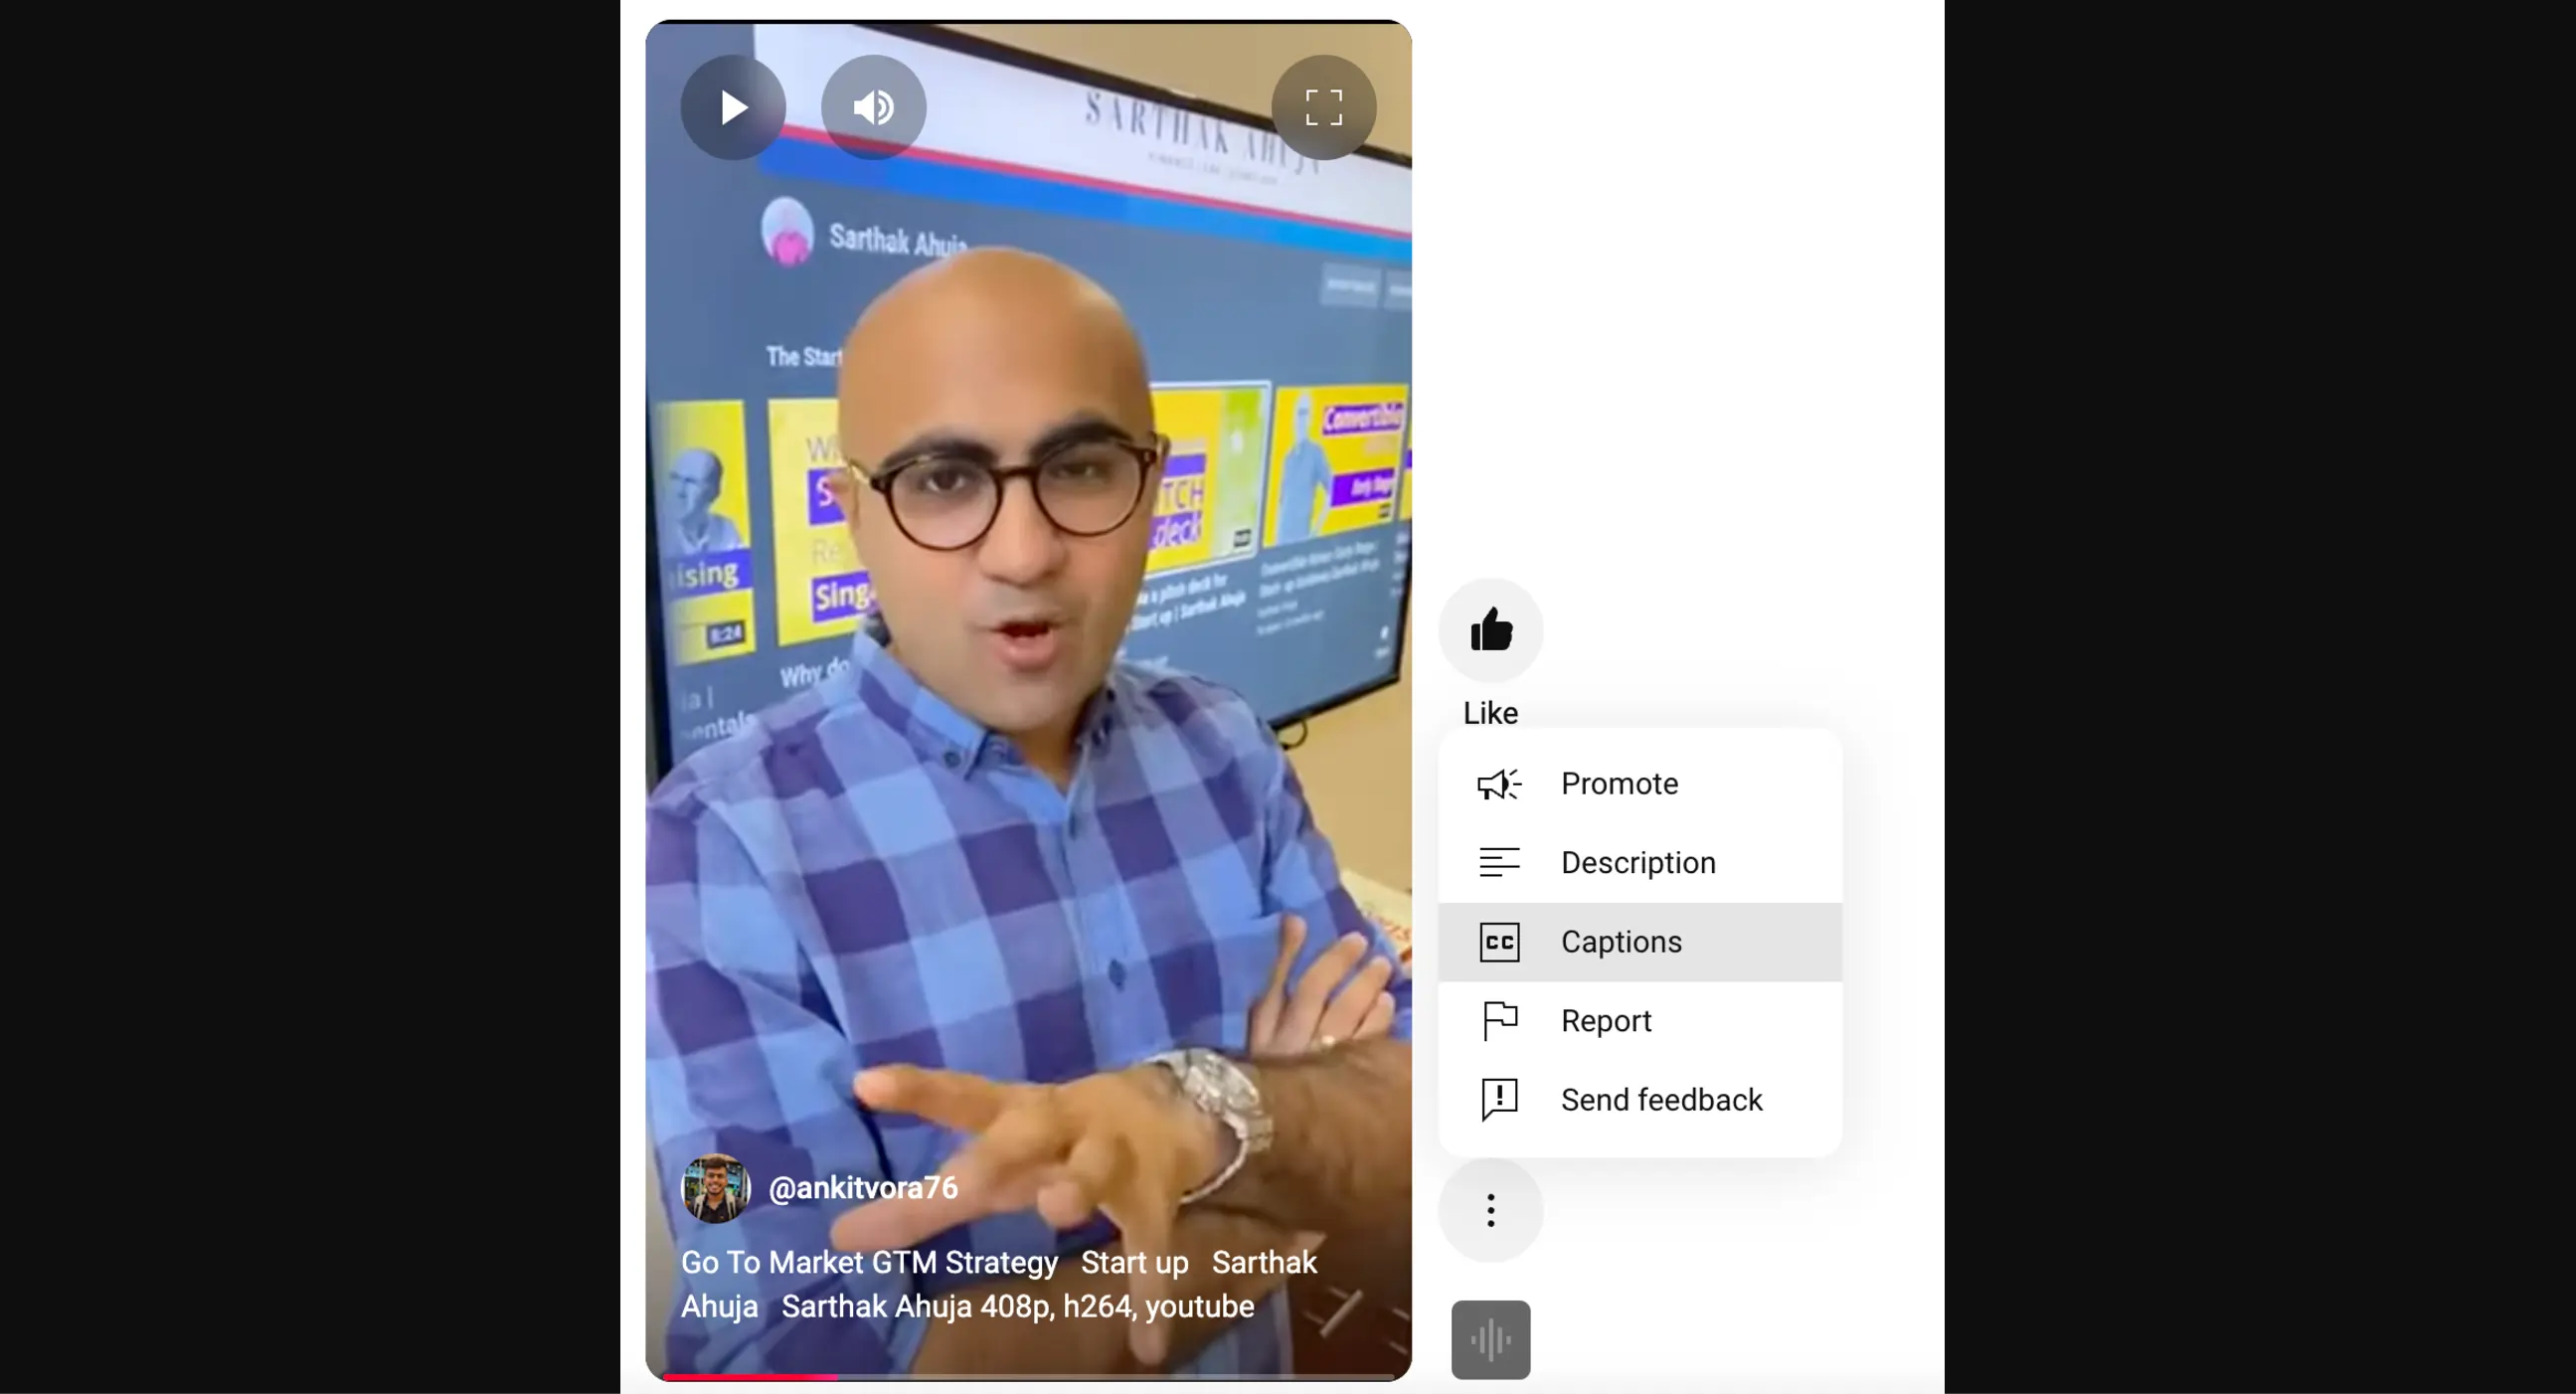
Step 4: Now, to add captions, click “Captions” from the right toolbar. Riverside offers a variety of caption presets. Choose the one that best suits your video and aligns with your branding.
.webp)
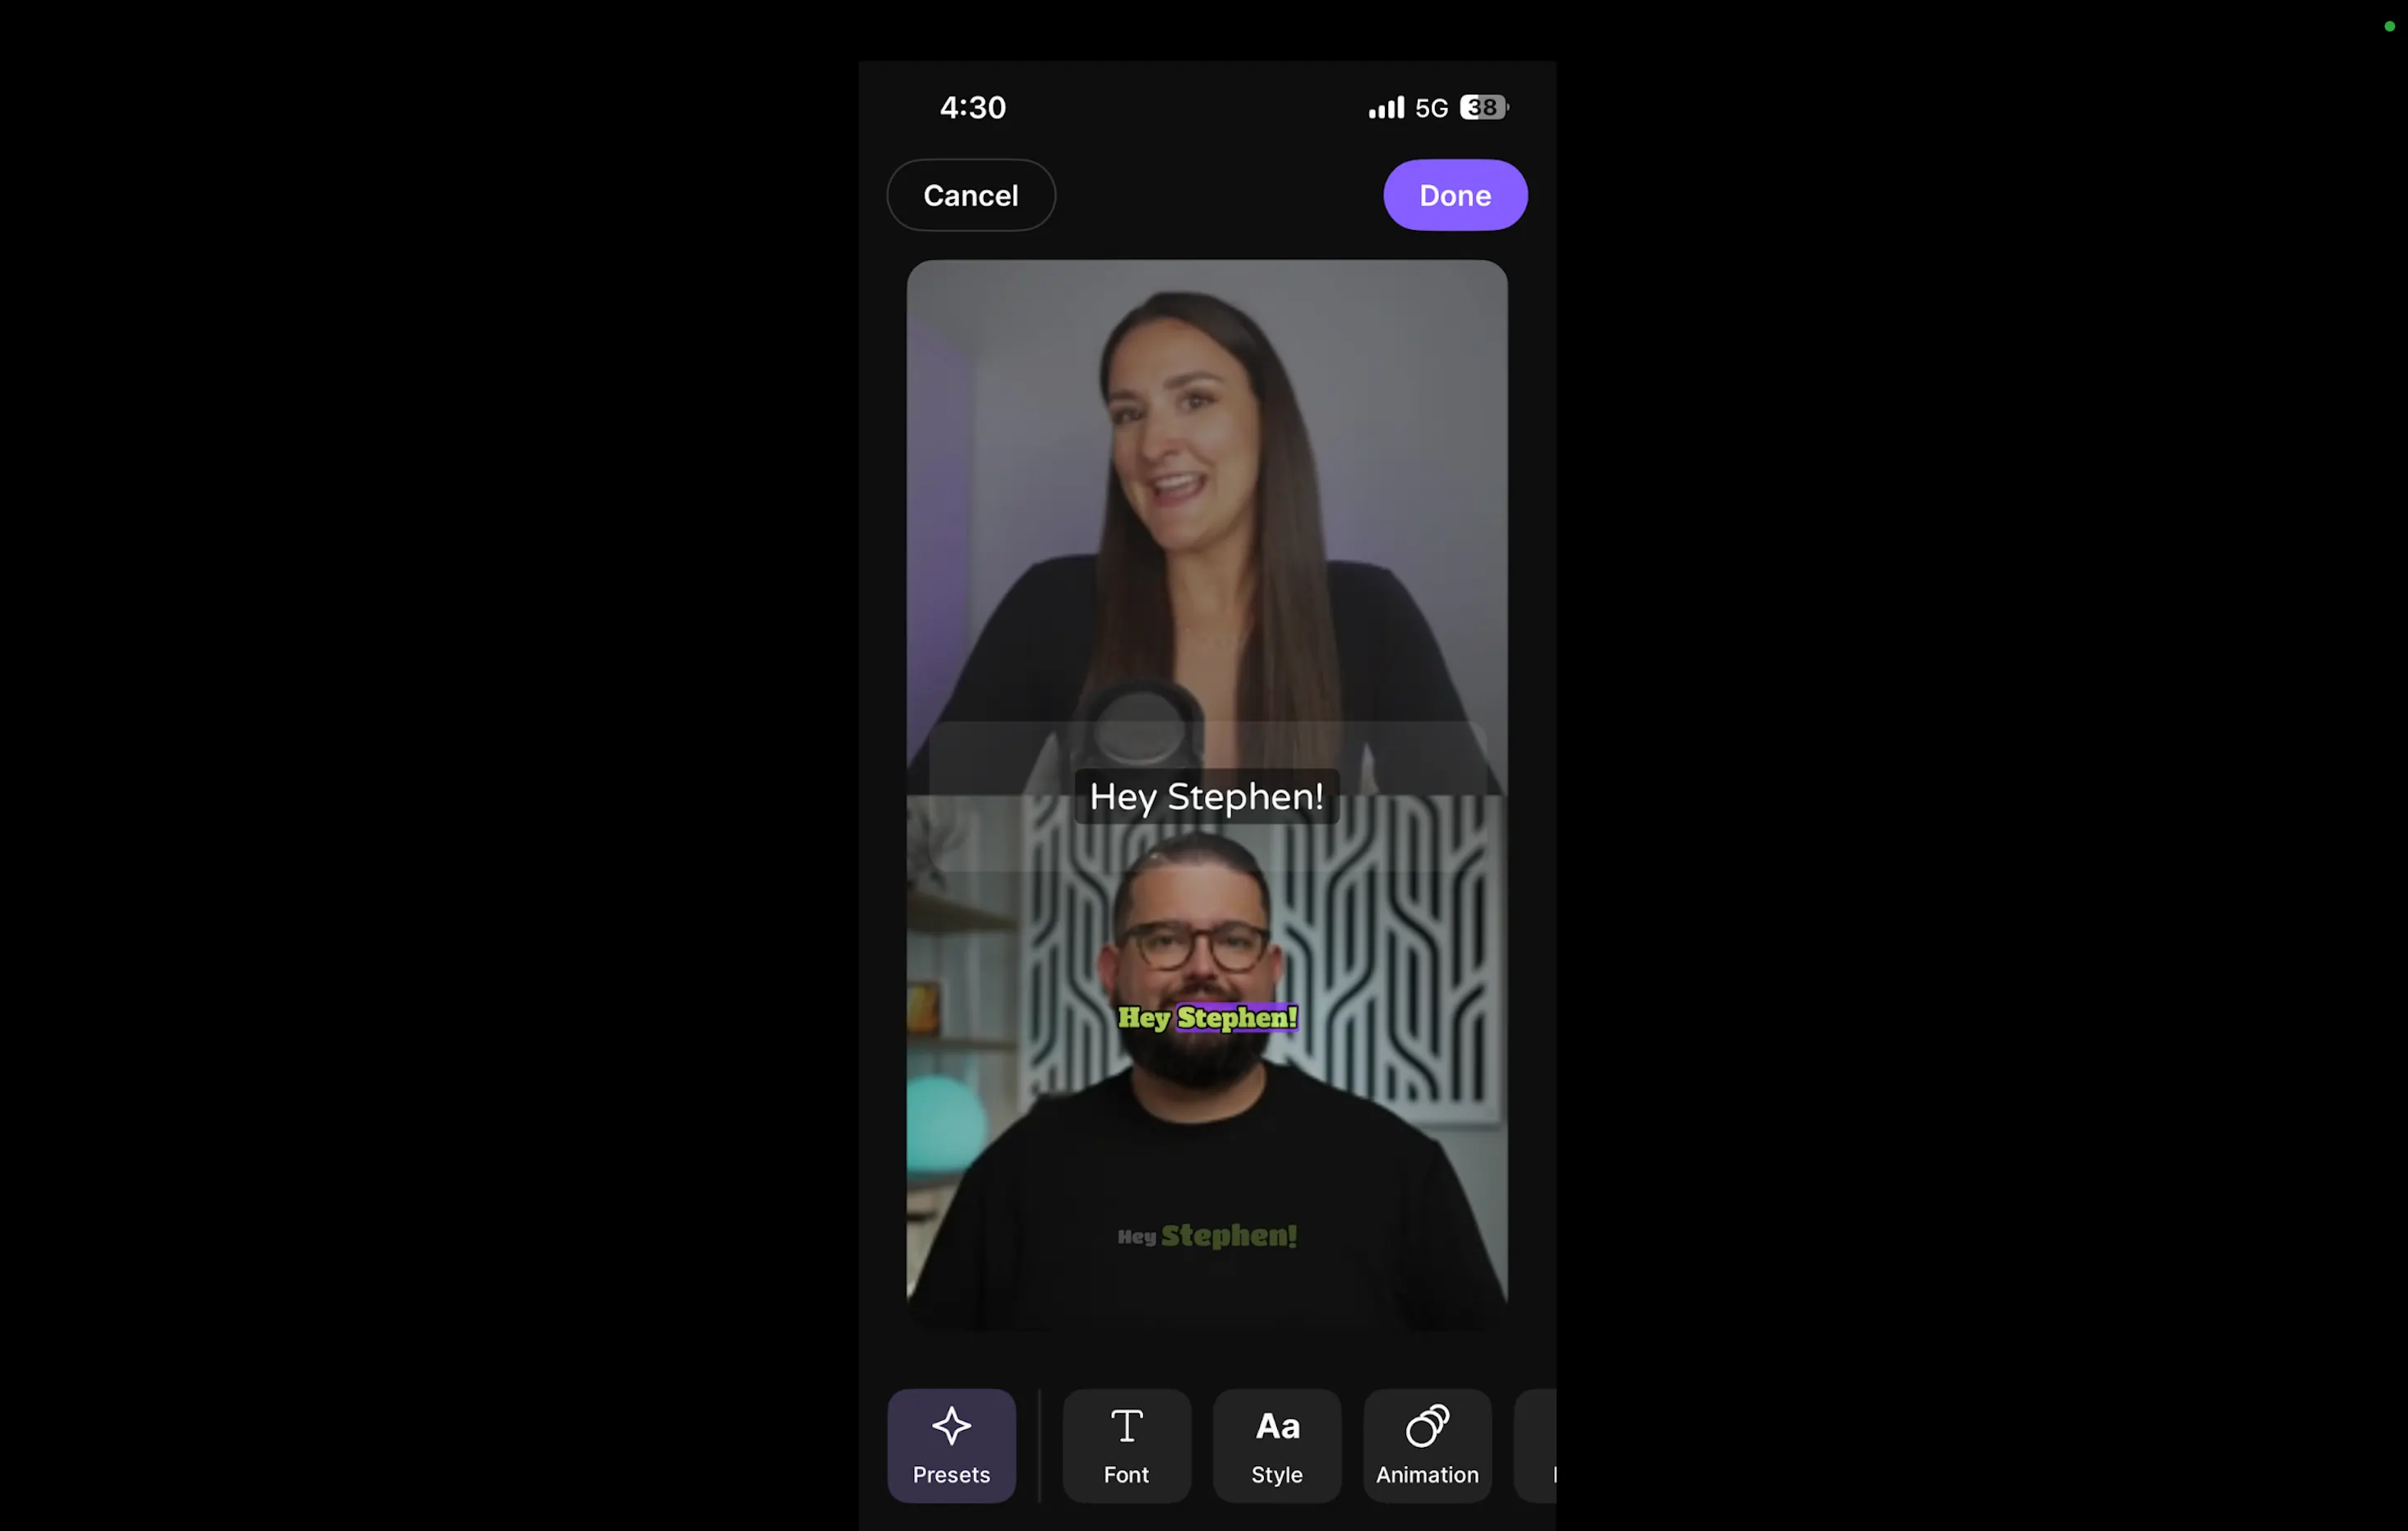
Step 5: The captions will automatically be added to your video. You can adjust their position by dragging and dropping them within the video frame.
Step 6: Customize the font size, style, and colors and add animations. Select the caption inside the video frame. Then, choose the font-changing option to change the font or adjust its size and positioning.
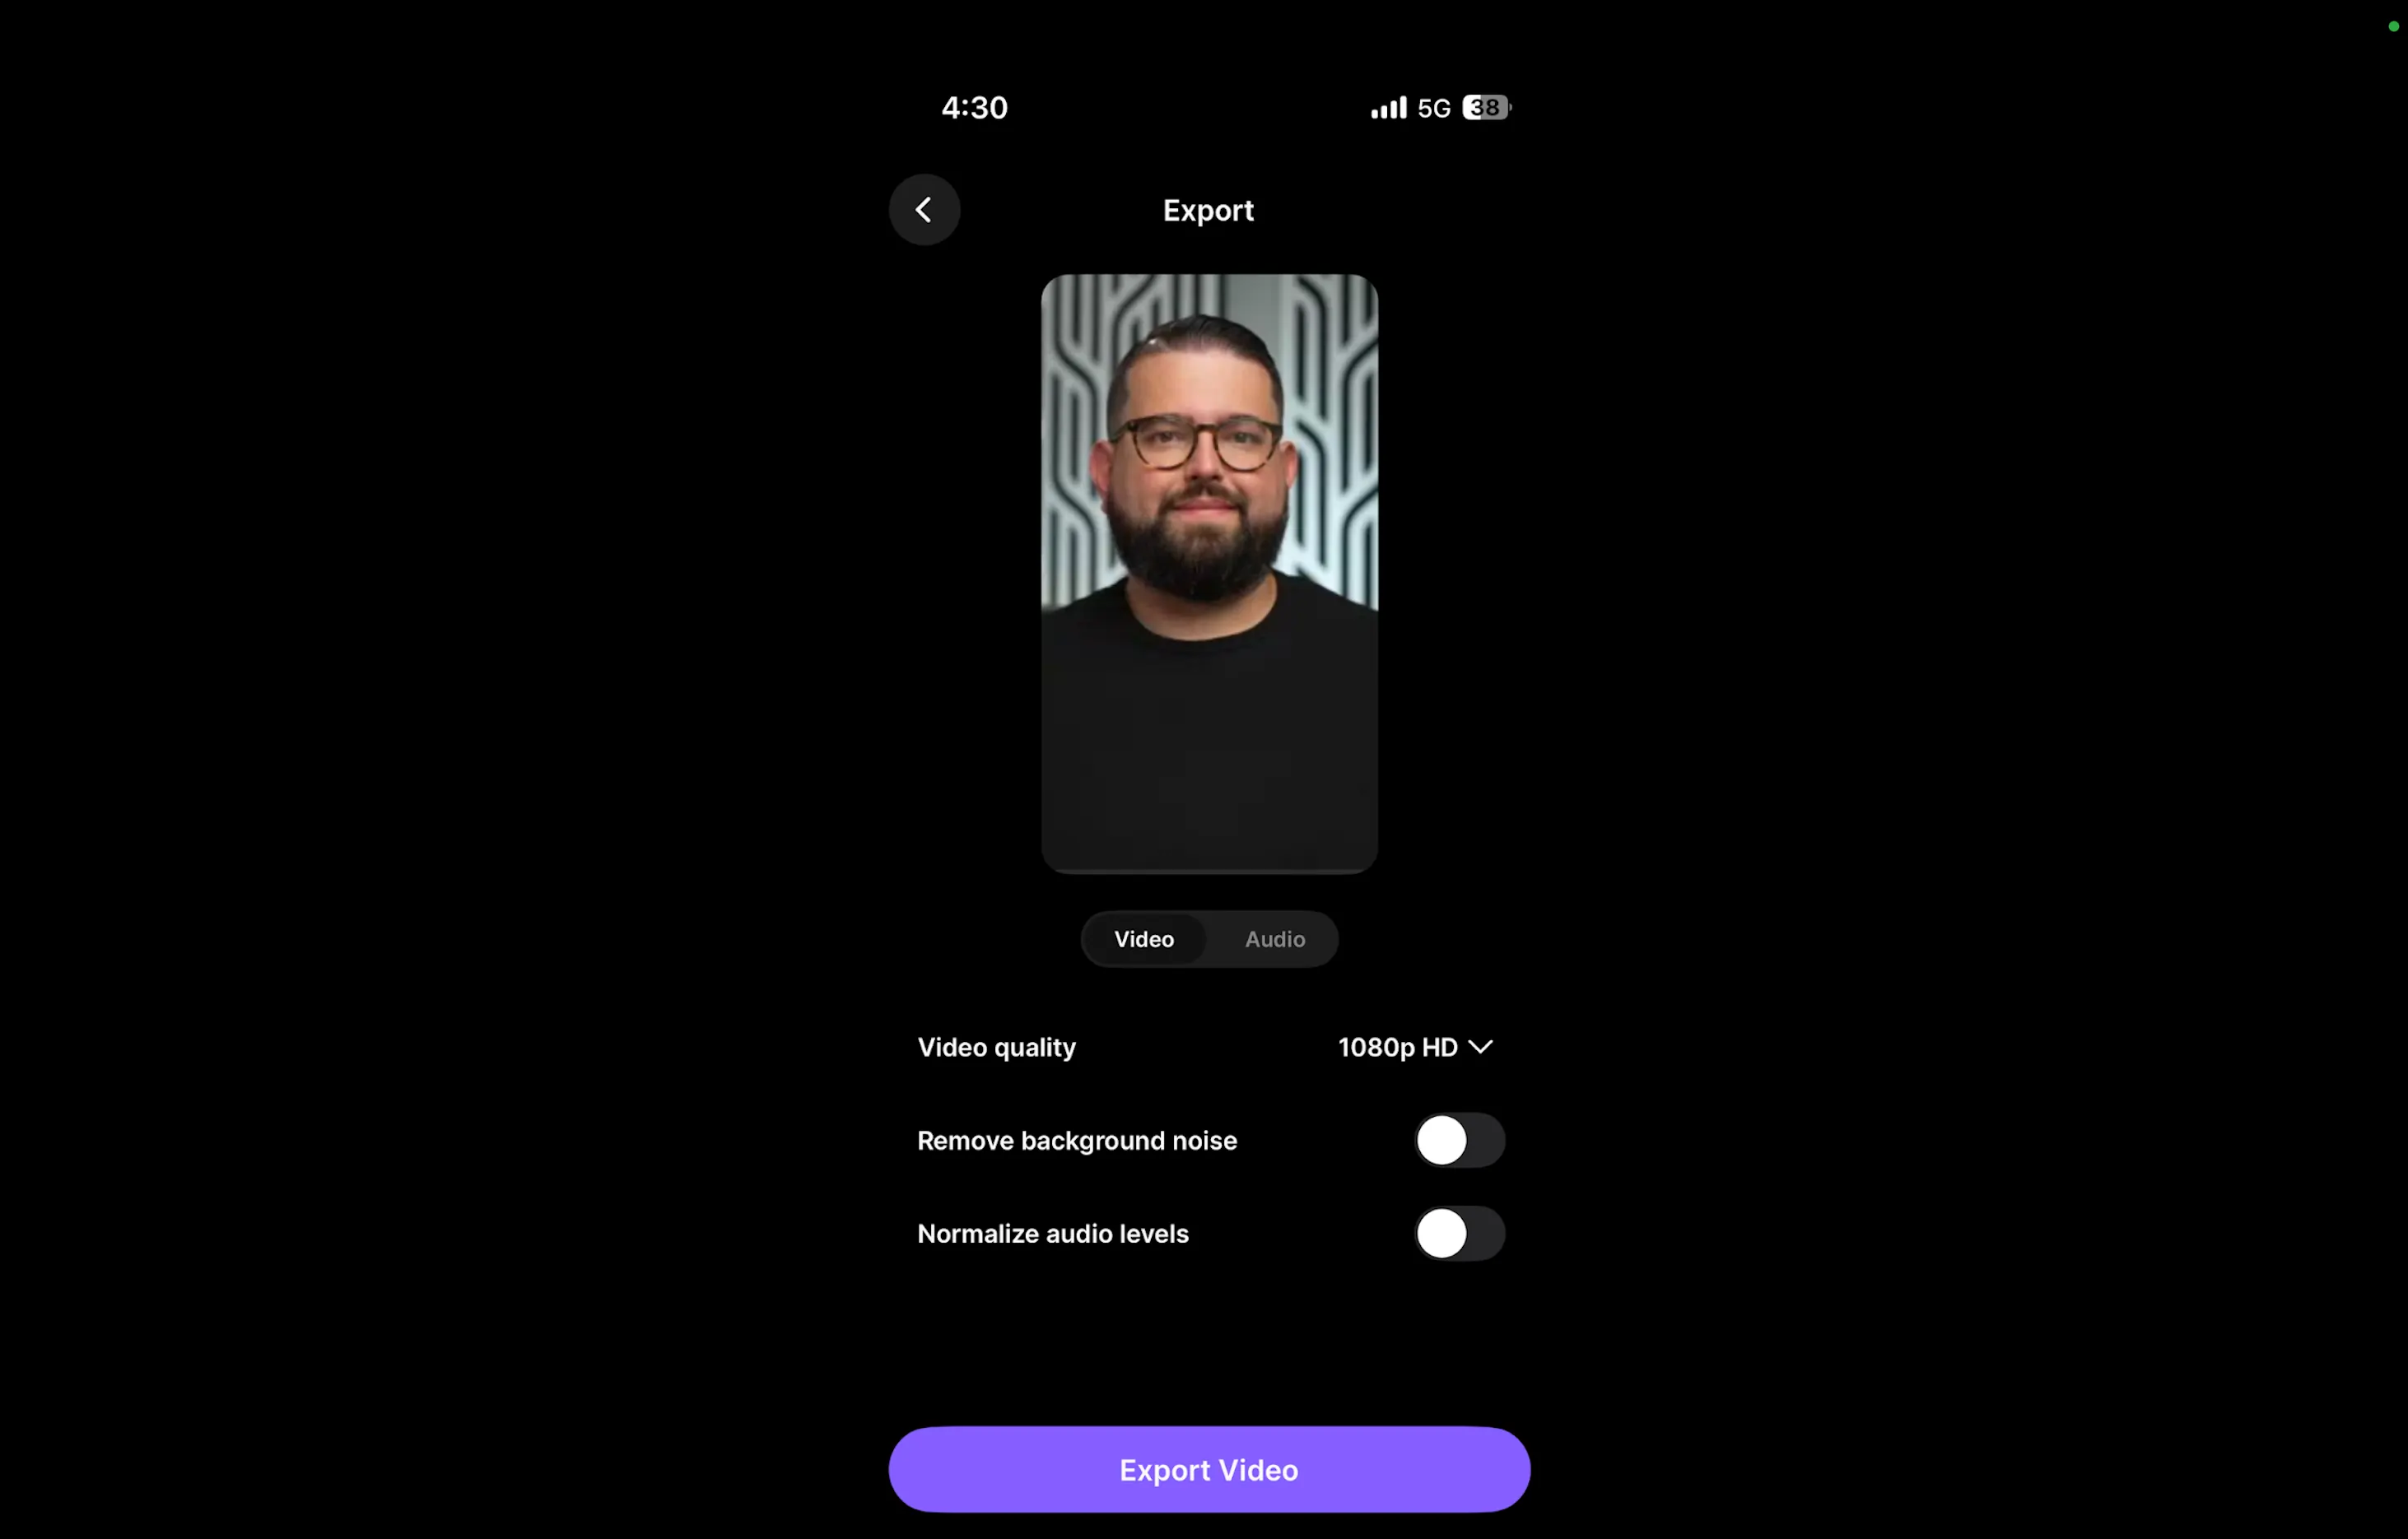
Step 7: Click “Export” at the top right to export your video with open captions. Select your preferred settings, then click “Export video.”
Step 8: With Riverside, export the video transcript and upload it to your YouTube video (as a closed caption) for SEO. Click the actions menu next to the transcript in the editor and select “Download transcript.”
.webp)
How to manually add closed captions to a YouTube video
YouTube Studio makes it easy to add closed captions to new and existing videos manually. While YouTube offers automatic captions (more on that later), they’re often inaccurate and not available in other languages.
You can also type or paste the captions, but this requires a significant amount of effort.
So, we’ll focus on the easier option—uploading the transcription.
Follow these steps to add closed captions to your YouTube videos manually:
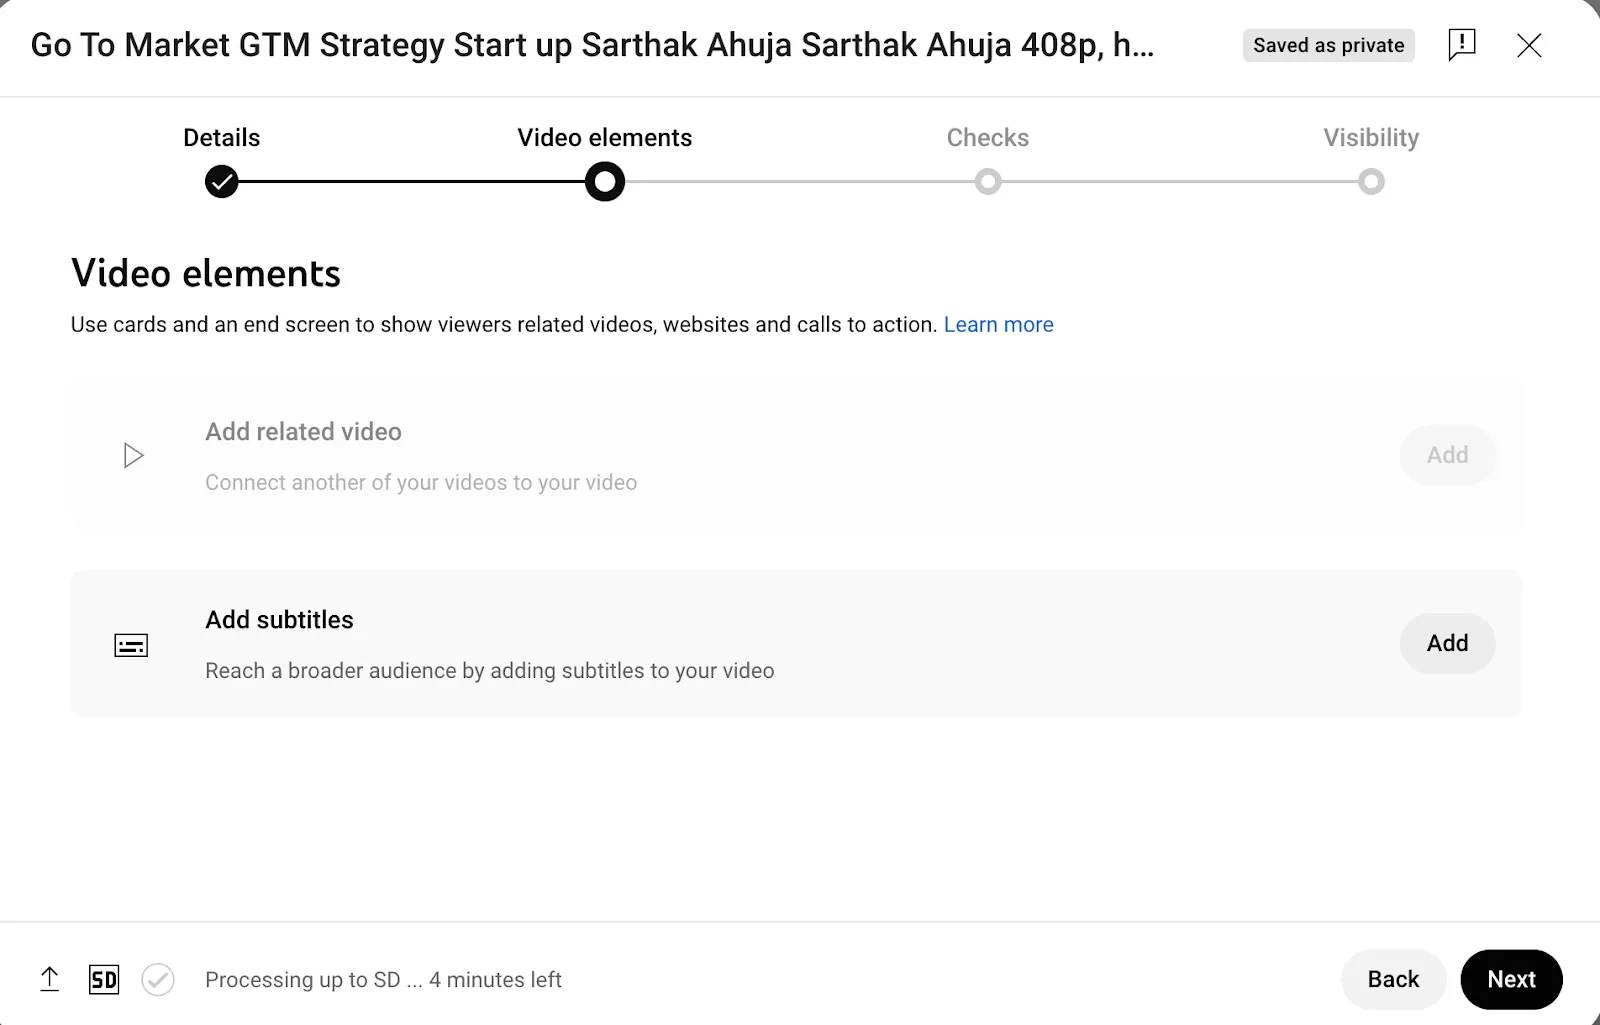
Step 1: For new uploads, go to the “Video Elements” section and click “Add” next to “Add Subtitles.”
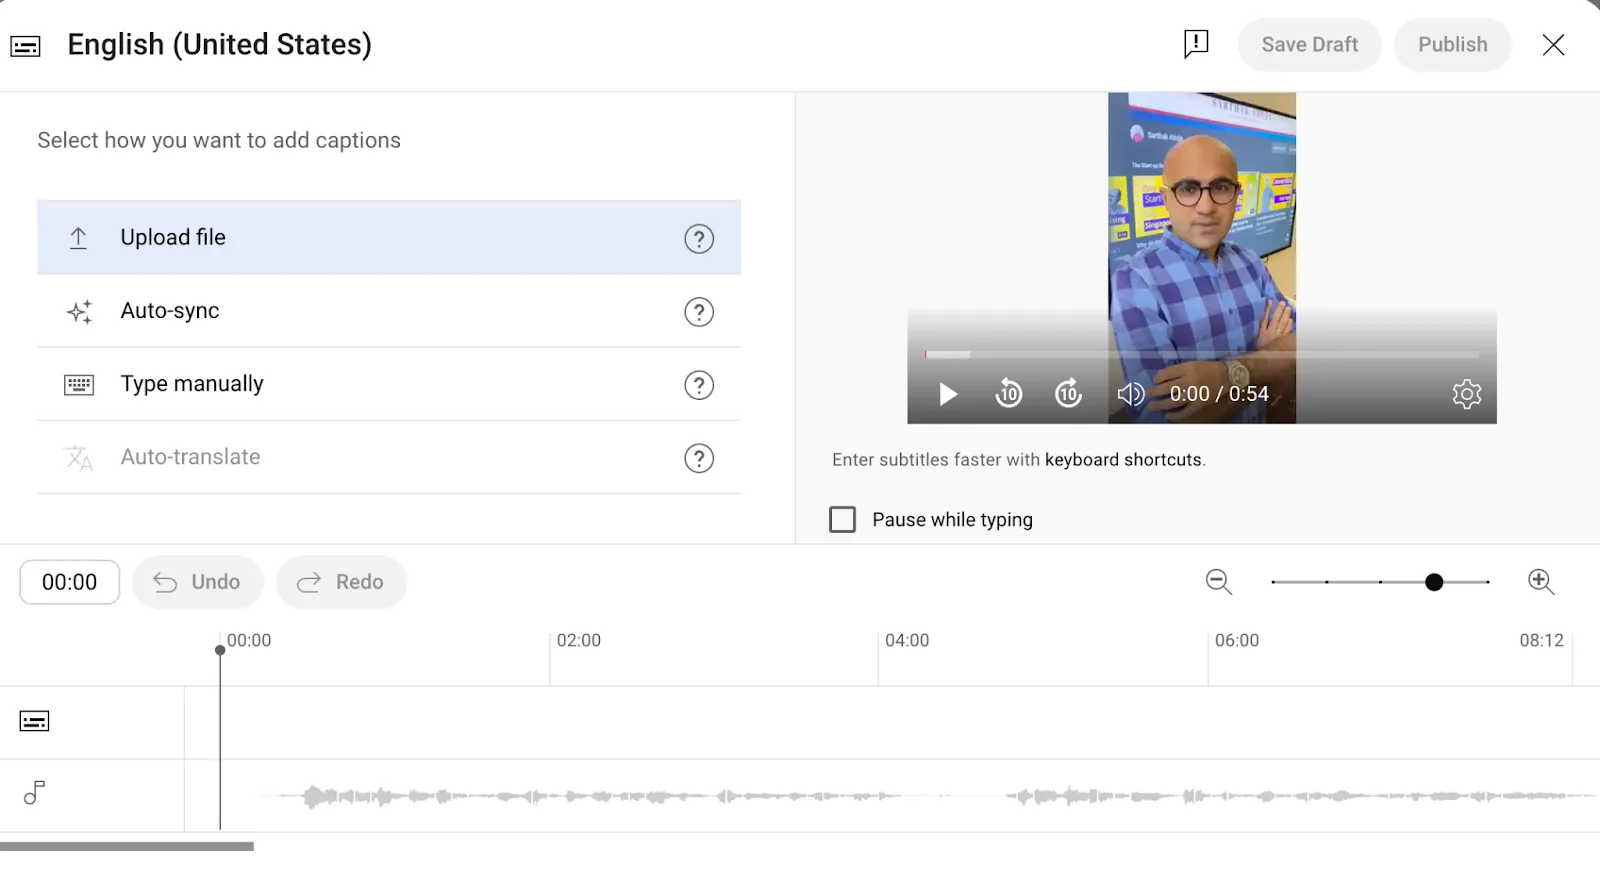
For existing videos, open YouTube Studio, click the “Subtitles” tab, select your video, and click the edit icon. You can choose the subtitle language in both cases.
Step 2: Choose “Upload file.” YouTube allows you to upload your caption file, whether it includes timing or not. Supported formats include .srt, .sub, .sbv, and more. Check out YouTube’s supported subtitle and closed caption file guidelines.
Step 3: Select whether you want to upload a subtitle file with timing or without timing.
- With timing: If your file includes timing, YouTube will display the captions precisely as specified in your file.
- Without timing: If your file doesn’t include timing, YouTube will use its auto-sync feature to match your captions to the audio in your video.
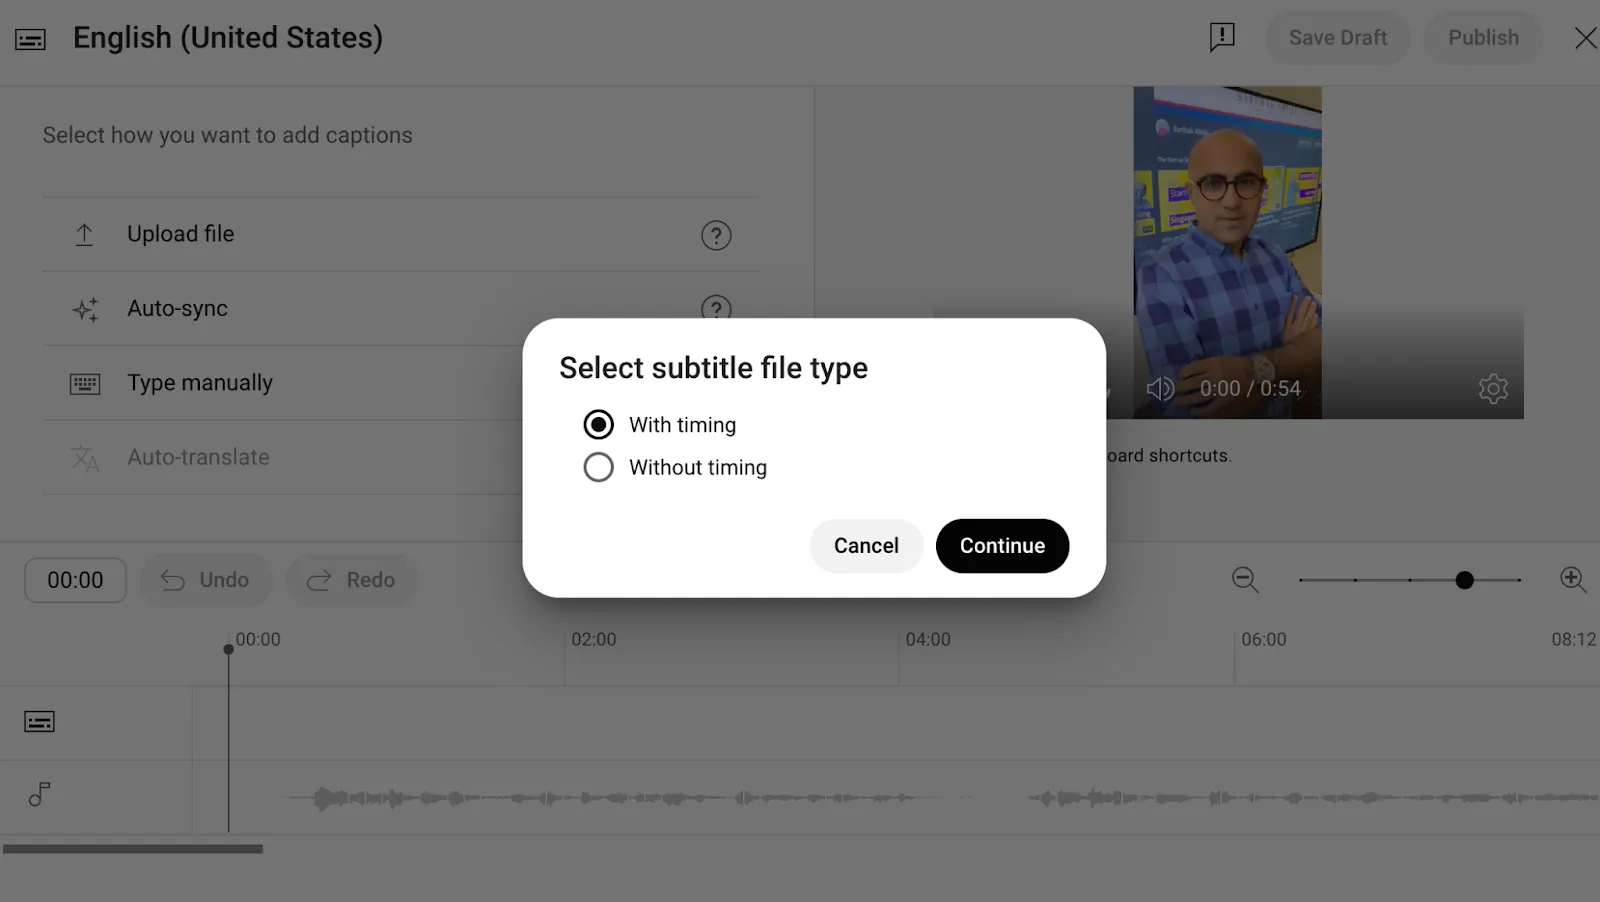
Step 4: If you used Riverside's transcription generator, you will have a clean, ready-to-use subtitle file with timing, allowing you to select the “With timing” option.
You’ll be taken to an interface where you can make changes to the text and add breaks for captions. Here's how to navigate it:
- Make changes to text: Simply click on the text box for each caption segment to edit the text as needed.
- Add breaks: To add a break between captions, click the “+” button or move to the next segment and press "Enter" to create a new line.
- Adjust timing: You can adjust the captions' timing by editing each timing bar's start and end times. Simply click on the time values and enter the desired start or end time to sync the captions with the video.
- Play and pause the video: Use the playback controls to pause at specific points and fine-tune the captions for each segment.

Step 5: After adding and reviewing all captions, click “Publish” to save your changes.
How to automatically add closed captions to your YouTube videos
YouTube automatically uses machine learning algorithms to generate captions based on your video’s audio. This is a quick and convenient option, but the accuracy can vary depending on the audio quality and clarity of speech.
You might need to edit the captions to fix errors.
Start by uploading your video to YouTube Studio. Once the upload and processing are complete, YouTube automatically generates captions based on the audio.
These captions will be available for viewers to toggle on or off while watching.
That said, YouTube’s automatic captions aren’t perfect. Errors can occur, especially if your video has background noise, heavy accents, or uses technical terms.
Review and edit your captions manually from YouTube Studios to make sure they are accurate.
Note: Keep in mind that YouTube Studio doesn’t support auto-translation for automatically generated captions. If you want to provide captions in other languages, you’ll first need to upload subtitles (either as a file or by typing them manually).
Once uploaded, use YouTube’s auto-translate feature to generate translations.
Bonus: How to add captions or subtitles to YouTube videos on your phone
YouTube Studio’s mobile app doesn’t currently support adding captions directly to your videos. However, you can easily add open captions using Riverside’s mobile app.
With Riverside, you can select from different presets, adjust fonts (size and style), choose animations, and more from your phone.
Step 1: Select the video from the dashboard in the mobile app. This will load the video in the editor. Then, tap “Captions.”
Step 2: Choose from a wide range of presets. Select the font, style, animation, color, and format. Then click “Done.” Your captions have been added to the video.
Step 3: Tap the export icon at the top-right corner to export the video. Then click “Export video” and upload it to your YouTube channel.
FAQs for adding captions and subtitles to YouTube videos
How do you view YouTube captions of a video that’s not yours?
To view captions on a YouTube video that’s not yours, follow these steps:
- Play the video on YouTube.
- To enable captions, click the "CC" button (if available) in the bottom-right corner of the video player.
- If captions are available in different languages, click the settings (gear) icon, select “Subtitles/CC,” and select your preferred language.
How do you put English subtitles on YouTube?
To add English subtitles to your YouTube video, follow these steps:
- Go to YouTube Studio.
- Click on the “Subtitles” tab from the left-hand menu.
- Select your video, click “Add Language,” and choose “English.”
- You can either upload a subtitle file (generate it using Riverside), use automatic captions (if available), or type the subtitles manually.
- Review and adjust the timing as needed, then click “Publish” to save your subtitles.
How can I get YouTube subtitles without a CC option?
If the CC (closed captions) option is not available, add open captions using a tool like Riverside.
Riverside allows you to create open captions, customize them (font, style, timing, etc.), and then export the video with embedded captions.
What is the difference between subtitles and captions?
Subtitles include only the spoken dialogue, often translated into other languages.
Captions include spoken dialogue, soundx effects, background music, and speaker identification.
Subtitles work well if your only goal is to reach non-native speakers or translate dialogue. However, if you want to make your video accessible to everyone and provide a complete audio-to-text experience, use captions.

.webp)


.webp)

