


Table of contents:
TL;DR
- For basic videos, you can screen record on Chromebook using its built-in keyboard shortcuts, screen capture, or screencast features.
- If you want more advanced features, try an online screen recorder like Riverside or a browser extension like Loom.
Wondering how to screen record on a Chromebook?
One of the best selling points of Chromebooks is their ease of use, and recording your screen is as simple as you’d expect.
If you’re looking for different ways to record your screen on a Chromebook, read on - this guide will walk you through them all.
How to screen record on Chromebook: 5 ways
To record your screen on a Chromebook, you have two main options: using built-in tools or online solutions.
Using the native functions or built-in tools is the simplest and most straightforward approach. But you might want to use an online third-party tool such as Riverside if you’re looking for extra features or specific functionalities.
Let’s start with the most straightforward approach: using the built-in tools.
How to screen record on Chromebook using the built-in screen recorder
You can use the built-in screen recorder in three ways:
- With a keyboard shortcut.
- Using Chromebook’s Screen Capture tool (for devices using Chrome OS 89 or later).
- Using Chromebook’s Screencast app (for devices using Chrome OS 104 or later).
How to screen record on Chromebook using a keyboard shortcut
Using keyboard shortcuts is the quickest way to capture your screen without navigating through menus.
This is ideal if you prefer not to interact with the Chromebook’s UI or a separate tool. Keyboard shortcuts are also a useful alternative to immediately capture unexpected or time-sensitive content.
Here are the steps to record your screen using keyboard shortcuts:
Step 1: Use the keyboard shortcut
Hold down “Shift” + “Ctrl” + “Show Windows”.
You can find the Show Windows key on the top row of your keyboard (where F5 would be on a PC keyboard). It looks like a rectangle with two vertical lines on the right.
.webp)
Step 2: Launch the tool
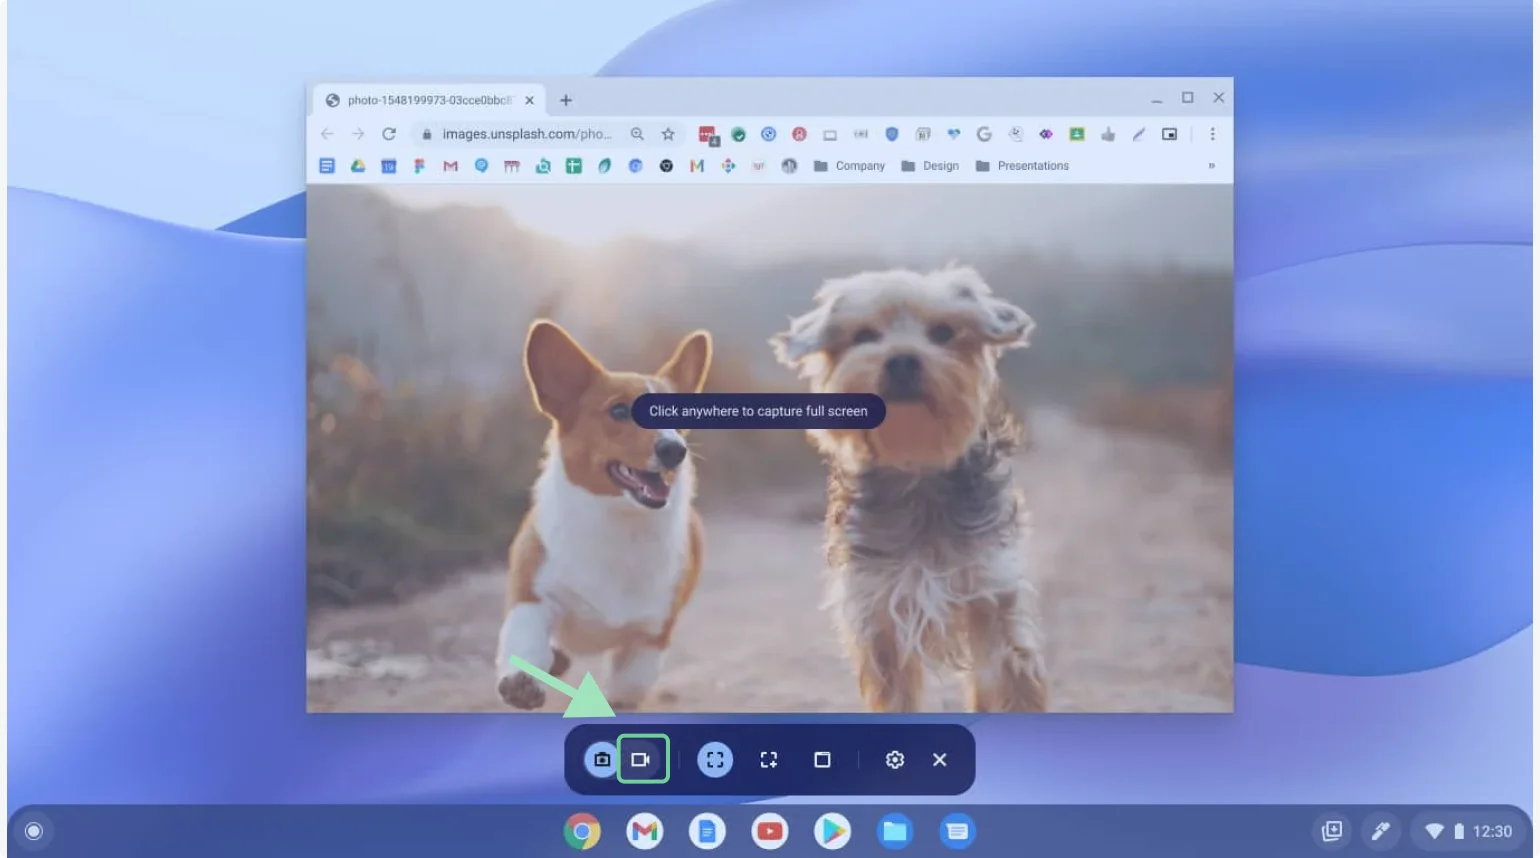
From the menu at the bottom of the screen, click on the “Screen Record” button (video camera icon).
Step 3: Activate audio and webcam
If you want to include audio or webcam footage in your recording, click on the “Settings” icon at the bottom.

Here, you can turn on “Front Camera” and choose to activate “Device Audio” and your “Microphone.” You can also turn on the “Show keys and clicks” option to show key combos, touch gestures, and mouse clicks during your recording.
Step 4: Select screen size
Choose which part of your screen you want to record by selecting one of these options:
- Full Screen (records your entire screen).
- Partial Screen (drag and select a portion of the screen to record).
- Window (records only the current window or tab).
Once you select one of these options, the screen recording will start automatically.
Step 5: Stop recording
When you finish, click the “Stop Recording” icon at the bottom-right corner of the screen.
Alternatively, you can stop recording instantly using the keyboard shortcut “Search” + “Shift” + “X”.
Step 6: Find your video file
Your screen recording will be saved in your Downloads folder.
To save it elsewhere, press “Ctrl” + “Shift” + “Show Windows”. Go to “Settings” > “Select Folder”, and choose your preferred save location, including options like Google Drive.
How to screen record on Chromebook with Screen Capture
The Chromebook Screen Capture feature is a basic built-in tool for capturing still images or recording short footage of your screen.
You can record the entire screen, a specific portion, or a single window. You can also activate your microphone to include a voiceover. This is especially helpful for creating a quick tutorial or instructional video.
Note: This feature is available only on Chromebooks running Chrome OS 89 or later.
Here are the steps to record your screen using Screen Capture:
Step 1: Launch Screen Capture
Click the clock icon in the bottom-right corner of your screen to open the “Quick Settings” panel.
From here, locate the “Screen Capture” button (if you don’t see it right away, click the small arrow to expand the panel). Click on the button to launch the tool.
.webp)
Step 2: Customize your settings
Click the “Settings” icon at the bottom.
Turn on “Front Camera” to activate your webcam and select “Device Audio” and “Microphone” if you want to include audio in your recording.
To choose where your video recording will be saved, click on “Select Folder” and pick a location (either a specific directory or Google Drive).
You can also turn on “Show Keys and Clicks” to display touch gestures, key combos, and mouse clicks during your recording.
Step 3: Select screen size
Like with keyboard shortcuts, you can choose which part of the screen you want to record by selecting one of these options:
- Full Screen (records your entire screen).
- Partial Screen (drag and select the portion you want to record).
- Window (records only the active tab or window).
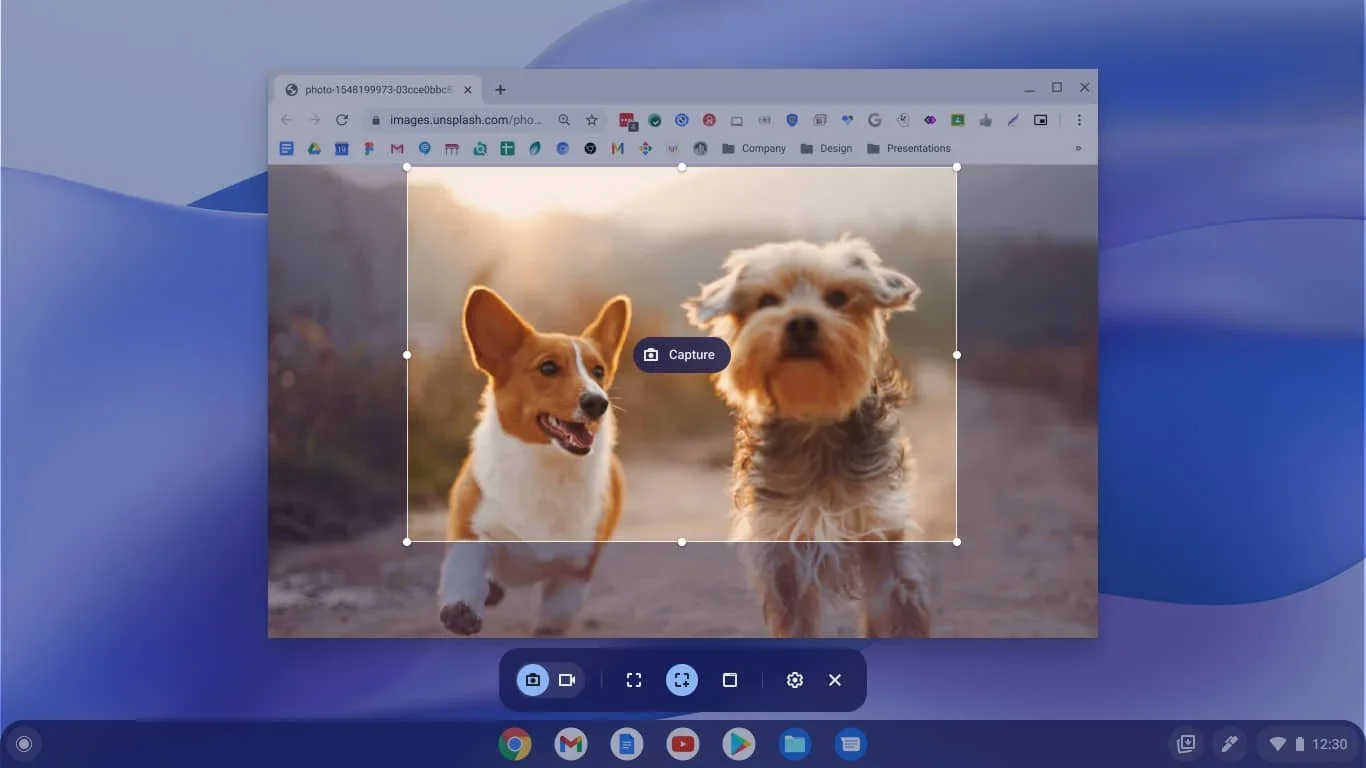
Step 4: Start recording
Click the “Record” button (video camera icon) to begin recording. You can also click anywhere on the screen to start the recording automatically.
Step 5: Stop recording
Once you're finished, click the red “Stop” icon at the bottom of the screen. You can also press “Search” + “Shift” + “X” to stop the recording instantly.
Step 6: Find your video file
Your video will be saved in the folder you selected earlier. If no folder was chosen, the video will default to the Downloads folder.
How to screen record on Chromebook with Screencast
The Screencast app is primarily designed for sharing your screen with other devices, but it can also be used for recording. It supports similar functions to Screen Capture, including video and audio recording, but goes a step further by allowing you to add annotations during or after the recording. It also generates automatic transcriptions once your video is saved on Google Drive.
Screencast is better optimized for screen mirroring and sharing with other computers, or even devices with larger displays like smart TVs. This makes it an excellent choice for presentations or educational settings. It’s fully integrated with Google Drive for easy storage and sharing.
Note: This feature is available only on Chromebooks running Chrome OS 104 or later.
Here are the steps to record your screen using Screencast:
Step 1: Locate the Screencast app
Open the App Launcher from your taskbar by clicking on the lower-left corner of your screen. In the launcher search bar, type “Screencast” and click on the application when it appears.
To pin the app to your shelf for easier access later, right-click the Screencast icon and select "Pin to shelf."
Step 2: Start a new screencast
In the Screencast menu, you’ll find four tutorial videos (Welcome, Transcript Tools, Marker, and Sharing Screencasts). These can help you get familiar with the tool.
When you’re ready to begin, click on the blue “+ New Screencast” button at the top left of the screen.
.webp)
Step 3: Customize your screencast settings
Before recording, customize your settings. You can enable “Audio Output” to record audio using your microphone, and turn on the “Camera” to capture video of yourself, which will appear in the bottom-right corner during the screencast.
You can also enable “Show Clicks and Keys” to display touch gestures, key combinations, and mouse clicks during your recording.
Step 4: Select screen size
Choose the part of the screen you want to share by selecting one of these options:
- Full Screen (records the entire screen).
- Partial Screen (drag and select a portion of the screen).
- Window (records only the active tab or window).
Click anywhere on the screen to begin sharing.
.webp)
Step 5: Start the recording
To start recording a video of your screencast, click on the red dot “Record” button on the bottom bar.
This bar also includes useful tools like the marker tool, which allows you to highlight or annotate parts of the screen during your presentation.
Step 6: Stop the recording
When you're finished, click the red button again to stop the recording.
Step 7: Access your files
Your video will automatically be saved to your Google Drive. By default, all recordings are stored in the “Screencast Recordings” folder on your Drive.
Step 8: Edit transcriptions (optional)
The Screencast app automatically transcribes everything you say. To edit the transcription, open the recording file, click the three dots in the top-right corner, and select "Edit text."
You can undo these changes later if you need to.
How to screen record on Chromebook online
While built-in tools are convenient for basic screen recording needs, they may lack the flexibility and precision required for more professional results. That's where online tools come in.
Online screen recording solutions like Riverside provide more sophisticated editing capabilities, longer recording times, higher video and audio quality, and extra features like clips and transcriptions.
Let's explore two popular online methods for screen recording on your Chromebook.
How to screen record on Chromebook using Riverside
If you want a quick screen capture, then you can use our online screen recorder tool.
But signing up for Riverside account gives you access to many more features than the few available with Chromebook’s native tools. You can record studio-quality, uncompressed audio and video, and add multiple effects during the recording using Riverside's Media Board.
You can record audio, video, and your screen in separate tracks. This means you can edit one track without affecting others.
After recording , check out our AI-powered, text-based editor to trim your video, optimize your audio, and automatically add customizable captions. You can even insert custom logos and backgrounds. Plus, since Riverside is cloud-based, you're not limited by your Chromebook's storage capacity, allowing for longer and higher-quality recordings.
Key features:
- Studio-quality recording: 4K video resolution and uncompressed 48 kHz WAV audio.
- Multitrack recording: Record all your audio, video, and screen recordings on separate tracks, then download them as raw, uncompressed files.
- Media Board: Add royalty-free or custom-made audio and video effects in real time during your recording.
- Text-based editor: Trim your video footage as easily as deleting text in the recording transcript.
- Customizable captions: Automatically generate captions, then customize their size, color, and font.
- AI transcriptions: Download highly accurate text or subtitle transcripts, available for 100+ languages.
- Magic Audio: Normalize your audio, and remove pauses, silences, and background noise with a few clicks.
- Cloud-based storage: No need to worry about file management or limited local space.
- Webinar and conference recording: Host and record your webinars, invite up to 10 guests, and show them your slides in up to 4K resolution.
And capturing your screen with Riverside is super easy! Just follow these steps:
Step 1: Start a new recording session
Log into your Riverside account and select your recording studio from the left sidebar. To create a new studio, click the “+” (plus) button on the top of this sidebar.
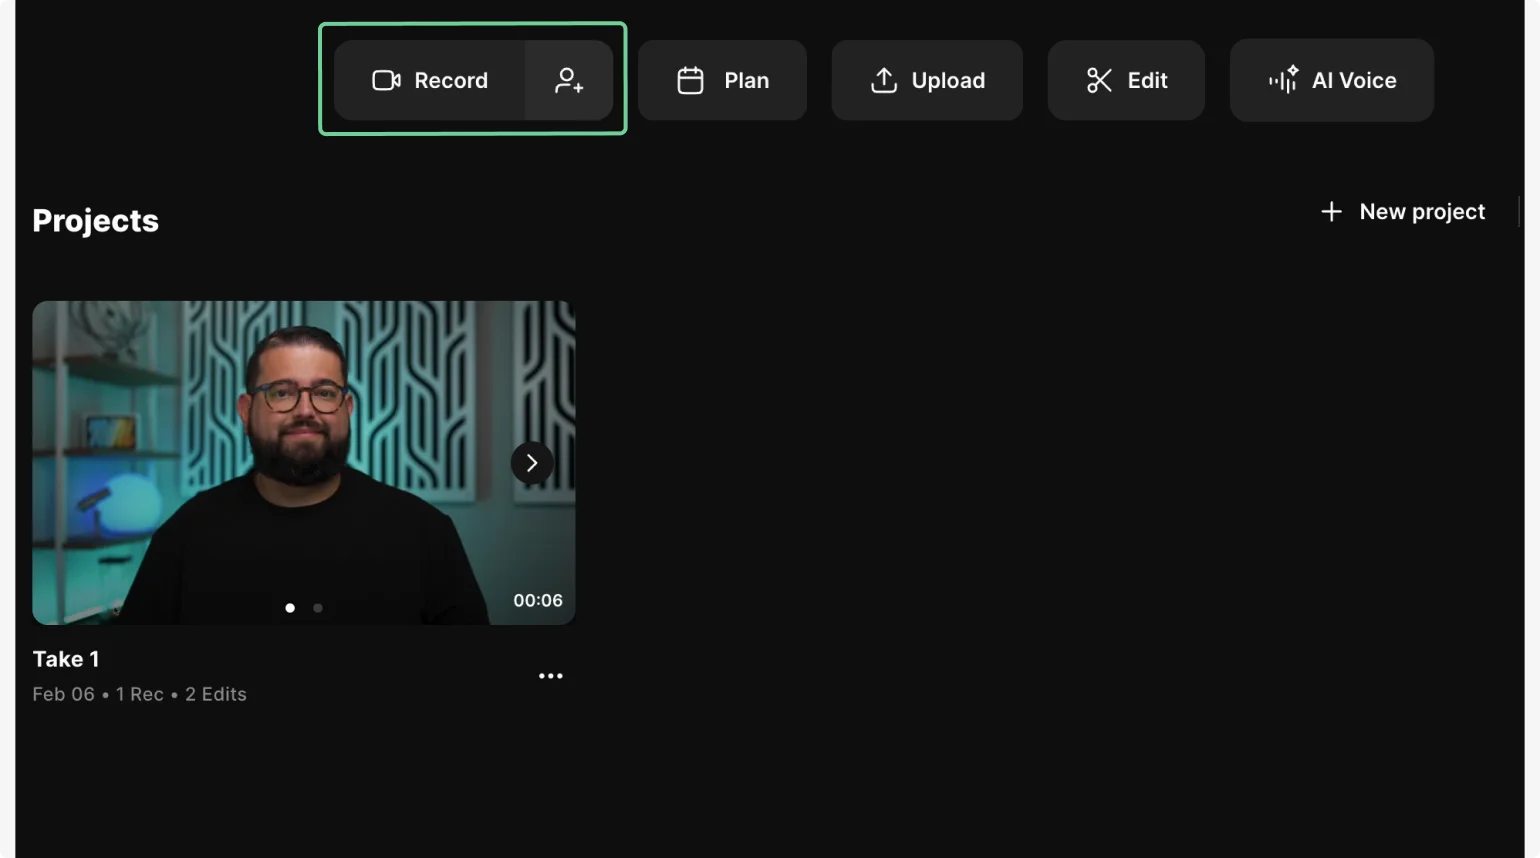
From here, click on the “Record” button at the top of the screen to start a new recording session.
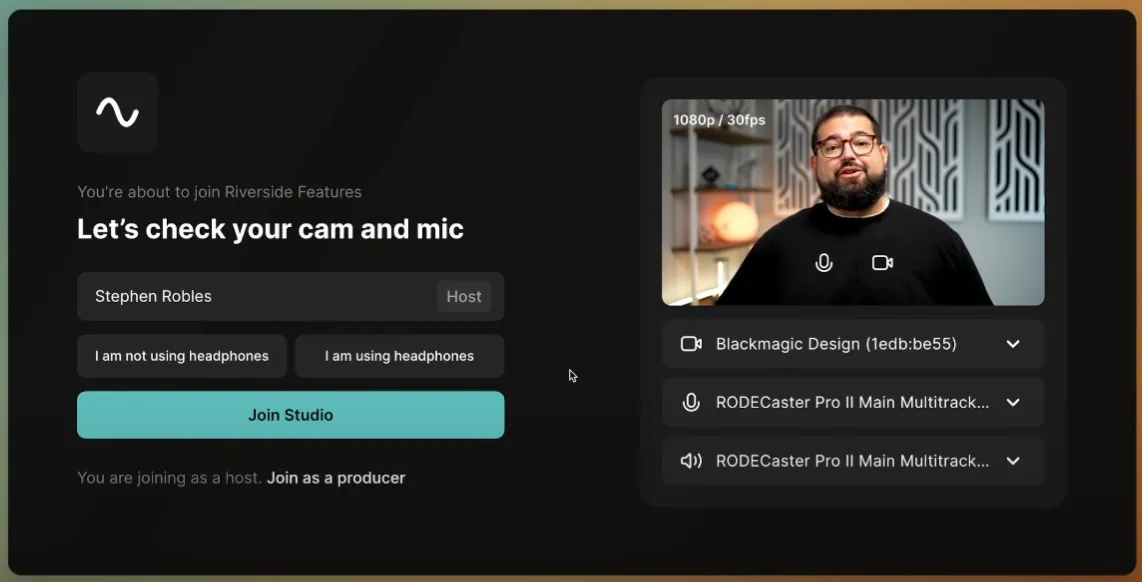
In the lobby, select your microphone, camera, and speaker output. Select whether you’re using headphones, then click on “Join Studio” to enter the recording studio.
Step 2: Share your screen
Once inside your Studio, click on the “Share” button at the bottom, then select “Screen.”
.webp)
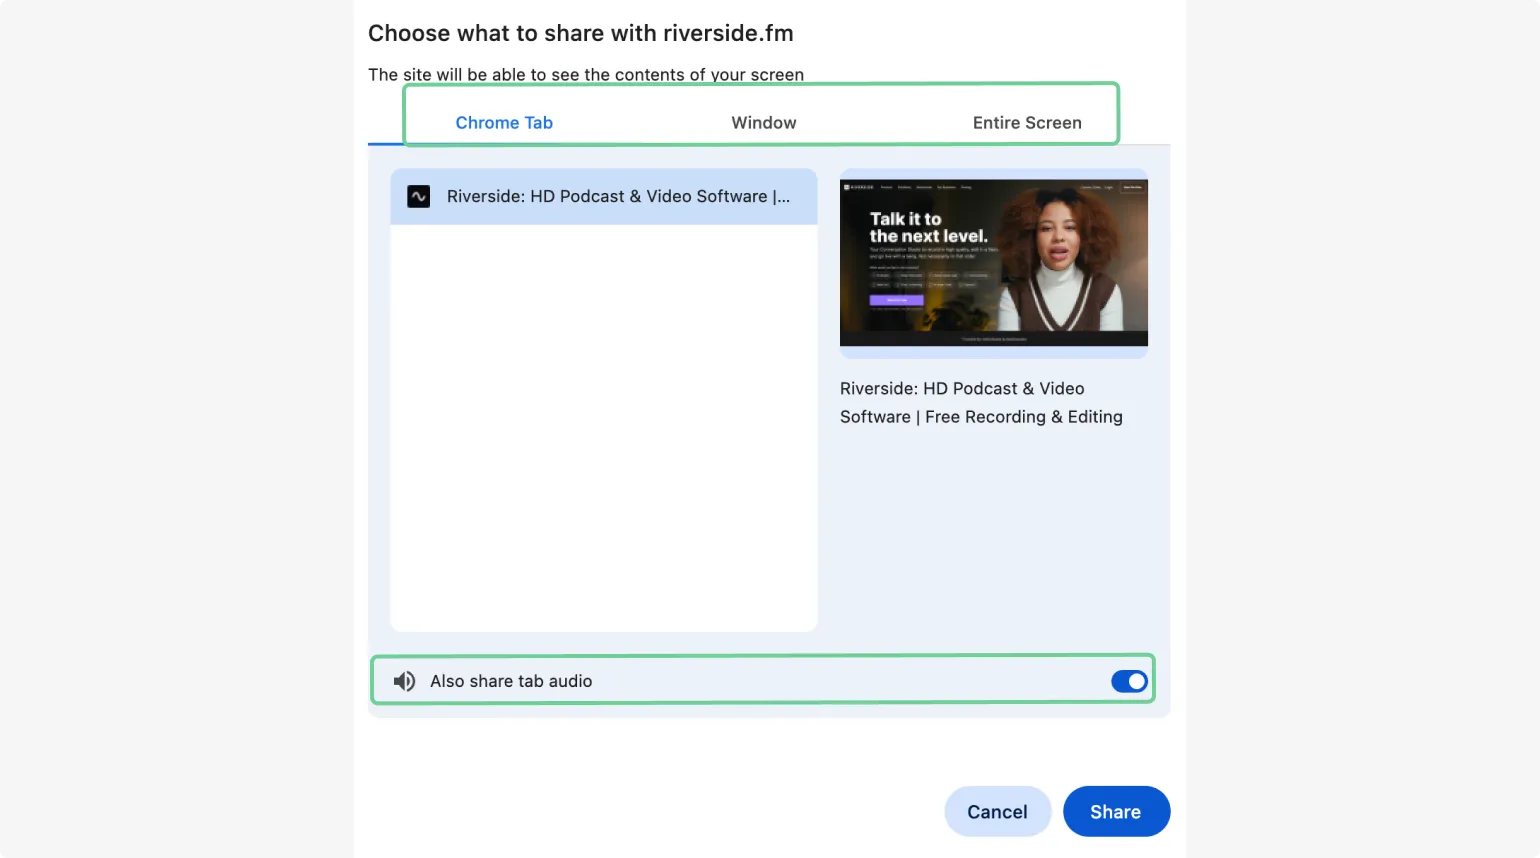
A new window will appear, allowing you to choose the part of the screen you want to share by selecting one of these options:
- Full Screen (records the entire screen, no matter what tabs or windows you go to).
- Window (records only one active app or window).
- Chrome tab (records only one active Chrome tab).
From here, you can also select whether you want to share the audio from your system or shared Chrome tab.
Click the “Share” button at the bottom to start sharing your screen.
Step 3: Start the recording
When you’re ready to start, navigate back to your Riverside tab and click on the red “Record” button at the bottom of the screen
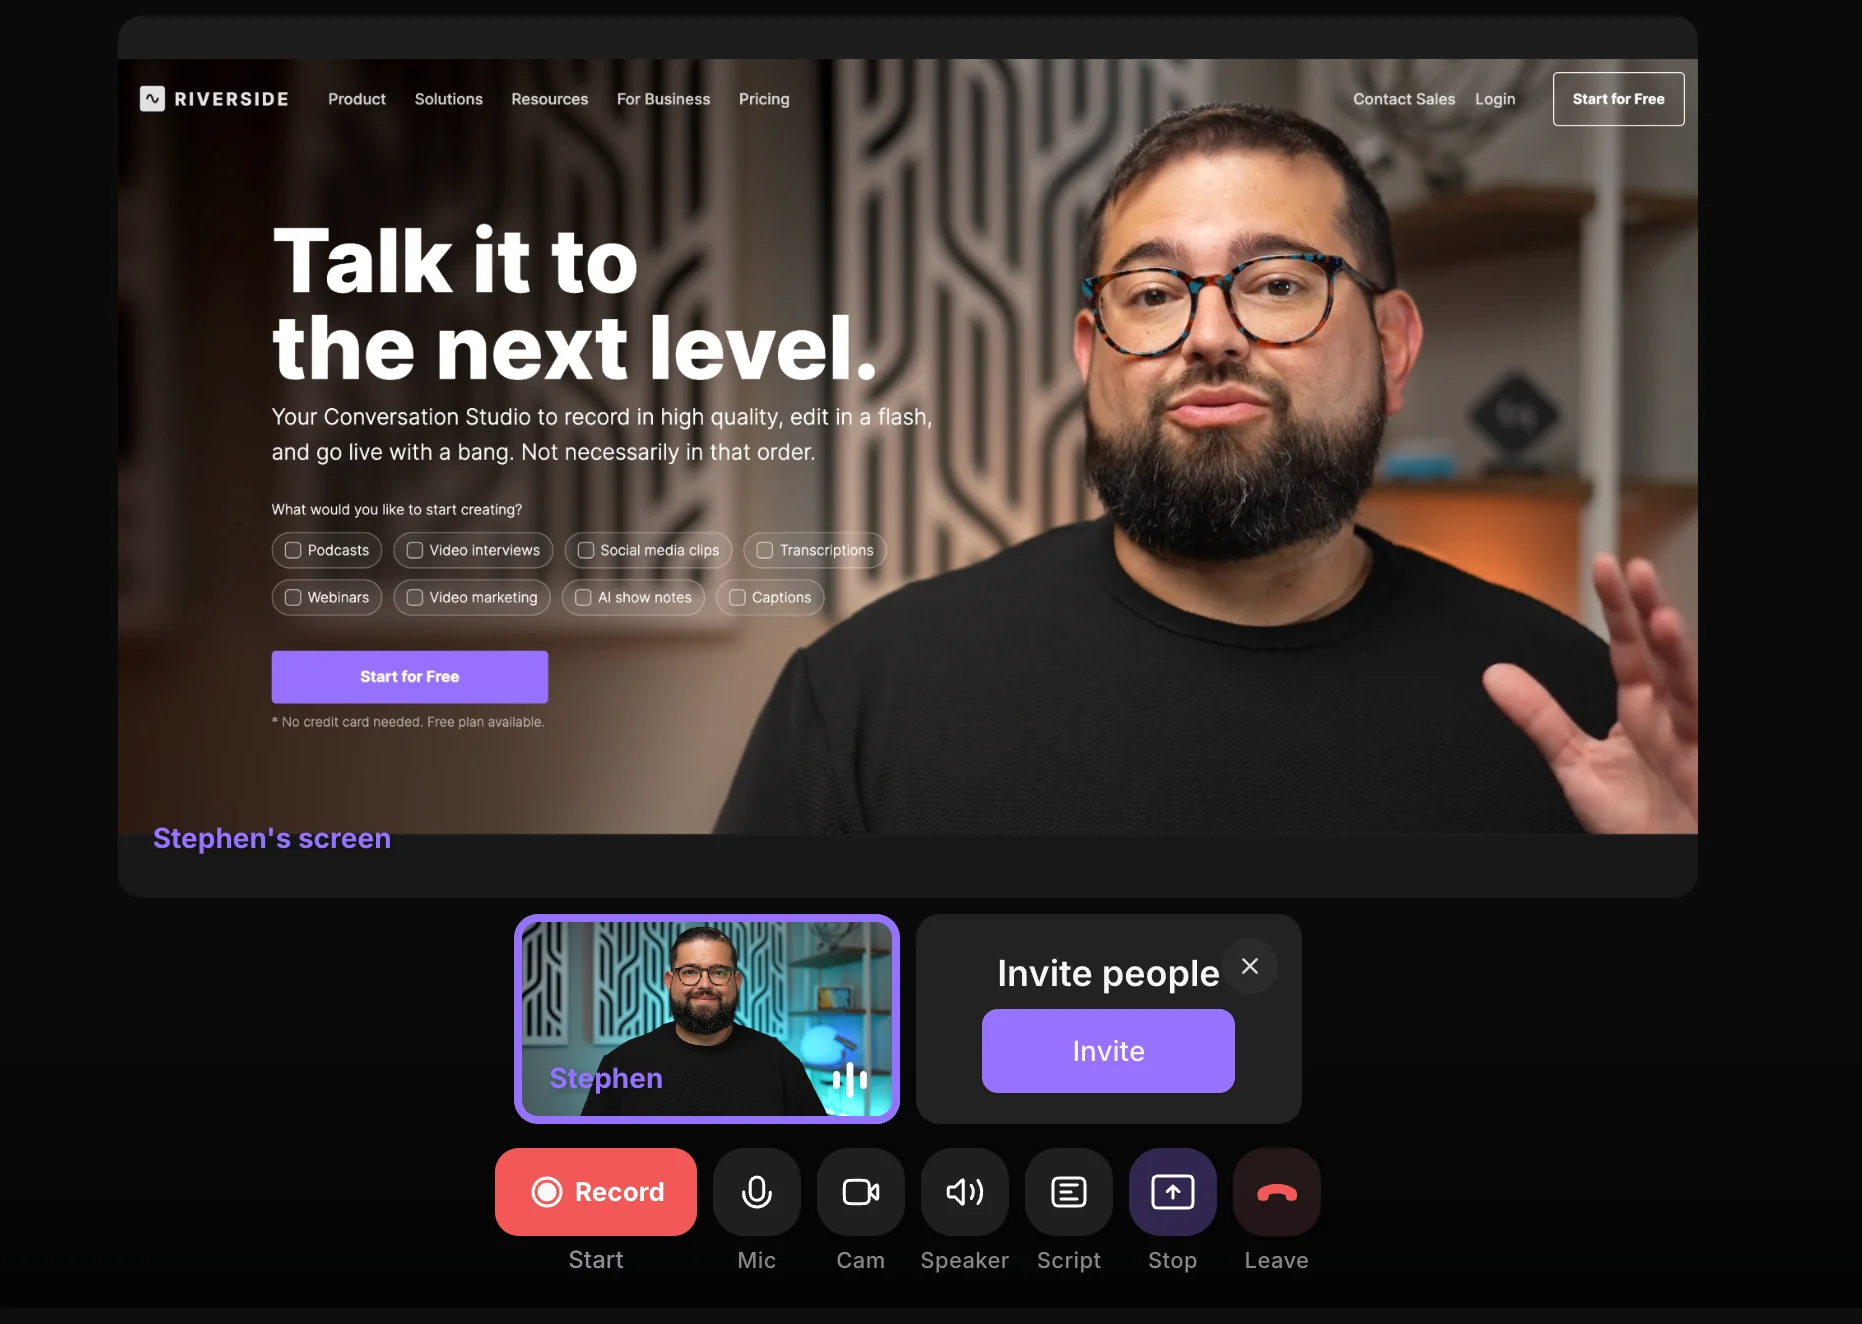
If you'd like to test everything before starting, click “Run test recording” to check your microphone, camera, and the overall audio and video quality.
You can also click “Invite” to send guests a link to join your recording.
To customize your recording use the right toolbar. Click:
- “Text” to add lower thirds or other text on your recording screen.
- “Media” to add pre-recorded music, sound effects or video.
.webp)
Step 4: Stop the recording
Once you finish recording, click the “Stop” button at the bottom of the screen. Wait a few seconds, then click the purple “View recordings” button that will pop up on the lower left corner to access your recording.
You can also find all your recordings in the “Projects” section of your main dashboard.
Step 5: Edit your recording
From your Projects window, hover on the recording you want to edit, then click on the “Edit” button to access Riverside’s video editor.
Here, you can polish your recording: trim it, add captions and overlays, customize logos and backgrounds, normalize audio levels, and more.
Step 6: Export your video
Once you’ve finished editing your video, click the "Export" button in the top right corner. Select the desired video quality, then tap "Export video."
Step 7: Download your video
Go back to the recording's dashboard to find your exported video at the bottom. Hover over the clip to reveal the "Download" button, then click to download your final video.
Record your screen on a Chromebook with a browser extension
Browser extensions are a middle-ground alternative between the simplicity of built-in tools and the precise control offered by full-fledged online platforms. They integrate directly into your Chrome browser and are ideal for capturing screen activities without leaving the browser.
Here’s how to install and use them:
Step 1: Search the browser extension
Open the Chrome Web Store.
Inside the Chrome Web Store, type the name of the screen recording extension you want to use, such as “Loom” or “Screencastify,” or simply type “screen recorder” to browse through the tools.
We'll use Loom for this example.
Step 2: Install the browser extension
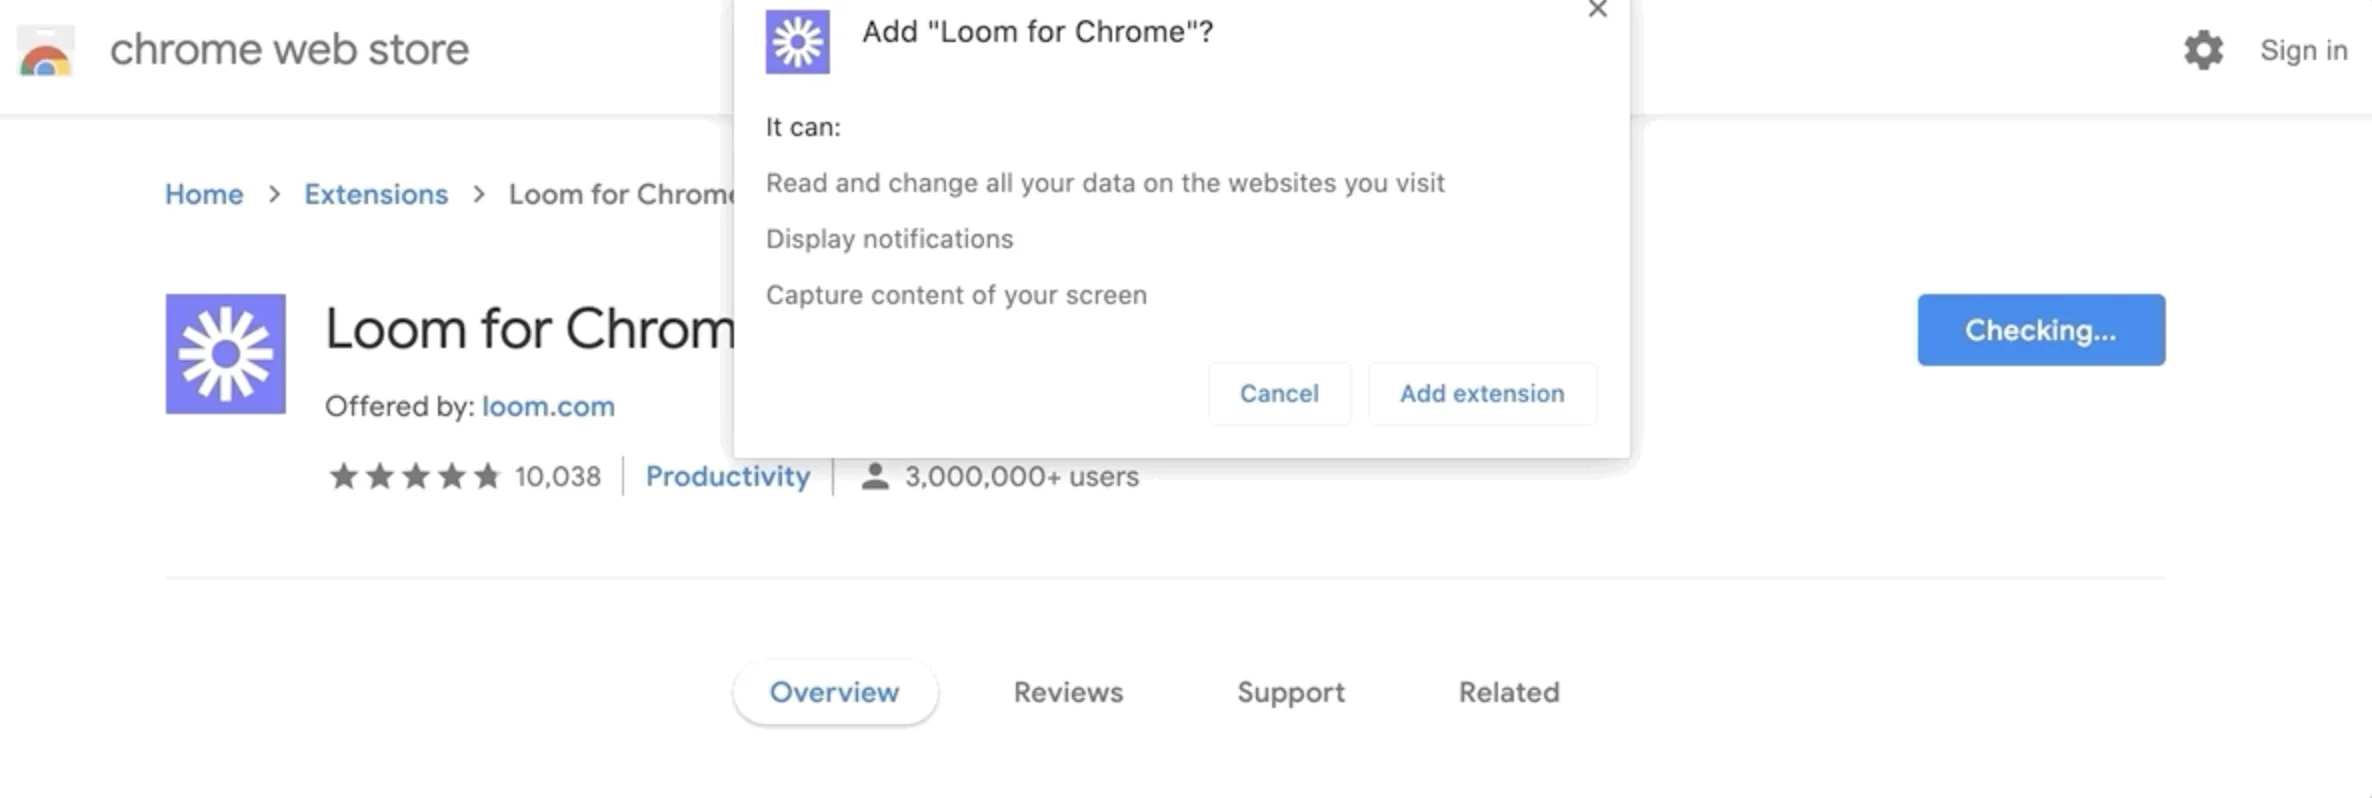
Once you’ve found the extension of your choice, click on it to open its page. Then, click the blue “Add to Chrome” button.
A pop-up window will appear asking you to confirm the installation. Click “Add Extension” to complete the process.
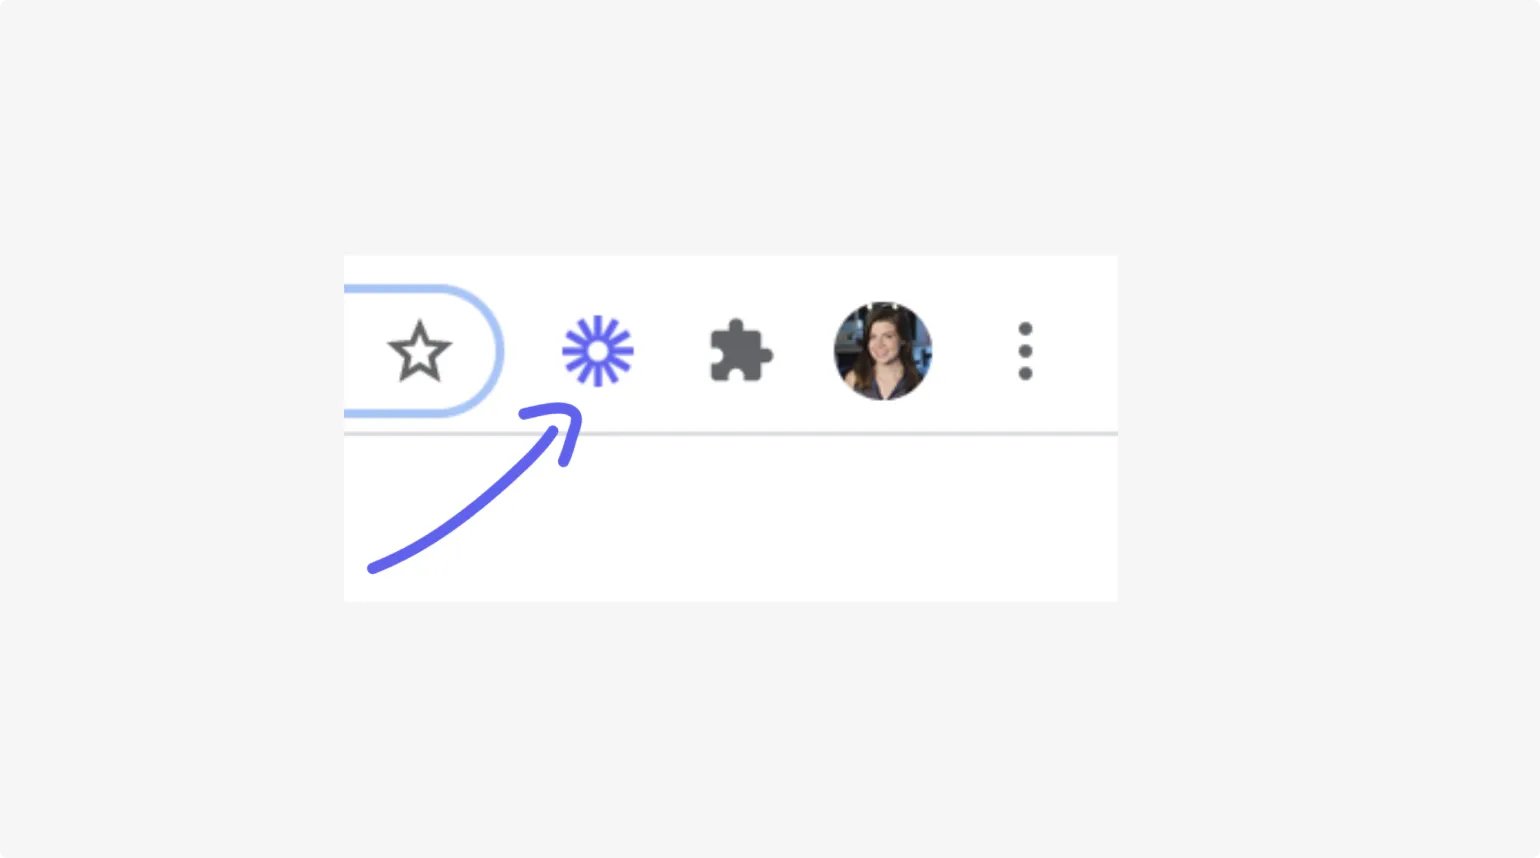
Step 3: Find the extension and pin it
The extension icon will now appear in your browser toolbar, on the right side of the address bar. If it doesn’t, click on the “Extensions” icon (a puzzle piece) in the top right corner to browse all installed extensions.
Find your screen recording tool’s icon, then click on the “Pin” icon to keep it visible in your toolbar.
Step 4: Set up the extension
Click on the extension icon in the toolbar to open it. Some screen recording extensions will require you to create an account and log in first.
Be sure to grant access to your microphone and camera to the browser extension, and select whether you want to enable them before launching it.
With Loom, you'll see a screen recording bar appear.
Step 5: Select screen size
Select the portion of the screen you want to share:
- Full Screen
- Partial Screen
- Window
You can also select with camera or microphone you're using.
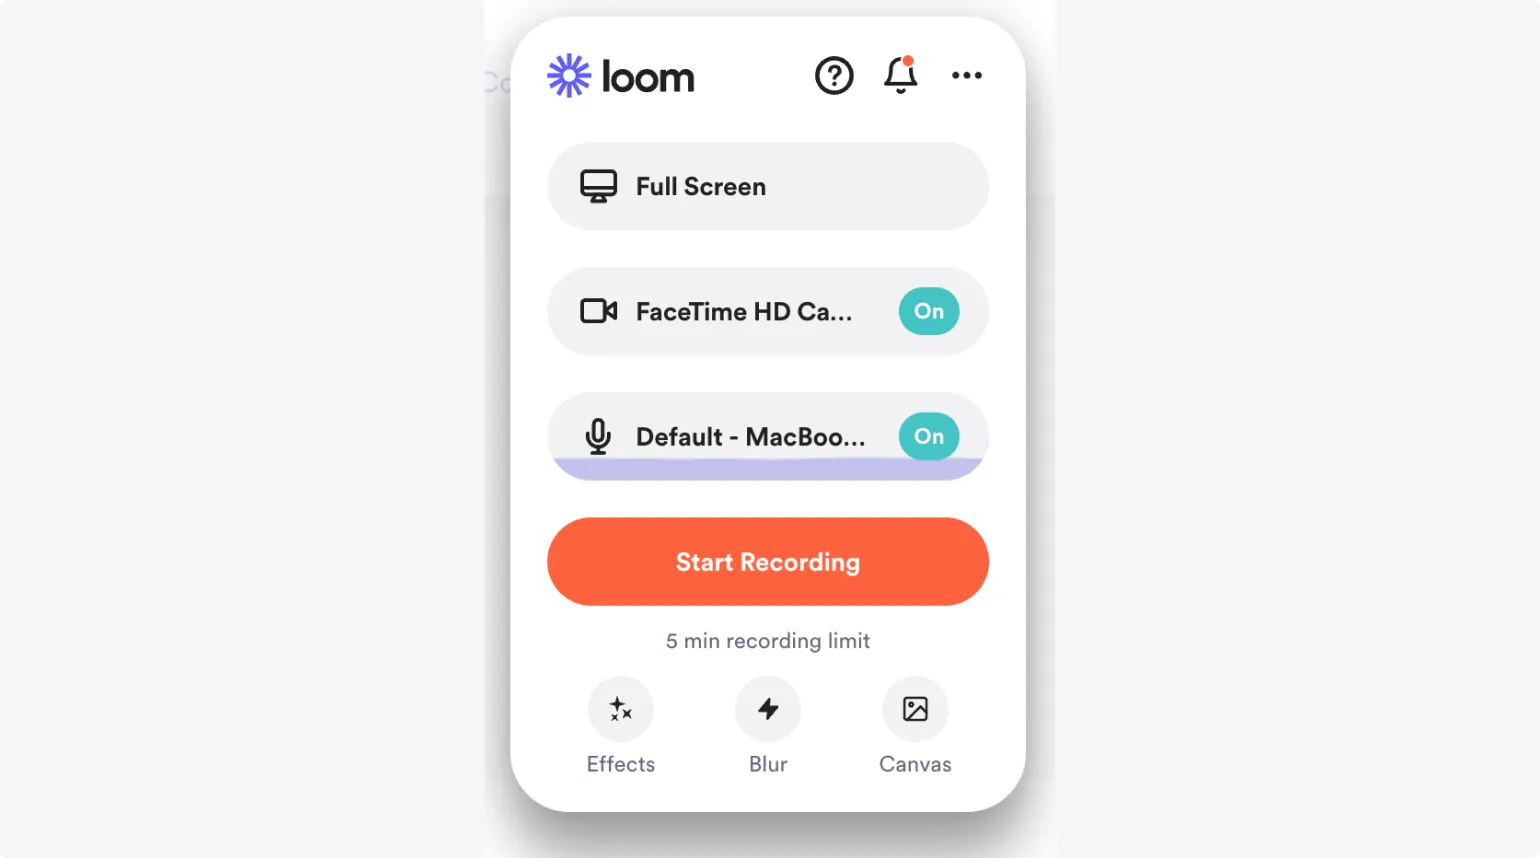
Step 6: Start the recording
Clicking the “Start Recording” button (or equivalent, depending what tool you're using).
Some extensions may give you a short countdown before beginning the recording.
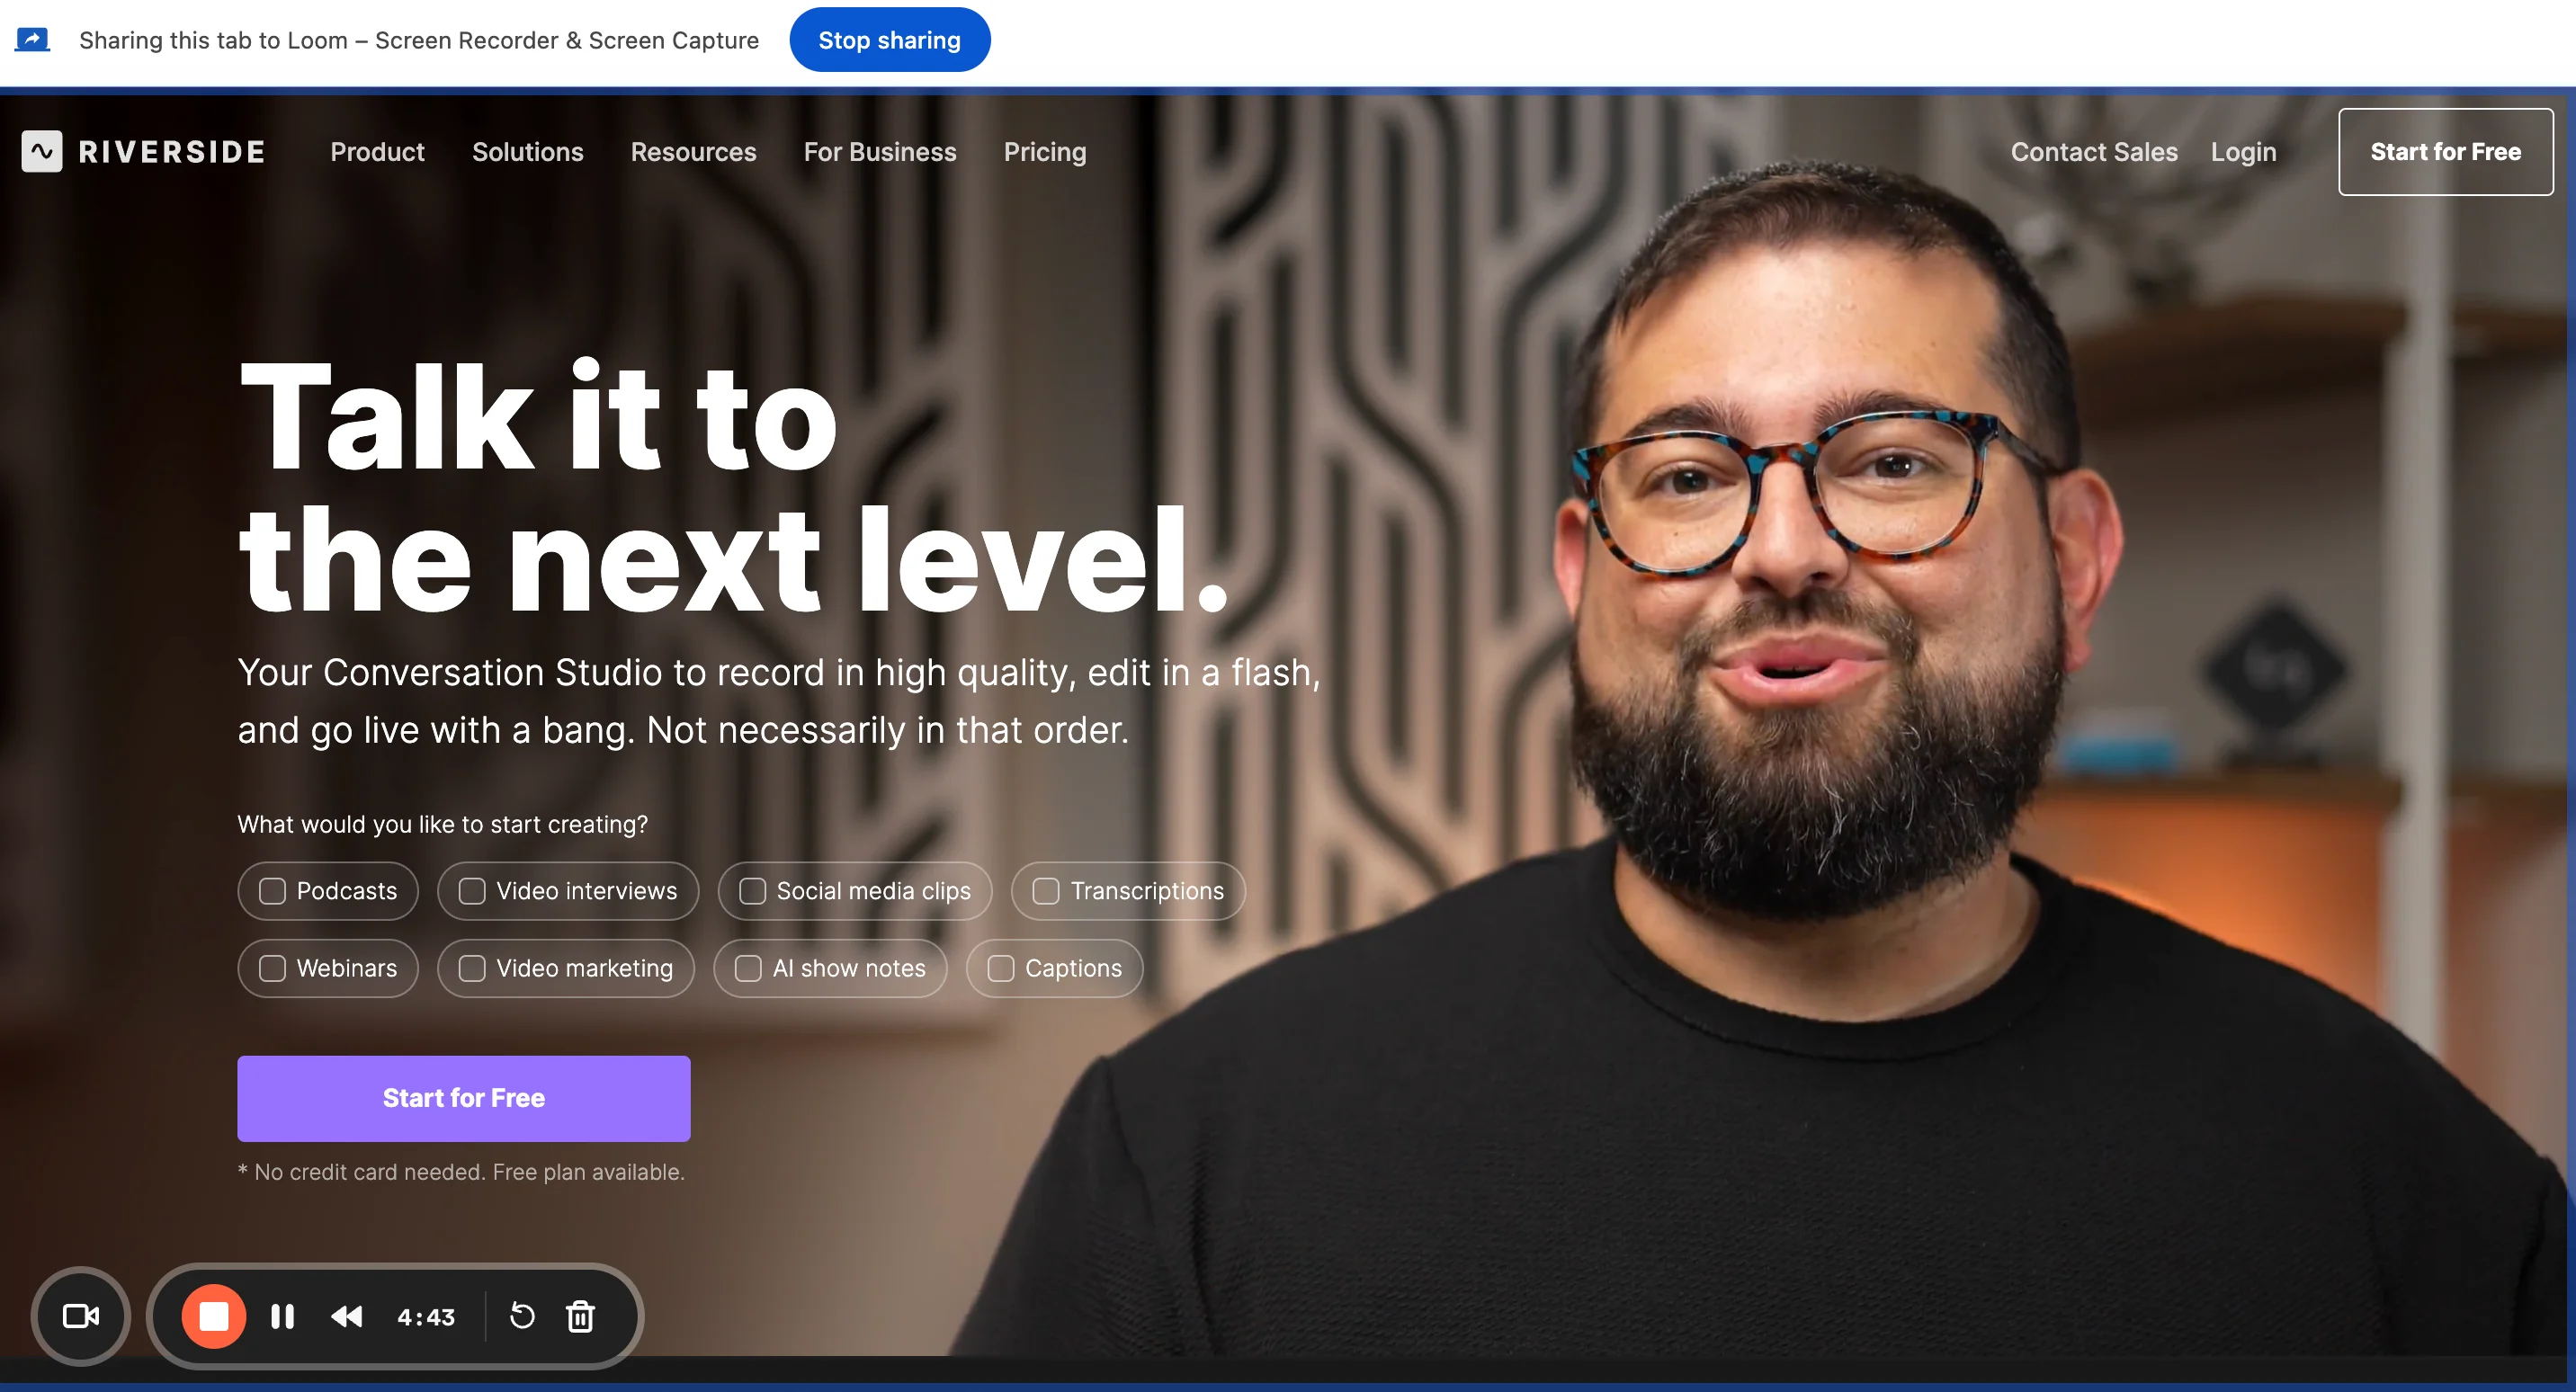
Step 7: Stop the recording
When you’re done, click the “Stop” button. This may appear in a small window, as part of the extension’s toolbar, or by clicking the extension icon again - depending on the extension’s interface.
For Loom this appears on the bottom left corner.
Step 8: Save and edit your recording
After finishing the recording, most extensions will let you save the video to your device or upload it directly to cloud services like Google Drive or Dropbox.
Some also provide direct sharing links and a dashboard where your recordings are stored. From there, you can view, download, or further edit your videos. Many extensions offer basic editing tools, such as trimming, cutting sections, adding text, or highlighting key points.
If you're using Loom, you'll automatically get redirected to a page where you can download and share your recording.
Final thoughts
Screen recording on a Chromebook is a very straightforward process thanks to its built-in tools like the Screen Capture tool and the Screencast app. However, while these native features are okay for a quick presentation or tutorial, they don’t go much further beyond basic recording. If you require more advanced functionality, such as higher-quality video, multi-track editing, or automatic captions, you should look for online solutions like Riverside.
FAQs on how to screen record on Chrome
Still need more information? Here are the answers to some frequently asked questions.
Does the Chromebook have a screen recorder?
Yes, Chromebooks running Chrome OS 89 or later have a basic built-in screen recorder available. You can access it either with keyboard shortcuts or by launching the Screen Capture tool in the Quick Settings menu. Chromebooks running Chrome OS 104 or later also support screen recording through the Screencast app.
How to screen record on Chromebook with audio?
To screen record on a Chromebook with audio, launch the native screen recording tool. Before you start the recording, click the “Settings” icon at the bottom. Here, select “Device Audio” and/or “Microphone” if you want to include audio in your recording.
What is the best free screen recorder for Chromebook?
The best free screen recorder for Chromebook is Riverside. It offers high-quality video, uncompressed audio, multitrack recording, and cloud storage. Unlike most browser-based extensions or built-in tools, Riverside allows you to add sound, music, and text during the recording. And you don’t have to settle for the initial recording - our text-based editor and AI-powered Magic Audio tools make it easy to fine-tune your footage and optimize audio quality.
How do I enable Chrome recorder?
To enable Chromebook's screen recorder, hold down “Shift” + “Ctrl” + “Show Windows”, then select “Screen Capture” and choose the video option to record your screen. Choose the part of the screen you want to share, then click on the red “Record” button to start.
How do I Record myself and my screen at the same time on Chromebook?
To record both yourself and your screen on a Chromebook, launch the built-in Screen Capture tool or Screencast and ensure your webcam is enabled. Select the area you want to record, toggle on the “Front Camera” option. Your webcam feed will appear as a small overlay on the bottom right corner of your screen.


.webp)
-(1).webp)
.png)

