


Table of contents:
How to automatically add subtitles or captions in Premiere Pro
How to import captions or subtitles into Premiere Pro
How to add subtitles or captions to a video in Premiere Pro manually
Exporting your video with subtitles in Premiere Pro
Troubleshooting common subtitle issues in Premiere Pro
An easier Premiere Pro alternative: How to add subtitles with Riverside
Key takeaways:
- Automatically transcribe with Premiere Pro: Premiere Pro version 15.4 (and above) allows you to transcribe and add captions to your videos automatically.
- Manually transcribing your captions is possible: Manually transcribing your videos in Premiere Pro is an option but is time-consuming.
- Create caption presets: In Premiere Pro, you can create caption presets to achieve a consistent look every time.
- Riverside is a more intuitive alternative: Riverside automatically transcribes content and enables you to create subtitles and captions in just a few clicks.
Subtitles and captions aren’t just a nice-to-have—they’re essential for grabbing attention, keeping viewers engaged, and boosting your video’s discoverability.
In this step-by-step guide, you’ll learn how to add subtitles in the popular video editing tool Adobe Premiere Pro, transforming your content into polished, professional videos.
Let’s dive in!
How to automatically add subtitles or captions in Premiere Pro
If you have a deadline looming and want to add captions quickly, the easiest way to add video subtitles is using Premiere Pro’s built-in auto-captions feature.
Simply follow these steps:
Step 1: Open the auto-captions menu
With the dashboard open, head to the timeline and select the specific audio file for which you want to generate captions. You can highlight the entire audio file or a particular section.
Go to “Window” at the top right of the screen and then “Captions and Graphics.”
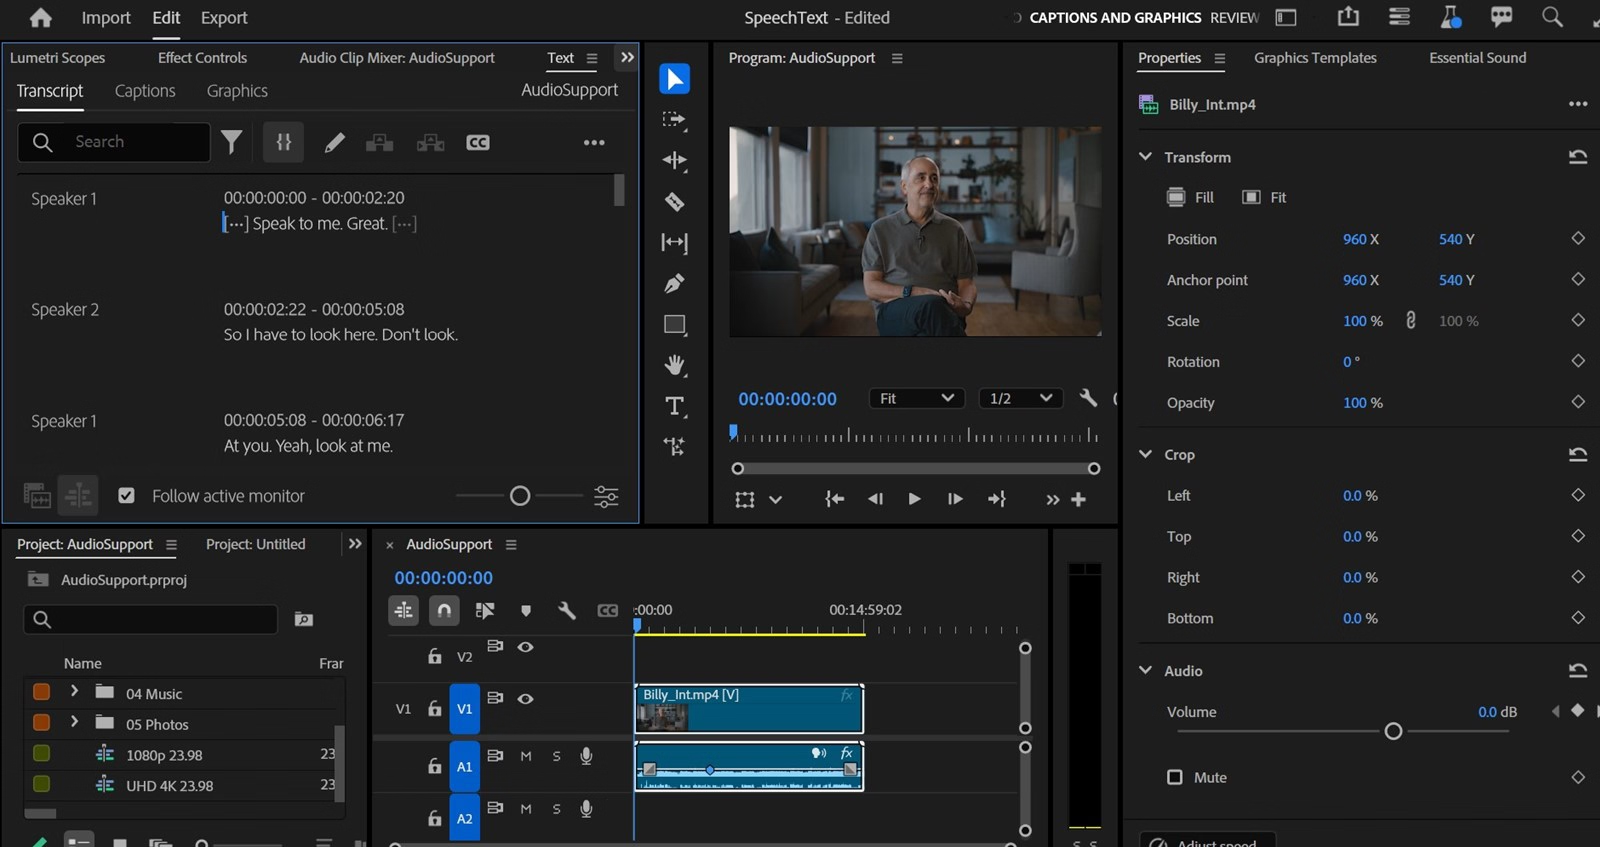
Step 2: Transcribe your audio
Once the captions menu is open, select “Transcribe,” Premiere Pro will automatically generate a transcript for you. It can take up to a few minutes to transcribe, depending on how long your audio file is.
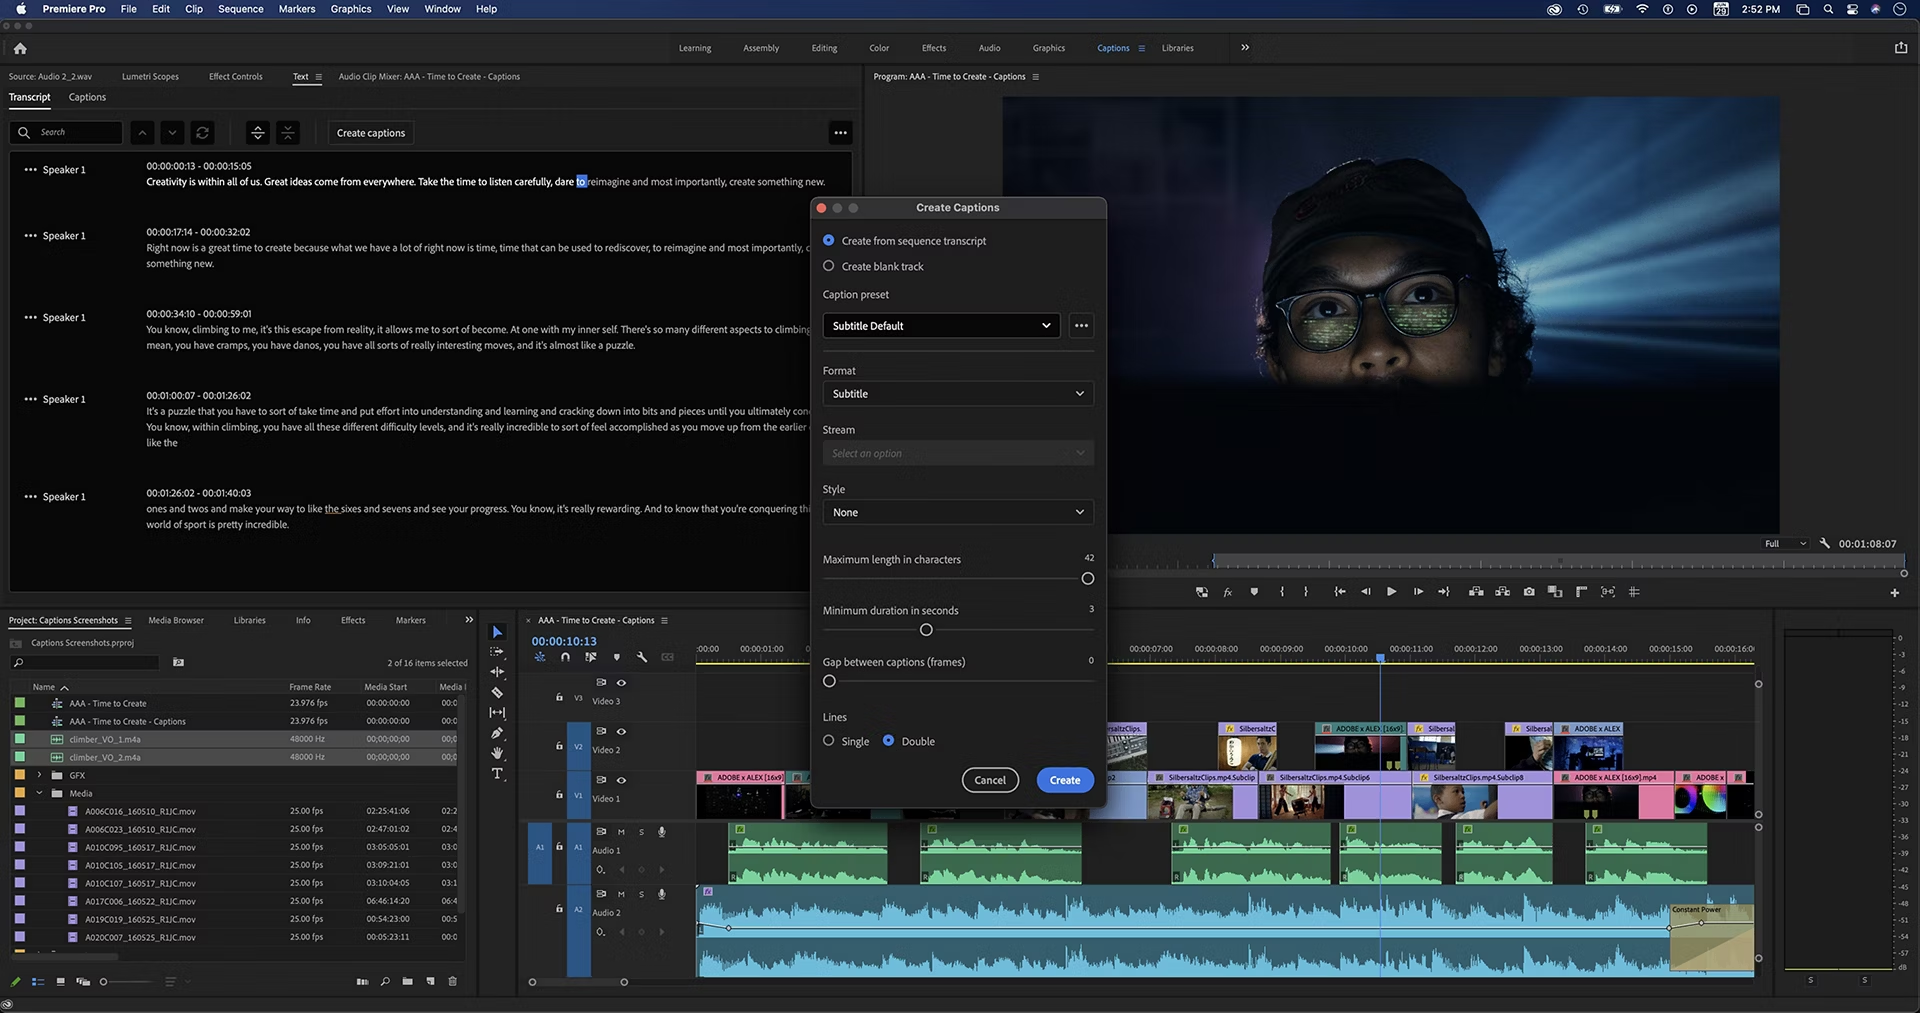
Step 3: Format your captions
Once the transcription is ready, select the “Closed Captions” icon (represented by the letters CC enclosed within a box). This will bring up a menu to format your captions.
Here, you can choose your captioning preferences, such as formatting, length in characters, duration, and whether you want single or double lines.
When you’re happy, click “Create Captions.”
Step 4: Customize your captions
Now, it’s time to customize how your captions appear on the screen. In the timeline, highlight the captions and head to “Essential Graphics.”
If you can’t see “Essential Graphics,” head to “Window” in the top left-hand side of the screen and make sure it’s selected.
Now, it’s time to get creative. You can customize the font, text size, alignment, and other elements.
How to import captions or subtitles into Premiere Pro
Are you one step ahead and already have the transcription file ready? You’ll be pleased to know that you can import this into Premiere Pro.
Follow these steps:
Step 1: Import your captions
On the dashboard, select the “Text” tab (at the top left of the screen). If you don’t see this, go to “Window” and “Captions and Graphics.”
You’ll see two options: “Create new caption track” and “Import captions from file.” Selecting the latter will bring up your device library.
Locate your captions (it needs to be an SRT file) and then hit “Open.”
Pro tip: Use the shortcut “Cmd” + I on your keyboard to bring up your library.
You’ll then see the “Caption Track” window. Select the start point for your captions, and then select “OK.”
Once your captions have been added, they will appear at the top of your timeline.
Step 2: Edit your captions
You can check for errors and make edits to your captions. Simply highlight your subtitles and click on the “Captions” tab (left-hand side of the screen).
Select the pencil icon just above your transcript to edit the caption text.
Step 3: Customize your captions
Once you're happy with the transcription, you can customize how your captions appear on the screen.
Head to “Essential Graphics.” If you can’t see it, highlight it in the “Window” menu at the top of the screen.
Here, you can customize the font, text size, alignment, background color, and more.
Read more: Closed Captions vs Subtitles: The Difference & When to Use Each
How to add subtitles or captions to a video in Premiere Pro manually
Manually adding subtitles and captions is time-consuming. But, if you prefer to do it this way, follow these steps:
Step 1: Create a new caption track
Head to the “Text” tab on your Premiere Pro dashboard. If you don’t see this, go to “Window” and “Captions and Graphics.”
Select “Create new caption track.”
Next, select “Subtitle” and then hit “OK.” Subtitles will appear towards the top of your timeline.
Step 2: Create your captions
In the “Text” tab (top left-hand corner), click the “+” icon, and Premiere Pro will add a new caption line.
Listen to the segment and type out the audio. Repeat this process until you have transcribed and captioned the entire video.
You can adjust the timing of your captions by clicking and tracking the separate caption tracks on the timeline.
Step 3: Check for mistakes
Once you have transcribed your audio, make sure to check for any errors, such as spelling mistakes.
You can make further edits to your transcript and subtitles at any time. If it’s a particularly long audio file, take regular breaks. Stepping away from the screen and resting your eyes will help you edit more accurately.
Exporting your video with subtitles in Premiere Pro
Exporting your videos with accompanying subtitles is easy in Premiere Pro; simply follow these steps:
- Go to the “Export” screen in the dashboard or use the keyboard shortcut “Cmd” + “M.”
- Ensure “Captions” is switched on, and then select the drop-down.
- In the export options, select “Burn captions into video” (this will be selected by default).
- Hit “Export” and wait for Premiere Pro to save the video with the burned-in captions.
How to export subtitles separately
You can export the video and subtitles separately if you don’t want the captions to appear on the screen. In the export options, select “Create Sidecar File.” Premiere Pro will export the video and a separate SRT file for your captions.
If you export this way, your captions will not be burned into the video, so they will not automatically display on the screen.
This is useful when uploading the transcript file separately from the video to places such as YouTube or LinkedIn.
Troubleshooting common subtitle issues in Premiere Pro
Encountering issues with subtitles can be frustrating, but troubleshooting them doesn't have to be a daunting task. Here are some practical tips for resolving common problems that often arise when adding captions in Premiere Pro.
Captions not showing up in Premiere Pro
Are captions not displaying? This is frustrating, but there’s often an easy fix.
First, check if you are using the latest edition of Premiere Pro. Sometimes, an update can fix this issue.
You could also have an issue with your Workspace. Premiere Pro Workspaces are great for personalizing things but can cause bugs and glitches. A quick reset may fix the problem. Go to “Window,” “Workspace,” and then “Reset to Saved Layout.”
Lastly, quickly deleting and re-uploading the captions could fix the problem. If that still doesn’t work, contact Premiere Pro’s support.
Issues importing the SRT file into Premiere Pro
Occasionally, Premiere Pro can have issues importing SRT files. This usually involves formatting issues, such as additional blank lines or characters that Premiere Pro can’t process.
If you run into this issue, address the above and try to re-upload the SRT file.
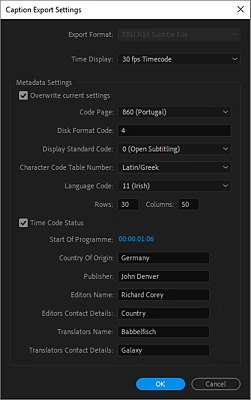
SRT caption file and video aren’t the same dimensions
Let’s say your video dimensions are 1920p X 1080p, but your caption SRT file is a different size. In this case, it may not display properly in Premiere Pro.
This is easy to fix. Right-click on your SRT file, select “Modify,” then select “Captions.” In the “Captions” tab, ensure your caption file is the same size as your video by typing in the correct size and hitting “OK.”
An easier Premiere Pro alternative: How to add subtitles with Riverside
If you’re looking for an alternative to Premiere Pro, look no further than Riverside. It provides a much simpler interface compared to Premiere Pro. It also provides tools for more dynamic captions, with many options for styling, font, and placement. Plus, you can even record your content on Riverside, making it a one-stop shop for video creation and editing - including adding captions.
Add subtitles in a matter of minutes with Riverside, following these steps:
Login to Riverside.
Select your Studio and the video to which you want to add captions (you can also upload a video to Riverside).
Click the “Scissors” icon to open your video in the Riverside editor.
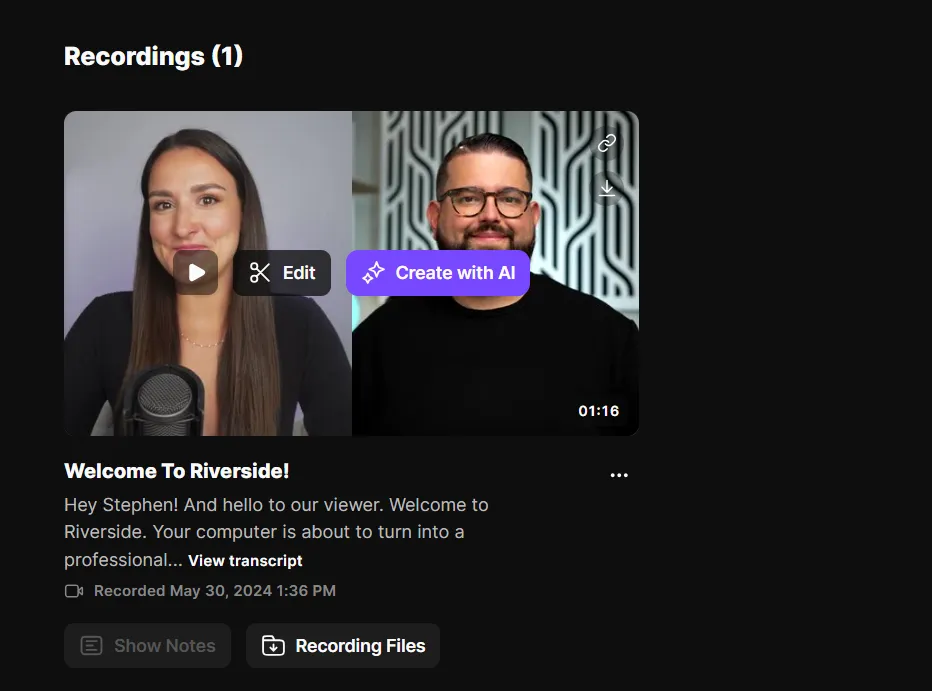
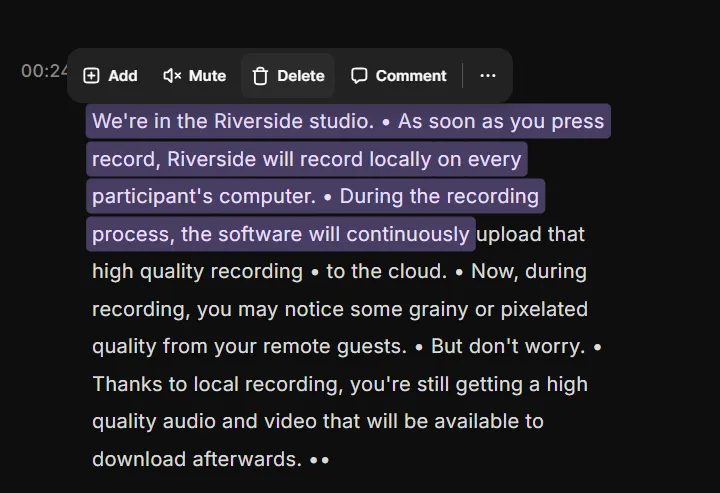
You’ll see your video on the right side of the screen and Riverside’s automatic transcriptions on the left-hand side.
Trim your video using the video timeline at the bottom of your screen. Or, you can use the text-based editor to trim words from your transcript, and the corresponding video will disappear.
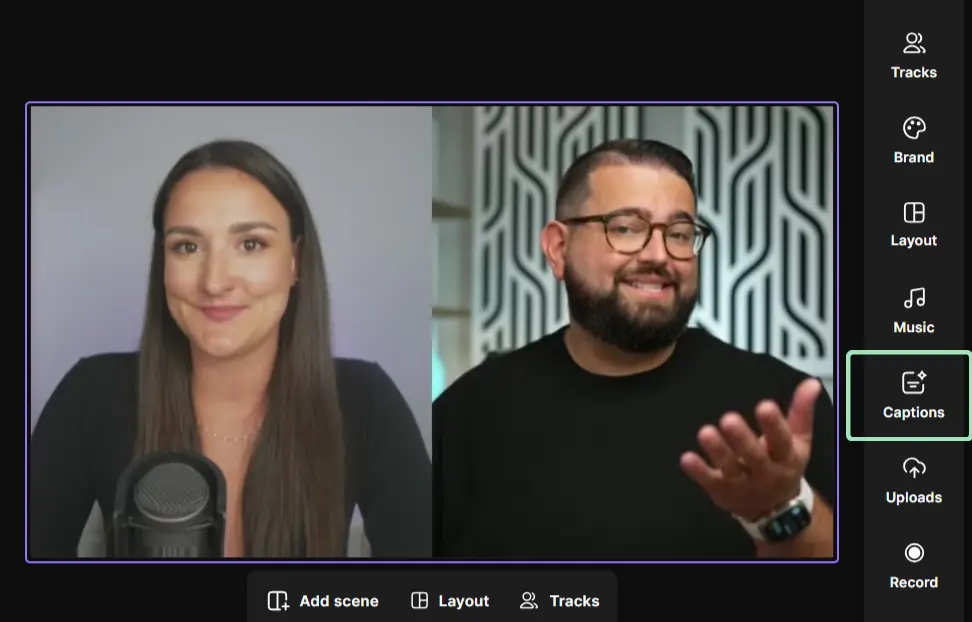
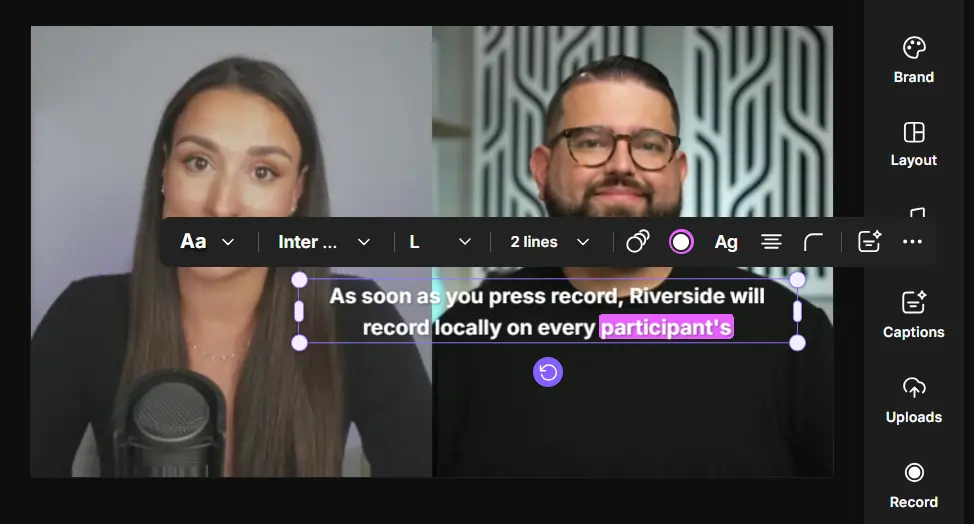
Select the “Captions” icon in the toolbar on the right side of your screen.
Choose the style of your captions. You can also adjust font, size, case, color, and alignment.
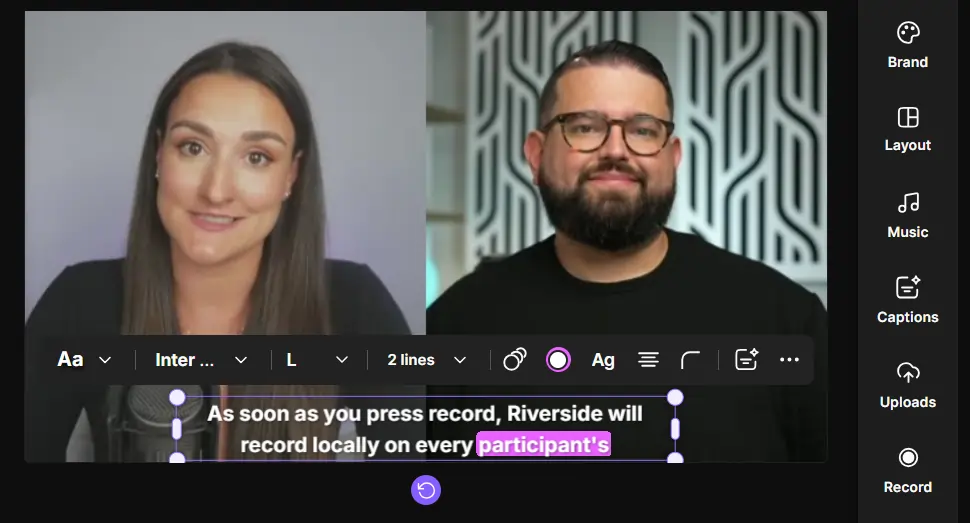
Choose where you want the captions to display by clicking and dragging them around on the screen.
When you’re happy with your edit, click “Export” at the top right of the screen.
It really is as simple and easy as that! Riverside can also accurately transcribe your content in 100+ languages, allowing you to create captions and subtitles for just about any audience in the world.
Final thoughts
For seasoned video editors, Premiere Pro is a solid option for adding captions and subtitles to videos. You can automate the process or manually add them. You can even create caption presets to speed up the workflow.
Premiere Pro does have a steep learning curve, though. If you’re struggling, Riverside’s caption tool is suitable for all levels of video editors. It allows you to create custom, professional-looking captions in minutes.
Whether you use Premiere Pro or Riverside, remember to have fun and enjoy the creative process.
FAQs on How to add subtitles and captions in Premiere Pro
Which subtitle formats does Premiere Pro support?
Premiere Pro only supports SRT files when uploading video captions. SRT stands for SubRip Subtitle, the most common file format for captions and subtitles.
What version of Premiere Pro has auto-captions?
Auto-captions was first introduced by Premiere Pro in 2021, with their 15.4 version of the software. With the Speech to Text software, users can automatically generate captions for their videos directly from within the platform without using an external tool.
Can you create dynamic captions in Premiere Pro?
Dynamic captions incorporate stylistic enhancements—such as animations, color changes, and varying font sizes—to align with the video's content and tone. You can apply these effects in Premiere Pro in a few ways:
- Navigate to the “Effects” panel in Premiere Pro to use the text animation presets. Choose a preset and drag it onto your timeline's text layer.
- Apply animation by right-clicking and selecting “Upgrade Caption to Graphic” in the captions editor. Then, use keyframes to animate text properties.
- Use plugins like SubMachine and Captioner, which have extensive customization options for captions, including Motion Graphic Templates.
How do you create your own captions preset on Premiere Pro?
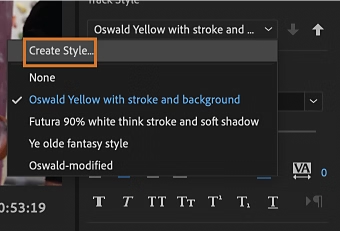
To create captions presets in Premiere Pro, double-click the subtitle track on your timeline to open “Essential Graphics.” Here, you can play around with how you want your captions to display, such as changing the font, text size, alignment, color, etc.
Now, it’s time to save it as a preset. To do this, go to “Track Style,” “Create Style,” and then give it a name. Then, hit “OK” to save your preset.
The next time you generate a transcript and captions, you can automatically select that style for faster and easier editing.

.webp)


.webp)

