.webp)


Table of contents:
It’s time to start capturing better recordings and transforming your Zoom presentations into fresh content opportunities. There’s so much that you can create.
By learning how to record presentations on Zoom and achieve better audio and video quality, you can take control of your production strategy. You can capture Zoom recordings that allow you to clearly communicate important concepts and ideas with an audience. You can create video materials for use in training, marketing, communication, and more!
Want to record your Zoom presentation but not sure how to start? We’ve put together this helpful step-by-step guide to help you along the way. Here’s everything you need to know about Zoom presentation recording.
Can you screen-record a presentation on Zoom?
You can easily use Zoom’s screen-share feature and recording capabilities to capture a presentation. To record on Zoom, you’ll have to host the presentation meeting, or you’ll need special permissions.
If you’re a participant and don’t have permission, then another option is to use external software. You can use your device’s in-built screen recording tools or another screen recording software platform to record Zoom presentations.
Using a non-native recording tool to capture Zoom content can have some drawbacks. These recordings are likely to achieve a lower overall quality. In your final recording, the sound may be crackly, and video resolution may be low, reducing your content’s professional value.
How to easily record a presentation on Zoom
Recording a presentation on Zoom is easy when you know what you’re doing! In fact, as a presentation host, you can quickly and easily set up recording without ever leaving the Zoom app.
To get started with your Zoom presentation recording, follow these simple steps.
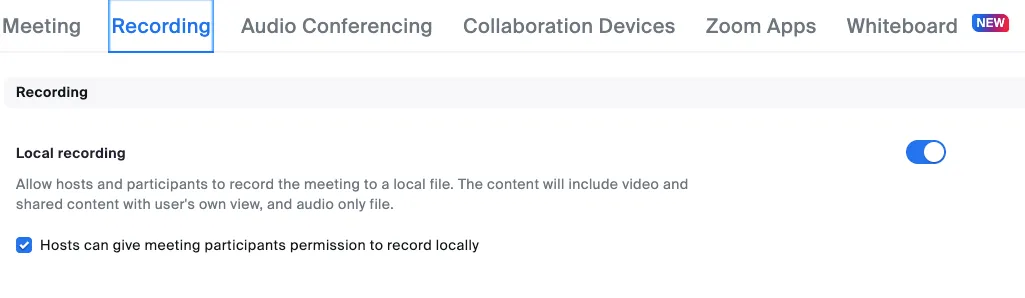
Step 1: Open your Zoom account, and navigate to the ‘Settings’ menu. Here, select ‘Recordings’, and ensure that ‘Local recordings’ are switched on.
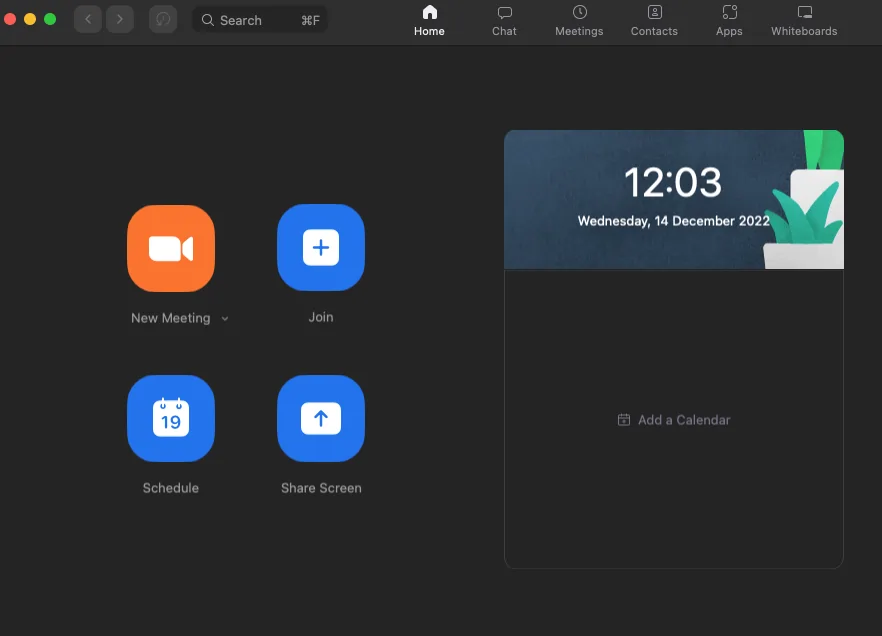
Step 2: Next, navigate to your home screen and launch a call by pressing the ‘New Meeting’ button. If prompted, select ‘join with computer audio’, or choose another microphone.
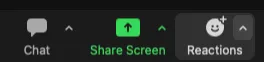
Step 3: Before you begin, import and/or open any presentation materials you’ll need, such as slides or images. You can easily share presentation materials by using the ‘Share Screen’ option and selecting the relevant tab where your materials are located.
Step 4: Check that you are unmuted. If you need to record video of yourself, ensure that your webcam is switched on, and select ‘Start Video’ from the bar menu at the bottom of your screen.
Step 5: Ensure that everything you need for your presentation is working correctly before beginning your recording. When you’re ready, select record from the bar at the bottom of your screen.
Choose whether to do a Zoom local recording on your computer, saving your recording to your desktop, or record to the cloud, recording to your Zoom account.
Step 6: Start your presentation, and work through your materials while Zoom records.
When your presentation is complete, press ‘Stop Recording’, and then press ‘End’ and ‘End meeting for all’ to close off the recording.
Step 8: Once your Zoom meeting has ended, locate your recorded files. If you chose to save files locally on your computer, you’ll find them on your desktop or in your device’s documents folder. If you recorded to the cloud, you’ll receive an email when your files are ready.
Step 9: Edit, trim, or refine your recording on your video editor of choice. Then prepare to share it as a training resource, marketing asset, or something else.
How to record a presentation on Zoom as a participant
Generally, speaking, Zoom’s in-built recording tools allow meeting hosts to capture the call.
If you’d like to record a Zoom presentation as a call participant, you’ll need to obtain permission from the host of the call, or you’ll need to be invited as an alternative host. You’ll then be able to use the app’s standard recording tools.
As a standard Zoom participant, it is unfortunately not possible to record content. In this case, it’s best to ask the call host to record content for you. Another option is to use external recording software.
To record your Zoom presentation using an external screen recorder, follow these steps:
Step 1: Choose your software system.
Step 2: Launch your Zoom meeting, and set up your presentation.
Step 3: Follow your software’s instructions to record your screen.
Step 4: Once your presentation is complete, stop your recording and save your files.
Is Zoom your best option for recording a presentation?
Zoom offers great native recording features that can help you easily capture presentation content. However, that doesn’t mean that Zoom is the best recording tool on the market.
In some instances, Zoom recordings can be prone to low recording quality. This may compromise your professionalism, and make it difficult to see or hear your recordings clearly. This is usually because Zoom relies on internet connection for recording. If you have connection problems your resolution suffers. It’s also worth knowing that Zoom doesn’t offer separate video or screen-share tracks which limits your editing flexibility.
If you want to explore Zoom alternatives, there are plenty of great ones to choose from, with some tools offering a range of extra features and functionalities that will help you produce better presentations than ever before.
We have a full guide on Zoom alternatives. Although, with recording files unaffected by your internet connection, and with high-quality resolution, Riverside is a risk-free bet.
“Riverside is far better than Zoom for recording interviews.” - Seth Godin, author, entrepreneur and marketing leader.
Recording presentations with Riverside
Riverside offers a seamless presentation recording experience. This video recording software is best for high-quality audio and video, captured from any location. It’s got all the remote recording tools you need, and with a built-in editor plus separate tracks of your screen, video and audio, post-production becomes much easier.
Riverside features and functionalities include:
- Studio-quality results, offering up to 4K video resolution and 48kHZ audio quality
- Local video and audio recordings which means everything is captured directly on your device and unaffected by unstable internet connection
- Separate screen, audio, and video tracks for each participant, providing better editing control
- Up to 10 participants in one recording and up to 1,000 audience members
- Cloud storage, including automatic uploading, so that you can save time and keep files secure
- User-friendly interface that anyone can use, regardless of skill level
- Desktop and mobile software versions, helping to record content anytime, anywhere
- Native editing tools for customized logos and backgrounds plus automatic audio fine-tuning
- Text-based video editing so you can create professional content as easily as editing a text transcript
- Magic Clips tool for turning your long-form recordings into multiple short clips at the tap of a button
To start experiencing all these benefits and more, start recording on Riverside!
How to record a video presentation with Riverside
Ready to give Riverside a try for your next recording? Follow these simple steps to get started.
Step 1: Create a Riverside account, and start your journey.
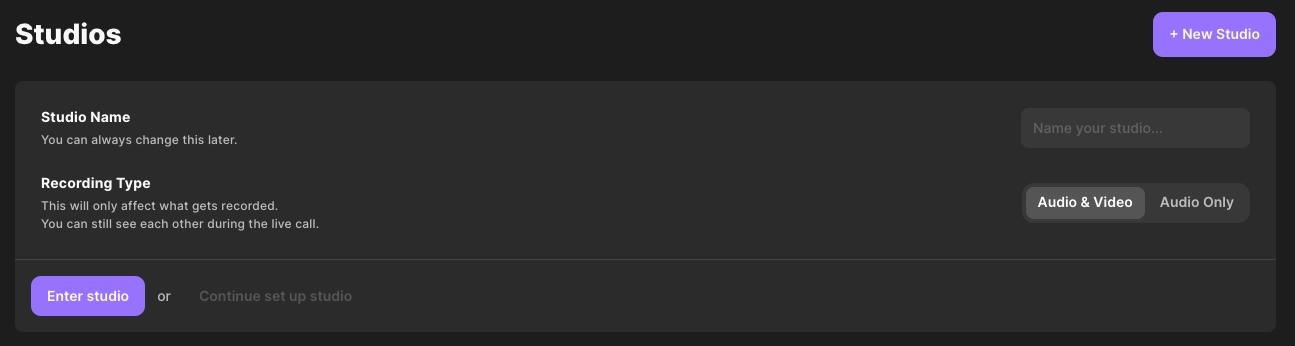
Step 2: Go to your Studios dashboard, and select ‘+ New Studio’ at the top right of your screen. Name your studio, and choose ‘Audio & Video’ as your recording type.
Then you can either choose to adjust settings by selecting ‘Continue set up studio’ or you can select ‘Enter Studio’ to get recording.
Step 3: On the next screen, check that you are joining as a host, and verify your chosen camera and microphone options on the right side of your screen. Select whether or not you’re using headphones. Then press ‘Join Studio’.
.webp)
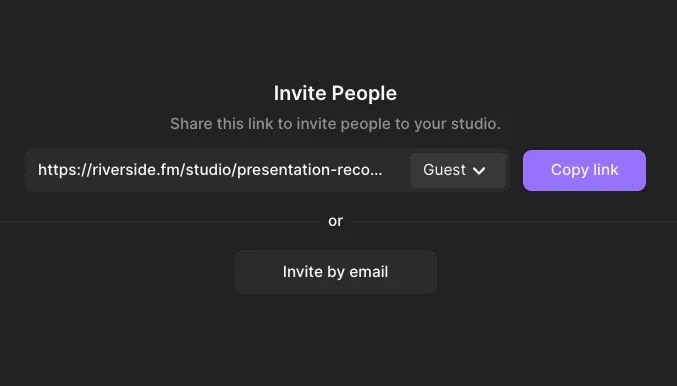
Step 4: If you haven’t already, invite your remote guests.
To do this from the studio, simply select ‘Copy link’ or ‘Invite by email’ on the right Invite People tab.
If this doesn’t appear or you’d like to add more guests later on, select ‘+ Invite’ from the right Studio dashboard.
Step 5: Next, you can start preparing your presentation.
At the bottom of your screen, use the menu bar to select ‘Share’. Then select the open tab or window on your device where your presentation materials are located.

Step 6: Once you’ve set up these details, select ‘Record’ from the bar menu at the bottom of your screen, and start recording your presentation.
Step 7: Throughout your recording, use the ‘Mark Clip’ button to mark sections of your recording that stand out and could be used later to create short-form videos.
Step 8: When your presentation is complete, press ‘Stop’ to end the recording.
Step 9: Once the files have finished uploading, go to the right side of your screen, select ‘View recordings’.
Step 10: Here, use the ‘Edit & create clips’ button to access Riverside's in-built editing tools. When you’re ready, choose ‘Export’ to save and download your recorded content.
You can also download your files as separate tracks for your own editing. To do this, don’t select Edit, but select the files you want to download and press ‘Export’. You’ll also have the option to download files directly into a Descript or PremierePro timeline-suitable format.
Step 11: Prepare to share your presentation recording as part of your training process, marketing strategy, or something else entirely.

FAQs on how to record a presentation on Zoom
Are you still wondering how to record a presentation with ease? Here are our answers to a few of our most frequently asked questions.
How do I record myself presenting slides?
The good news is that you can easily capture your slides as part of your presentation recording! The simplest way to achieve this is by opening your slides in a separate window or tab on your device. Then you can use Zoom’s screen-share feature to record those slides, selecting the destination tab and sharing your screen for the duration of your call.
Can you record a Zoom session if you are not the host?
Unfortunately, Zoom is not designed to allow call participants to record content. If you’re not the host of your call, you’ll need to request hosting or recording permissions from the person who is. Alternatively, you can ask the call host to record on your behalf or use external screen recording if you have the consent of other participants.
How do you record a presentation with camera?
You can integrate webcam footage as part of your presentation recording simply by using Zoom’s native video capture tools. However, if you are screen-sharing to present with slides, these will dominate the screen, with your video only taking up a small portion of the audience’s view.
An alternative is Riverside, which records content on separate tracks so you can capture video and audio in full, then edit as required.
Are you looking for an easy, intuitive way to record your next presentation? Record with Riverside, and capture all your content in high-quality seamlessly.


---Riverside.webp)


