


Table of contents:
Instagram users spend a massive 17.6 million hours a day watching Reels. These snappy short-form videos capture people’s attention and hold it for just the right amount of time. If you want to engage your audience and reach more people, making Reels is the answer.
So, how do you get started?
In the following guide, we’ll show you how to make Instagram reels successfully. We’ll first look at the value of creating Reels, then we’ll dive into our step by step guide and touch up on some best practices.
Read on to get started.
Why Should You Create Instagram Reels?
Before making your own Instagram Reels, you may wonder what value they hold. Let’s look at some benefits you can expect when you share them.
1. Increased Visibility
Instagram Reels have the potential to reach a larger audience. The clips can appear on the Explore page and in users' feeds. This increases your chances of gaining new followers and engagement. One report from Statista suggests that Instagram accounts with up to 500 followers have an average reach rate of 892%.
Check this guide from Jade Beason on how to leverage the power of social media to build your influence.
2. Engagement
Short-form content can be more engaging. Users can like, comment, share, and even remix your Reels, allowing more significant interaction with your content. One study found that 35.4% of the total likes on Instagram are attributed to Reels content.
Short-form videos are more likely to quickly catch the attention of the audience as they are quick and easy to digest. On the other hand, long-form videos take longer to watch and are a bigger time investment for the viewer.
3. Creativity and Branding
Instagram Reels allow you to uniquely showcase your creativity, personality, and brand identity. You can use music, effects, and trends to create engaging content that resonates with your target audience.
4.Showcasing Products or Services
Businesses can use Reels to showcase their products or services visually appealing and entertainingly, potentially leading to increased sales and conversions. Research suggests 77% of people have bought a product or service after watching Reels.
5.Quick and Easy Content
Reels are short, typically 15 to 60 seconds long (although you can now make 90-second content) making them easier to create than longer video formats. This feature lets you quickly share engaging content without a significant time investment.
How to Make Instagram Reels Successfully
Now that you know why using Reels as part of your content strategy is important, let’s talk about how you can do it. Take a look at our step-by-step guide below:
Step 1: Plan your Reel
First things first, you need to plan out your Reel. What is the aim of the video? What message do you want viewers to take away? What format will you use? Answer all of these questions when you are in the conceptualizing stage. You should have a clear outline — or even a storyboard — of what you hope to achieve in advance.
Step 2: Find your hook
The first few seconds of your Reel are crucial for getting people to watch your video. Make sure your hook is solid and attention-grabbing. It could be a funny joke, a catchy song, or a visually stunning moment. First impressions matter.
Step 3: Record your content
If you’re recording on Instagram, go to your home dashboard, select the +button, and then select REEL. Here, you can choose a template to follow, or upload a pre-recorded video if you recorded your content elsewhere.
Instagram Reels offers a variety of creative tools and effects, such as AR effects, text overlays, and countdown timers, to help creators make their videos more engaging.
Experiment with different filters, text styles, and transitions to find what works best for your content. Keeping up with current trends and challenges is vital to stay relevant and attract more viewers.
While you can record your Reel using Instagram, you might want to try other options. Using software such as Riverside allows you to record high-quality video content from anywhere. Plus, with our Magic Clips feature, you can turn one long recording into multiple reels with one quick click.
Make sure that there are no distrapdactions when recording your content. It may take a few takes, but you will nail it.
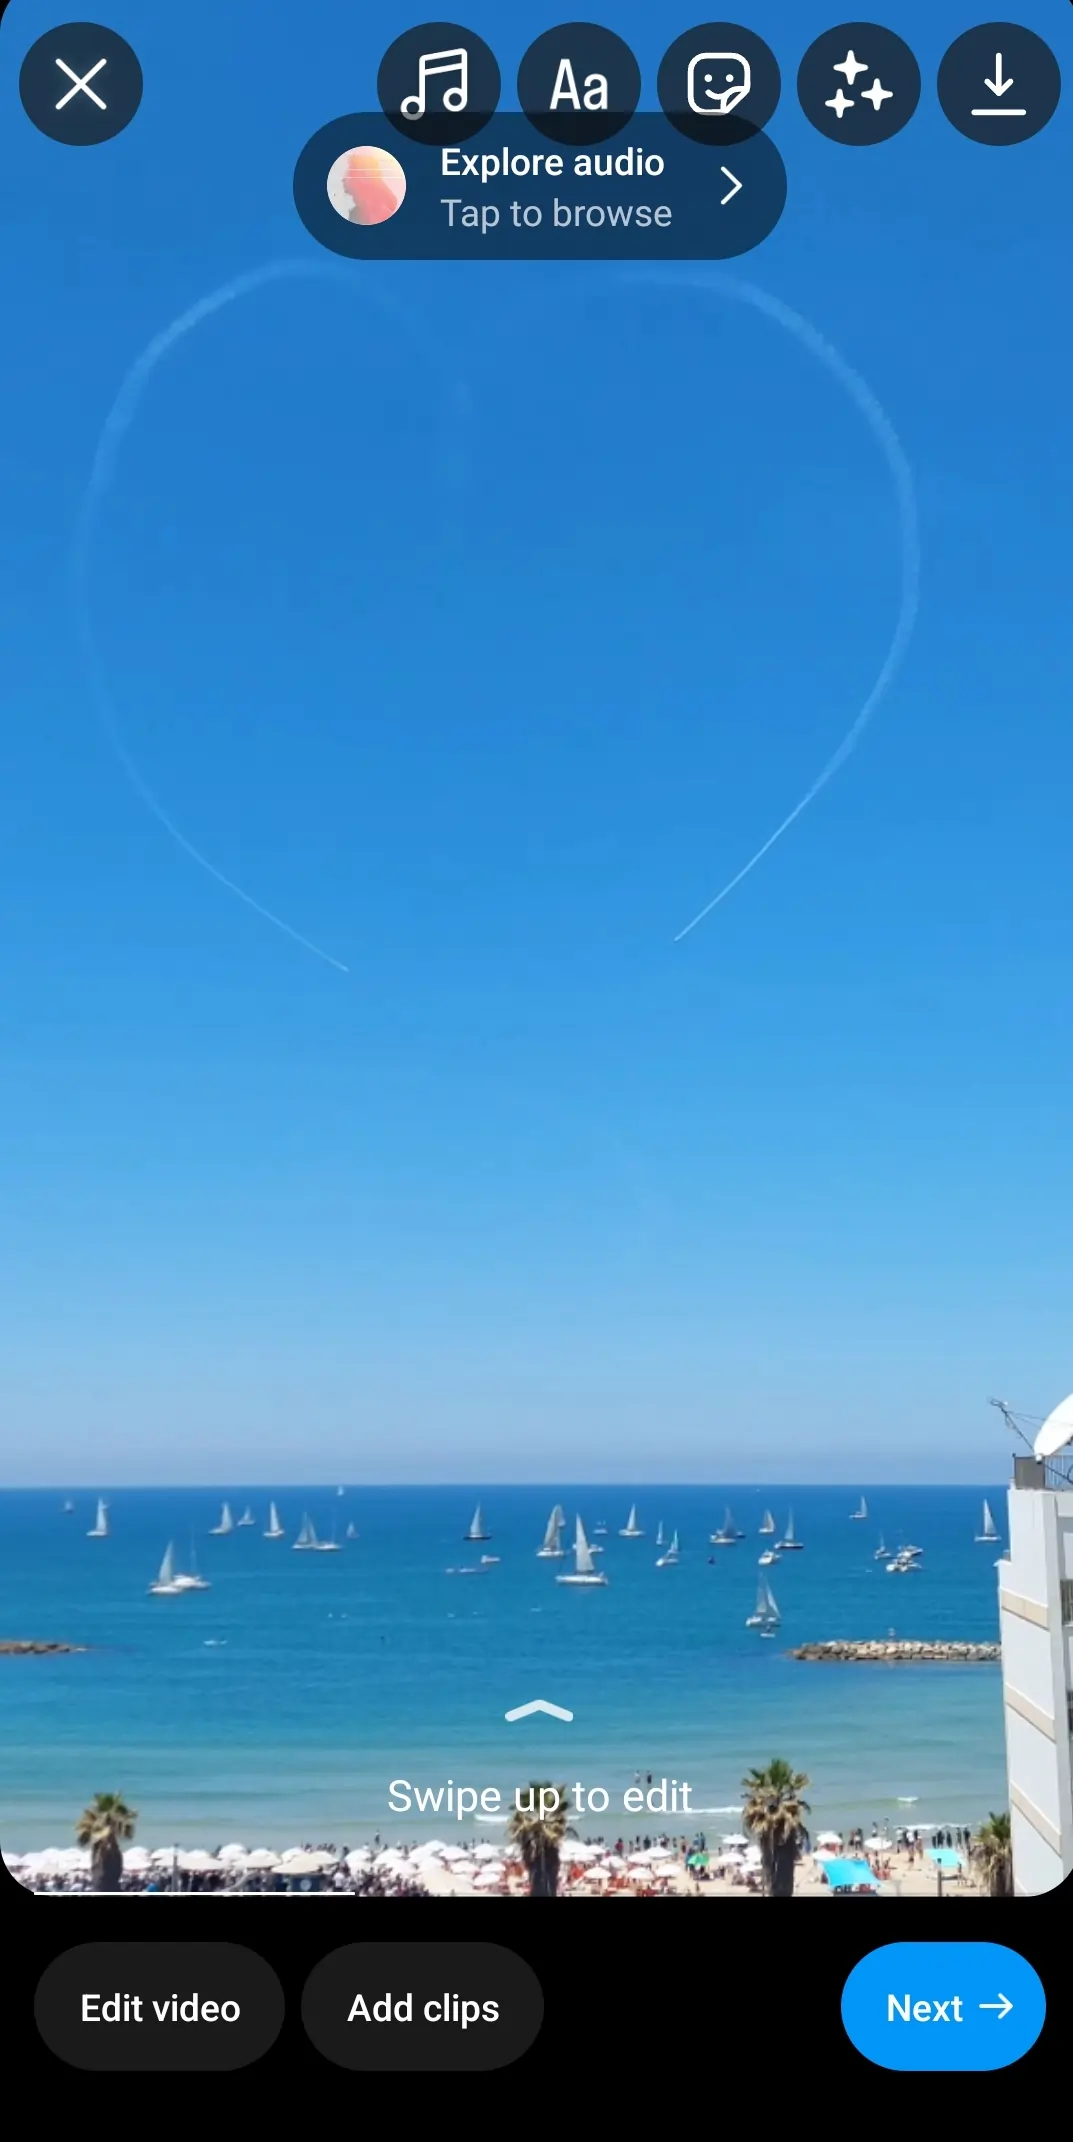
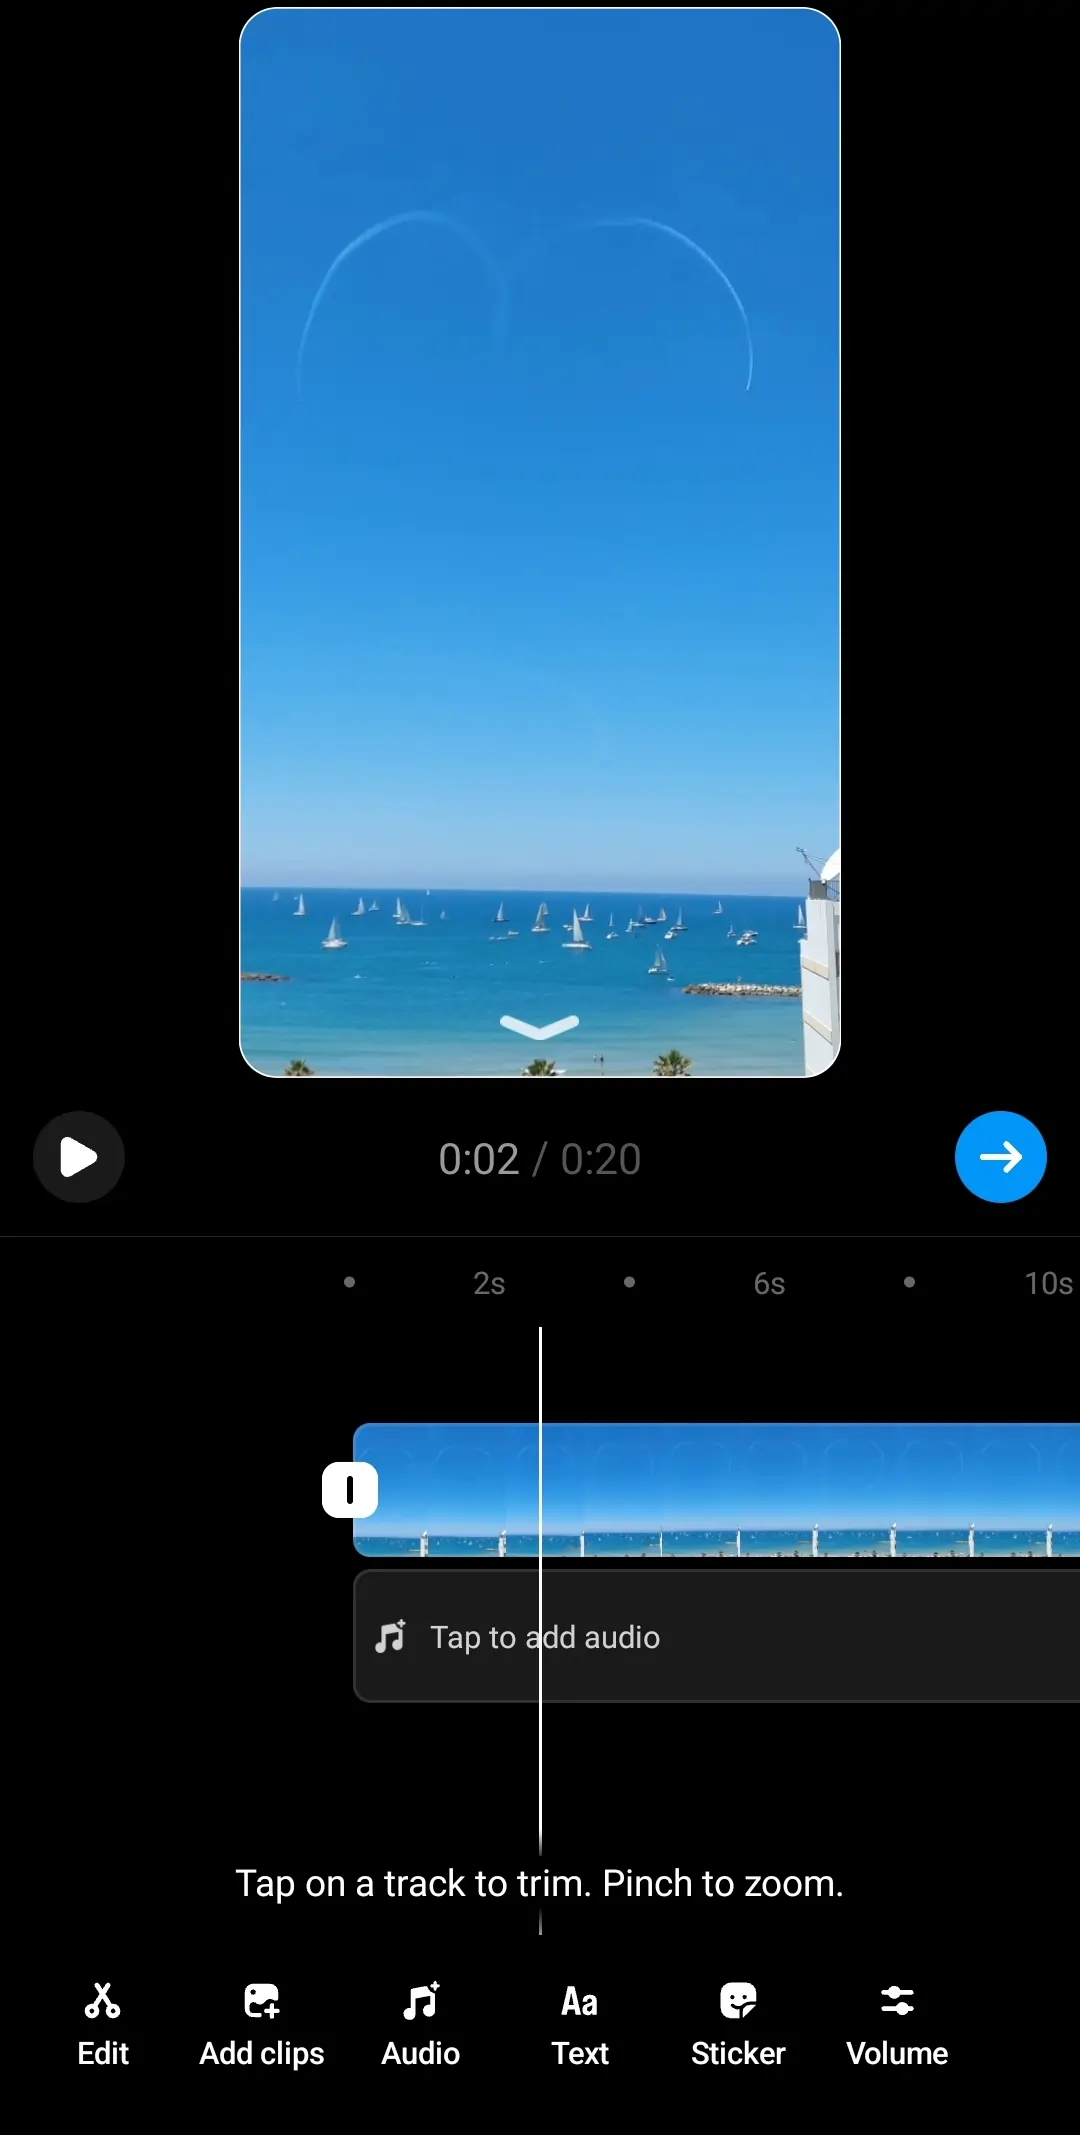
Step 4: Edit your video
Next up, it’s time to edit . Just like recording, you can edit reels directly on Instagram. Simply click on the Edit video button. You’ll see tools for:
- Adding text,
- Audio or music,
- Stickers for your reel,
- Changing the volume,
- Trimming your recording,
- Including video transitions, and more.
While some creators claim that using Instagram’s built-in editor makes the algorithm push your video up, the tool can be glitchy. Many have reported losing their content and prefer using external editors to keep their recordings safe. Using an external editor means you’ll also have access to more tools.
If you’re recording on Riverside, you can try our text-based Editor. Our Editor works with AI transcriptions, so editing your video recording is as simple as deleting text. You can add subtitles to your video, fine-tune your audio, and customize your layout and background.
Take the time to edit your video, make sure the sound is perfect, and cut it to the right length.
Step 5: Prepare your reels for publishing
When you have perfected your video, the next step is to prepare it for publishing.
If you created your video on a separate platform, click on the + sign at the bottom of your feed and then scroll across to “Reel” to get started. Upload your video, then when you’re ready, select Next.
Fill in your reel post caption. Your post captions are just as important as your video content. As a general rule, you need to create concise, informative, and entertaining captions. Try to tell a story, ask a question, or give your audience a call to action.
Step 6: Share and post
Once you're happy with your Reel, click Share to post it. However, it's essential to choose the optimal posting time for your target audience based on their online activity and tag relevant accounts for greater visibility.
Step 7: Measure your success
Use Instagram Insights to track how many people are watching your Reels, how long they're watching them for, and how many people are engaging with them. This information will help you determine what's working and not, so you can improve your Reels over time.
Step 8: Repurpose your content
Once you've created a successful Reel, you can repurpose it in other ways and on other platforms. For example, you could turn it into a TikTok video or a YouTube short. This move will help you reach a wider audience with your content.
How to streamline your Instagram Reels with Riverside Magic Clips
.webp)
With Riverside, you can turn one long-form recording into multiple reels at the tap of a button. We offer up to 4K video recording and an array of automated editing tools to streamline your content creation workflow.
Our Magic Clips tool uses AI to select the most interesting parts of your video and transforms them into short shareable clips. This is great if you’re creating long-form content and want to double it up into Reels without the added effort. You can then polish these off in our Editor.
The Editor works with AI transcriptions for easy, precise edits. Any text you delete in your recording transcript removes the matching video and audio. You can also add video captions, adjust your background and layout, or fine-tune your audio with our automated tools.
But these are some of many key features that Riverside offers.
Key features
- Repurpose long-form recordings into multiple reels, all with one quick click
- Easy to remove unwanted parts with the trimmer
- Use the text-based editor to quickly edit video content
- Seamless workflow with recording and editing on one platform
- Customizable layouts and backgrounds
- Straightforward and works for any editing skill level
- Record high-quality 4K video resolution
- Automated fine-tuning tools like background noise removal and level normalization
- AI-generated transcriptions for easy subtitles or captions
- Add captions to videos at the tap of a button, then style them with different colors or fonts

If you want to create Reels using Riverside, follow these steps:
Step 1: To create your Reel, you will first need to sign up to the Riverside platform. There are plans available for every budget — pick the one that suits you.
Step 2: Enter one of your existing studios, or create a new one by pressing the “+ Create New'' button. You’ll see a box in which you can name your studio. Select “Audio & Video” input and then press the “Enter Studio” button.
Step 3: Choose and test your equipment, then select if you’re using headphones or note. When you’re ready, click “Join Studio”.
Step 4: Once you are in the studio, you can invite guests if you want to collaborate with another creator. (You can also do this in your studio dashboard.) Simply click
When all your guests are ready, you can start recording. You should have planned your content ahead of time.
Make sure that everything in the background of the video looks right. Press “Record” and start creating your video.
Step 5: While recording your content, you can use the Mark Clip button to save specific key points in the video. (This isn’t necessary to create clips).
After recording your content, press the Stop button, wait for everything to upload then click “View Recordings”.
Step 6: In the Recordings dashboard, click on your take and scroll down till you see the Magic Clips box. Click “Generate Clips” and let our Ai find key moments in your recording and turn them into short, shareable clips.
You’ll also find draft clips of any points you marked along your recording.
Step 7: If you want to make your clips more engaging, you can edit them at this point. The text editor allows you to edit the video by changing the transcript — much like you would a Word Document. You can also get AI-generated subtitles too.
Step 8: Select a clip that you want to use and press “Export”. You will be taken to a full screen featuring the clip. Choose what quality you want to have when exporting the file. The process can take 10 minutes to complete and you will get an email when it’s ready.
Step 9: Save the file as a video on your smartphone. Next, open Instagram and click the “+” button and then “Reel”. Upload the Magic Clip as a Reel.
Best Practices On How To Create Instagram Reels To Increase Your Reach
Ready to start making a Reel? Before you hit that Record button, you need to know what the best practices are. Follow our key advice here:
Follow design guidelines
No matter where you're posting, you'll want to make sure you're optimizing your video's design to the platform. For Instagram, make sure your captions and text are not covered by in-app buttons and features. Try keep your captions and text in the middle.
Leverage trending challenges and hashtags
One of the best ways to get your Reels seen by many people is to participate in trending challenges and use relevant hashtags. When you use a trending hashtag, your Reel will show up in the search results for that hashtag, which means more people will have the chance to see it. Why not give it a go?
Post captions
Your post captions matters more than you might expect. Craft compelling captions that intrigue, entertain, and encourage interaction, prompting viewers to like, comment, and share.
Strategic use of audio
Music and sound effects can add great interest and energy to your Reels. Choose captivating music and consider creating your audio to capture your audience's attention and make your Reels more memorable and shareable.
Visual creativity
Flex your creative muscles. Incorporate eye-catching effects, transitions, and visual elements to captivate viewers and make your Reels stand out.
Showcase your style and personality
Instagram Reels are a great way to show off your unique style and personality. Be yourself and have fun with your videos. People will be more likely to watch and engage with your Reels if they feel like they're getting to know the real you.
Concise storytelling
Short-form videos need to offer value quickly. Deliver a clear and concise message or story within the Reel format, ensuring it's easy for viewers to understand and engage with.
Consistent posting schedule
The more Reels you post, the more likely you will reach a wider audience. So, be sure to regularly share Reels to maintain a significant audience engagement and establish a predictable content flow.
Collaborations and cross-promotion
Want to increase your content reach? Partner with other creators to tap into their audience, expanding your reach and fostering a sense of community.
Audience engagement
Show that you are part of the community. Respond to comments, interact with your audience, and use insights to tailor your content to their preferences, building stronger connections.
Repurpose content
With tools like Riverside, you can turn a long-form YouTube into multiple clips for TikTok, Instagram, or Shorts. You can also reuse well-performing old content and reshape it a little. This helps you create more content with less effort so you don't get burnout.
FAQs on How to Make Instagram Reels
How do you make a reel with pictures and music on Instagram?
Open the Instagram app and tap on the "Reels" icon at the bottom of the screen. Click on the "+" icon in the top left corner of the screen to create a new Reel. Tap the "Gallery" icon to select the pictures you want to use in your Reel.
Once you've chosen your pictures or video, you can adjust the length of each clip by dragging the edges of the clip. To add music to your Reel, tap the "Audio" icon and select a song from your gallery or Instagram's music library. You can add text, stickers, and effects to your Reel by tapping the corresponding icons in the toolbar.When you're happy with your Reel, tap the "Share" icon to post to Instagram.
How do you create and post a Reel on Instagram?
Launch the Instagram app on your mobile device and log in to your account. Tap the “+” icon at the bottom of your home feed. Swipe along the bottom menu and select "Reel".
Use the camera to record a new video by holding the record button. Alternatively, tap the gallery icon to upload a video from your device. Trim the video, and add effects, filters, stickers, and text using the available creative tools.
You can also adjust the speed and add audio. Tap the music symbol icon to add a music track to your Reel. You will be able to see a list of popular songs. Search for a song, select a segment, and adjust the volume. You can also press the “voiceover” button to record and add a voiceover.
Play your Reel to ensure everything looks and sounds as you want. Make any necessary adjustments. Write a caption, add relevant hashtags, and tag other users if needed. Tap the "Share" button to publish your Reel. It will now be visible to your followers and potentially a wider audience.
Can you turn a video into a reel?
The short answer is yes. Make sure that you have the video saved on your smartphone. Open Instagram and then press the “+” button and “Reel” and then share the file.
Is it better to post a video as a reel?
If you want to share a video on Instagram, the Reels feature is the way to go. Reels has a massive 14% reach rate, which is the highest rate on the platform. To put that into perspective, other media types have between a 9% and 10% reach rate.
What is the difference between a reel and a post on Instagram?
There are a handful of differences that you need to know about here. Let’s take a look at some of them below:
Length: Reels can be up to 90 seconds long, while posts can be up to 10 minutes long.
Format: Reels are always vertical videos, while posts can be vertical or horizontal videos or images.
Features: Reels have several features that posts don't, such as the ability to add music, sound effects, text, and stickers.
Discovery: Reels are more discoverable than posts, appearing in a dedicated Reels tab on the Instagram app.


.webp)


