Table of contents:
Captioning your videos immediately makes your content more accessible and engaging, increases comprehensibility, and improves your SEO ranking. Creators looking to level up their content should not overlook the potential unlocked by captions and subtitles.
With software like Riverside.fm making adding captions easier than ever, it’s an easy transition to make. This article walks you through the basics of captions and subtitles, how it works, and the best (free) tools available.
TL;DR
- Captions convey dialogue and non-speech audio, whereas subtitles only communicate dialogue to the viewer.
- Adding captions or subtitles makes your content more accessible, ensures clarity, maximizes engagement, and improves SEO.
- There are three ways to add captions: DIY, professional transcriptionists, and transcription software.
Difference between captions and subtitles
Though these two terms are often used interchangeably, captions and subtitles are two different ways of transcribing a video. The major difference lies in what aspects of the audio they convey:
What are captions?
Captions convey all the audio in a video. This extends beyond dialogue to include sound effects and other non-speech sounds. They principally aim to accommodate those who cannot hear any audio at all.
Captions can be open or closed:
- Open captions are integral to the video and cannot be turned off.
- Closed captions (CC) can be turned on and off depending on the viewer’s needs.
What are subtitles?
Subtitles only capture dialogue. Their principal use is in the translation of foreign language videos and film, and for this reason, subtitles presume that the viewer can also hear the audio.
Why would you add captions or subtitles to video?
Including captions or subtitles in your video may feel like an additional effort that’s not worth your while. Firstly, with software like Riverside, video transcription can become a seamless part of your workflow that requires no additional input from you. Secondly, you may be surprised to find that captions and subtitles can benefit your content. Here’s how:
Compensate for poor audio quality
In cases where your audio is low-quality or is obstructed by background noises, including captions or subtitles will mean that footage is still useable. Rather than abandoning that clip or re-recording, you can assist the viewer in understanding the footage through your captions or subtitles.
Ensure clarity even with complex content
Including captions or subtitles can help your audience better understand your content. You can ensure your message is effectively conveyed by reinforcing it with text. This is particularly useful if your video content covers complex themes or you tend to use niche jargon.
Make your content accessible to a broader audience
To ensure your content is inclusive and accessible, it’s vital to include captions in your videos. This ensures that those who are deaf, hard-of-hearing, or non-native speakers can still enjoy and interact with your content.
Improved SEO
Transcribing your video to produce captions or subtitles is a great way to improve your SEO ranking. Search engines can read, analyze and index your transcript resulting in higher rankings, maximized exposure, and more views.
Create more engaging content
Including captions or subtitles ensures that your viewers can engage with your video wherever they are. Viewers scrolling on Instagram or TikTok, for example, might not want to play the audio aloud but may still want to watch your video, relying on the captions for the whole experience.
Repurpose & strengthen your content
You can use your captions or subtitles to repurpose and strengthen your content. You could use your captions to produce a blog post or transcript that you publish alongside your video.
A transcript with timestamps will also help your audience navigate your video because they'll be able to skip ahead to the parts they're most interested in.
How to add captions or subtitles to video
Though it may sound like transcribing your video to produce captions or subtitles is a long and arduous process, in reality, it’s not. If you’re wondering how to add captions or subtitles to your video, we’ve got you covered. Here’s how it works:
Record your video
Nothing changes at this stage, so record your video as per usual. As always, try and maximize the quality of your audio and video for the best results.
Transcribe a video manually or automatically generate an SRT file with Riverside.fm
To publish your captioned or subtitled video to major social media platforms such as Facebook and LinkedIn, you’ll need to generate a transcription.
For closed captions, you'll want a separate SRT file. An SRT file is a transcript format specifically for captioning. It includes timestamps and usually differentiates between speakers.You'll upload this with your video to your chosen platform, and your viewers will have the freedom to toggle these captions on or off your video.
With open captions, you'll burn this transcript into your video. Some platforms have built-in transcription and can do this without an SRT file. But let's first cover generating a transcript for closed captions.
There are two ways to generate an SRT file:
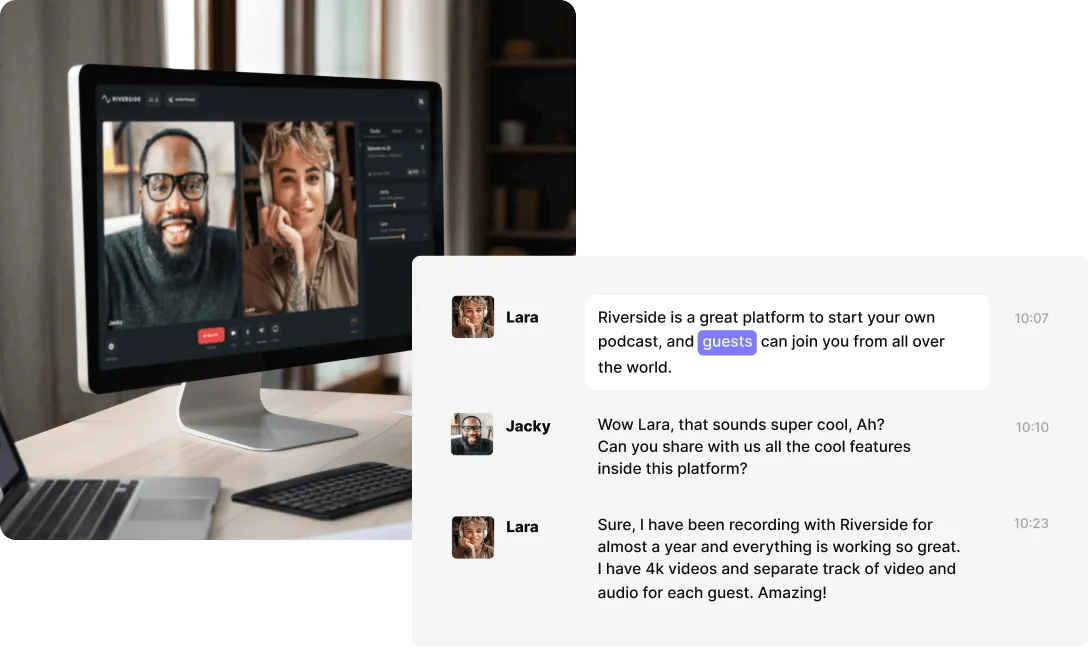
You could choose to transcribe your video manually, but this requires time and effort. Instead, why not capitalize on an auto transcription software such as Riverside.fm’s Automated Transcription feature?
Riverside automatically transcribes all your recordings, all you need to do is download your transcripts. Simply go to your 'view recordings' page and select the take you want a transcription for. Under the 'Recording Files' click 'Download' and select an SRT file.
Note: if you prefer, you can export your transcription as a .txt file with Riverside.fm. We recommend an SRT format because this is generally better for captioning.
Decide on the caption style
Once you’re happy with the captions, you’ll need to decide whether you’re opting
for subtitles or captions. If you go for the latter, you’ll also need to choose between closed or open captions.
Edit captions
Bear in mind that no transcription will be perfect the first time around. Ensure to edit your captions, checking for accuracy and clarity. Plus, depending on whether you’ve chosen subtitles or captions - this will affect what aspects of the audio are included in the text.
For open captions:
If you want your captions to become part of the footage, you might need to upload your SRT file to an editor that allows you to merge them.
As we mentioned above, many platforms also do this automatically.
With Riverside you can instantly add captions to your video. From the 'view recordings' dashboard, select your take and then click on 'Go to Editor'. Here you can click on the caption button in the top toolbar. Select a style and then click on the captions in your video frame to drag and position them as you want.
Other video editors such as iMovie are a bit trickier to work with and require manual input of the captions.
Once you’ve done this, you’ll be able to export the video as usual and publish it on the social media platforms of your choice.
For closed captions:
If you want to give your viewers a choice over whether they make use of your captions or not, you can go directly to the platform of your choice, such as YouTube, Facebook, or Linkedin. Upload your video alongside your .srt file, click publish, and you’re good to go.
Auto-captioning features
It's not always necessary for the creator to produce their captions. Some platforms, such as YouTube, can provide auto caption videos. However, remember that automatic captions are not always the most accurate and can result in grammatical or linguistic errors.
Best ways to produce captions for your video
There are three ways to create captions to your videos: DIY, Professional Transcriptionists, or AI Transcription software. No single option is better than the others, but they vary in convenience, price, and efficiency.
Manual Transcription
DIY Transcription
This is arguably the most tedious and labor-intensive way to produce captions for your videos. You’ll have to rewatch your footage and manually transcribe every bit of dialogue (as well as non-speech elements if you want captions). The upshot is that this DIY transcription is entirely free.
Professional Transcriptionist
You can also pay a professional transcriptionist or manual transcription service to produce your captions for you.
The major advantage of choosing a human transcriptionist is that they can pick up on nuance, navigate regional accents, and edit your captions in a way that software can’t. That said, you’ll face a steeper bill and longer turnaround times.
Some of the best manual transcription services out there include GoTranscript, Rev, and Scribie.
Transcription Software
Using captioning software is the easiest, quickest, and most efficient way to produce captions for your video. Transcription software makes transcribing your video simple so that you can reap all the benefits without any additional hassle.
Using transcription software like Riverside.fm you can add captions to your video online. And there’s no lengthy turnaround time or hefty price tag attached. To bear in mind, you’ll need to check over your transcript since AI transcription can result in some errors.
With Riverside, you get access to transcription software as part of your subscription, so there’s no additional cost associated with captioning your video! And if you don't have a subscription, you can use our free Ai transcription tool.
Best free tools software to easily add captions
Here are the two of the best free tools to add captions to your videos at the click of a button:
Riverside
With Riverside you have the option to download TXT or SRT files, but you can also burn captions directly into your video. You can choose between various caption styles, and you can position your captions as you like. The platform works with AI transcriptions available in over 100 languages. Match this AI with Riverside's top-quality audio recordings, you're guaranteed unbeatable transcription accuracy. Best of all, you can edit your video using these transcriptions. In Riverside's editor, any text you delete in your transcripts removes the matching video and audio.
Movavi Video Editor
When you've got your SRT file ready, choose between hard or soft subs (the same difference as between open and closed captions), then upload your file.
Movavi Video Editor has a synchronization tool so that you can ensure no line of text is out of sync with the audio.
Once you're happy, export the video in the video format of your choice. Movavi Video editor supports mov, mp4, avi and more.
Jubler
Jubler can both create new subtitles to a video or refine and upload pre-existing subtitles.
You can also 'live edit' the subtitles of your video while in 'playing mode.’ Here you can add new subtitles or shift the alignment of the existing text.
Final Thoughts
Since adding captions to your video doesn’t have to be labor-intensive, expensive, or inconvenient, there’s no reason not to. The benefits of captioning your video content combined with just how easy it is with software like Riverside.fm, really do make it a no-brainer.


-(1)-(1).webp)


