.webp)


Table of contents:
In a post-pandemic world, Zoom has become an increasingly popular platform for virtual collaboration. In fact, almost 300 million people join Zoom meetings every day!
In many cases, it can be helpful to record your Zoom meetings. This can give you access to important information to look back on later. It provides you with valuable insights, as well as footage you can repurpose for marketing or training use.
But what happens if you’re using Zoom on your phone? How do you record a Zoom meeting on your phone? You’ve come to the right place! Here’s how you can get started.
Can I record a Zoom meeting from my iPhone?
You can definitely record a Zoom meeting on iPhone, and you can even do so directly through Zoom. In order to record from Zoom you’ll need to use the iOS app and you’ll have to have a Pro, Business, Education, or Enterprise account. Only hosts and co-hosts can record, so if you’re a participant or don’t have a paid account you’ll have to use a work aroun.
Luckily, there is a wide variety of screen recording software on iPhone that you can use to capture your Zoom meetings. Not all offer top-quality resolution, but they’ll do if you just want a recording to refer back to. If you’re after high quality you’re better off using a local recording platform (like Riverside).
We’ll explore all your options below and guide you through recording a Zoom meeting on iPhone no matter if you’re a host or just a participant.
How to record a Zoom meeting on iPhone from the app (host only)
Recording a Zoom meeting is most straightforward when you are the host of the meeting. As a host, you’ll have access to full recording permissions that allow you to directly use Zoom’s built-in recording tools.
Follow these steps to get started!
Step 1: Launch a meeting
First, download and open the Zoom app on your iPhone device. Navigate to the main screen, and launch a new Zoom meeting, appointing yourself as the host of the call.
Step 2: Launch recording tools
Once you have entered your meeting, navigate to the meeting controls toolbar. Here, click on the Record icon. If you do not see this as an option, you may need to check your account settings to ensure that you meet all necessary requirements for the feature. (We go over requirements later in this blog.)
Step 3: Start recording
Next, click the “Start recording” button. The app will bring up a display in the top left corner of your screen to verify that a new recording has begun. When you see this, you can start your meeting!
Step 4: End recording
Host your session as usual. When you are ready to pause or stop recording, tap the Record icon again. This will prompt the options to Pause recording or Stop recording. If you are ready to stop recording completely, you’ll need to tap Stop a second time to confirm this action.
Step 5: Access recorded content
After your Zoom meeting has ended, wait for the recording to process and upload. Since all mobile recordings take place on the Cloud, you can find your files under the Recordings menu in your account’s Zoom web portal.
3 Alternative ways to record Zoom meetings on an iPhone:
If you are not the host of your Zoom meeting or don’t want to use Zoom’s built-in recording tools, you can try several other methods to capture content. Here are 3 helpful alternatives!
Built-in iPhone recorder
Available for hosts and participants: Yes
Your iPhone’s built-in recording software can help you capture Zoom meetings with ease! Follow these simple steps.
Step 1: Check iPhone storage capacity
Before recording, you need to check your iPhone’s storage. To do this, open “Settings”, and navigate to “General”, then “iPhone storage”. At the top of your screen, check what free storage you have available to ensure there is plenty of space for a new recording.
Step 2: Add the recording toggle
Next, you’ll need to add the recording toggle to your iPhone control panel. To do this, open the “Settings” app again, and go to the “Control Center”. Here, navigate to the “Included Controls” menu and ensure that you add “Screen Recording”. If it’s not added, select the + icon beside this in the list of controls.
Step 3: Launch new Zoom meeting
Finally, you’re ready to record your Zoom meeting. Launch the Zoom app, and start a new meeting (or enter an existing call). When you’ve entered the meeting, swipe down from the top right corner of your screen to open the control panel.
Step 4: Start recording your call
Here, select Record. When your recording begins, a red bar will appear at the top of your screen. When your meeting ends, you can re-launch the control panel and hit the Record button again to stop recording.
Screen mirroring app
Available for hosts and participants: Yes
A screen mirroring app is another option to help you achieve a secure, stable recording using your iPhone. This allows you to easily mirror your screen display onto another device.
There are many screen mirroring apps to choose from, but for this tutorial, we’re referring to Apple’s in-built AirPlay. To get started, follow the steps below.
Step 1: Open AirPlay on iPhone
Before entering your Zoom meeting, open the AirPlay app on your iPhone. Then, you’ll need to connect your iOS device and your PC to the same Wi-Fi network.
Step 2: Launch and pair AirPlay with PC
Next, you’ll need to launch AirPlay on your PC device. On your iPhone, open the “Control Center”, and select “Screen Recording” to search for connected devices. Choose your computer’s name from the list.
This connection will mean that your iPhone screen streams to your PC.
Step 3: Join your Zoom meeting
You can join a Zoom meeting on your iPhone, and it will appear simultaneously on your PC. On your PC, press the recorder icon on the AirPlay interface to start a new recording. When your recording is complete, click this button again to stop it. The recorded files will save to your PC device.
Third-party iPhone screen recorder
Available for hosts and participants: Yes
Alternatively, you can easily capture Zoom footage using a third-party iPhone screen recording application. Follow these steps!
Step 1: Choose and launch a recorder
First, you need to choose the right third-party screen recorder. Browse the Apple App Store to find an application that suits your needs. Then download and launch your chosen software, registering for an account if needed and allowing necessary permissions. You’ll need to allow the Screen Recording feature in your device’s Control Center.
Step 2: Launch a new Zoom meeting
Next, launch the Zoom app on your iPhone, and either start a new meeting or join an existing call. Get ready to start the meeting and begin capturing video and audio content.
Step 3: Start recording your call
Using your third-party app, tap the Record button and enable any other important features (like a microphone icon for capturing audio). To stop recording, press the pause or stop icon, and save your Zoom recording.
Read more: 10 Top Screen Recorders for Zoom Meetings in 2024
What are the requirements to record a Zoom meeting on iPhone?
The requirements to record a Zoom meeting on your iPhone will vary based on the methodology you’re using.
In most cases, you will need to ensure that the screen recording functionality is fully enabled in your device settings. If you are recording using Zoom’s native tools, it is likely that you will need to be the host of your Zoom call. You’ll also need to have a subscription to a Pro, Business, Education, or Enterprise Zoom account.
Is Zoom good for recording meetings on the go?
Zoom can be a great resource for hosting virtual meetings. For many users, Zoom is an effective choice for communicating on the go. It’s comprehensive meeting features make it easy to stay connected and collaborate with others.
However, it’s important to remember that Zoom is not always the best option. If you’re looking for high-resolution recordings then Zoom may not be an ideal choice. Zoom records on the cloud which means your recording is susceptible to your internet connection. You can’t capture separate video tracks which limits your editing flexibility and if you want to make quick edits after recording, you’ll have to use separate software. If you’re creating content to share online, then you’re better off using a dedicated video meeting and creation platform.
“Riverside is far better than Zoom for recording interviews.” - Seth Godin, author, entrepreneur and marketing leader.
Riverside iOS app: A Zoom alternative for recording meetings in top-quality
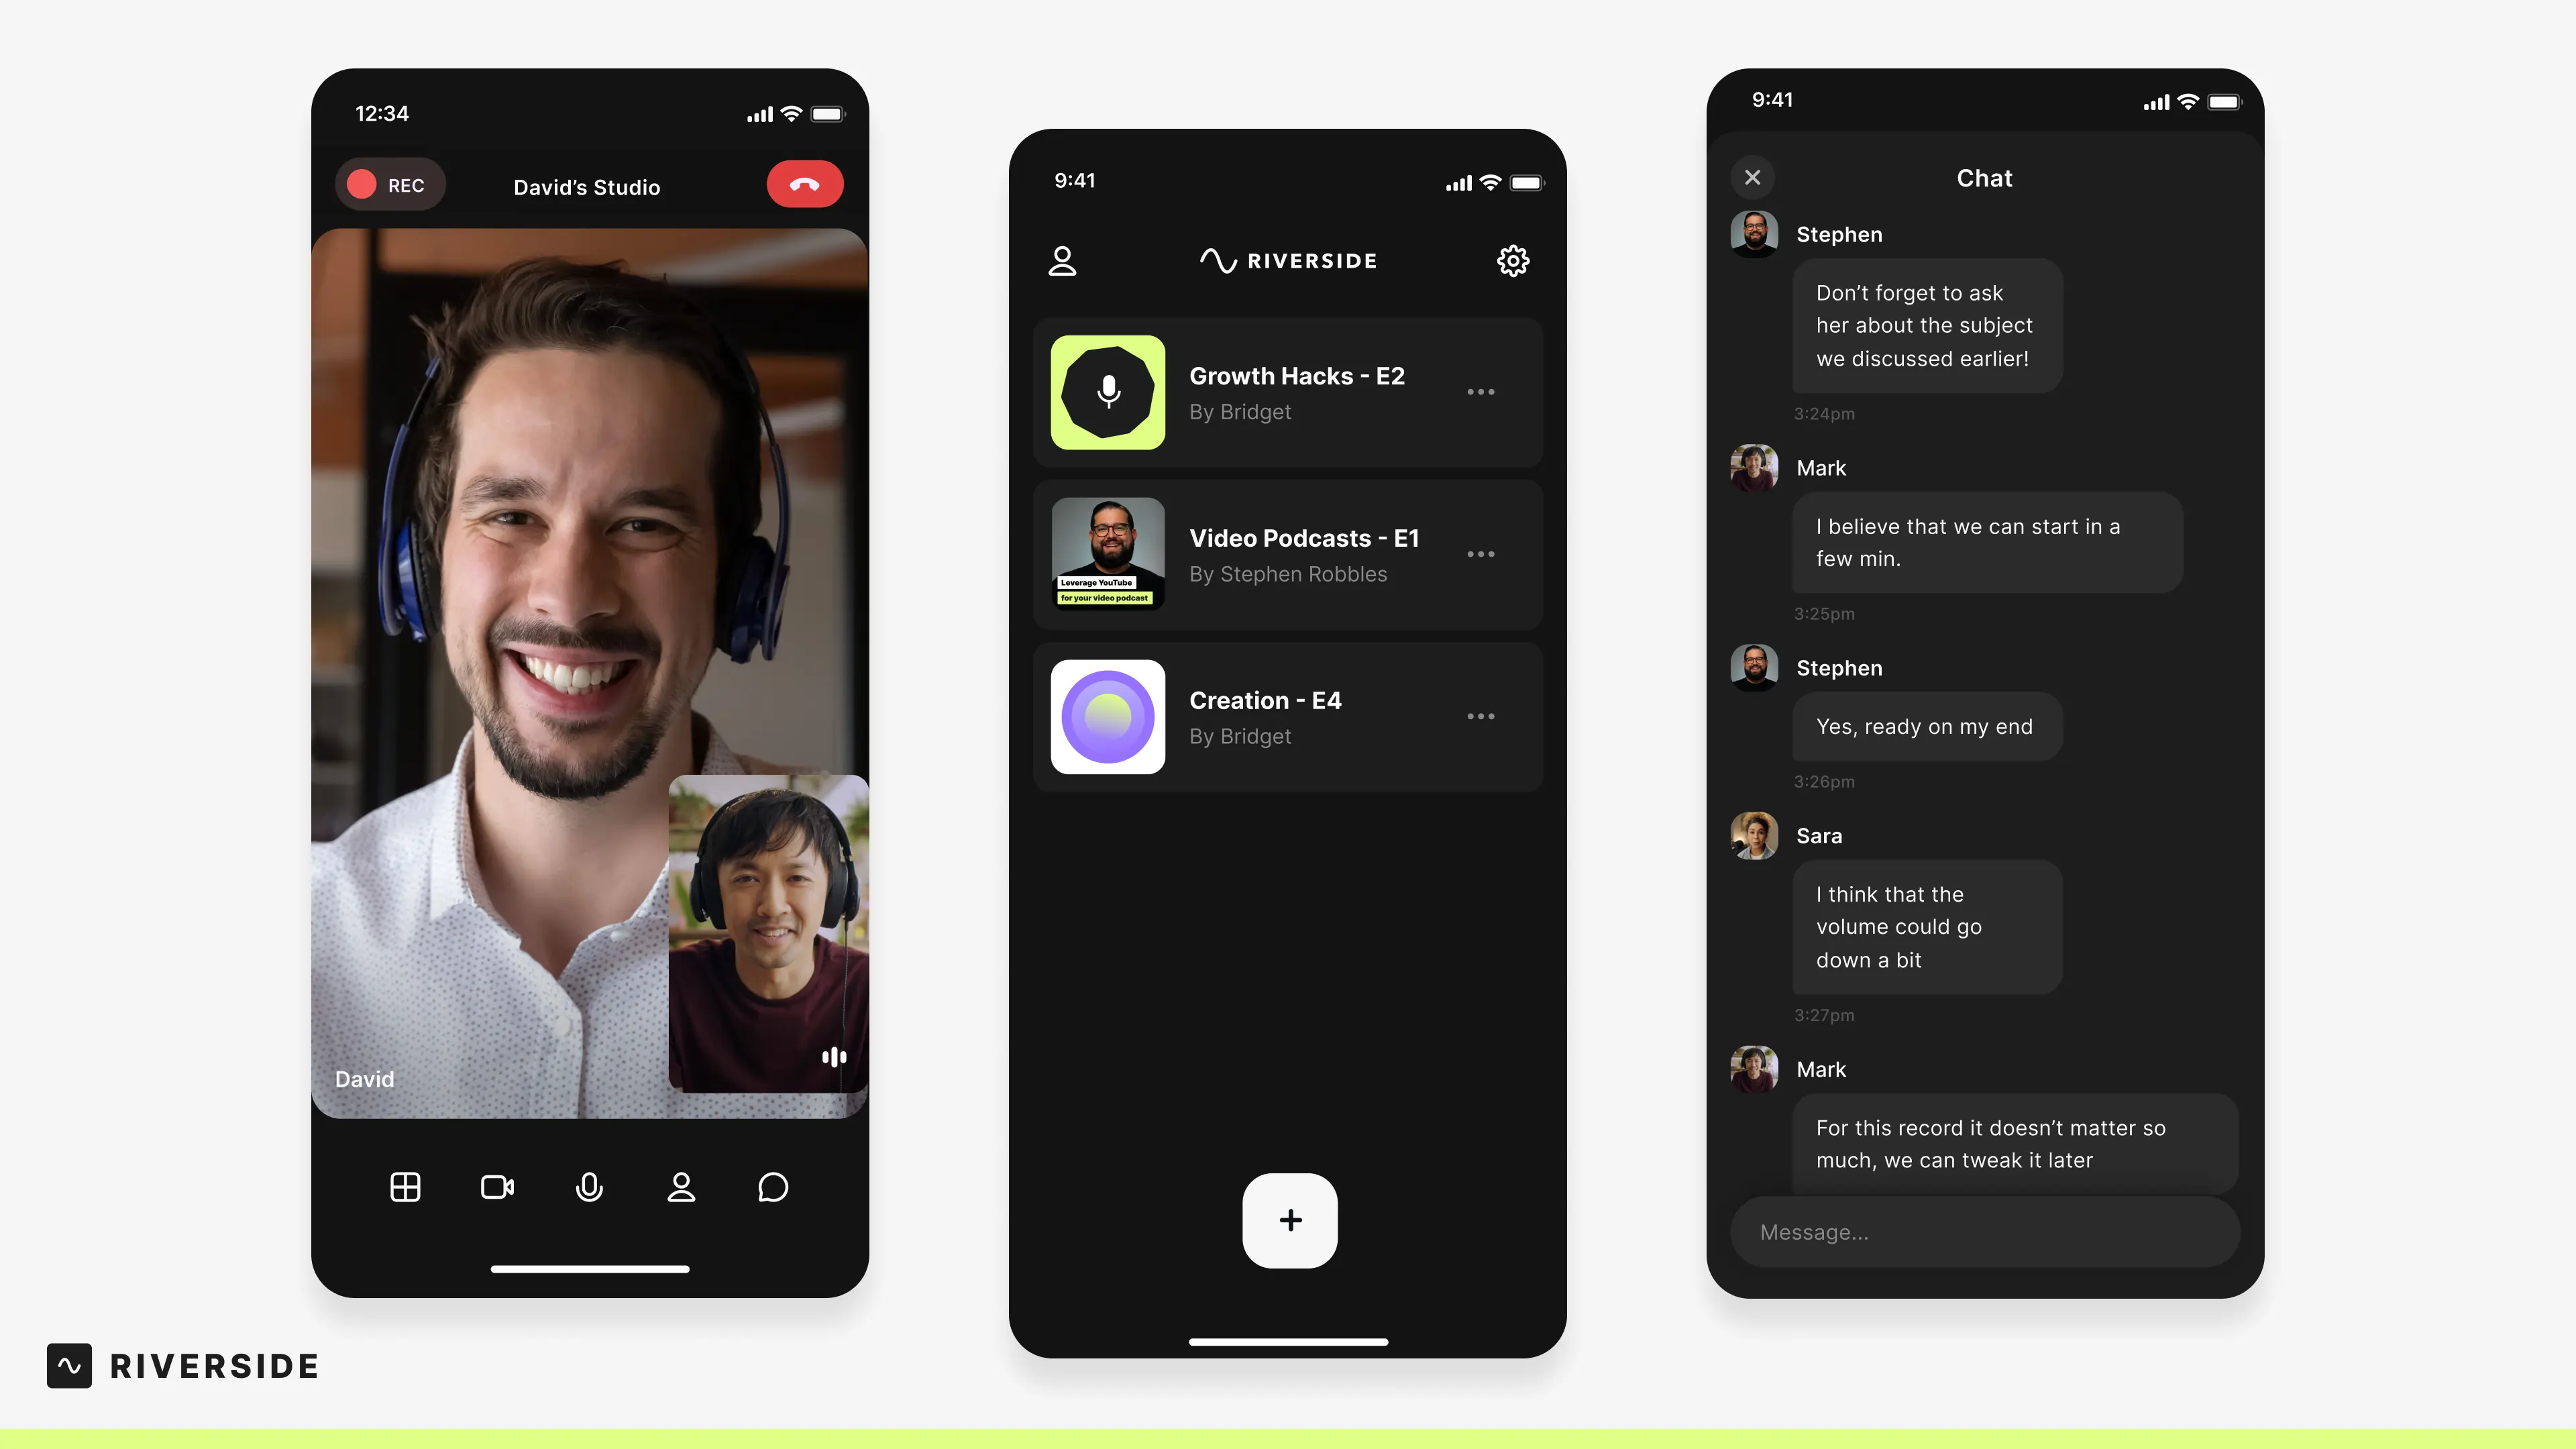
Riverside’s iOS app is an excellent alternative to Zoom if you’re looking for a great way to host effective meetings while prioritizing content value and quality.
With Riverside, you can capture separate video and audio tracks for up to 10 call participants while achieving studio-quality content results. The Riverside app provides professional control alongside a clear user-friendly interface.
Key features include:
- Local recording technology to maintain quality and stability regardless of fluctuations in internet connection
- Up to 4K video resolution and 48 kHz sound quality results for superior professionalism
- Separate video, audio and screen sharing tracks for up 10 participants, giving you more editing control and flexibility
- Multicam mode so that you can turn your phone into a secondary camera for a desktop recording
- Host controls that allow you to adjust iPhone-user guests’ camera settings
- Progressive uploads and cloud storage so as soon as you finish recording you can access your files from any desktop or mobile deice
- Text-based editor in the desktop site where you can trim recordings as easily as reading through text
- Magic Clips creator which uses AI to turn your recordings’ key moments into multiple short-form videos
- Automatic AI transcription functionality available in over 100 languages

How to record a meeting with Riverside’s iOS app
Want to record your next meeting with Riverside? Follow these steps to get started.
Step 1: Log in to Riverside, and navigate to a new recording studio. You can select a pre-existing studio, or you can click the ‘+’ button to create a new one.
Step 2: Enter your name, then test out and select your camera, microphone, and speaker inputs and outputs. When ready, click ‘Join’ to enter the studio.
Step 3: Use the “Invite People” button to add relevant guests to your call.
Step 4: When your meeting is ready to begin, press the red Record button at the top of your screen to start recording.
Step 5: When your meeting ends, press Stop at the top of your screen.
Step 6: You can then access your recordings from the desktop site. Simply login, go to the same studio you recorded in and select ‘View recordings’.
Step 7: Here, you can download your files or select ‘Go to Editor’ to adjust your recordings. In the editor you can:
- Trim your recordings by deleting text
- Customize your video layout and background
- Add and style video captions
- Fine-tune your audio with our automated tools
use the Edit & create clips button to enter the Riverside editing suite.
Step 10: When you’re happy with your recording, choose Export at the top right of your screen, and download your completed recording.
FAQs on how to record a Zoom meeting on iPhone
Still unsure about how to record a Zoom meeting on your iPhone? Here are our answers to a few frequently asked questions.
How can I record a Zoom meeting on my phone?
Yes! Zoom has its own built-in recording tools, but you have to meet certain requirements to use this. If you’re not a host or don’t have a paid account, you can use a screen recorder or other external software to record Zoom meetings on yourb phone.
Why can’t I record on Zoom on my iPhone?
Having trouble recording a Zoom meeting on your phone? There may be many reasons for this. If you are trying to use Zoom’s built-in recording feature, you might lack the required call hosting permissions. If you’re trying a different method, you may need to update your iPhone settings to allow screen recording.
How do I record a meeting on my iPhone?
The best way to record a meeting on your iPhone will vary depending on your needs, skills, and goals. In some cases, it is fine to use built-in recording software. You may also want to try your iPhone’s screen recording feature or a third-party recording app. Alternatively, you can switch to another meeting hosting software program with greater recording capabilities. We recommend Riverside for iOS!
Interested in recording your next meeting with Riverside? Try the software today!


.webp)


