Table of contents:
Why should you add music to your videos?
How to add music to videos: 6 Steps
Step 1: Choose the right music
Step 3: Choose a video editing platform
Step 4: Open your video and choose or import your music track
Step 5: Edit your music track and video
Step 6: Export your video masterpiece
Bonus: How to add music to videos on different platforms
Key takeaways:
- Open your video editor and import your video recording.
- Choose the music you want to add to your video. Make sure this is copyright-friendly.
- Add the music track on to your editing timeline and adjust it’s volume and duration.
Is adding music to your video worth the time, resources, and effort?
How can you legally source music, and what tools and software do you need to add music to your video masterpiece?
If you have questions like this, you’re not alone!
This article will explore why you should consider adding music to your videos and give you easy-to-follow, step-by-step instructions for getting it done.
Ready? Let’s get to it!
Table of contents
- Why should you add music to your videos?
- How to add music to videos: 6 Steps
- Step 1: Choose the right music
- Step 2: Download your music
- Step 3: Choose a video editing platform
- Step 4: Open your video and choose or import your music track
- Step 5: Edit your music track and video
- Step 6: Export your video masterpiece
- Bonus: How to add music to videos on different platforms
- Best practices for adding music in videos
- Troubleshooting common issues
- Final thoughts
- FAQs on How to Add Music to Videos
Why should you add music to your videos?
Music is powerful. The right music will help ensure your audience feels whatever emotion you’re trying to convey, whether it’s shock, sadness, excitement, or joy.
Plus, effective music placement helps to provide context and enhance storytelling. For example, you can use music to build tension and suspense in particular scenes. Just think of some of the scariest movies you’ve seen and how much music added to the tension and fear you felt.
Yes, using music adds another step to your production process, but the benefits are worth it. And it doesn’t take as long as you think! Let’s get into the details around how to do it.
How to add music to videos: 6 Steps
If you’re on board with adding music to your videos and need some guidance on how to do that, we’ve got you.
Just follow the simple steps below.
Step 1: Choose the right music
First impressions count. This is why choosing the right music for your video is so important. The music you choose should enhance the overall mood and theme of your video content.
What music would your target audience resonate with and find the most compelling? This is what you need to consider as you start listening to samples and making decisions about what vibe you’re going for.
Licensing and copyright considerations
When purchasing and downloading music, always check the fine print to avoid legal issues - you don’t want to get yourself into hot water.
You can either use:
- Copyright-free music
- Music in the public domain
- Royalty-free music (although this is usually at a one-time cost.)
Make sure to read the licensing details. If anything is unclear, ask the provider for clarification. For example, does the license cover you for single or multiple uses?
Where can you find music for videos?
Any quick search in Google for “royalty free music for videos'' will come up with a range of options.
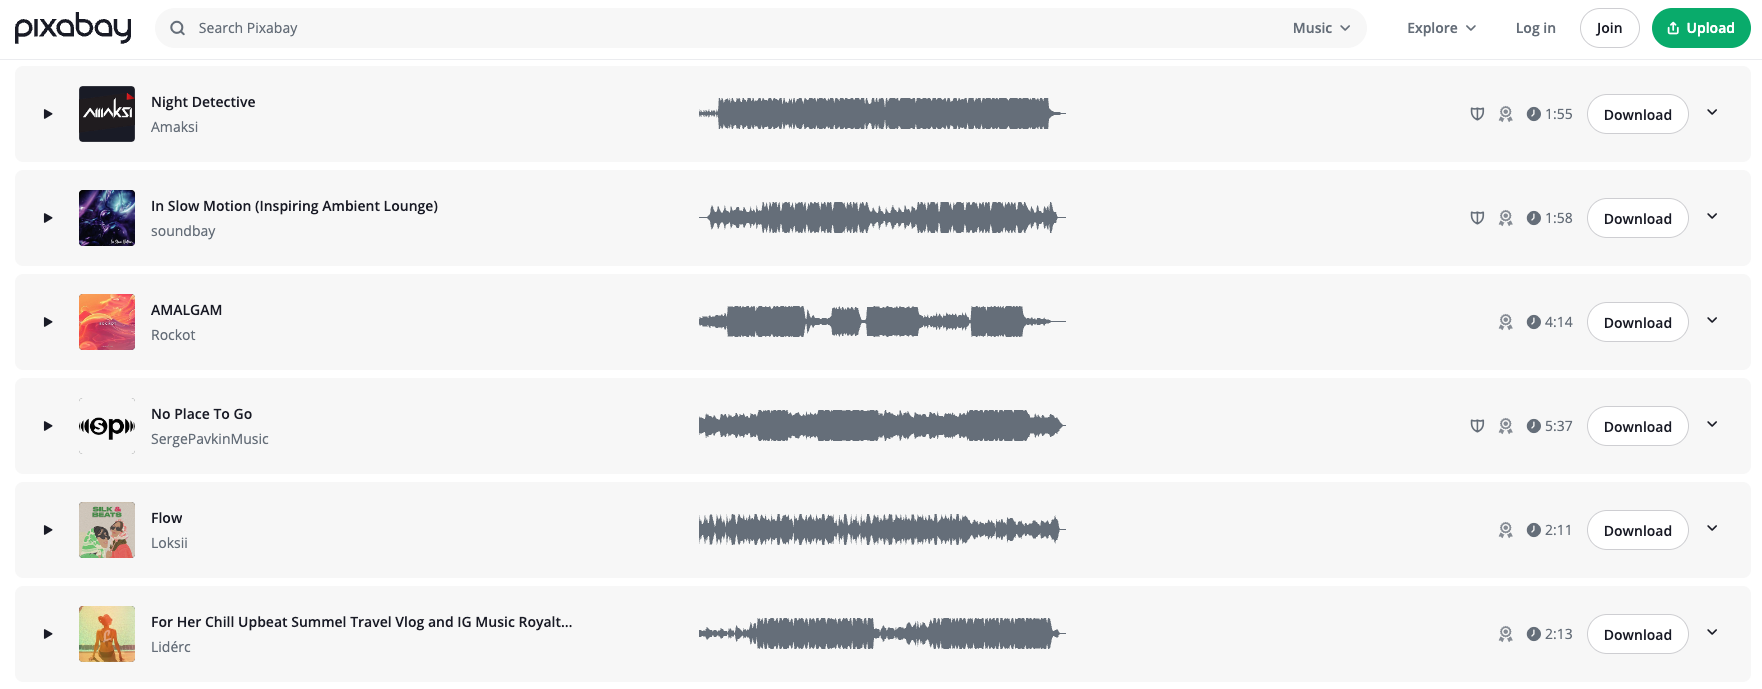
Some popular sites for finding royalty-free music include:
- Bensound
- Pixabay
- Soundstripe
- Uppbeat
- SoundCloud
- AudioJungle
Some video editing platforms include a music library of royalty-free options. For example, with YouTube Studios, you can filter by either Attribution required or Attribution not required.
Step 2: Download your music
Download your chosen audio track, and save it somewhere on your device where you’ll be able to find it easily.
We also recommend that you save any proof-of-purchase along with the music licensing details - just to be on the safe side.
Step 3: Choose a video editing platform
Next, you’ll need to choose a platform to edit your video.
Make sure your chosen solution is compatible with your device. Not all desktop editing platforms will be compatible with Windows or macOS, for example. It’s the same for mobile apps, which may not be compatible with both iOS and Android operating systems.
You’ll also want to ensure your video editing platform offers multitrack editing. This ensures that you can add additional tracks (like your music audio) to your editing timeline. You’ll have much more flexibility to move your music around and adjust it without touching the rest of your video audio.
While we have a whole list of video editing software you can check out, we suggest trying Riverside.
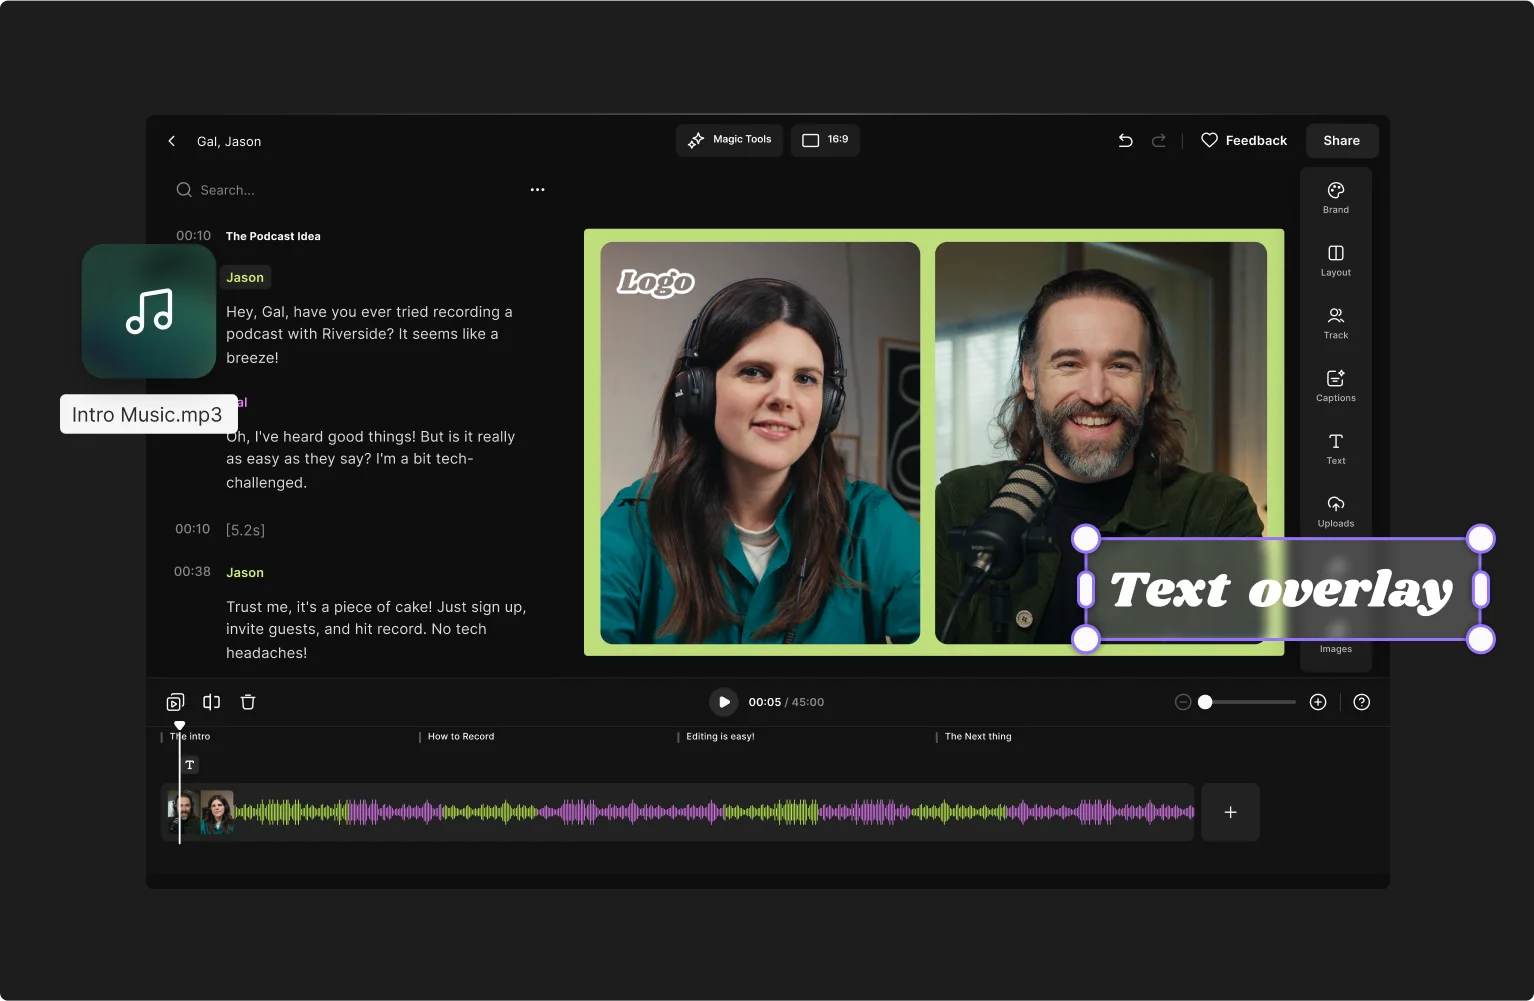
With Riverside you an record in up to 4K video and 48kHz audio and then immediately edit after recording. Our video editor offers text-based editing, automatic audio enhancement and a variety of tools to customize your video in minutes. It’s also compatible with both Windows and MacOS.
Are there free editing platforms?
Yes, there are plenty of free video editing platforms. Just be mindful that you may not have access to all the tools and features. For example, you won’t be able to download your videos in higher resolutions like 1080p or 4K on some free plans.
Step 4: Open your video and choose or import your music track
In your chosen video editing platform, either open or upload your video track, and then upload your music track.
You may also be able to choose music from the platform's library, depending on the software you’re working with.
How to do this in Riverside
If you used Riverside to record your video, simply head to “Recordings” and select the video you want to edit.
Once you have selected your video, click “Edit,” located in the top right of the screen, and then “+ Create new edit.”
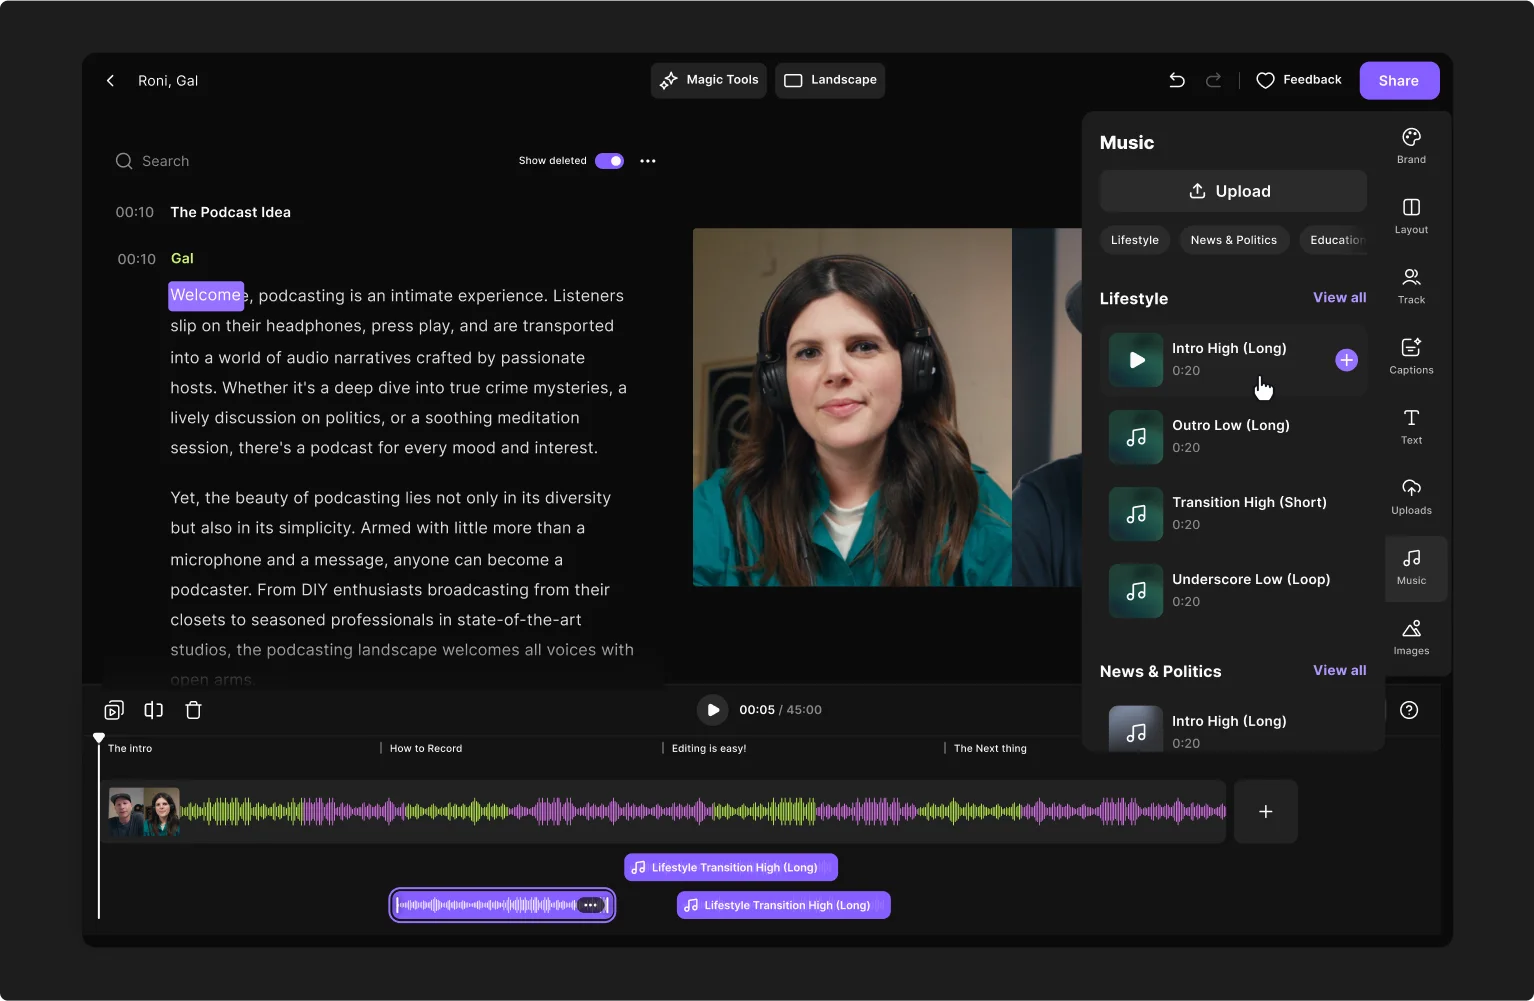
Go to the left toolbox in the Editor, and click the downward arrow till you see the music button. Click this ‘Music’ button to see our media library.
You can select one of our existing tracks or click “Upload” to add your own music files.
To add a track click on the “+” button next to it.
Step 5: Edit your music track and video
Now it’s time for the fun bit: editing your music track and video! This is where you can let your creative juices flow.
Decide when you want your music to play, and the duration. What images and text do you want on the screen? Also, don’t forget about your branding, such as logo and backgrounds.
How to do this in Riverside
You can choose your music track duration by dragging the two ends of the rectangular box. You can also zoom out by dragging the “Navigation” icon to the end of your video track.
Head to the “Brand” icon to add a background and your logo on the screen while the music track is playing. You can also head to “Captions” and “Text” to further customize your video.
If you would like to add images as well, this is super easy with Riverside. Head to “Images” and either upload your own image or choose one from the library of royalty-free images.
If you change your mind, simply highlight the asset on the timeline and hit your backspace or delete key. This can be done at any time. You can also select “Undo” to revert the last change that you made.
Step 6: Export your video masterpiece
Once you’re happy with your work, it’s time to export your creation from the platform. First, select the right dimensions for your project:
- 16:9 (YouTube, Spotify)
- 9:16 (Shorts, Reels, TikToks)
- 1:1 (LinkedIn, X, Instagram)
Choose which resolution you would like to export in: 720p, 1080p (HD), or 2160p (4K). You will also have the option to “Remove watermark,” “Normalize Audio Levels,” or “Remove background noise.”
Once you have selected all the settings you want, hit “Export.”
Bonus: How to add music to videos on different platforms
How to add music to videos on Windows 10 and 11
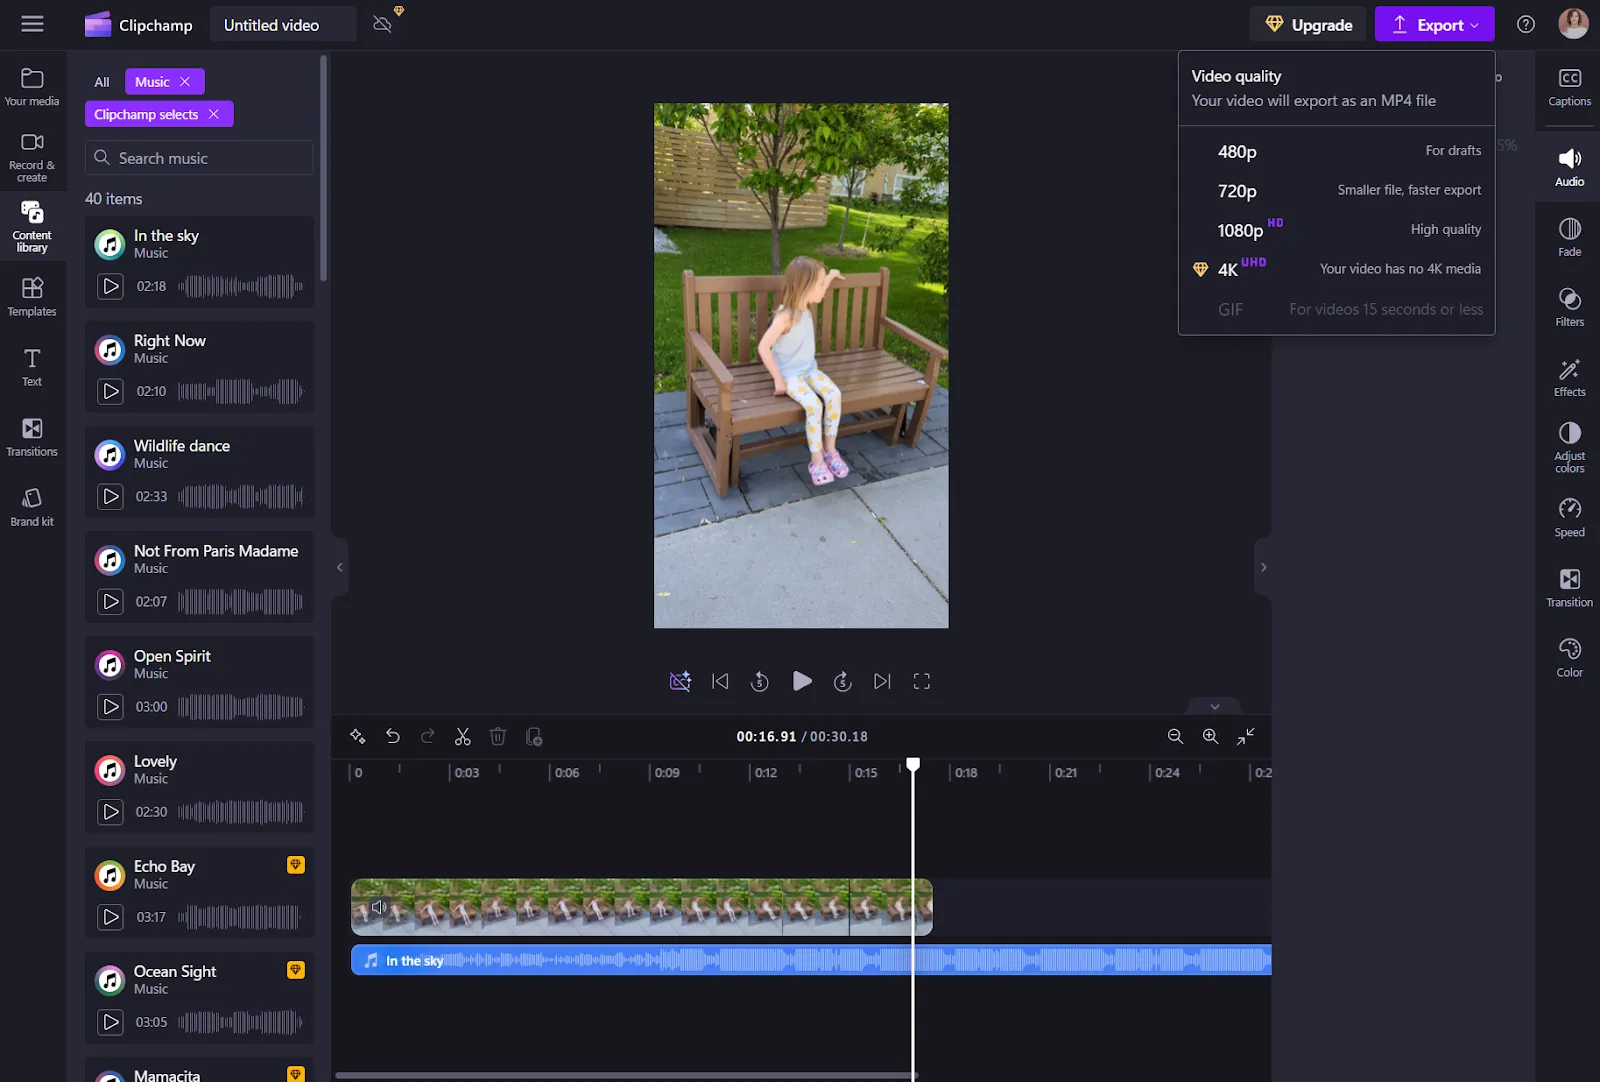
Both Windows 10 and 11 now support Clipchamp for video editing. Follow these simple steps to add music to your video on a Windows 10 or 11 device:
Step 1: Open the Photos app on your device. If you haven’t already, you can opt to add Clipchamp from the “Settings” menu.
Step 2: Launch Clipchamp on your computer or via your web browser.
Step 3: Select “Create a new video” from the home screen. Then, select “Import Media” to upload your video file from your computer and drag it into the editing screen.
Step 4: Select “Import Media” again to upload audio files from your computer, or click “Content Library” in the left toolbar to browse Clipchamp’s music library.
Step 5: Drag your music from the media library to the timeline.
Step 6: Click on the music track in the timeline to select it. Use the handles at each end of the music to trim the music to the desired length. Adjust volume by clicking on the “Audio” icon (speaker) on the right-hand menu. Fade music in and out by clicking the “Fade” icon (a circle) on the right-hand menu.
Step 7: If you want to synchronize the music with your video, use the handles on the timeline to move it to specific parts of the video. If you need to split the music track, you will find the “Split” tool (scissors) above the timeline.
Step 8: Click the “Play” button to preview and adjust your video. Make any necessary adjustments to the music’s track, position, volume, or length.
Step 9: Once you’re happy with your work, you can export your video by clicking “Export” in the top-right corner of the screen. Here you will have the option to choose the video quality as well. Name your file and save it to your computer.
How to add music to video on macOS using iMovie
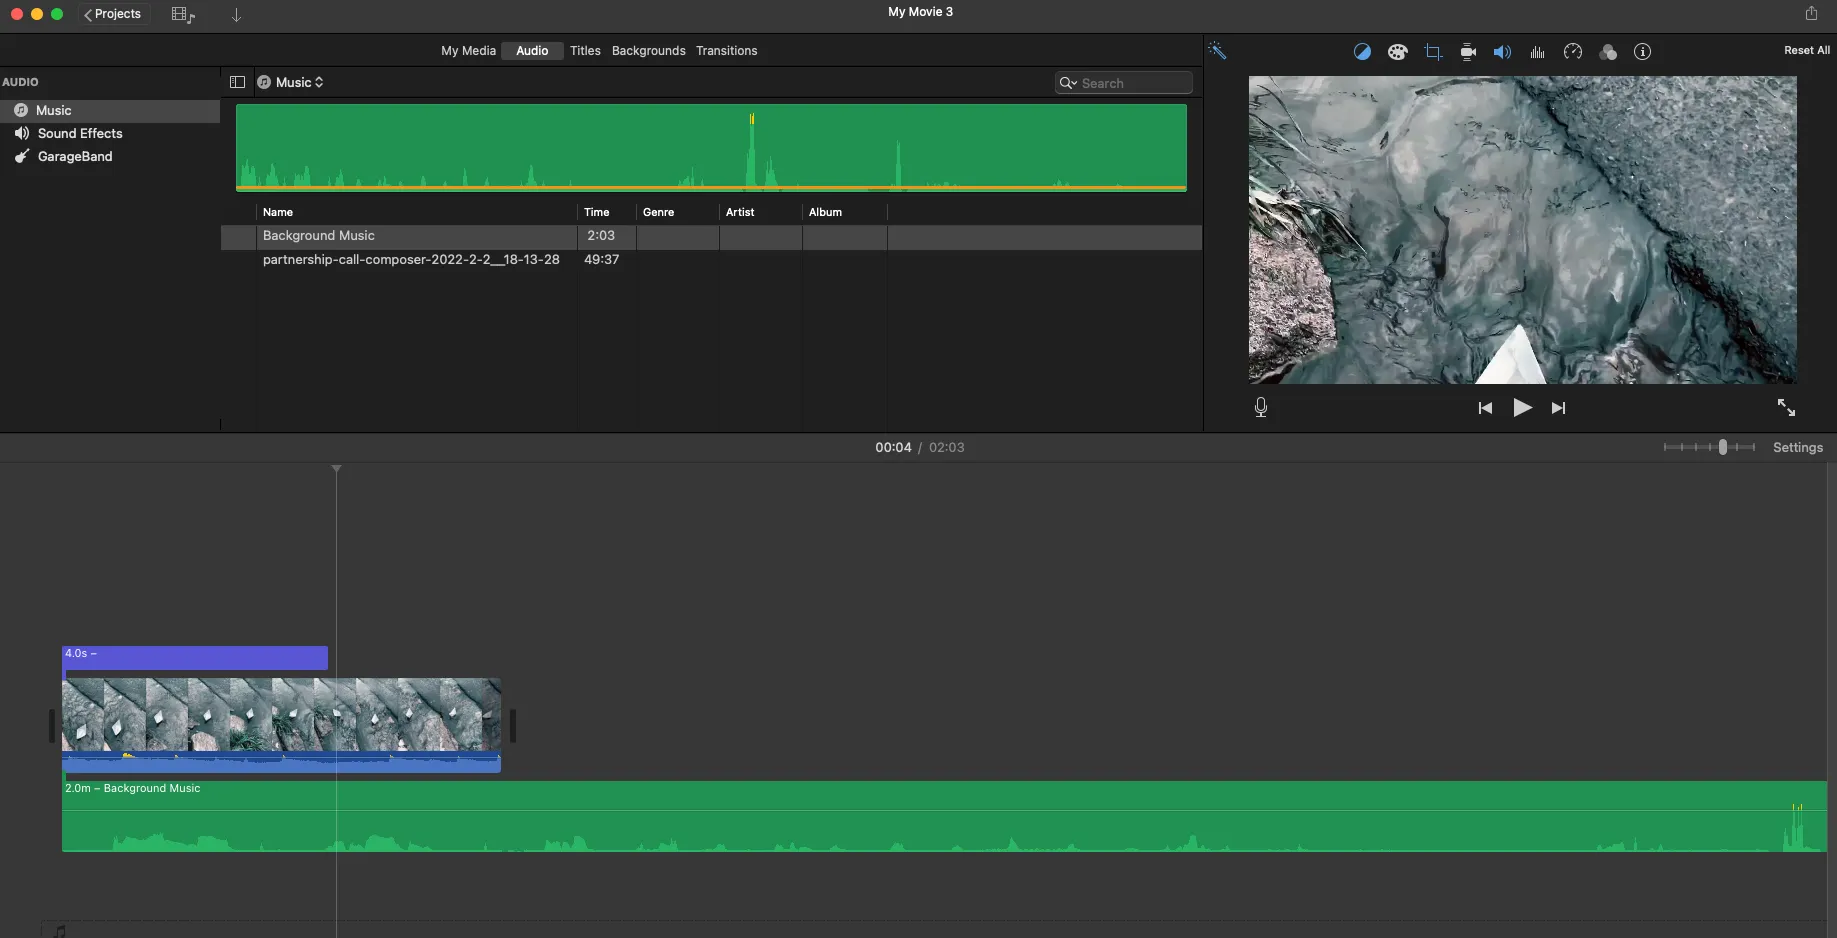
iMovie is the built-in video editor for Mac devices. Here’s how to use it to add music to a video:
Step 1: Open iMovie on your device. Hit “Launchpad” and type “iMovie” in the search bar, then click the purple start icon.
Step 2: Select either “Create New,” or select a project that you’ve already started working on.
Step 3: Click “Import Media.” A small window will pop up where you can browse your device and select the video and music tracks you want to import. Highlight the file(s) and click “Import Selected.” If you have multiple tracks click “Import All.”
Step 4: Your video and music tracks will appear in “PROJECT MEDIA” under “My Movie.” Drag and drop your video track to the timeline, which is located at the bottom of the screen.
Step 5: Drag and drop your music track to your timeline. You can either drag the file before your video, after your video, or just underneath so that they play simultaneously.
Step 6: Trim the length of your music track by dragging the ends of the audio waveform. If it’s a long track, zoom out to make this easier.
Step 7: Customize your video. Adjust volume levels, reduce background noise, add equalization, choose playback speed, and apply audio effects.
Step 8: Preview your video by clicking “Play” in the top right of the screen.
Step 9: Now it’s time to export your masterpiece! Go to “File,” “Share,” and “File.” Rename the title to something useful and descriptive.
Select format, resolution, quality, and compression. Hit “Next” and choose where you would like to save your video on your device. Click “Save.” A notification will pop up on your screen when the exporting has finished.
How to add music to a video on YouTube
.webp)
It’s super easy to add music to a video on YouTube using YouTube’s video editor.
Step 1: Select the video you would like to edit, click “Editor”, and select “Audio”.
Step 2: Browse YouTube’s music library, preview music tracks, and click “Add” on your chosen track.
Step 3: Filter between tracks that are “Attribution required” or “Attribution not required”.
To learn the steps in-depth we’ve got a full guide on how to add music to YouTube videos.
How to add music to videos on your phone
Many mobile platforms already have built in tools for adding music. For example, you can this directly on Instagram and TikTok, (We’ve got a full Instagram editing guide and TikTok editing guide if you’d like to learn how.)
The above said, using a dedicated editing app will give you more flexibility. For example with CapCut this is how you can add music to videos:
Open up your video project. Click on the “Audio” button in the bottom toolbar. Then click “Sounds” and you’ll see a variety of tracks to choose from.
Choose a song and click the “+” button to add it to your video.
The song will now appear in your editing timeline where you can drag the edges to trim the song or lengthen it. You can also hold and drag to move the track around.
Best practices for adding music to videos
Here are some basic guidelines to follow when adding music to your videos.
Audio levels (dialog vs. music)
Music should always enhance your video, not take away from the main message. Always adjust your audio levels to ensure the dialog is clear, and not competing with your background music.
Fade-in and fade-out effects
Subtly applying sound effects such as fading the music in and out helps make your transitions smoother, and certainly adds a level of professionalism.
Seamless background music
You’ve found the perfect music track for your video, but it’s too short. Not to worry, this is where looping comes in very handy! Looping is where you repeat a music track so that it plays continuously in the background.
There are many audio editing tools that include features that do this automatically, such as Adobe Audition. This ensures the music plays continuously without any noticeable breaks.
Troubleshooting common issues
Here are some common issues when adding music to videos - and our tips on how to fix them.
Audio sync problems
Audio syncing issues can be frustrating, but there are a few things that you can try.
First, in your chosen editor, you can adjust your timeline settings to see if this fixes the issues. There may have also been an issue when you imported the media. In this case, a simple delete and re-import may solve the problem.
Volume inconsistencies
If some tracks sound much louder or quieter than others, you can improve audio quality using an audio editor. You can do this in Riverside by opening the Editor and clicking “Export.” There you can choose to “Normalize Audio Levels” or “Remove Background Noise.” The automated tool will do it in one click.
For more advanced audio editing, you could try a tool like Audacity, which is free and available for both Mac and Windows computers.
File format compatibility issues
Compatibility issues with file formats often occur when you’re using different software to record and edit your video.
If you try to upload a file that isn’t compatible, use an online converting tool - most are free. It’s also a good idea to make sure you’re using the most up-to-date version of your editing software, as this can help prevent this issue as well.
Software crashes
Losing a project to a software crash isn’t uncommon, especially if you’re editing large files or have a lot of different software and applications running on your machine.
To avoid this, save your progress frequently, and always have a backup of your raw audio. You should also close anything on your device that you don’t need running in the background.
Again, it’s always a good idea to make sure your editing software is updated to the latest version.
Final thoughts
Adding music can help to make your videos more compelling and engaging. It also helps to portray emotions and adds a level of professionalism. This is great for standing out and attracting new viewers.
If you need more help getting started, there are plenty of online communities where you can get more advice and support. You can also reach out to Riverside’s support team. We’re always happy to offer support and guidance!
So what are you waiting for? Start adding music to your videos today!
FAQs about adding music to a video
Still unsure about adding music to a video? Here are some answers to your frequently asked questions!
Is it legal to use any music in my videos?
Unfortunately, you can’t use any music you find in your videos. You must have the legal right to use your chosen music track. Always opt for royalty-free music, or other options that have the correct licenses to avoid copyright infringement issues.
Always check the small print, and check with the provider if anything isn’t clear in the license.
Will adding music affect my video's file size or quality?
Any additional media, such as music, will increase the overall file size of your video. When done correctly, however, the size change shouldn’t be significant.
Always make sure to either compress your music files on upload or export. It’s also recommended to choose high-quality audio files.
Can I adjust the music volume relative to other audio in my video?
Yes, most editing tools will allow you to adjust the volume of all audio tracks you are working on, such as music, spoken dialogue, and sound effects. This way you can ensure that you have the right volume for each media file so that they complement one another.
How do I add music to a video for free?
There are many places where you can browse properly licensed music tracks for your video that are free, such as YouTube Studio, Pixabay, Soundcloud, and more.
When it comes to editing your video, there are also plenty of free options, including Riverside. With Riverside, you get an all-in-one recording and editing tool that’s super easy to use. It also integrates with social media platforms like YouTube for easy uploading.


.webp)


.webp)


