%20(1)%20(1).webp)


Table of contents:
Can you record yourself and your screen on Mac?
How to record yourself on Mac: 4 Methods
Recording yourself on Mac with the built-in camera
Recording yourself on Mac using your iPhone or iPad
Recording yourself online on Mac using Riverside
Best practices for nailing your recordings on Mac
Troubleshooting: Why can't I record a video on my Mac?
Whether you’re trying to record a quick video call or just want to record a presentation, you’ll need to know your way around your computer's recording tools.
If you’re recording on a Mac, there are various ways to record yourself.
Wondering how to get started? Here are 4 simple methods to learn how to record yourself on Mac!
Can you record yourself and your screen on Mac?
Yes! Recording yourself is easy using a Mac device, so long as you have access to suitable software tools. Many solutions also include functionality for screen recording, so you can capture onscreen displays and video streams simultaneously.
There are a variety of Mac-compatible tools you can use to achieve different goals and access unique recording features and functionalities. The right choice for you will depend on your goals and recording needs. This is why it’s helpful to fully understand what options are available.
How to record yourself on Mac: 4 Methods
Ready to start recording on Mac? Here are 4 easy methods you can use to get started!
Recording yourself on Mac with the built-in camera
Your first option is to record yourself using Mac’s built-in camera tools. This is a great solution if you are new to recording and need a simple, easy-to-use system with minimal complications. However, Mac’s native camera does come with some limitations.
The built-in camera is limited in terms of functionality and won’t support extra recording features, such as native editing. Mac’s built-in camera is also prone to producing low-quality videos, so it’s not the best choice if you need crisp, clear, professional-looking content.
How to record yourself on Mac with QuickTime
Recording with QuickTime is easy! Follow these simple steps to begin.

Step 1: First, launch the QuickTime Player app on your Mac device.
Step 2: At the top left of your screen, select “File”, followed by “New Movie Recording”.
Step 3: Select the Options menu, and choose camera, microphone, and screen inputs. You can also set your recording quality here.
Step 4: Once you’re happy with your settings, exit the Options menu, and press the Record button at the bottom of your screen to start capturing content.
Step 5: When your recording is complete, press Stop, and choose File, then Save to name and save the file.
How to record yourself on Mac with Photobooth
Photobooth is another native-to-Mac simple recording solution. Get started with these steps.
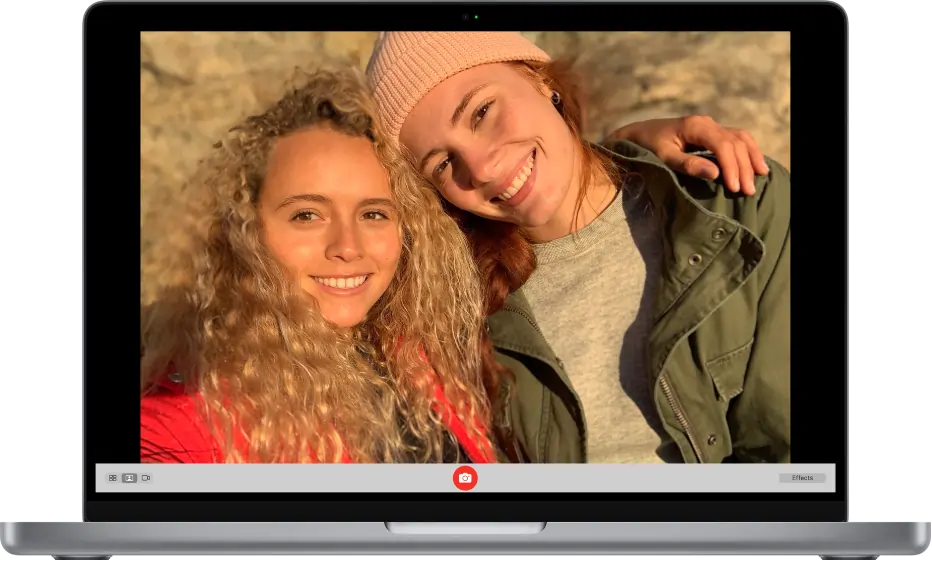
Step 1: Make sure that your camera (or built-in webcam) is set up correctly before beginning to record.
Step 2: Next, launch the Photobooth app on your Mac device.
Step 3: At the bottom of your screen, use the toggle to select the Video option.
Step 4: Press Record at the bottom of your screen to begin a new recording.
Step 5: When you’re done, press Stop, and Save your recorded file.
Recording yourself on Mac using your iPhone or iPad
In some cases, it’s also possible to use your iPhone or iPad as a camera, feeding video information directly into your Mac device. This can help you achieve higher video quality while still making the most of readily available recording equipment.
Recording using an iPhone or iPad camera is simple and effective. Unfortunately, many phones won’t deliver the same results as using a professional video camera, but it’s a great starting point for enhancing your video content. You’ll find that some phones can even capture 4K video.
How to record yourself on Mac using Continuity camera
You can combine your iPhone or iPad camera with Mac’s recording infrastructure using the Continuity camera. Here’s how!
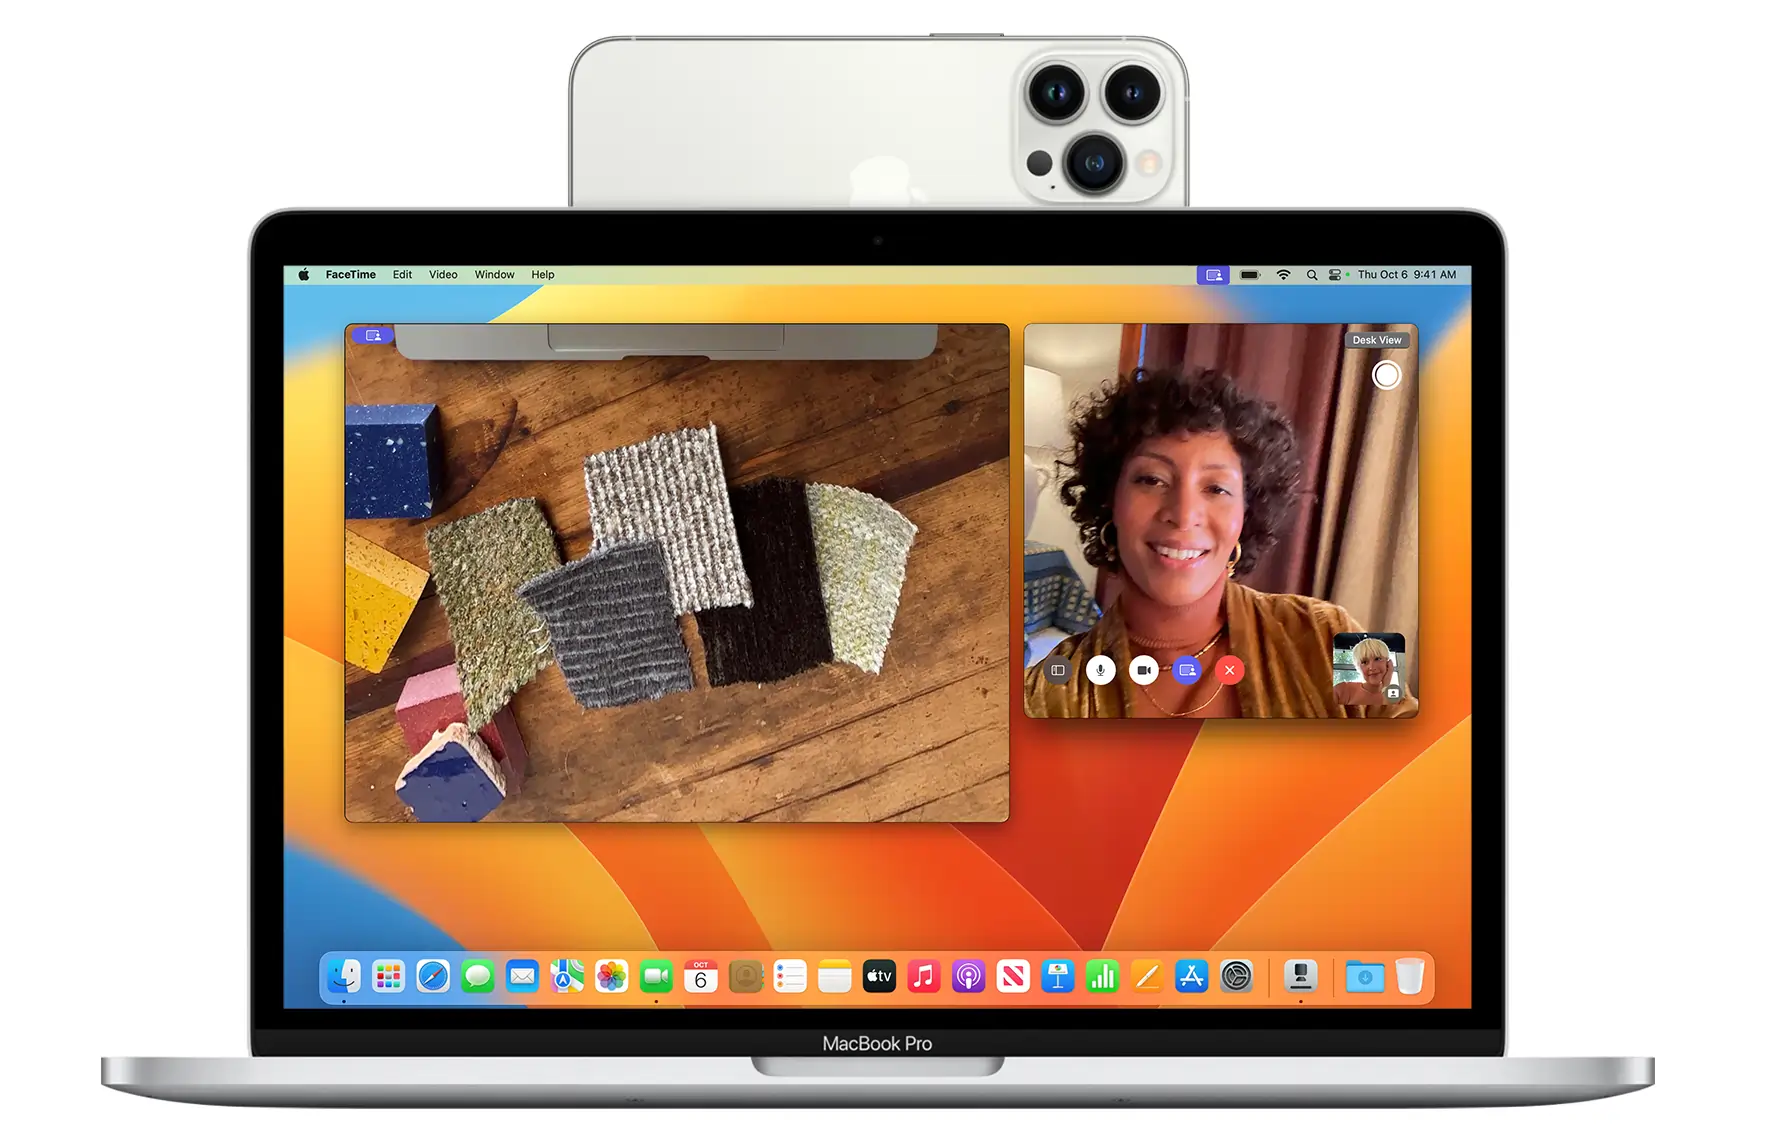
Step 1: Start by securing your iPhone or iPad device so that it stays steady near your Mac throughout the recording process. A compatible mount or stand can help.
Note: Your iPhone or iPad will need to maintain power while recording, so it’s a good idea to plug it into your Mac or a USB charger.
Step 2: Next, open FaceTime or another app to use with your iPhone or iPad camera. If the app doesn’t automatically use the iPhone or iPad camera, choose this input from the app’s video or camera menu.
Step 3: If you want to record your device’s microphone as well, ****navigate to the Apple menu, then “System Settings”, and select “Sound” from the sidebar to select your iPhone or iPad microphone in the audio “Input tab”.
Step 4: When you’re ready to start, press Record, and direct your focus to your iPhone/iPad camera.
Step 5: When you are happy with your content, Stop the recording, and take care to correctly Save files, ideally to both devices.
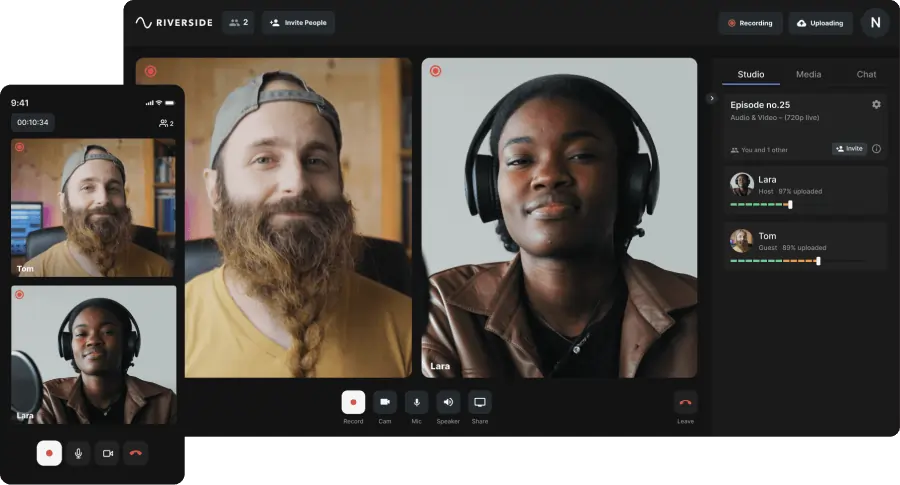
Recording yourself online on Mac using Riverside
When it comes to recording yourself online via a Mac device, Riverside delivers many great advantages. With Riverside, you’ll have access to higher-quality recording tools and an AI video editor to streamline your workflow.
Riverside offers an intuitive web-based recording solution! Using Riverside, you can easily capture studio-quality video and audio content with separate tracks for up to 8 call participants. You and your guests can join a recording from any Mac device, or you can join from an iPhone if you’re recording on the go. Better yet, you can use our multi-cam feature to turn your phone into a secondary webcam.
Our platform supports up to 4K video local recordings and offers a comprehensive editor suite, where you can refine your content. You can even access AI features that take control of the complexities for you. For instance, Magic Clips uses AI to automatically identify key moments in your recordings and turn them into short-form video clips for content repurposing. This is perfect if you know you want to produce professional content but feel unsure of your own editing capabilities.
Key features:
- Intuitive mobile app for easy recording control when you’re on the go
- iPhone camera controls, allowing hosts to control their guests video settings
- Multi-cam feature, allowing you to turn your phone into a second camera angle
- Up to 4K video resolution, making your content clear and professional
- Local recording, capturing video and audio directly on each user’s own device instead of relying on internet
- Separate tracks, both for video and audio for up to 8 call participants
- Advanced Riverside Editor, including captions and layout controls, plus text-based editing
- Magic Clips, using AI technology to automatically create short social media clips
- Automatic transcriptions are available in over 100 languages
- Built-in teleprompter to help you stay on track throughout your call

Best practices for nailing your recordings on Mac
When it comes to recording yourself on a Mac device, there are a few things you should keep in mind for the best possible results.
Know your goals
Knowing what you want to achieve helps guide all other decision-making. By recognizing what you need, you can look for the right features and tools, now and in the future. Do you need simple, low-quality videos for personal use? Or are you creating high-quality clips for social media or business purposes?
Choose software wisely
When choosing software, think about the tools and features that work best for your needs. Look at aspects like recording resolution, separate track recording, and built-in editing tools. You may also want teleprompter software built into your recording platform to help you keep track of things. Consider your existing skill level and how different software tools can accommodate this.
Curate your environment
Recording isn’t just about the equipment you use. The environment you record in, greatly impacts quality. When you’re recording on your Mac, try to record in a quiet space with minimal background noise. Capture content during periods where distractions are limited. Ideally, record in a space that makes you feel inspired and comfortable.
Be willing to edit
No video project is perfect from the outset! That’s why editing is so valuable. Once you’ve recorded your content, revisit it and polish it off by trimming out unwanted parts, adding effects, and more. This is where tools like Riverside, with text-based editing and AI tools, can help take the burden off your shoulders.
Learn along the way
Finally, the secret to good video production is to never stop learning. Even as you develop your confidence as a content creator, it’s important to keep improving your skills. Explore new features and tools within your recording software. Learn from peers in your niche or industry. Rewatch your old content and think about what you can do better in the future.
Troubleshooting: Why can't I record a video on my Mac?
Sometimes, recording on Mac can mean running into technical difficulties! Fortunately, most issues have a simple solution.
If you are unable to record a video on your Mac device, check that your operating system is completely up-to-date and compatible with your chosen software. Verify that you have installed all the relevant files to use your recording tool.
If you’re still having trouble, you may need to visit your device settings and check that the correct camera and microphone are selected as standard input sources. When you’ve checked the right boxes, your recording should go off without a hitch!
If these fixes still aren’t working, you might be encountering a glitch or a problem with your device. If this happens, it’s usually best to wait a while and try again. Still, having challenges? Approach an Apple Support technician who can guide you through possible problems and their solutions.
FAQs on how to record yourself on Mac
Still unsure about how to record yourself on a Mac device? Here are our answers to a few frequently asked questions.
How do I record myself with audio on my Mac?
Recording yourself with audio on a Mac is easy! Most recording tools include in-built audio capture. All you need to do is check that you’ve selected the correct microphone in your app settings. Verify that your audio is working before your real recording by reviewing the mixer panel or capturing a short test project. Then you’re ready to begin!
Should I record myself using my Mac built-in camera?
Recording yourself using Mac’s built-in camera can be a good option if you lack access to other recording equipment. However, the native camera is limited in the quality it can produce. This means that your video may appear grainy or dull. If you want to capture higher-quality video content, it’s best to use a video camera or even your iPhone or iPad camera linked to your Mac device.
Final thoughts
Recording on Mac is a valuable skill that can help you capture great video content in no time! And the more you learn about the process, the better your recordings will be.
By selecting the right recording tools and following the steps to achieve the best possible quality, you can create strong content suitable for a range of uses.
Want to get started recording yourself on Mac and achieving studio-quality visual results? Try Riverside today, and capture content that makes an impact.


%20(1).webp)
.webp)
.webp)


