


Table of contents:
If you’re a content creator, you know the value of editing!
It’s all about keeping the audience’s attention span. Cutting out unnecessary parts of your videos makes them super snappy, engaging, and interesting. But how can you get started?
You’ve come to the right place if you are looking for answers. In the following guide, we will look at how to cut a section out of a video. Here’s what you should know.
Can you cut out parts from a video?
The short answer is yes — you certainly can.
Luckily, learning how to shorten a video is easier than you might imagine. Once you have recorded your content, there are plenty of free and paid-for tools you can use to isolate and delete the parts you no longer need. In the following guide, we will take a look at seven different programs you can use.
How to Cut Out Parts of a Video: Step-by-Step
Ready to get started? While each program will be slightly different, most follow a similar process. Here’s a basic step-by-step on how to cut out parts of a video.
Step 1: Select the video you want to edit
The first step in cutting out parts of a video is selecting the footage you want to modify. You will need to have the video saved to your device, or you should have it accessible in the cloud.
Step 2: Download video editing software
Now that you have selected your footage download an appropriate editing tool. Later in this guide, we will take a look at how to shorten a video with various tools. Make sure you know which editing software you want to use. Download it and open it to get started.
Step 3: Select the content you want to cut
Open up your project file and start trimming away any unwanted sections. Use markers to indicate where to cut or split clips since different programs may require other instructions. The exact process you use will depend on the software. Some programs allow you to simply drag and drop parts of a video. However, for others, you will need to use markers and cut out the content. Choose software that suits your editing ability here.
Step 4: Save your edited video
After making all necessary changes, you should save or export your newly edited file. You can do this easily using pre-set export settings available on most video editing tools.
How to Cut Out Parts of a Video: 7 Tools to Try
1. Riverside
Price: Free (Free Version), $15.00 (Standard Version), $24.00 (Pro Version)
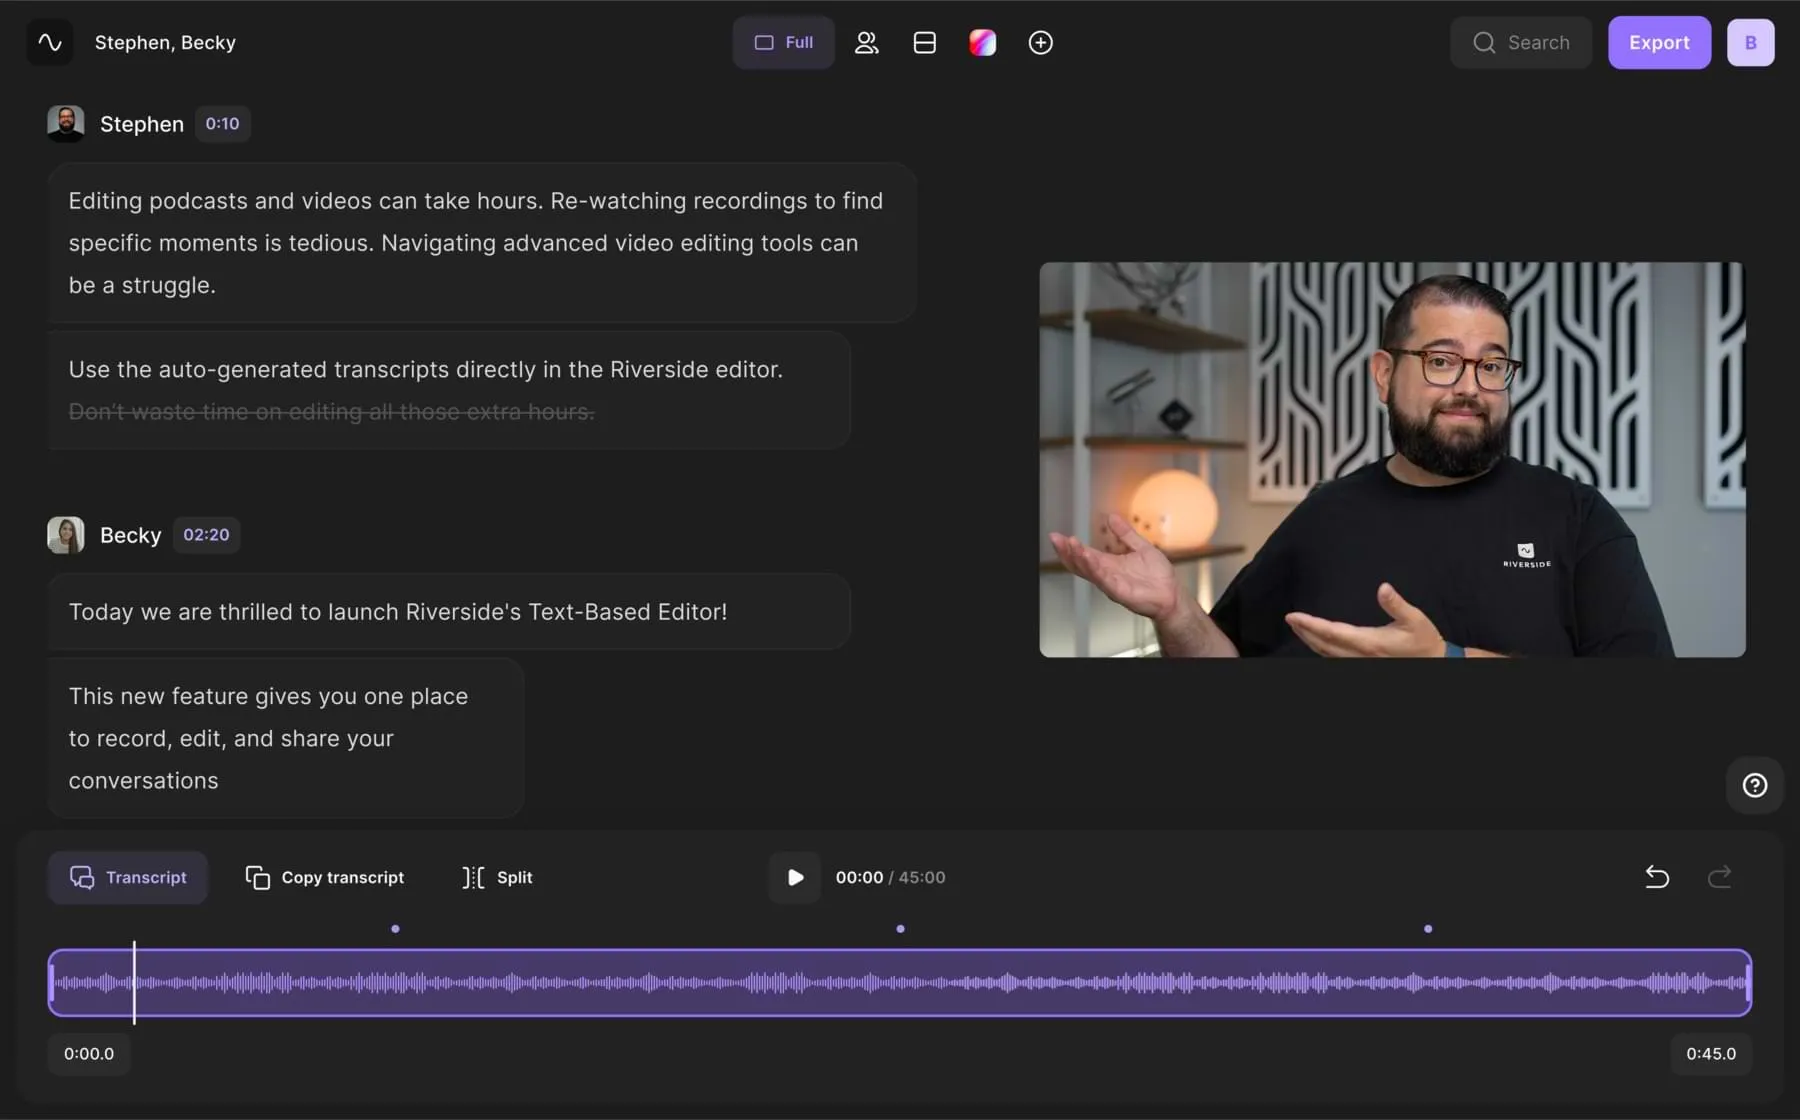
Riverside is professional video creation software that ticks all of the boxes. There are plans suitable for any budget. You can start by recording your video in up to 4K resolution without worrying about internet connection getting in the way. With local recording, everything records directly on each person’s device. You can capture separate audio and video tracks giving you greater editing control, and with our text-based editor, trimming your content is a breeze.
Riverside’s text-based editor uses AI transcriptions, so cutting your videos is as easy as deleting text. Transcriptions are available in over 100 languages and any text you remove from your transcript removes the matching video and audio in your recording.
One of the major advantages of Riverside is that it’s suitable for people of any skill level. You don’t need to be a pro video editor to get this right. You can also create shareable clips effortlessly or use customizable backgrounds and layouts to give your video a personal touch.
How to Cut Out Parts Of a Video With Riverside
Step 1: Open Riverside and create your own online recording studio. Record your video content remotely, with or without guests. (You can learn how here).
Step 2: After all your files upload, select Go to Editor from the recording dashboard.
Step 3: In the editor, you’ll see a preview of your transcript, along with the usual video timeline editor.
You can cut out sections by deleting text in your transcript. Select the content you want to cut (by highlighting the text), and then press Remove to cut it. It works the same way as editing text in a word processor.
Alternatively, you can cut out parts using the video editor:
Click on the beginning point of the section you’d like to cut, and a marker should appear. Select split and a cut will form in the editor. Do the same on the end point of this cut. Select the whole section and click Remove
Step 4: When you have finished editing your video, simply save and export your video file in the format that suits you.

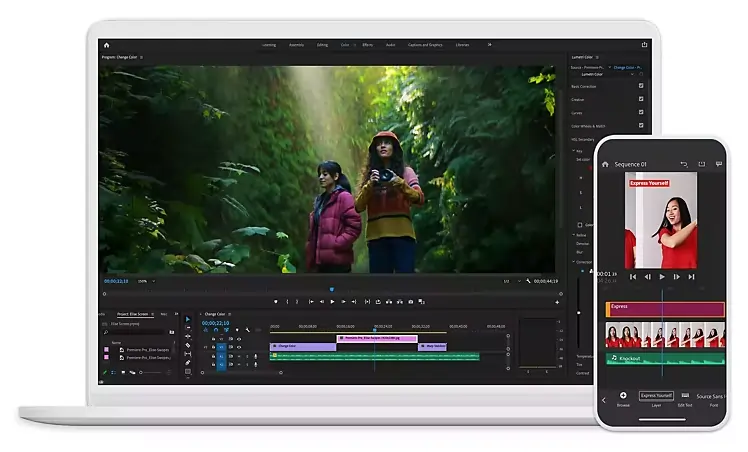
2. Adobe Premiere Pro
Price: $20.99/month (Standard), or $52.99/month (Creative Cloud All Apps plan)
Adobe Premiere Pro is available for Windows and macOS. You can download and install it on both of these platforms. It's a more user-friendly option for basic video editing tasks, so it’s a better choice for those new to video editing. It also comes complete with many tools, including a text-based editor.
How to Cut Out Parts Of a Video With Adobe Premiere Pro
Step 1: Open Adobe Premiere Pro and create a new project.
Step 2: Import the video file you want to edit into the program.
Step 3: Drag the video file from the "Project" panel to the "Timeline" panel at the bottom.
Step 4: Play the video and determine the points where you want to cut out a section.
Step 5: Move the white vertical line to the starting point of the section you want to cut out.
Step 6: Click the "Razor Tool" in the "Tools" panel or press the "C" key on your keyboard.
Step 7: Click on the video clip at the point where you want to cut.
Step 8: Move the play head to the end point of the section you want to cut out.
Step 9: Click the "Razor Tool" again and click on the video clip at the end of the section.
Step 10: Select the section you want to remove by clicking and dragging over.
Step 11: Press the "Delete" key on your keyboard to remove the selected section.
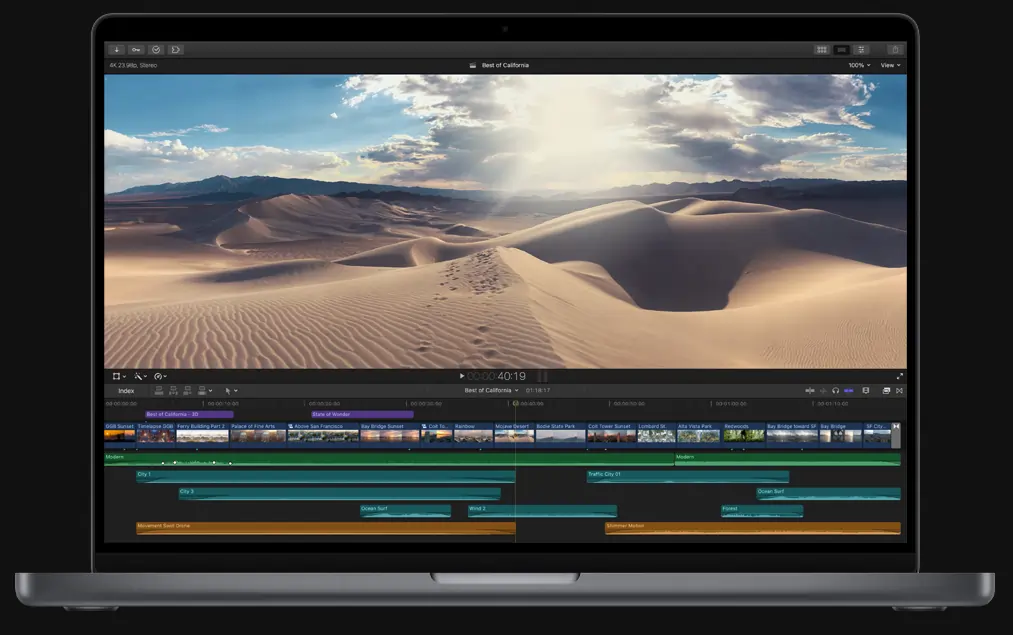
3. Final Cut Pro
Price: $299.99 (one-time purchase)
Final Cut Pro is a professional video editing software by Apple Inc. It supports various video formats and resolutions, including 4K and 8K, and allows users to import and export footage from multiple cameras and devices. It’s relatively straightforward to use
How to Cut Out Parts of a Video With Final Cut Pro
Step 1: Open Final Cut Pro and create a new project.
Step 2: Import the video you want to edit into your project.
Step 3: Drag the video clip from the browser to the timeline.
Step 4: Play the video and locate the section you want to cut out.
Step 5: Set the vertical line on the timeline to the beginning of the section.
Step 6: Press the "I" key to set an “in point”.
Step 7: Set the marker to the end of the section you want to cut out.
Step 8: Press the "O" key to set an “out point”.
Step 9: Select the section you want to remove and press the "delete" key.
4. iMovie

Price: Free (on Apple devices)
iMovie is a video editing software Apple Inc. developed. With that in mind, it is available for free on all macOS, iOS, and iPad devices. The software allows you to edit, create, and share high-quality videos. It has handy editing features, including basic editing tools such as trimming, adding transitions, titles, music, and effects.
How to Cut Out Parts of a Video With iMovie
Step 1: Open iMovie and create a new project or open an existing one.
Step 2: Import the video you want to edit into iMovie.
Step 3: Drag the video clip you want to edit from the Project Media section onto the timeline at the bottom of the iMovie window.
Step 4: Move the white line to the beginning of the section you want to cut.
Step 5: Click on the video clip to select it, then click on the scissors icon above the viewer.
Step 6: Move the play head to the end of the section you want to cut, and click on the scissors icon again.
Step 7: Click on the unwanted section of the clip to select it, then press the delete key on your keyboard.
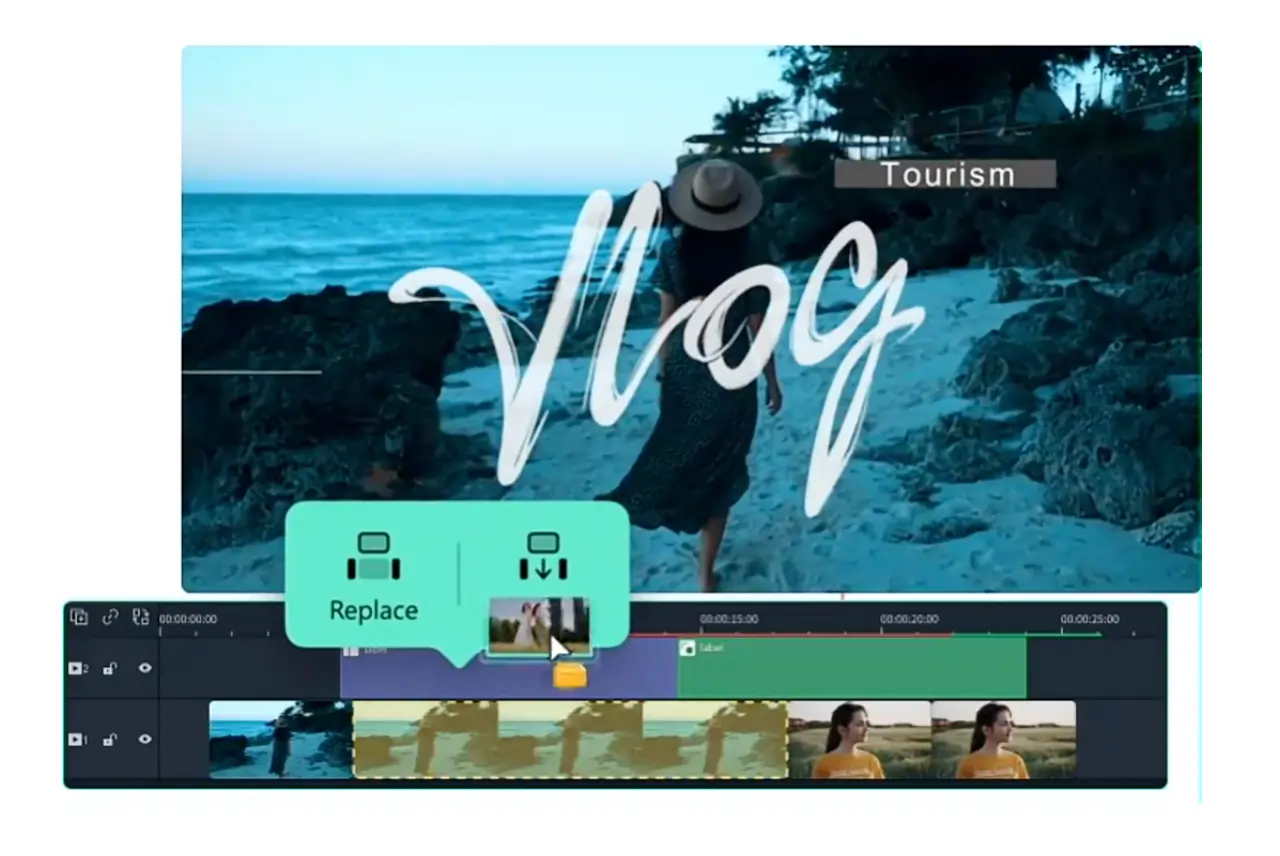
5. Filmora
Price: $39.99/year
Filmora is available for both Windows and Mac operating systems. What's more, it’s super user-friendly and accessible to beginners while still offering advanced features for more experienced editors. You can pay a simple annual subscription for this software.
How to Cut Out Parts of a Video With Filmora
Step 1: Open Filmora and import your video clip into the software.
Step 2: Drag and drop the video clip from the media library into the timeline at the bottom of the screen.
Step 3: Use the playback controls to find the point where you want to start cutting in the video.
Step 4: Click on the "Scissors" icon above the timeline or press the "S" key on your keyboard.
Step 5: Next, use the playback controls to navigate to the point in the video where you want to end the cut.
Step 6: Click on the "Scissors" icon again or press "S" on your keyboard.
Step 7: Select the section of the video clip you want to remove by clicking on it in the timeline.
Step 8: Press the "Delete" key on your keyboard or right-click on the selection and choose "Delete" from the context menu.
6. DaVinci Resolve
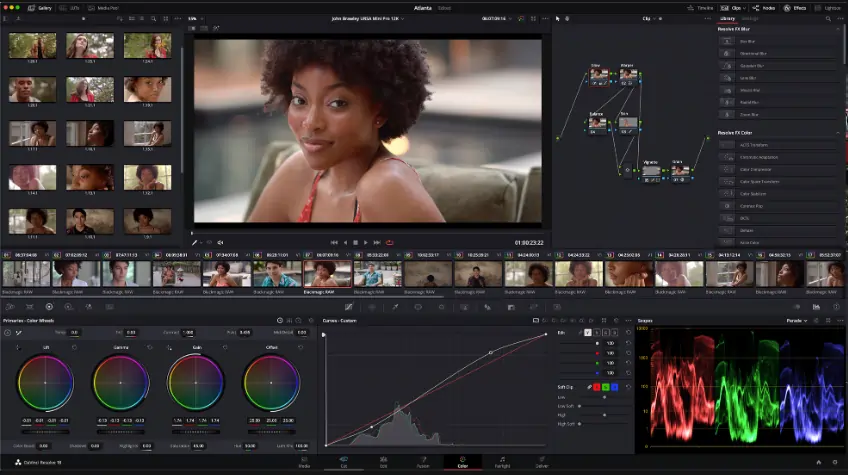
Price: Free (Free Version), $24.99/month (DaVinci Resolve Studio)
The software is available for Windows and macOS operating systems in two versions: DaVinci Resolve and Resolve Studio. The former is a free version that offers basic editing andcolorr correction tools. The other is a paid versionwiths more advanced features, such as 3D compositing, motion graphics, and multi-user collaboration tools.
How to Cut Out Parts of a Video With DaVinci Resolve
Step 1: Open DaVinci Resolve and create a new project.
Step 2: Import the video file you want to edit by clicking the "Import Media" button on the Media page and selecting the video file from your computer.
Step 3: Drag the video file to the timeline on the Edit page.
Step 4: Scrub through the video timeline to locate the section of the video you want to cut out.
Step 5: Use the "Mark In" and "Mark Out" buttons to select the range of the video you want to cut out.
Step 6: Press the "delete" key on your keyboard to remove the selected range of the video.
7. Online Video Cutter
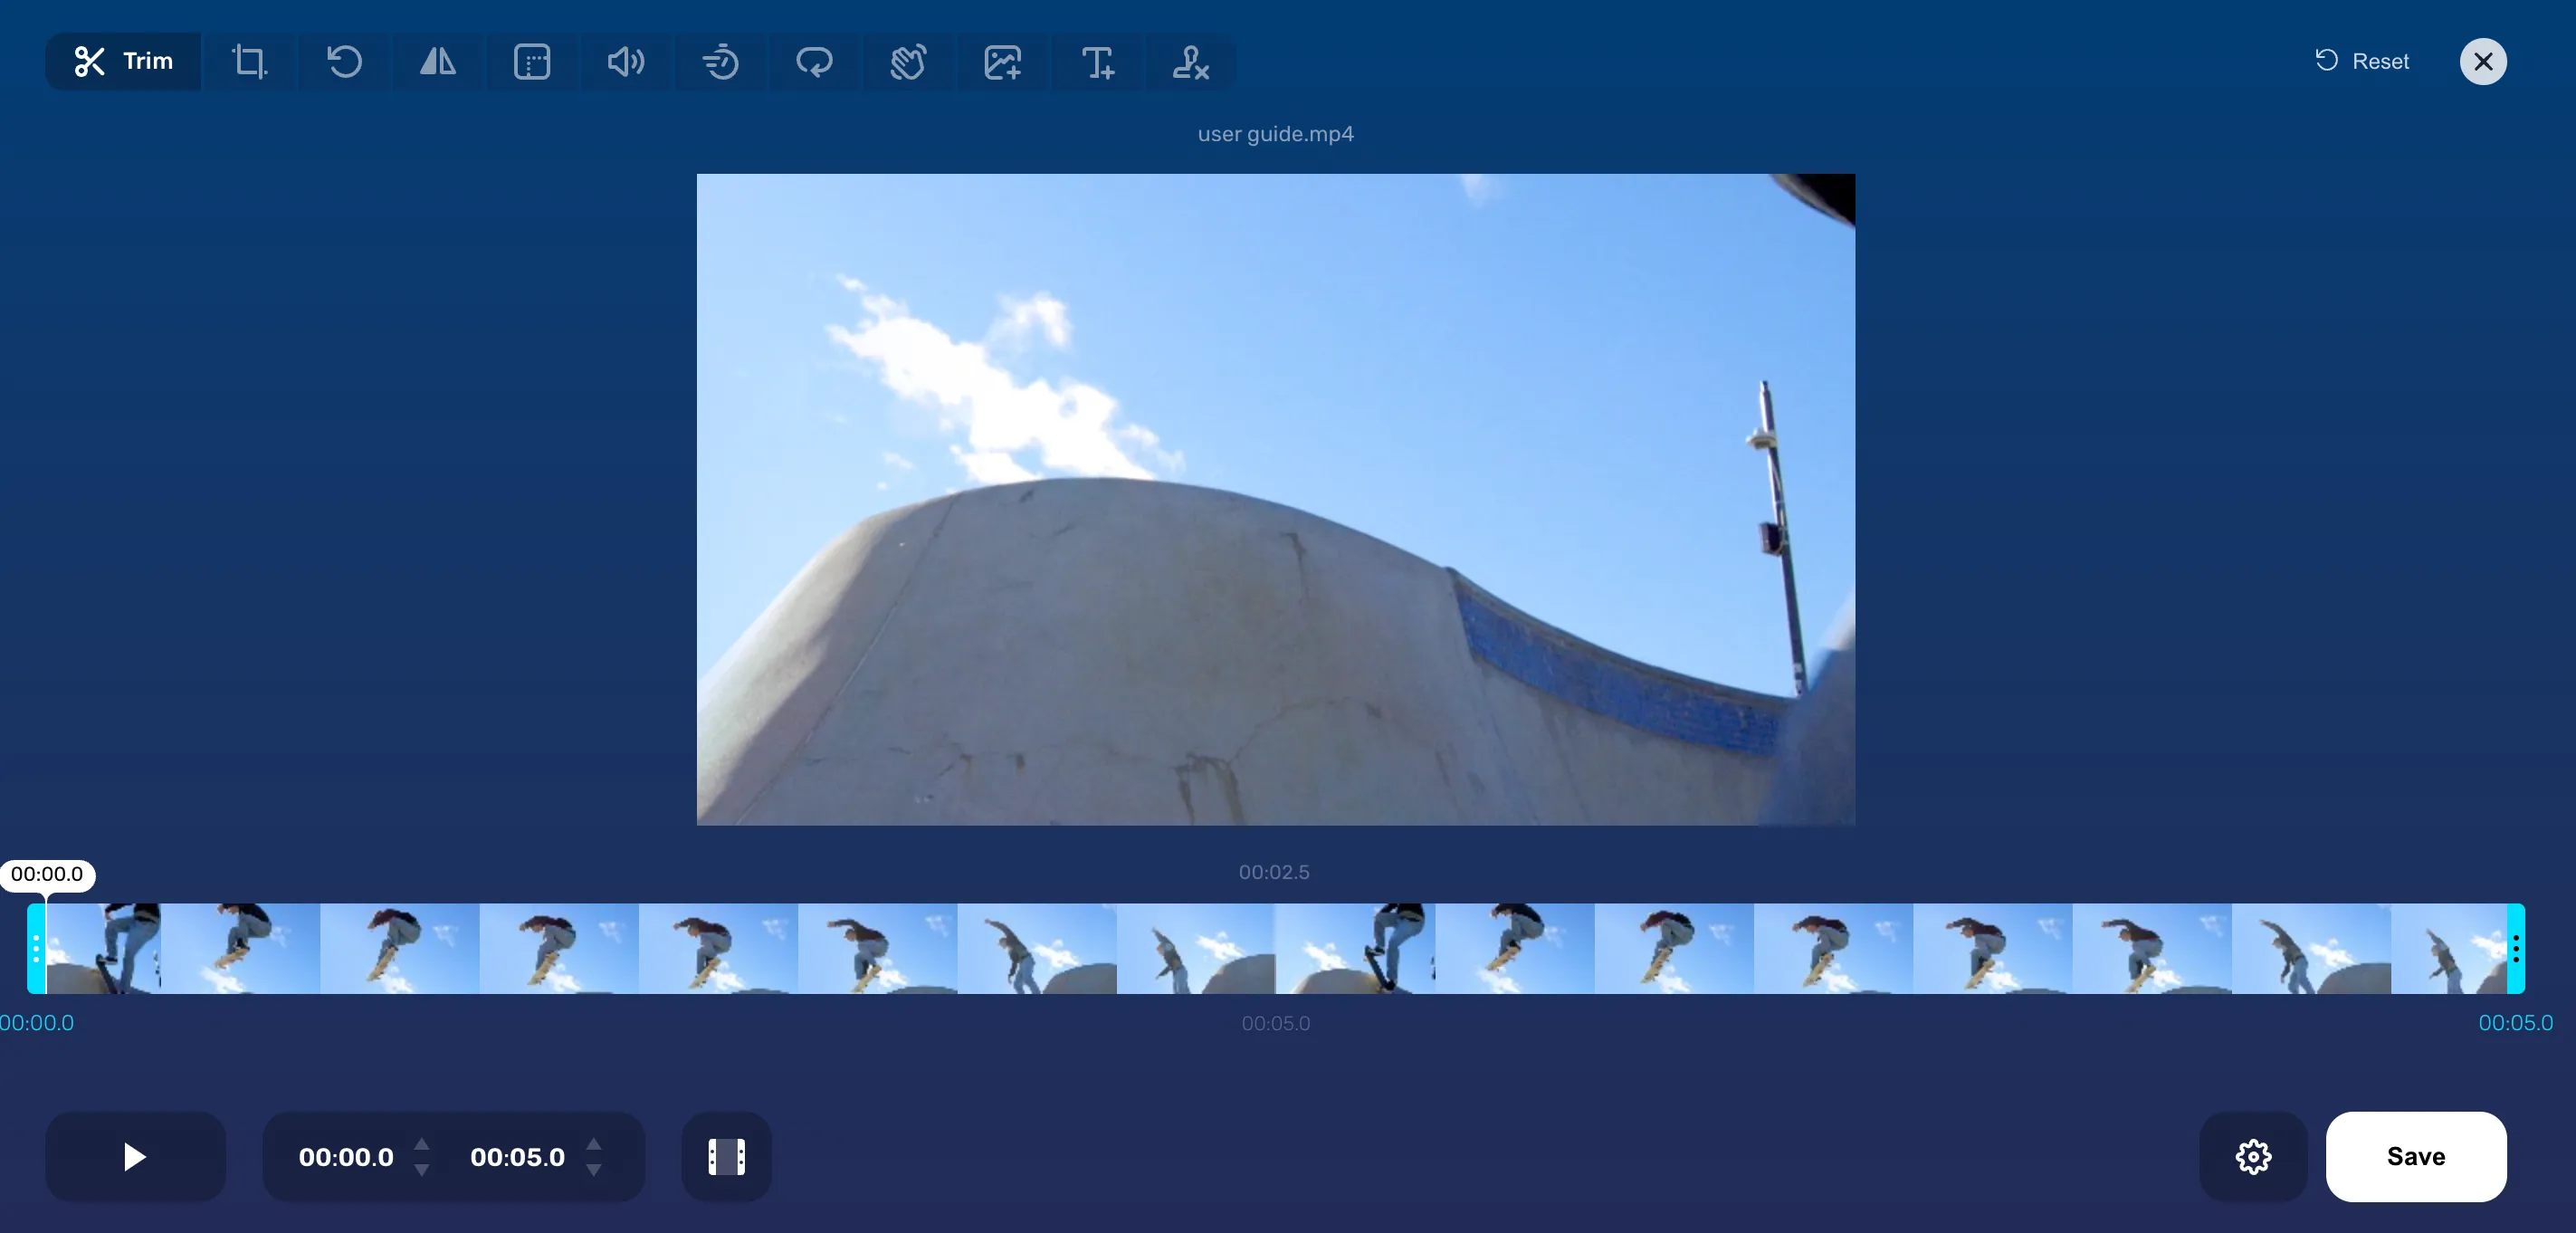
Price: Free
Online Video Cutter is an excellent tool for anyone who can quickly edit and trim their videos without downloading software, also available for Android users. It's an excellent option for those who don't have much experience with video editing and want a simple, easy-to-use tool.
How to Cut Out Parts of a Video With Online Video Cutter
Step 1: Go to Online Video Cutter on your web browser.
Step 2: Click the "Open file" button to upload the video you want to edit.
Step 3: Use the slider on the timeline to navigate to the video section you want to cut out.
Step 4: Once you have selected the section to cut, click on the "Start" button to set the starting point and then click on the "End" button to set the ending point.
Step 5: Use the player at the bottom of the page to preview the cut.
Step 6: Click the "Cut" button to remove the selected section from the video.
Step 7: Click the "Download" button to download the cut video to your computer.
Bonus: How to cut out video clips for social media with Riverside
Looking for a way to repurpose your video content for social media?
With Riverside, you can turn your video recordings into short, shareable clips all in one quick click. Our Magic Clips tool uses AI to detect key moments in your recordings and generates multiple clips you can share all over social media. Here’s how simple it is:
Step 1: Record your video as usual and wait for your files to upload.
Step 2: In the recording dashboard, go the Magic Clips box and click Generate clips. The AI will do the rest and create multiple clips for you.
Step 3: Download your clips, or hover over them to select Edit. This will take you to the Editor where you can add captions, customize your video layout and more.
FAQs on How to Cut Out Parts of a Video
Looking for some more answers? We’ve got you covered. Here are a couple of FAQs that will help you along the way.
How do I cut out part of a video and save it?
As we have covered in this guide, there are plenty of ways to cut out part of a video. Depending on your needs, you can use any of the above tools to get started. The key to getting this right is isolating the part of the video you want to remove — often with markers — and then press “delete”. Of course, the exact process varies from program to program.
Is there a way to cut out the middle of a video?
Yes. Learning how to edit out parts of a video is relatively straightforward. It’s important to check out the various video editing tools on the market, and figure out which ones work for you. In this guide, we have given you an overview of seven options and how they work.


.webp)
.webp)


