Table of contents:
Who says you need to be an expert to record professional videos?
Though the world of videography can seem intimidating from the outside, tools like Riverside empower everyone to try their hand at making professional videos. Even if you have zero experience creating videos, it’s totally possible to produce professional standard content from the comfort of your home - trust us.
Since everyone has to start from somewhere, we’ve put together a beginner's guide to creating pro videos with tips for leveling up your videography.
TL;DR
- Professional videography is achievable for beginners.
- Using tools like Riverside, it’s possible to create professional quality video from home.
- Videos offer huge benefits - increased engagement, better interactions, and improved shareability.
- You’ll need a mic, camera, good lighting, and a recording tool to make a professional video from home.
Can you create videos professionally without hiring an expert?
Absolutely. Though there are certainly benefits to hiring a professional videographer, this isn’t always possible or necessary. Tools and platforms like Riverside make it easy to create professional and high-quality videos using even the simplest setup.
Why should you create video?
If you’re on the fence about branching out into video content, let’s take a look at why it’s definitely the right decision:
Benefits of video in your content plan
More versatile content
Creating video makes your overall content much more flexible. You can use the video and audio together or use them separately. This means you get a lot more bang for your buck out of each second of content you record.
Higher retention and engagement
According to Forbes, viewers retain 95% of a message when they watch it on video but only 10% when they read it, which is pretty convincing in video content’s favor. Higher engagement means better interactions and a higher chance of developing a loyal audience base.
Cultivate a relationship
Creating video means you can put your face to your voice. Humanizing your content in this way means your audience can connect with you better.
Better content for socials
It’s hard not to notice that our timelines and feeds are full of short-form video content. If you pivot to creating videos, you can also amp up your social presence with short-form clips and reels that should help to maximize your reach. Plus, 83% of people would share video content with their friends if it's related to their interests, so it’s worth putting yourself out there. If you're recording long-form content such as a podcast, you can easily create multiple short-form videos from one recording. Try Riverside's Magic Clips, which identifies key moments in your recordings and turns them into short, shareable videos.
What do you need to record videos professionally?
As we said earlier, you don’t need a full studio setup to achieve professional results.
Video equipment
You’re obviously going to need some video equipment to get started. This includes:
A camera (or webcam)
If you’ve got the budget, we’d recommend investing in an external camera such as a DSLR or camcorder. If you’d prefer not to spend too much, an external webcam or even your iPhone camera will do the trick.
Read more: 13 Best Cameras for YouTube Vloggers & Creators (2024)
Microphone
Next up is a recording microphone. Though you’re recording video, the quality of your audio is also vital to achieving a professional and polished finish. Again, you don’t have to break the bank to get your hands on a decent mic like the RODE PodMic, for example.
You can find a mic using our 2024 guide to the best studio microphones.
Headphones
Finally, consider getting a good pair of headphones. This will help you to monitor your audio and refine your mic technique.
Good lighting
Lighting can make or break your video, which is why it’s so important to get it right. You can invest in artificial lighting for maximum control over light levels or use natural light. A good start is to use three-point lighting, where you have a bright key light in the front, a supporting fill light, and a backlight.
Read more: Three-Point Lighting Guide: What Is It & The Best Way to Setup
Video-making tools
The next thing you’ll need is a video-making tool. This is where you actually record and edit your video. If you’re recording in a studio setting, you could use something like Adobe Premier Pro, Final Cut, or iMovie. For maximum flexibility to record with remote guests, you should choose a platform like Riverside.
4 Tips on creating professional videos without an expert
Embrace your creativity
It’s easy to feel a touch of ‘imposter’ syndrome when it comes to creating video content especially if you’re a total beginner. Our biggest words of advice are to embrace your own creative spirit and inspiration. The beauty of creating videos is that there is no set formula or ‘correct’ way to do it. So even an ‘amateur home video’ can wind up being a really professional piece of content.
Use the right tools
Using the right tools is absolutely essential. You should choose hardware and software that sets you up to record high-quality and professional video. For instance, investing in an external microphone will work wonders on the quality of your audio. This will instantly elevate the overall production quality of your video.
Local recording
In the same vein, using a recording software that locally records each participant is non-negotiable. Local recording means each participant records directly on their own device rather than over the internet. The result is that each participant’s audio and video is the same crystal clear quality that they see on their end, rather than the patchy version you see and hear over the remote call.
Quiet & light recording space
Choosing your recording space carefully is essential because it can greatly impact your video's overall quality. You’re looking for a quiet environment (ideally sound treated), free from background noise, vibrations, and other distractions. Lighting is also a huge consideration. If you can’t afford to invest in artificial lighting, you’ll need to find a room with ample natural lighting.
Keep it (relatively) simple
When you’re just starting out, simple is often the most effective. Though it’s easy and commendable to have big ambitions, the most straightforward concepts are often the easiest to pull off professionally.
How to easily make professional videos with Riverside

Riverside makes recording professional videos easy and intuitive - whether you’re a pro or not. You can (locally) record with up to 9 remote guests in high-quality WAV audio and up to 4K video. A Riverside account comes loaded with a host of powerful features that help you produce a studio-quality video right at home. And the best bit? You can start using the platform for free.
Let’s take a look at some of Riverside’s main features:
- Local recording. Riverside automatically records each participant locally for maximized quality, however strong your internet connection is.
- Separate track recording. Download separate audio and video tracks for each individual participant. This gives you more control during post-production because you can edit each person’s audio liberally.
- High quality video & audio. As we mentioned, Riverside records WAV audio and 4K video to help you achieve studio-quality results.
- Remote recording with up to 9 guests. Include a whole panel of guests in your video from anywhere in the world.
- Browser-based. No need to download an application, simply log in to your Riverside account from your browser to get started.
- Intuitive & easy to use. Riverside is for everyone, which is why there’s no steep learning curve involved in getting started with the platform.
- Mobile app. Record on the go using your phone with the free Riverside iOS or Android app.
- Ai transcriptions. Riverside automatically generates transcripts straight after recording for easy captions and content repurposing.
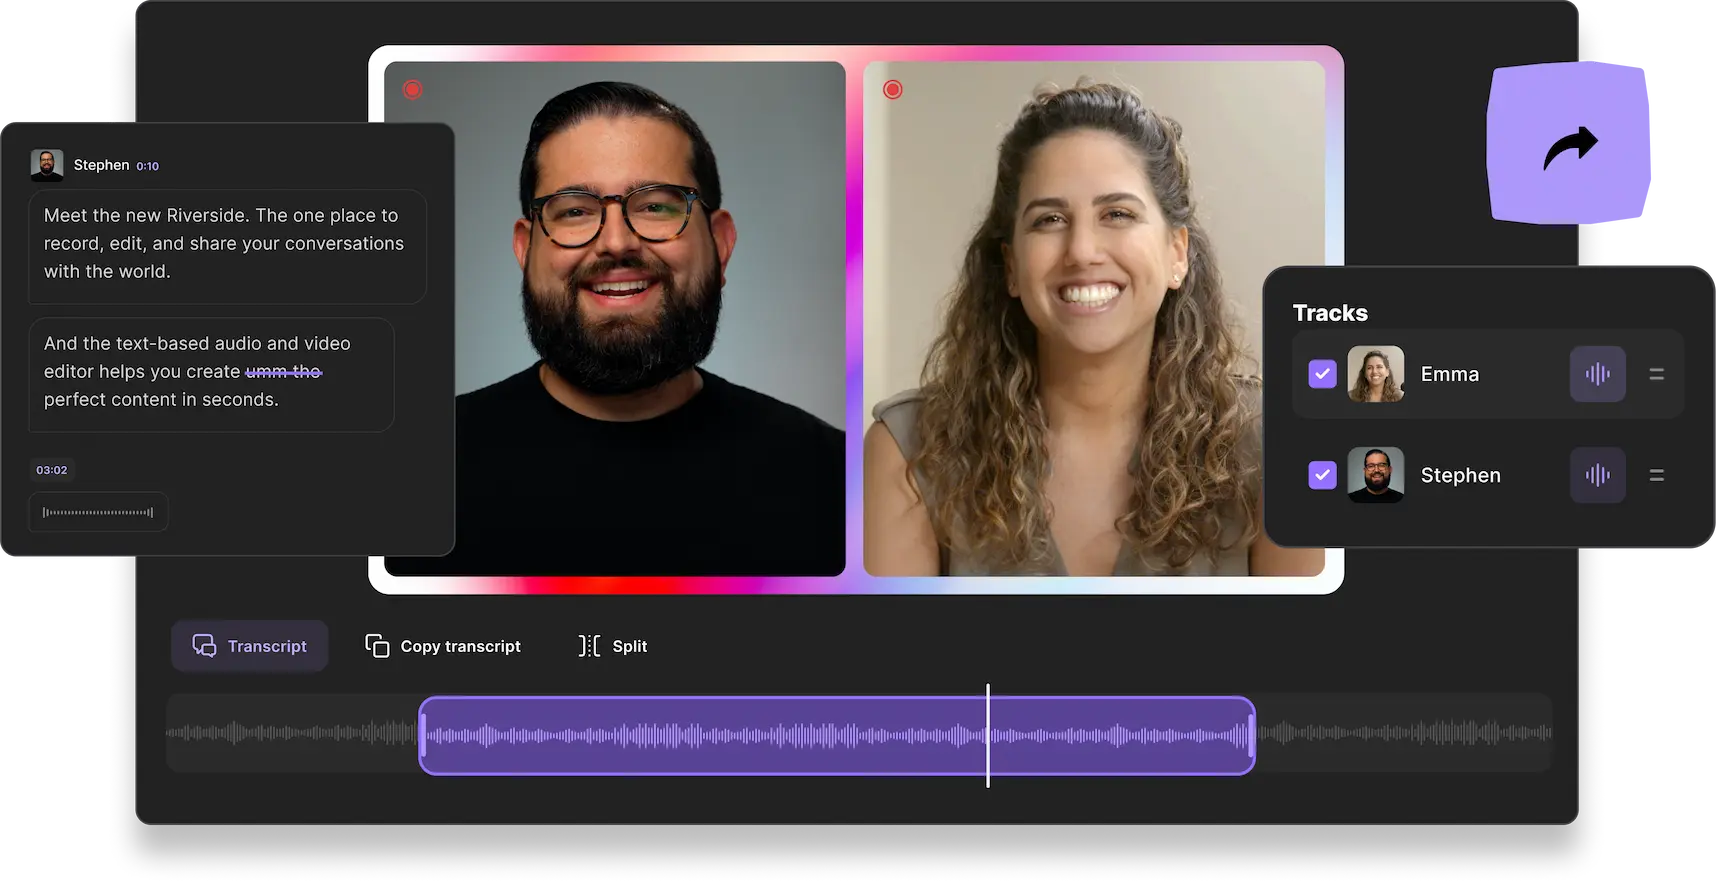
- Easy text-based editing. Use our ai transcriptions to edit your video as quickly as reading through a text-transcript.
- Budget-friendly. Riverside is affordable! You can start with a free plan or upgrade to a paid subscription which offers more benefits, at only $15 per month.
- Instant access to support. If you run into trouble, connect instantly to a customer support agent directly from your recording studio using the Live Chat tool.
Quick Guide to Recording with Riverside
Here’s a brief walkthrough of how to start creating with Riverside:
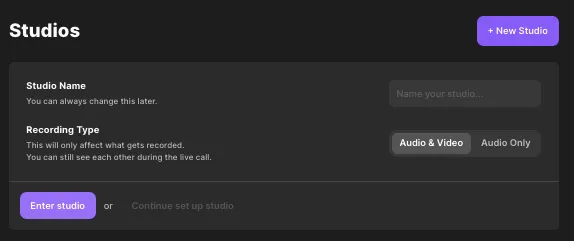
Step 1: Create a Riverside account then head to your dashboard. Click ‘+ New Studio’.
Step 2: Name your studio, choose ‘audio and video’ as your recording type and then click ‘enter studio’.

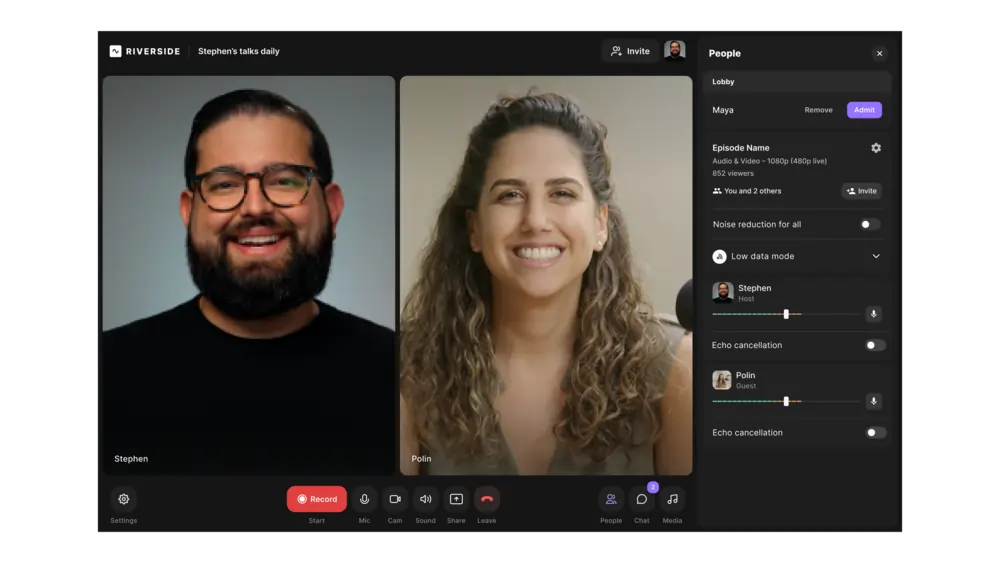
Step 3: You’ll land in the Lobby, where you can verify your recording equipment is connected correctly and check your appearance before you click ‘Join Studio’.
.webp)
Step 4: If you haven’t already, you can choose to invite remote guests.
Follow the invite prompt, or select the ‘+Invite’ button. You can invite guests by copying and pasting the link or sending them the invite directly via email.

Step 5: When everyone has joined, and you’re all ready, hit the red record button and enjoy your session.
Step 6: When you finish, hit the record button again to end the session. Make sure not to close the browser window before your recording processes properly. Tell your guests to do the same. You can track its progress at the top of your screen.
Each participant’s track progressively uploads as you record, but you may still have to wait a short time when you wrap up.
Step 7: When you leave the studio, you’ll land on your recording page, where you can see all your recorded tracks..
You can download these files as separate tracks, export them into a Premiere Pro or Descript timeline, or edit them directly on Riverside with our text-based editor.
To edit your audio, click the purple ‘Go to Editor’ button.
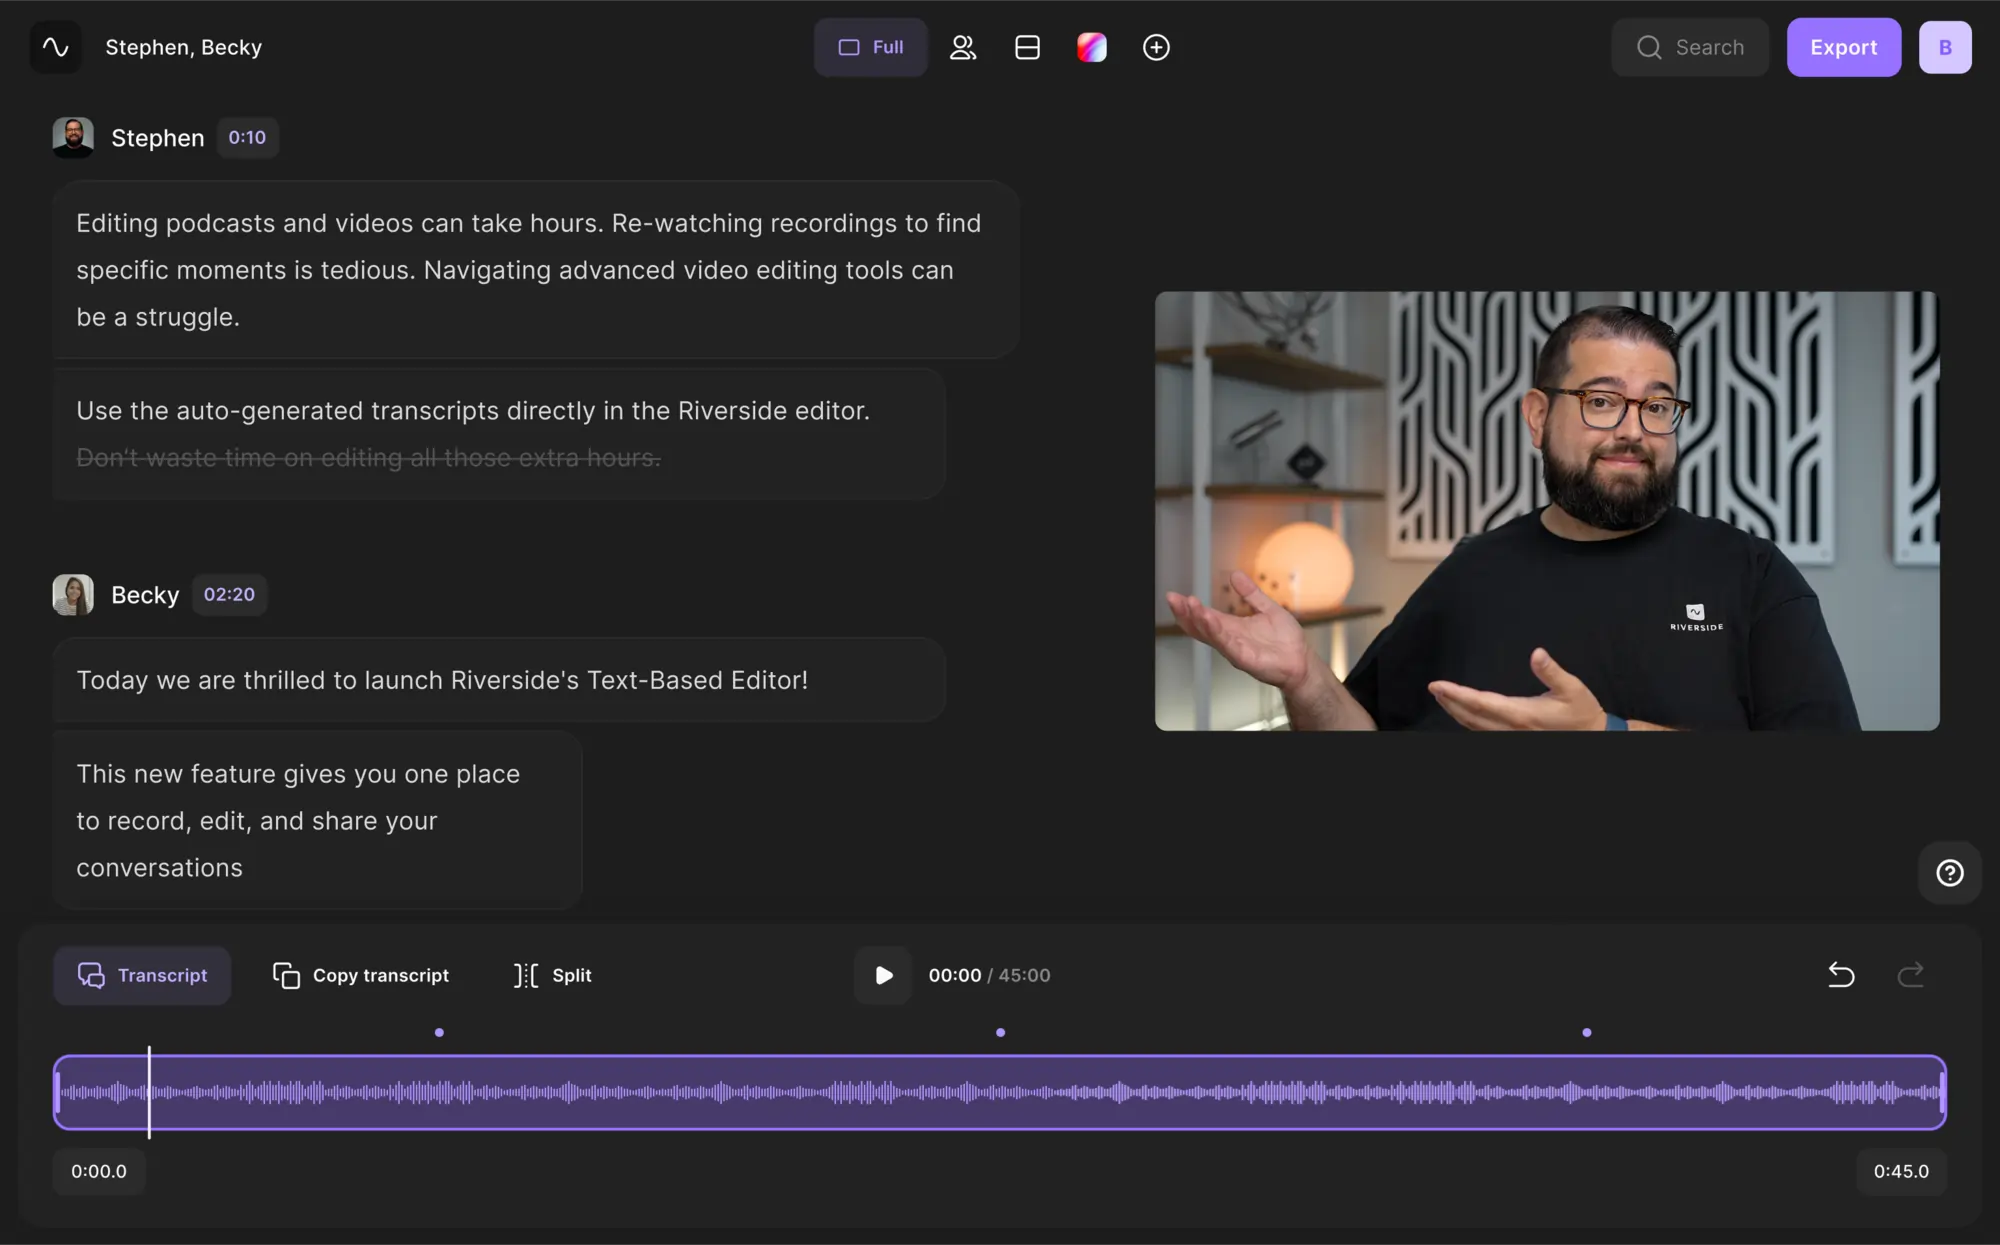
Step 8: In the editor, you can navigate and edit through your content using your recording transcript. Any text you delete in this transcript automatically removes the corresponding video in your recording. You can also search for a specific phrase, or customize your video with the tool bar at the top.
Other edits you can make include:
- Changing your layout and aspect ratio
- Customizing your background and adding a branded logo
- Adding video captions and stylizing them to suit your video
- Fine-tune and fix up your audio with a few quick clips

FAQs on How to Make a Video Without Hiring a Professional
How can I make a professional video at home?
You can create professional studio-quality videos at home using Riverside, a mic, a camera, and good lighting. Trust us. It really is that easy.
How do I start making social media videos?
First of all, you need to consider which platform you’re creating content for. Then you’ll need to weigh up whether long or short-form content makes more sense. If you’re thinking about Instagram, for example, you’ll definitely want to create ‘Reel’ type videos. YouTube offers you a choice: long-form or YouTube Shorts.
Then you’ll need the same setup we outlined earlier: a mic, camera, good lighting, and a recording tool like Riverside.
What type of YouTube videos get viewed most?
If you’ve ever browsed YouTube, you’ll know that YouTube videos cover a whole host of genres. But the most popular videos that top the charts tend to be music videos.
What is the easiest app to make a video?
Riverside makes professional video creation easy and accessible. It’s an intuitive, browser-based platform, so you don’t need to download any apps.
How do you film for beginners?
If you don’t want to invest in a full recording setup, use your iPhone and start recording. It really is as simple as that. If you’ve set your sights a little higher, try connecting up a mic and external camera to your computer and start recording using Riverside.


.webp)


