


Table of contents:
Why Does Audio Quality Matter?
Can You Improve the Audio Quality of Recordings?
10 Tips to Improve Audio Quality of a Recording
1. Find the Right Recording Space
2. Soundproof/Sound Treat Your Studio
6. Use Good Recording Software
7. Experiment With Mic Technique
8. Use Live Monitoring/Producer Mode
10. Export in Uncompressed Audio
Why record with Riverside for top audio quality?
How to Improve Audio Quality of a Recording in Post-Production
Imagine opening a podcast or audiobook and being assaulted by static, background noises, and inconsistent volume levels. Maybe the music is louder than the voices, or there are distracting pops and hisses interspersed in the speaker’s speech.
You’d probably give up on whatever you’re listening to, right?
Top-ranked podcasts, audiograms, radio shows, and even videos may have widely different subjects and content matter, but they all have one thing in common: they sound good.
If you want your audio recording to be successful, it needs to be recorded well with consistently high audio quality. Dialogue should be easily intelligible without distracting noises—and music and sound effects should be used appropriately and tastefully.
In this blog post, we’ll give you actionable tips for improving the audio quality of a recording in both pre-and post-production.
Why Does Audio Quality Matter?
High-quality audio is more than just easier to listen to. In fact, research shows that audio quality directly influences whether people believe what they’re hearing.
In one 2018 USC and the Australian National University study, scientists played a video of a scientific presentation to 97 participants. One group watched the video with good sound quality, while the other watched the same video with poor sound. Participants were then asked to rate the speech.
A pattern emerged: when the sound quality was low (and the speech was harder to hear), “viewers thought the talk was worse, the speaker less intelligent and less likable and the research less important.”
If the sound quality distracts listeners from the content, they’ll be more likely to abandon the show in favor of something more enjoyable—and, to their eyes, more credible.
Can You Improve the Audio Quality of Recordings?
It’s possible to maximize the quality of your audio recordings in both pre-and post-production. The best audio is produced with a mix of:
- Studio setup including a quiet location and soundproofing
- Proper equipment like a high-quality microphone, headphones, audio interface, and pop filter
- Quality software for recording and editing
- Proper recording etiquette like speaking at the right distance from the microphone and using the right angle and volume settings
- A live producer to adjust the recording environment in real-time
- Suitable recording settings like using uncompressed audio, local recording, and separate tracks for each participant
You can also improve your audio quality in post-production through the editing process—but of course, an ounce of prevention is worth a pound of cure. Below, we’ll walk you through the best ways to maximize your recording quality in pre-production.
10 Tips to Improve Audio Quality of a Recording
1. Find the Right Recording Space
First, establish a designated room or recording studio for your audio recording.
If you can, find a quiet location where you won’t be interrupted. The quieter and more isolated your environment is, the less background noise your microphone will pick up.
When choosing a recording space, look for one with no windows or shared external walls. It’s also best to avoid appliances (like a furnace) that might make occasional noises.
2. Soundproof/Sound Treat Your Studio
Next, ensure your studio has the right acoustics for your recording setup. If the room doesn’t already have carpet, start with a rug and soft furniture to absorb echoes. You can also invest in soundproofing and sound treatment materials like:
- Bass traps
- Acoustic foam tiles
- Sound diffusers
To learn more about setting up your own recording studio, check out our article on building a studio at home.
3. Use a Quality Microphone

If you’re just getting started in audio content creation, the built-in mic on your computer or smartphone may be enough. But if you’re serious about creating high-quality audio, you need a dedicated external microphone.
Choosing the right microphone for your setup, however, may be difficult since a variety of styles and models are available on the market. You’ll have to choose the right polar pickup pattern, decide between dynamic and condenser mics, and settle on either a USB or XLR connection. We recommend reading this in-depth guide to choosing a microphone.
To reduce the risk of damage (not to mention uneven sound), you’ll also want to invest in a microphone stand or boom arm to stabilize it. And a good shock mount can protect your microphone from vibrations and unwanted sounds.
Finally, unless you have a USB microphone, you’ll also need some sort of equipment to connect your mic to your computer. That device might be an audio interface or an audio mixer.
Downloadable tips: Here's a list of the best microphones recommended by content creators in the Riverside community.
4. Use Headphones
Let’s put it simply: everyone involved in recording should be wearing headphones.
Why?
Headphones help prevent audio echo and bleed—which preserves and improves the quality of your recording. Without headphones, your microphone will likely pick up the audio coming through your speakers (especially if you’re recording with remote guests).
And headphones can improve your own performance in real-time as you record. You’ll be able to hear yourself better, which lets you adjust volume levels or mic angles as needed.
Finally, a good pair of headphones helps you hear the recording better during the editing phase. Compared to your computer’s speakers, headphones provide accurate and high-fidelity audio that let you pick up on small issues that need adjusting.
For a guide to the best headphones currently on the market, check out this article on some of the best headphones.
5. Invest in a Pop Filter
If you’ve been in audio content creation for a while, you probably know about the problem of plosives—the popping sounds that happen when pronouncing hard consonants like ‘p’ or ‘b.’
A pop filter acts as a barrier that filters out plosives, giving you peace of mind that you’ll record studio-quality audio. Without one, you risk those distracting sounds taking away from your audience’s listening experience.
6. Use Good Recording Software
If you’re looking for maximum audio quality during the recording stage, your best bet is to choose high-quality recording software to deliver crystal-clear audio.
Unfortunately, not all audio recording tools are created equal; some simply have different priorities. For instance, you can record audio on tools like Zoom and Skype, but these platforms are designed for internet calling, meaning they compress audio files for faster transmission. Compressed audio might be easier to transfer, but it results in much lower audio quality.
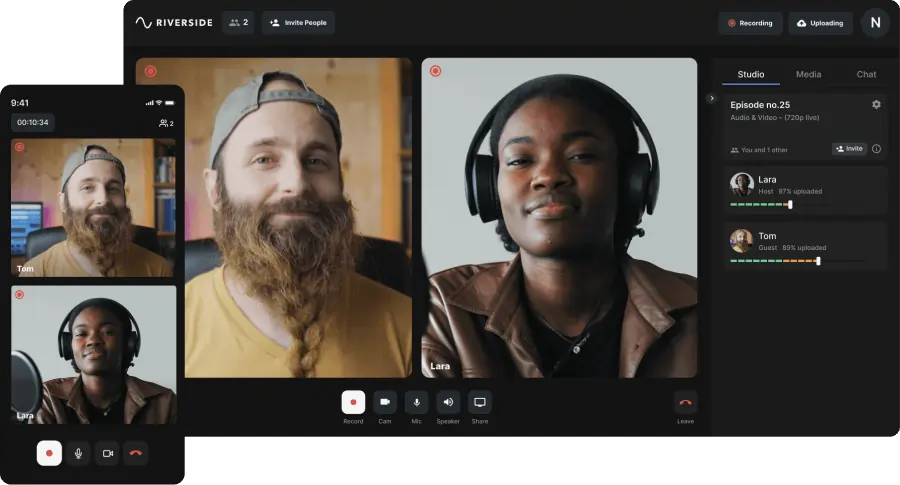
Riverside, on the other hand, was built for professional audio and video recording. It captures high-resolution files for a crisp, clean sound.
For the best audio quality, look for recording software that features:
- High-resolution audio at up to 48kHz
- Multiple audio formats (like MP3 files and uncompressed WAV files)
- Local recording to each participant’s device
- Separate tracks for each participant
- Audio mixing features for adding sound effects and music while you record
- Host controls that let you adjust audio settings of your guests
7. Experiment With Mic Technique
Much of your audio quality depends on how well you use your recording equipment. The proper mic angle, settings, and physical behavior will improve how good your audio sounds on the other end.
Angle
Play around with different microphone angles to see which one provides the best sound quality. If you aren’t using a pop filter, you’ll want to try angling your microphone about 45 degrees away from your mouth so that it avoids some of the harder consonants.
Gain
‘Gain’ is decibel input volume—and if you set it too high, it can create audio distortion.
Test the gain levels by speaking loudly into your microphone, then watching your recording software to see if the audio levels are hitting above the -10dB range on your meter. If they are, decrease your gain until the levels are more acceptable.
Speaking Volume
Even with the right mic input settings, you’ll do your future self a favor in the editing booth if you speak at a relatively consistent volume. Avoid whispering or muttering; speak clearly and audibly at all times, and try not to talk too loudly.
Speak Close Enough to the Mic, But Not Too Close
It’s a good rule of thumb (no pun intended) to keep your mouth about a hand’s length away from the mic at all times. But experiment with different distances; you might like how your voice sounds when you’re a little closer or farther away.
Whatever distance is right for you, be sure to stay consistent. If you lean forward or lean back in your chair at different points in your recording, the mic will pick up more and less of your voice. Either way, it’ll cause you more of a headache in post-production.
8. Use Live Monitoring/Producer Mode
If possible, choose recording software that includes live monitoring or producer mode. If you (or even better, your producer) can pay attention to things like volume levels and mic positioning while you’re recording, you can save yourself hours in the editing booth later.
9. Local Recording
The best way to ensure maximum audio quality is to use local recording (also known as double-ender recording). Instead of recording all participants on the same feed, local recording records each participant’s audio to their own device. That way, you’ll have separate, high-quality feeds that you can stitch together during post-production.
And with local recording, you don’t have to rely on your internet connection for good audio quality. Your recording won’t suffer even if your internet connection slows or is interrupted.
10. Export in Uncompressed Audio
Even the best audio recording suffers if exported in a low-quality format.
MP3s, for example, are a common audio file format—but they’re considered “lossy” files, meaning data is deleted in the compression stage.
WAV files, on the other hand, are “lossless”—meaning they don’t delete any data. With a WAV file, you’ll get much higher sound quality and have a much easier time editing your audio files.
That being said, there’s a case to be made for using both types of audio formats. For more information, check out our article comparing WAV vs MP3 file formats.
Why record with Riverside for top audio quality?
Riverside is an all-in-one recording and editing solution that makes it easy to create crisp, professional-quality audio recordings. Our browser-based software is simple and intuitive to use, but it doesn’t cut corners when it comes to audio quality.
Riverside’s recording software offers key features like:
- Uncompressed 48kHz WAV audio to ensure top sound quality.
- Local recording to each participant’s device so you don’t have to worry about a dropped internet connection.
- Separate tracks for each guest for easier editing.
- Record with up to 10 participants.
- Producer mode for real-time audio adjustments.
- Automatic background noise remover, so you don’t have to worry about accidental noises ruining a take.
- Text-Based Video & Audio Editor that saves you time and automates mundane tasks such as audio fine tuning and customization.
- Live streaming with easy simulcasting to LinkedIn, Facebook, YouTube, Twitter, and Twitch.
- Records high-quality video as well. Everything is recorded in separate tracks so you can easily divide audio and video files when editing.

How to Improve Audio Quality of a Recording in Post-Production
While it’s best to do all you can to maximize audio quality while you’re recording, there are a few ways to enhance audio quality during the editing process as well. Below, we’ll walk you through tips for using your favorite editing tool to improve a recording’s sound quality.
Improve the Audio Quality of a Recording in Audacity
Audacity is a popular, free editing tool that lets you automatically remove background noise, delete silent sections, and more. Here’s how to perform the most common audio-enhancing workflows in Audacity:
- To remove background noise: Highlight a section of audio that doesn’t contain any ambient noise. Select Effect > Noise Removal > Get Noise Profile. Then, highlight the entire audio feed and select Effect > Noise Removal > OK.
- To remove silent sections: Highlight the whole audio feed. Select Effect > Truncate Silence. Choose the min/max duration and compression ratio settings, then click OK.
- To normalize the volume: Highlight the area of the audio feed. Select Effect > Normalize.
Improve the Audio Quality of a Recording in Adobe Premiere Pro
Adobe Premiere Pro may not have as many editing features as Adobe Audition, but it can get the job done if you’re looking for basic audio editing. You can use the following tricks to enhance your recording’s audio quality in Premiere:
- To remove background noise: Select Effects > Audio effects> Denoiser. Drag the effect to your desired clip into the timeline. Use the Effect Controls tab to adjust the values to your liking.
- To remove echoes: Select Effects > Audio effects > Reverb. Drag the effect to your desired clip in the timeline. Under Effect Controls, choose preset options for the size of the room where it was recorded—or you can use the Individual Parameters settings to adjust the settings yourself.
- To normalize audio tracks: Select Effects > Audio effects > EQ. Drag the effect to your desired clip in the timeline. Under Effect Controls, you can choose presets like “warm presence” or “bass enhance.”
Watch the video below to learn more on how you can use audio effects to improve your audio quality.
Improve the Audio Quality of a Recording with Riverside’s Editing Tools
Riverside’s Editor tool lets you perform several basic editing functions, including but not limited to enhancing your recording’s audio quality.
To get started, open a recording with the Editor. In the top right corner of the Editor, click Export. In the Export Options dialogue box, you can choose to Normalize Audio Levels or Remove Background Noise. The automated tool will remove ambient sound and normalize audio with a click.
Interested in learning more about creating high-quality audio? Check out our blog for more informative articles.


.webp)


