.webp)


Table of contents:
What are YouTube automatic captions?
Limitations of YouTube automatic captions
Why remove YouTube automatic captions?
How to replace YouTube automatic captions with subtitles
Add open captions using the Riverside Editor
Add closed captions using the Riverside app
Add closed captions using Riverside’s free online transcription tool
Key takeaways:
- Accuracy isn’t great: YouTube’s automatic captions are only 60-70% accurate. The captioning system struggles with accents, background noise, and other issues.
- Punctuation is often an issue: YouTube’s captions also lack proper punctuation and often appear as continuous text blocks that can be challenging to read.
- Bad captions hurt your brand: Inaccurate captions can harm your brand image. On the other hand, accurate captions make content accessible to deaf and hard-of-hearing people, improve SEO, and boost brand credibility.
- Riverside can help with captions: Riverside’s transcription tools have high accuracy in 100+ languages and are easy to use.
Have you ever recorded a YouTube video and looked closely at the created subtitles? Not that great, right?
Sure, the subtitles are created quickly, but leave a lot to be desired in terms of quality and accuracy.
That’s why it’s best not to rely on YouTube’s automatic captions and to use third-party software. We’ll examine why YouTube captions often fall short and what tools you can use to create highly accurate captions.
Let’s get into it.
What are YouTube automatic captions?
Have you ever noticed those lines of text that appear at the bottom of some YouTube videos that match what the speaker is saying?
Those are automatic captions, a handy feature powered by YouTube’s speech recognition technology. This tech transcribes all uploaded video audio and converts it into written text. So when you upload a video, YouTube automatically generates these captions for you, as long as your audio is clear and spoken in a supported language.
How do they work?
YouTube’s automatic captioning system uses advanced speech and machine learning technology. These captions generated by this tech are time-synced to match the audio.
Here are the main features of the captioning system:
- Completely automatic: YouTube’s captioning system is entirely automatic. No manual effort is required on the creator’s part. Just upload the video and have YouTube do all the heavy lifting of generating captions for you.
- Generates subtitles in multiple languages: YouTube can create captions in multiple languages. However, it won't automatically caption an unsupported language or a language that it hasn't been able to automatically recognize.
- Captions are editable: Captions can be edited, which helps, as automatically generated captions aren’t 100% accurate.
- Makes content accessible: A primary goal of automatic captions is to make videos accessible to a broader audience, including:
- Deaf and hard-of-hearing viewers
- Non-native speakers
- Viewers in environments where they can’t play videos with sound (like in the office or while commuting)
Limitations of YouTube automatic captions
While YouTube's automatic captions are a helpful tool for accessibility, they often fall short in accuracy and reliability, leading to significant limitations for users who depend on them.
Poor accuracy
The accuracy of generated captions depends on audio quality. This has been proven by research like this from the University of Minnesota, which has shown that YouTube’s automatic captions typically achieve only 60-70% accuracy. In other words, one in three words could be incorrect.
Various factors can cause these problems, including background noise, overlapping dialogue, unclear accents or speech, and more.
No punctuation or context awareness
Automatic captions often appear as a wall of text. This makes them difficult to read and comprehend.
For instance, the captioning software doesn’t always understand when a sentence ends, so it doesn’t add periods. It also doesn't always understand when a sentence is a question, so it doesn’t add question marks.
Limited customization options
Automatic captions generated by YouTube can’t be edited. The only way you can do so is to download the caption file, make corrections in a text editor, and then re-upload it. Doing all of this is a time-consuming process.
To top it off, YouTube captions offer limited formatting options. They do not allow you to adjust font size, color, or positioning.
Why remove YouTube automatic captions?
Clearly, YouTube captions aren’t all that great.
Let’s look at why you should remove automatic captions and add your own.
Accuracy issues
The auto-caption system especially struggles when:
- Complex technical terminology and industry jargon are used.
- Multiple speakers talk over each other.
- There’s background noise or the audio quality is poor.
- There are different accents and dialects.
Lack of professionalism
Poor captions can damage your brand image. It makes you look unprofessional.
On the other hand, professionally created subtitles make your brand more trustworthy. They show that you care enough about ALL your audiences, including non-native speakers and people who are hard of hearing.
How to replace YouTube automatic captions with subtitles
Using the Riverside platform, there are three ways to add captions to YouTube videos. The platform can make captions in over 100+ languages and is highly accurate, much more so than YouTube’s automatic transcriptions.
These three ways include:
- Add open captions using the Riverside Editor.
- Add closed captions by downloading them from Riverside’s dashboard.
- Add closed captions using Riverside’s free transcription tool.
(If you’re wondering what open and closed captions are, here are the definitions:
- Open captions: Open captions are directly embedded in the video. They are permanently merged with the video and cannot be removed.
- Closed captions: Closed captions come as separate text files that sync with the video during playback.
Let's take a quck look at all three ways you can create accurate captions quickly using Riverside.
Add open captions using the Riverside Editor
Step 1: Record or upload your video
Log into your Riverside account, create a new studio, or go to an existing one.
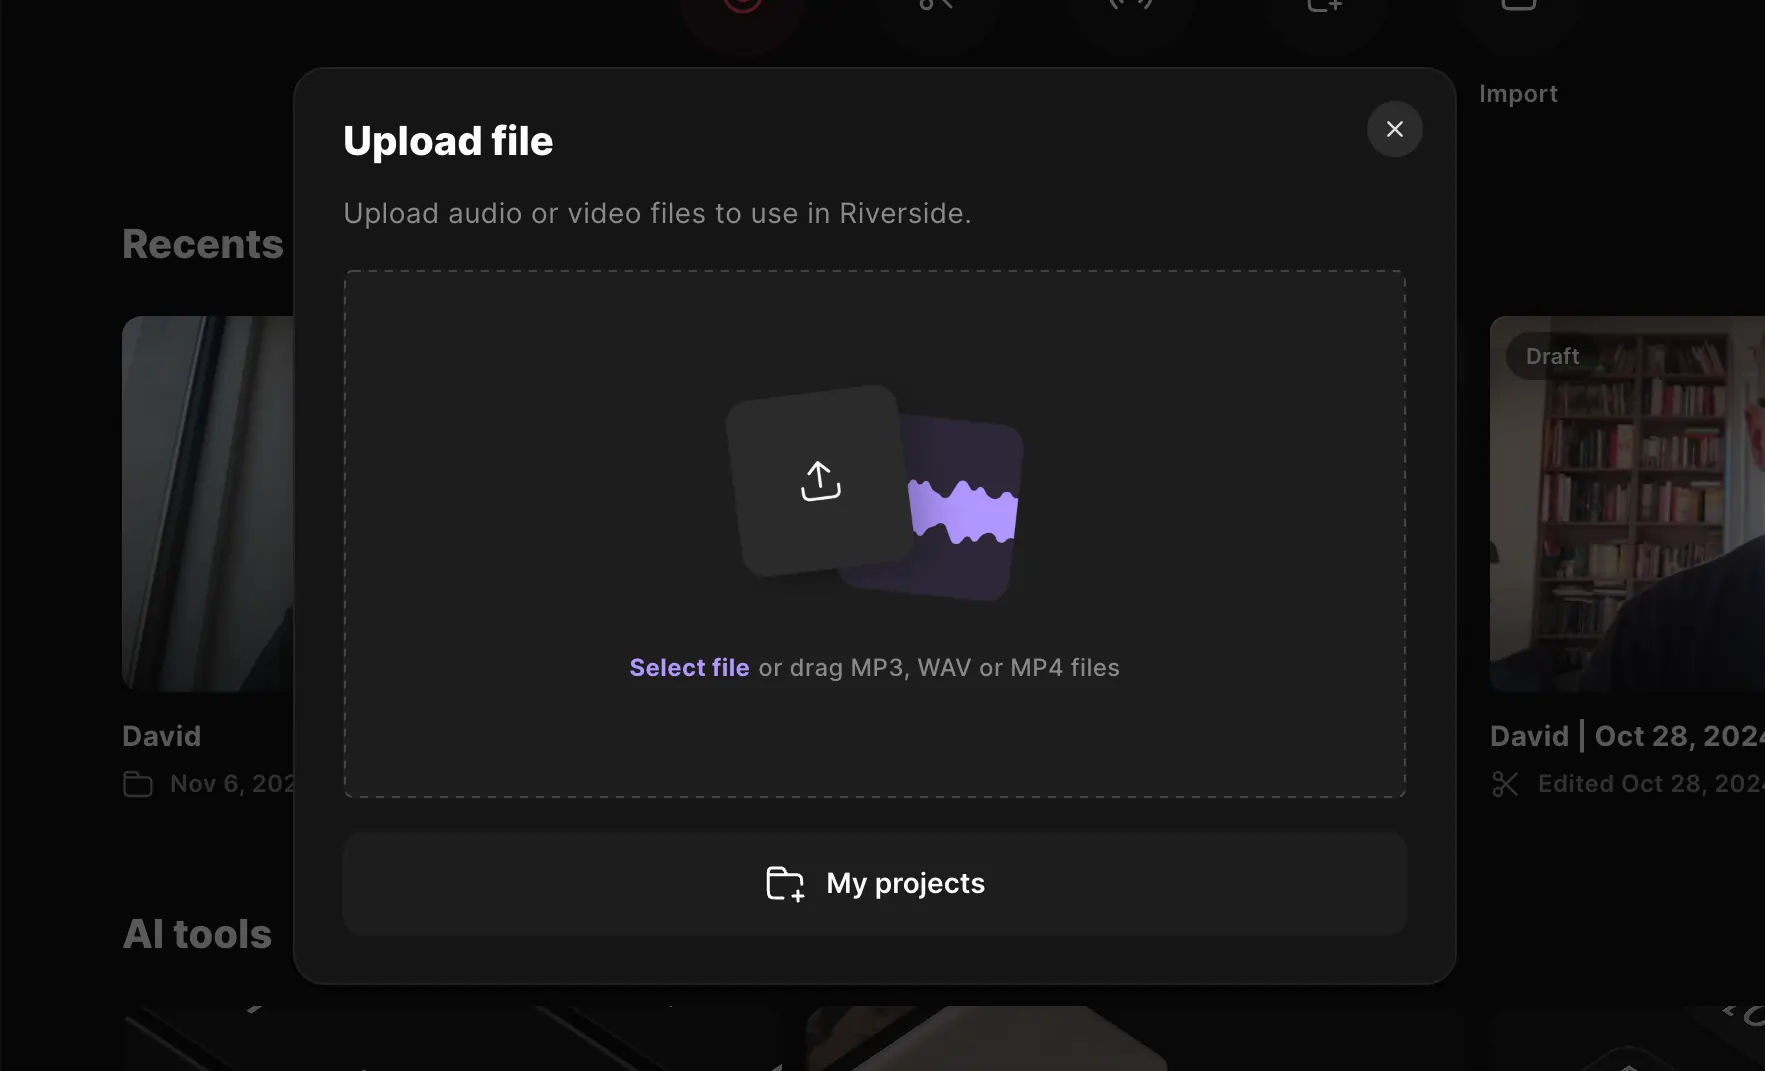
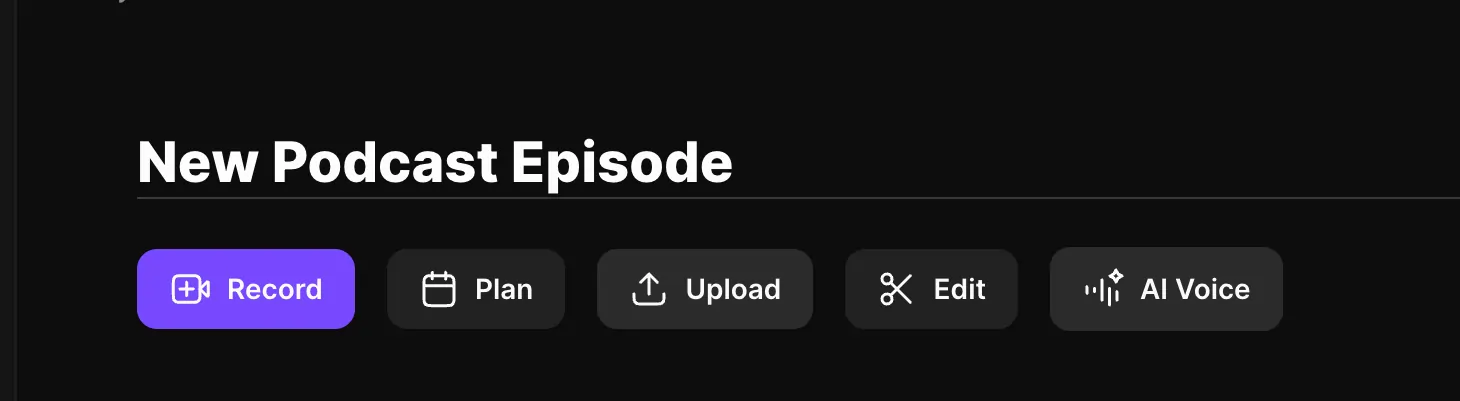
Next, if you don’t have a video, click “Record” to capture one. If you have an existing video, upload it by clicking “Upload.”
Learn more about recording with Riverside here.
After recording or uploading, hover over your recording and click “Edit” to go to the editor.
Step 2: Edit your video for YouTube
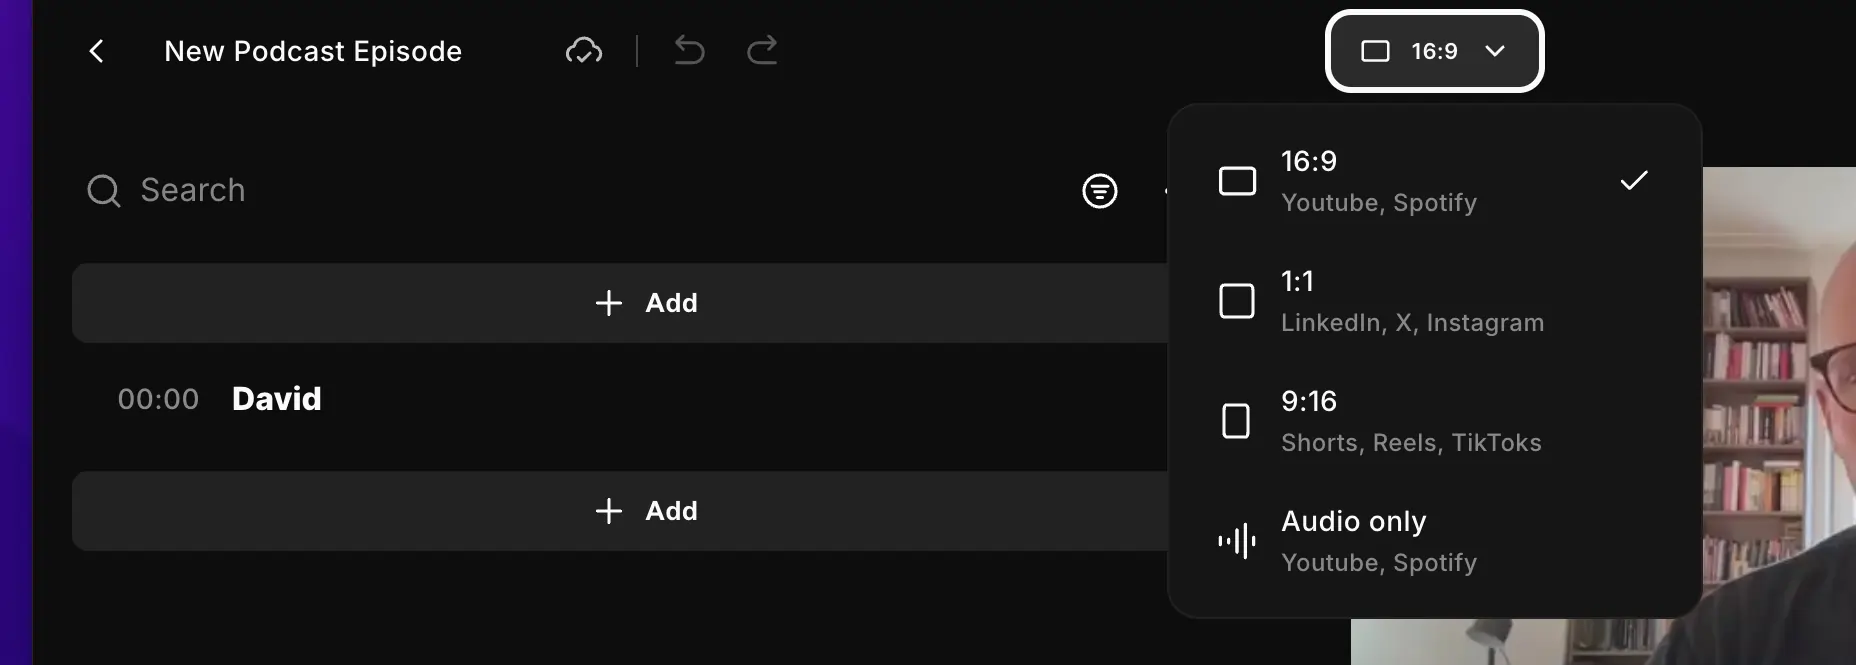
The first thing you should do is optimize your video for YouTube.
To do so, click on the aspect ratio button at the top of the editor and choose 16:9.
Next, trim your recording using Riverside’s text editor. Just delete the text you don’t want in the recording, and you’ll notice the corresponding portion of the video disappear. Alternatively, you can delete unwanted portions in the timeline. Just select these portions and click “Delete.”
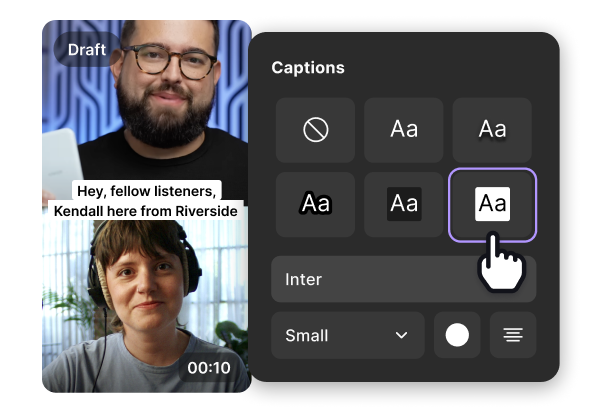
Step 3: Add and edit your captions
Click the “Captions” button on the right-hand side to add captions. You’ll find options to add captions in various fonts and formats here.
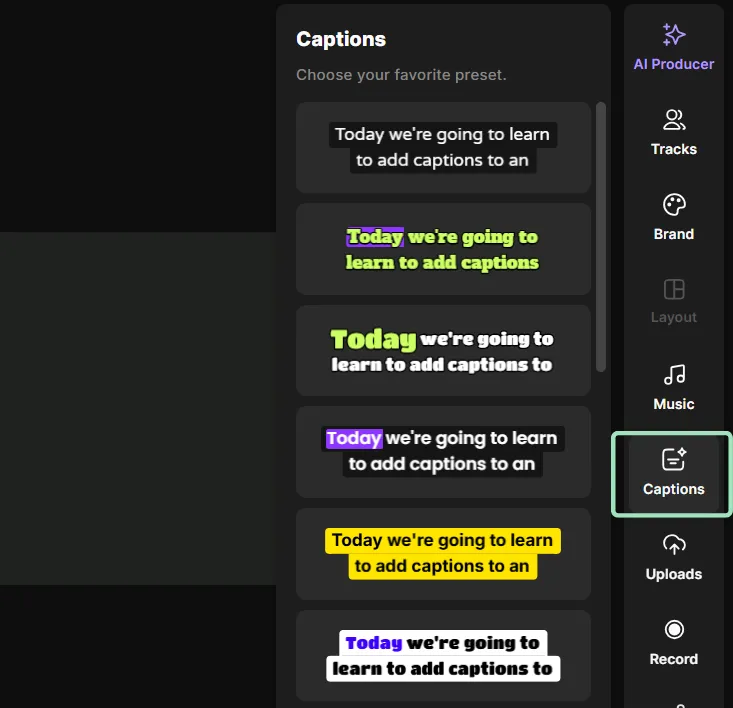
You can drag the captions around your video to find the proper placement.
Step 4: Finish editing your YouTube video
Before exporting the video, you can make the following enhancements to it:
- Enhance your audio by clicking “AI Producer” on your editor's right-hand menu. Here, you can remove silences and filler words and get rid of background noise with just one click.
- Add text overlays by clicking the “Text” tool in the right sidebar. And add image overlays by clicking “Images.”
- Brand your video by clicking “Brand” to upload an image or choose one from the royalty-free photos.
Step 5: Export your video
That’s it! All that’s left now is to export your video.
Click “Export” in the top right corner of the screen. Here, you can select various options to normalize audio and remove background noise.
Since you will be uploading to YouTube, we suggest you choose either 1080HD or 2160p 4K while exporting. Don’t go lower than that.
Then click “Export video.” A pop-up will appear saying, “Export your edit.” Click on “Go to export.”
Next, download your video. Now, all that’s left to do is upload it to YouTube!

Add closed captions using the Riverside
Here’s how to generate a caption file on Riverside.
Step 1: Log in to your Riverside dashboard
Log in to your Riverside dashboard. Then, either record or upload a video. For recording the video, you can follow the steps from the above section (minus the adding the caption bit).
Step 2: Download your subtitles
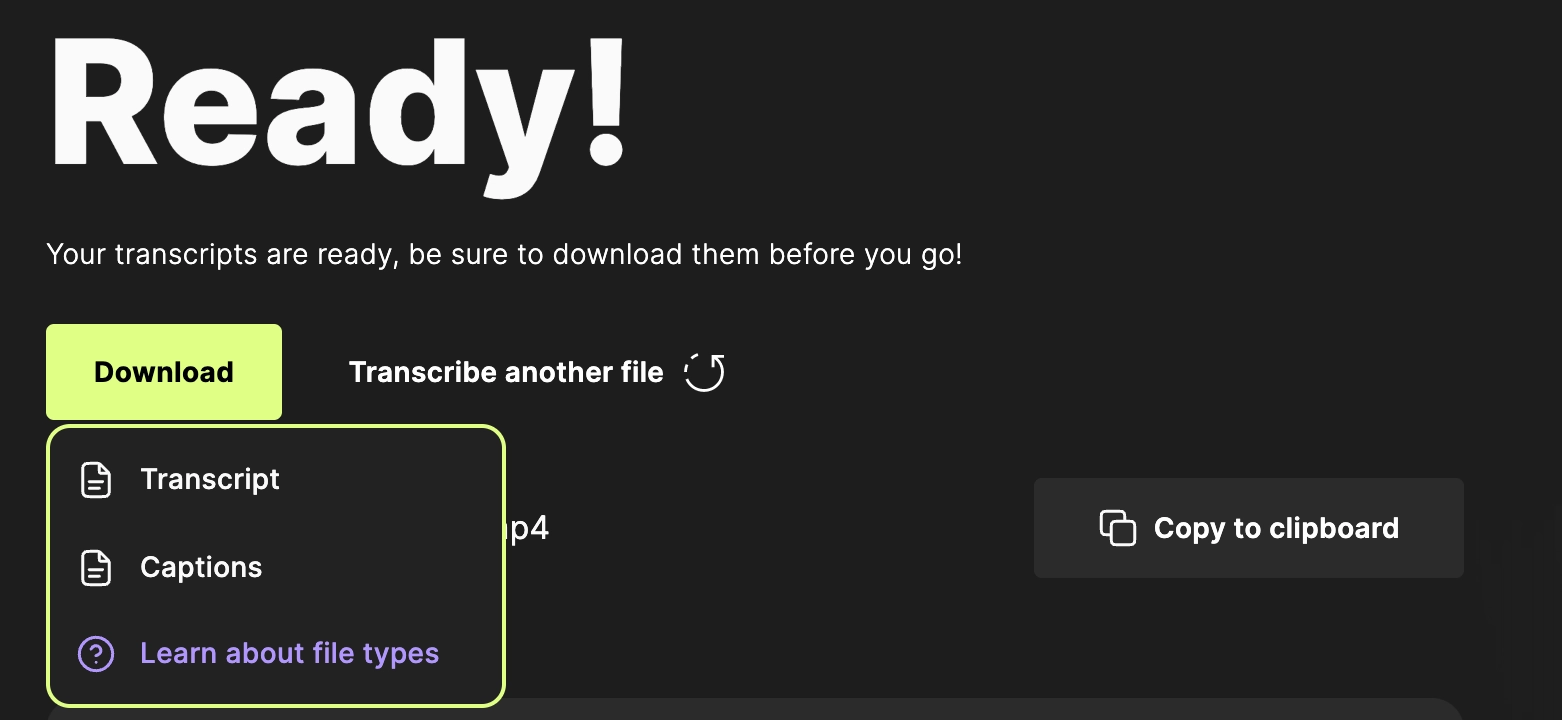
After recording or uploading your video, go to the video and click on its thumbnail. A new page will open; scroll down it. If your transcript is ready, it will be marked as “✓ Ready.” This means your transcription is done.
Then click “Download” and choose “Subtitles” to get an SRT file with timestamps.
Step 3: Upload captions to YouTube while uploading your video
That’s it. You can now upload your captions to YouTube while uploading your video.
Add closed captions using Riverside’s free online transcription tool
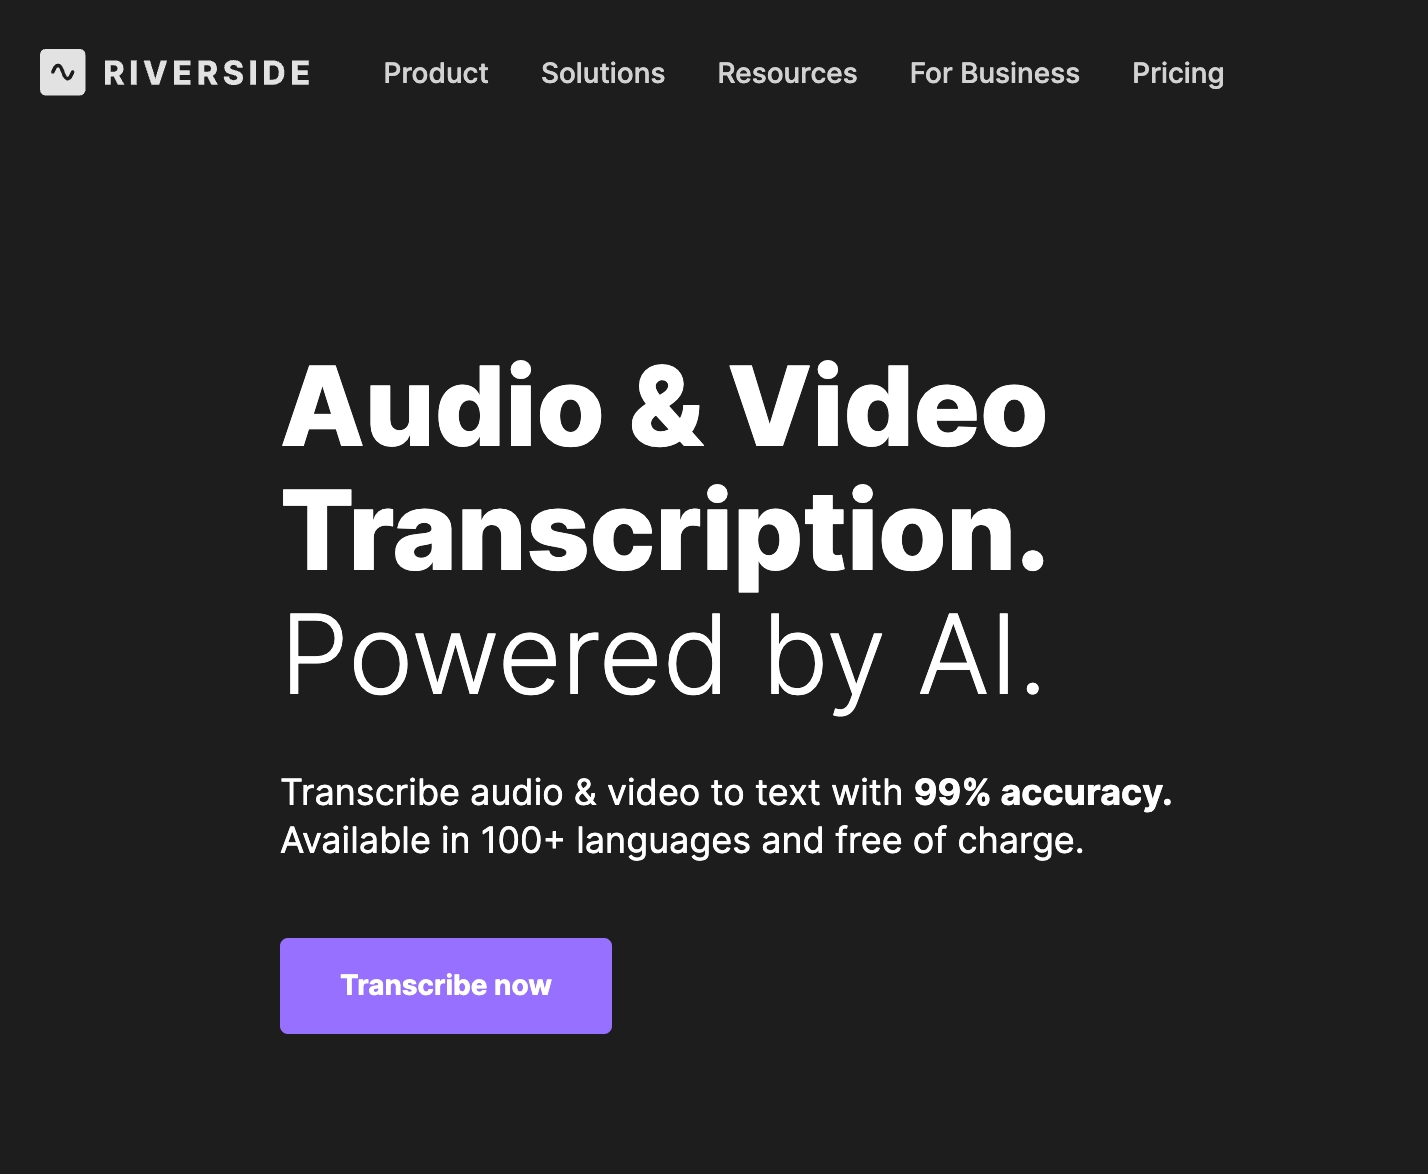
Riverside’s free online transcription tool lets you drop an audio or video file and get transcription in 100 languages. Here’s how to access and use the tool:
Step 1: Click on the transcription tool link. Then click on “Transcribe now.”
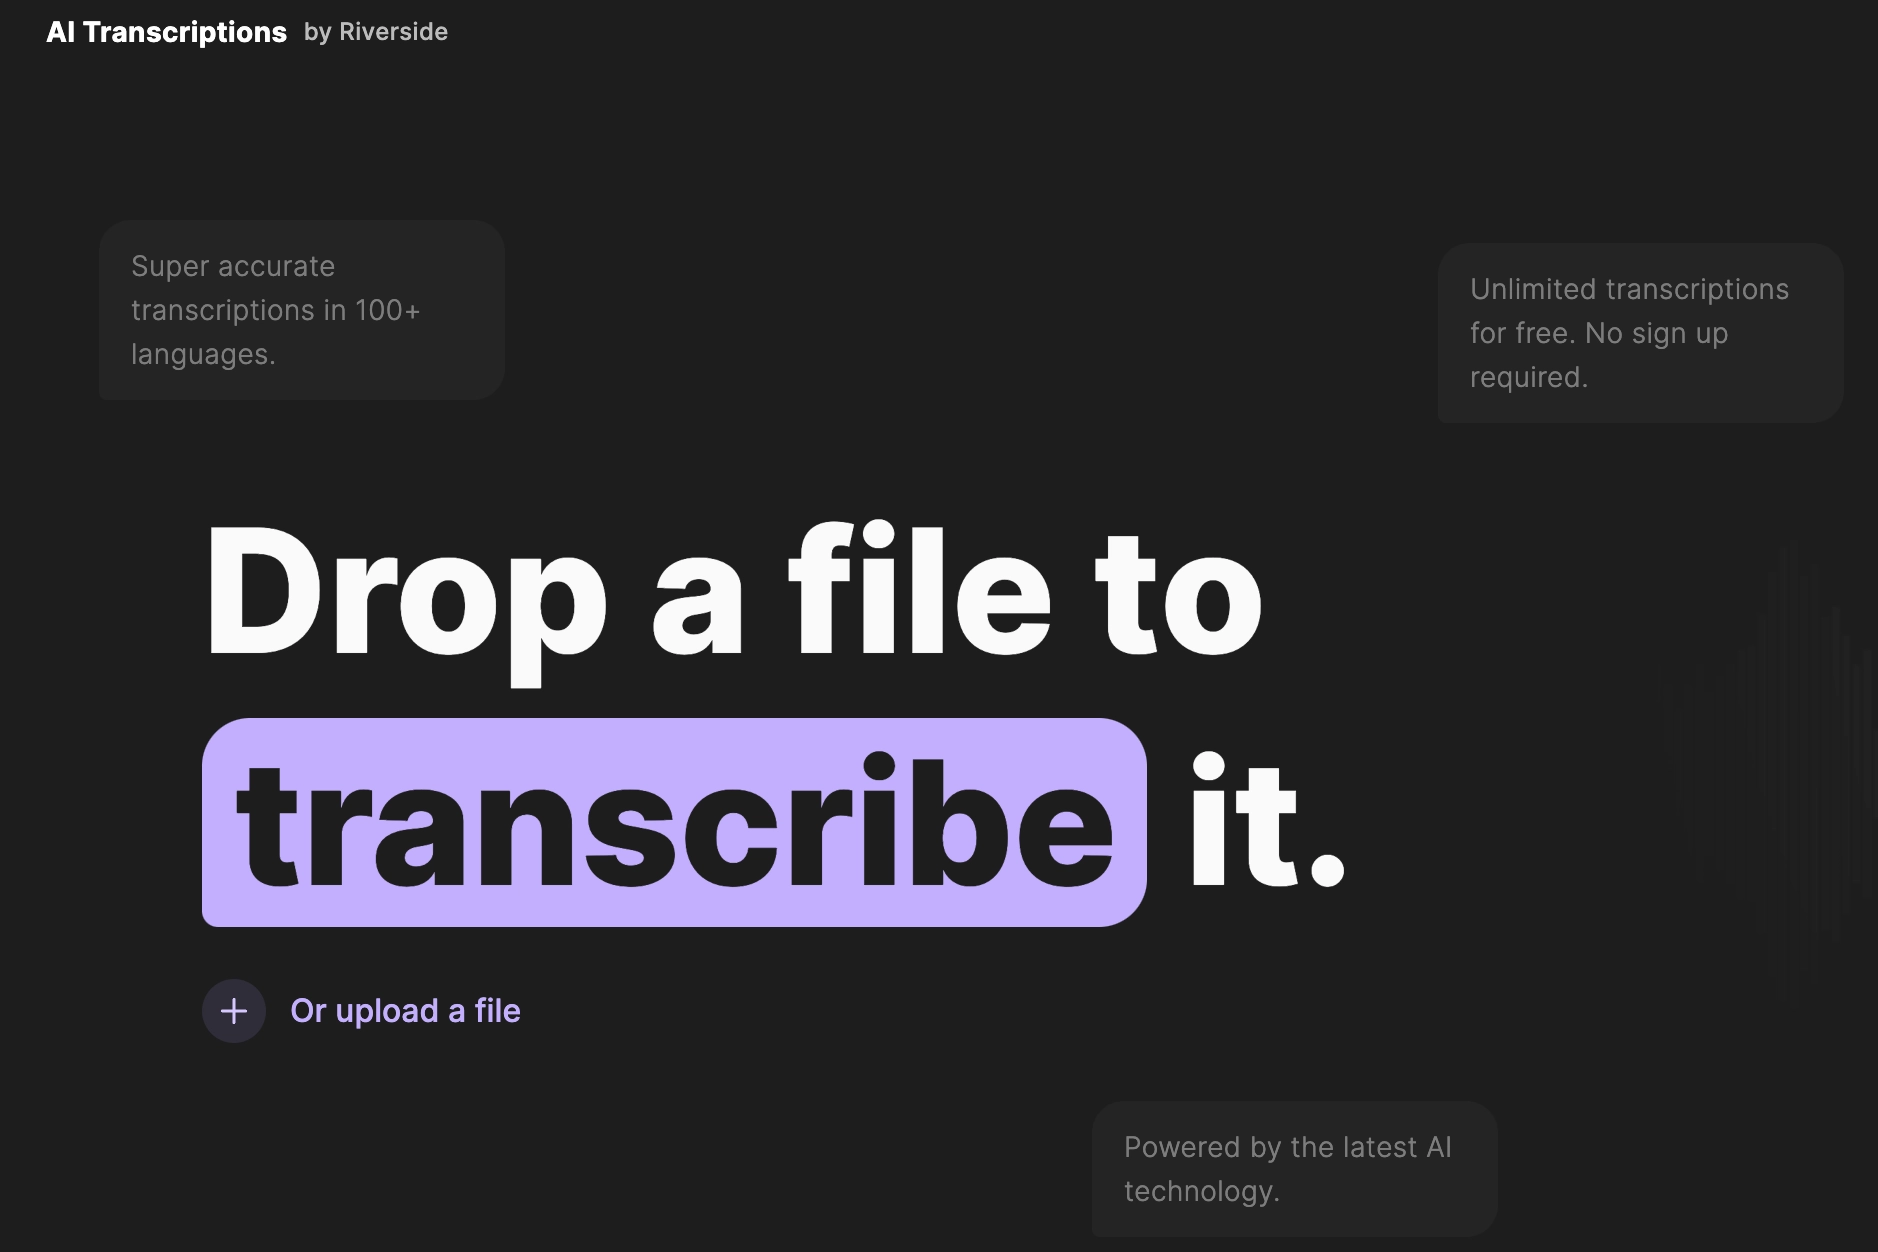
Step 2: Choose your audio/video file (MP3, WAV, MP4, MOV) from your device and drag and drop it onto the page. You can also press the “+” icon and upload your file.
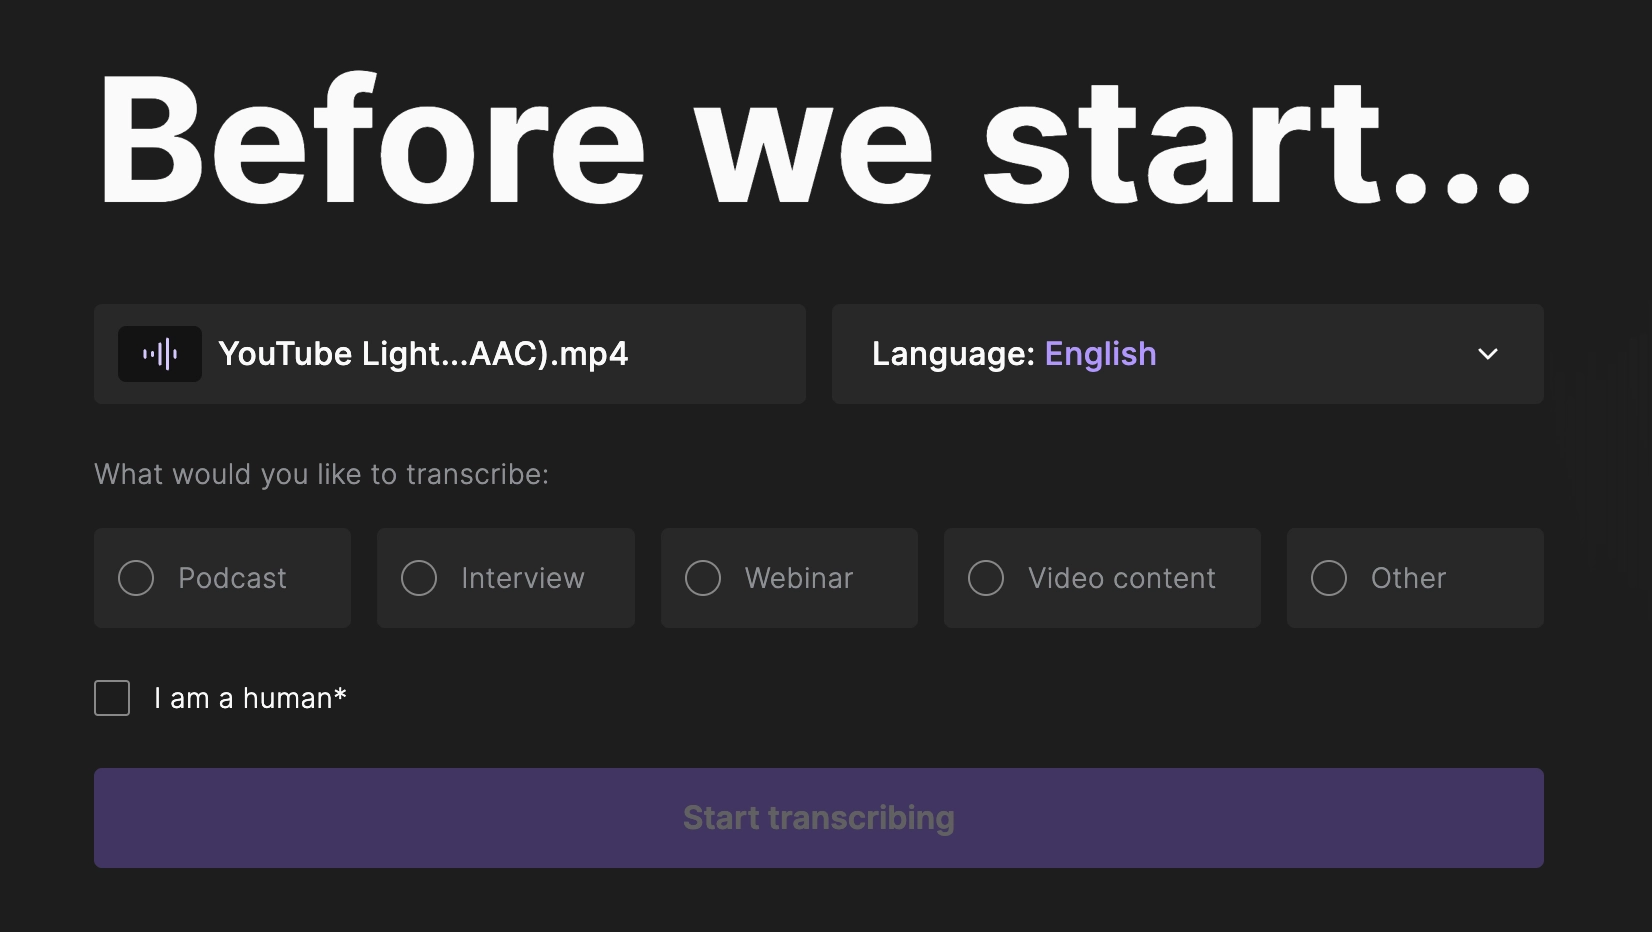
Step 3: On the next page, select one of the 100+ languages you'll use to generate your caption. Then, decide what kind of video you’re transcribing, click “I am a human,” and click “Start transcribing.” Finally, wait for the tool to finish the process.
Step 4: After transcribing, choose between (TXT file) and captions (SRT), and download the file.
Step 5: Upload the file to YouTube.
How to upload closed captions to YouTube
Here’s a step-by-step guide to upload your video and add closed captions.
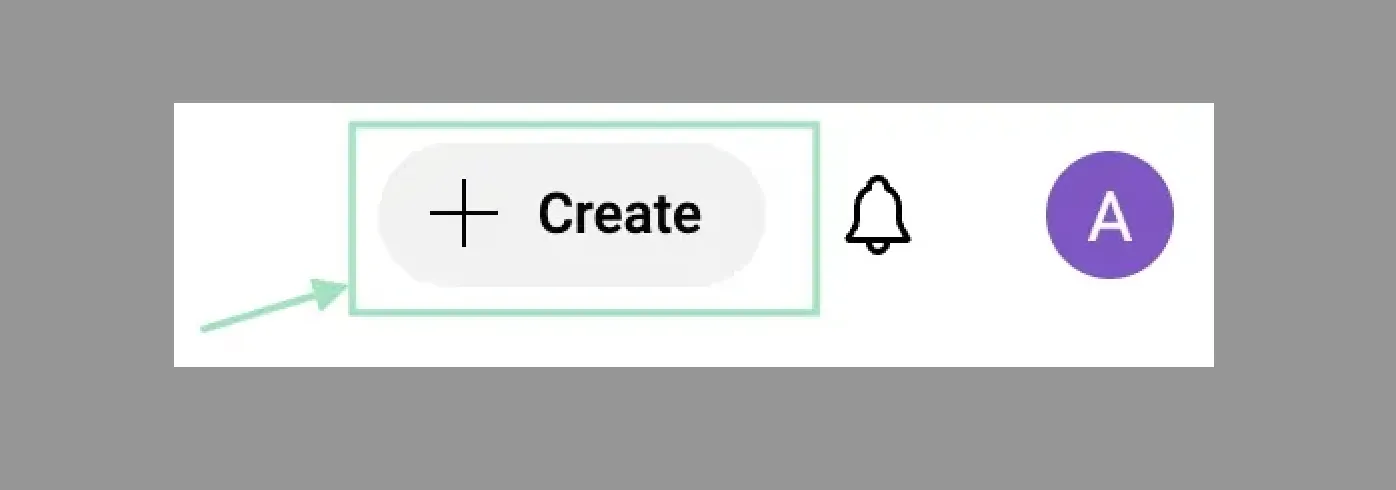
Step 1: Go to YouTube and click the “+ Create” button at the top right corner of the screen. Then, click “Upload video.”
Step 2: On the following screen, drag and drop your recorded video, or click “Select files” to add them.
Step 3: After uploading your video, you should see the below screen. Add in all details, and scroll down to check the “Made for kids” or “Not made for kids” option.
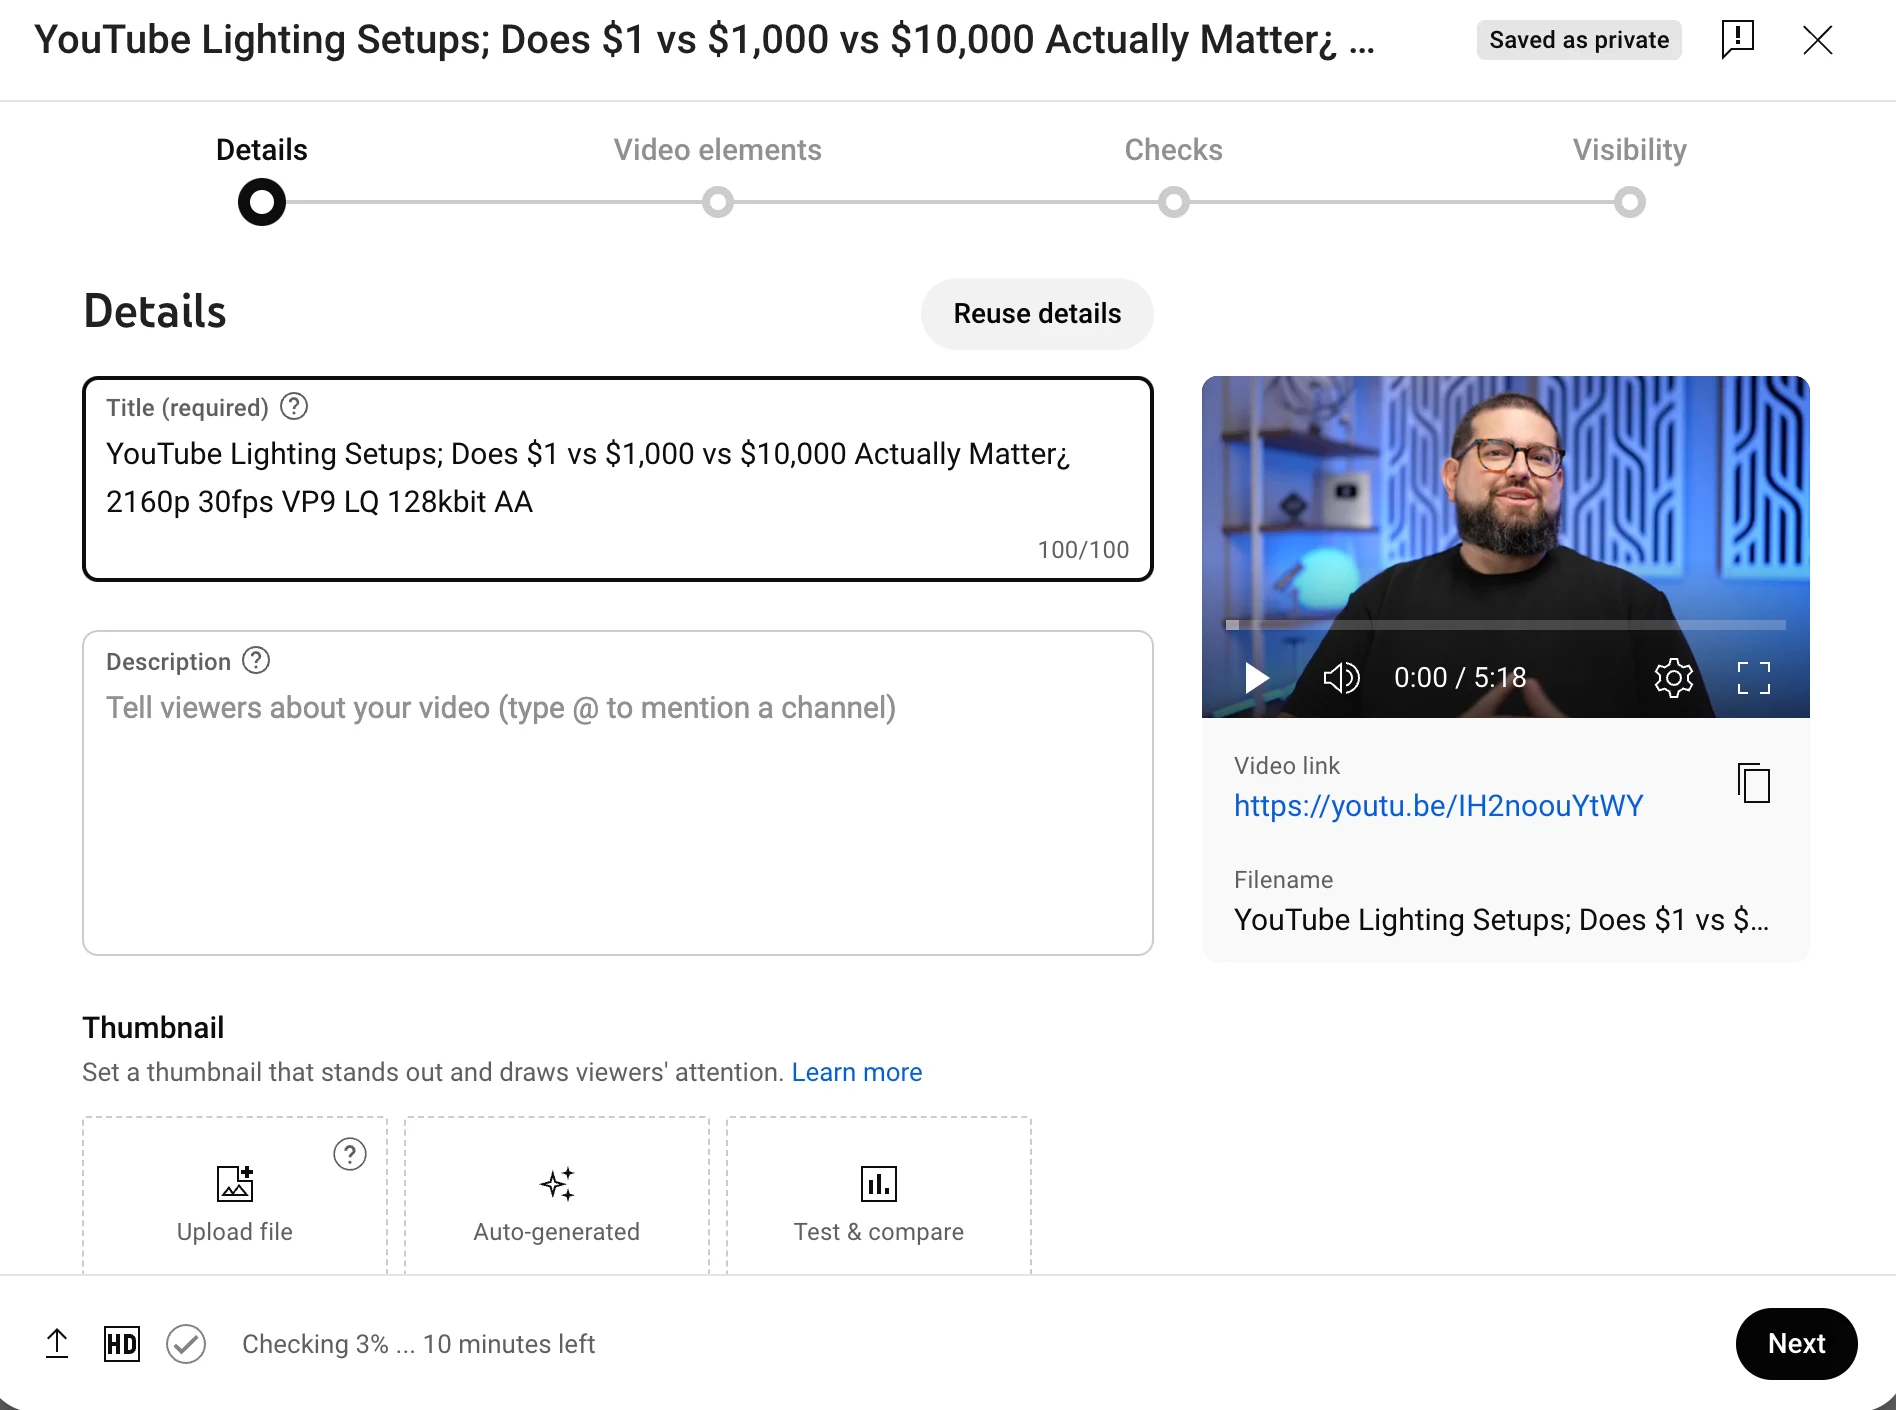
At the bottom of the screen, you’ll see a button “Show more.” Click it, scroll down to “Language and captions certification,” and choose “Video language” for your subtitles. Then click next.
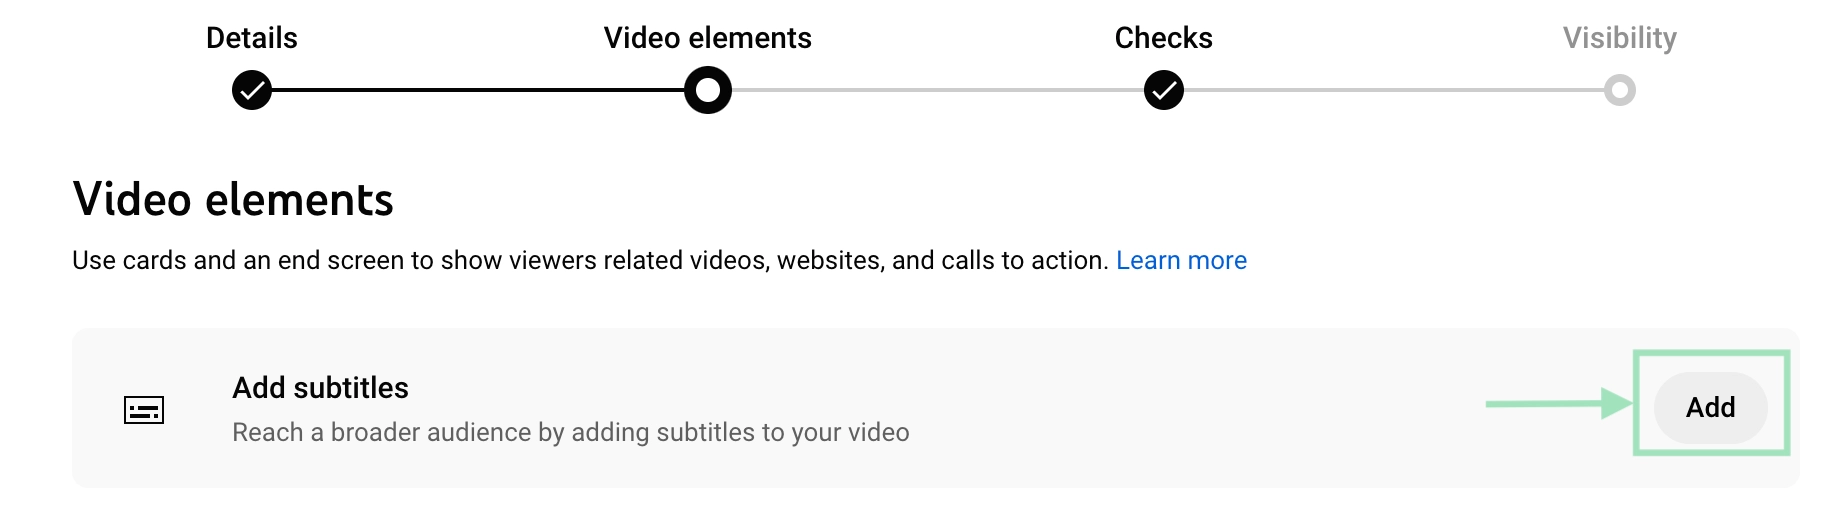
Step 4: Under the “Video Elements” page, click “Add” under Add subtitles.
Click “Upload file” on the next page to add your captions file from your desktop.
Select “With timing” if your caption already has timings or without timing if your captions don’t have programmed timing. If you select the latter, YouTube will sync your subtitles to your video’s audio itself. Then click “Continue” and add your caption file.
You’ll then see the following screen. You can play the video to double-check if the captions are synced well with the video. If you feel that specific captions aren’t correct, you can edit them on this page.
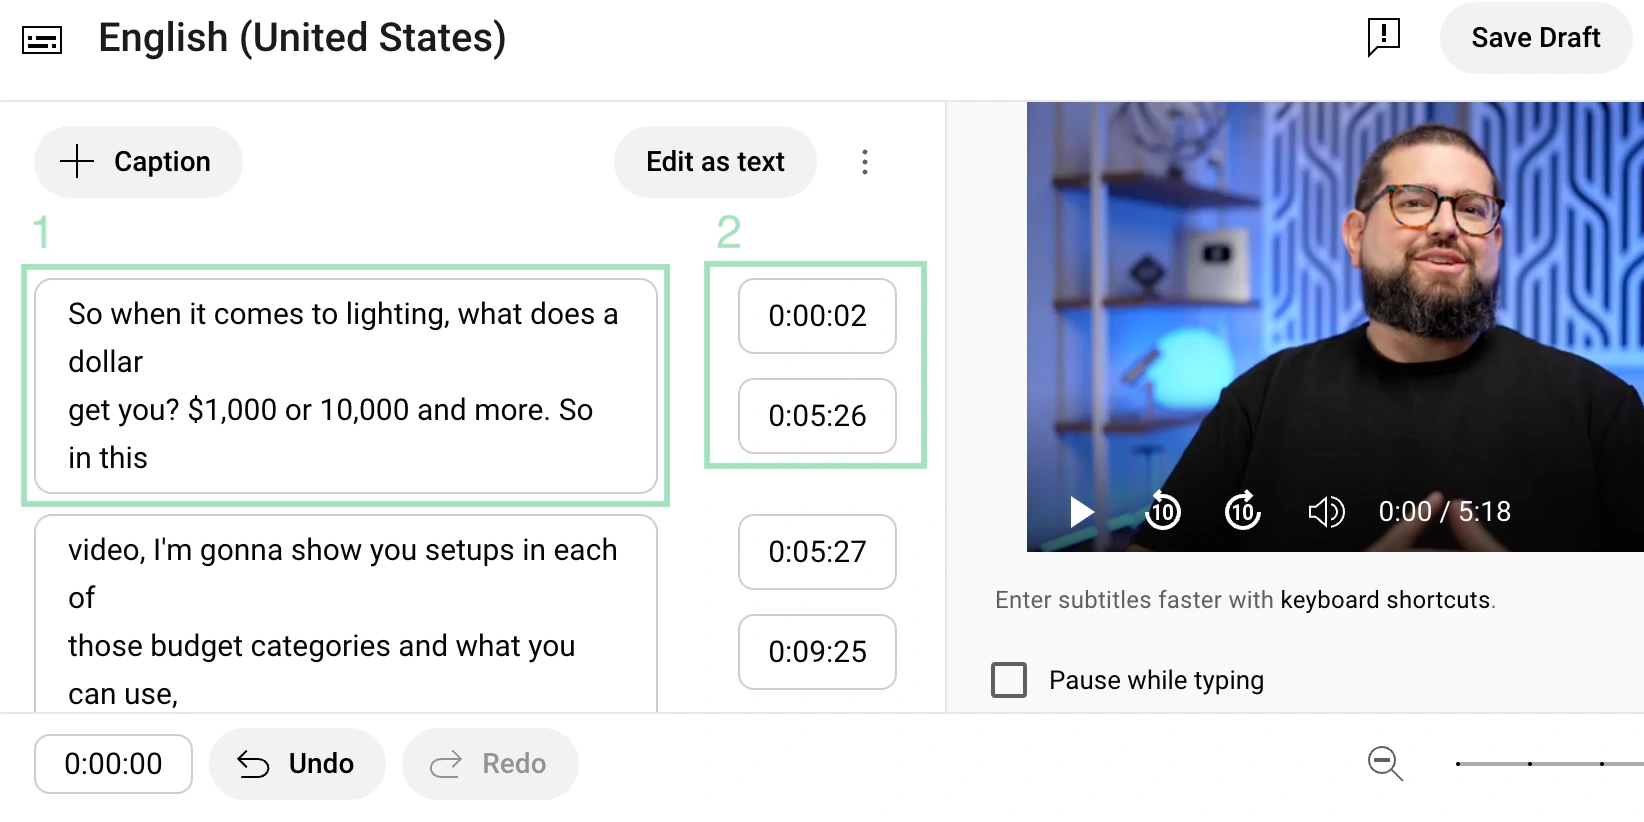
If everything looks okay, click “Done” once you’re finished. Then click “Next” and “Next” again.
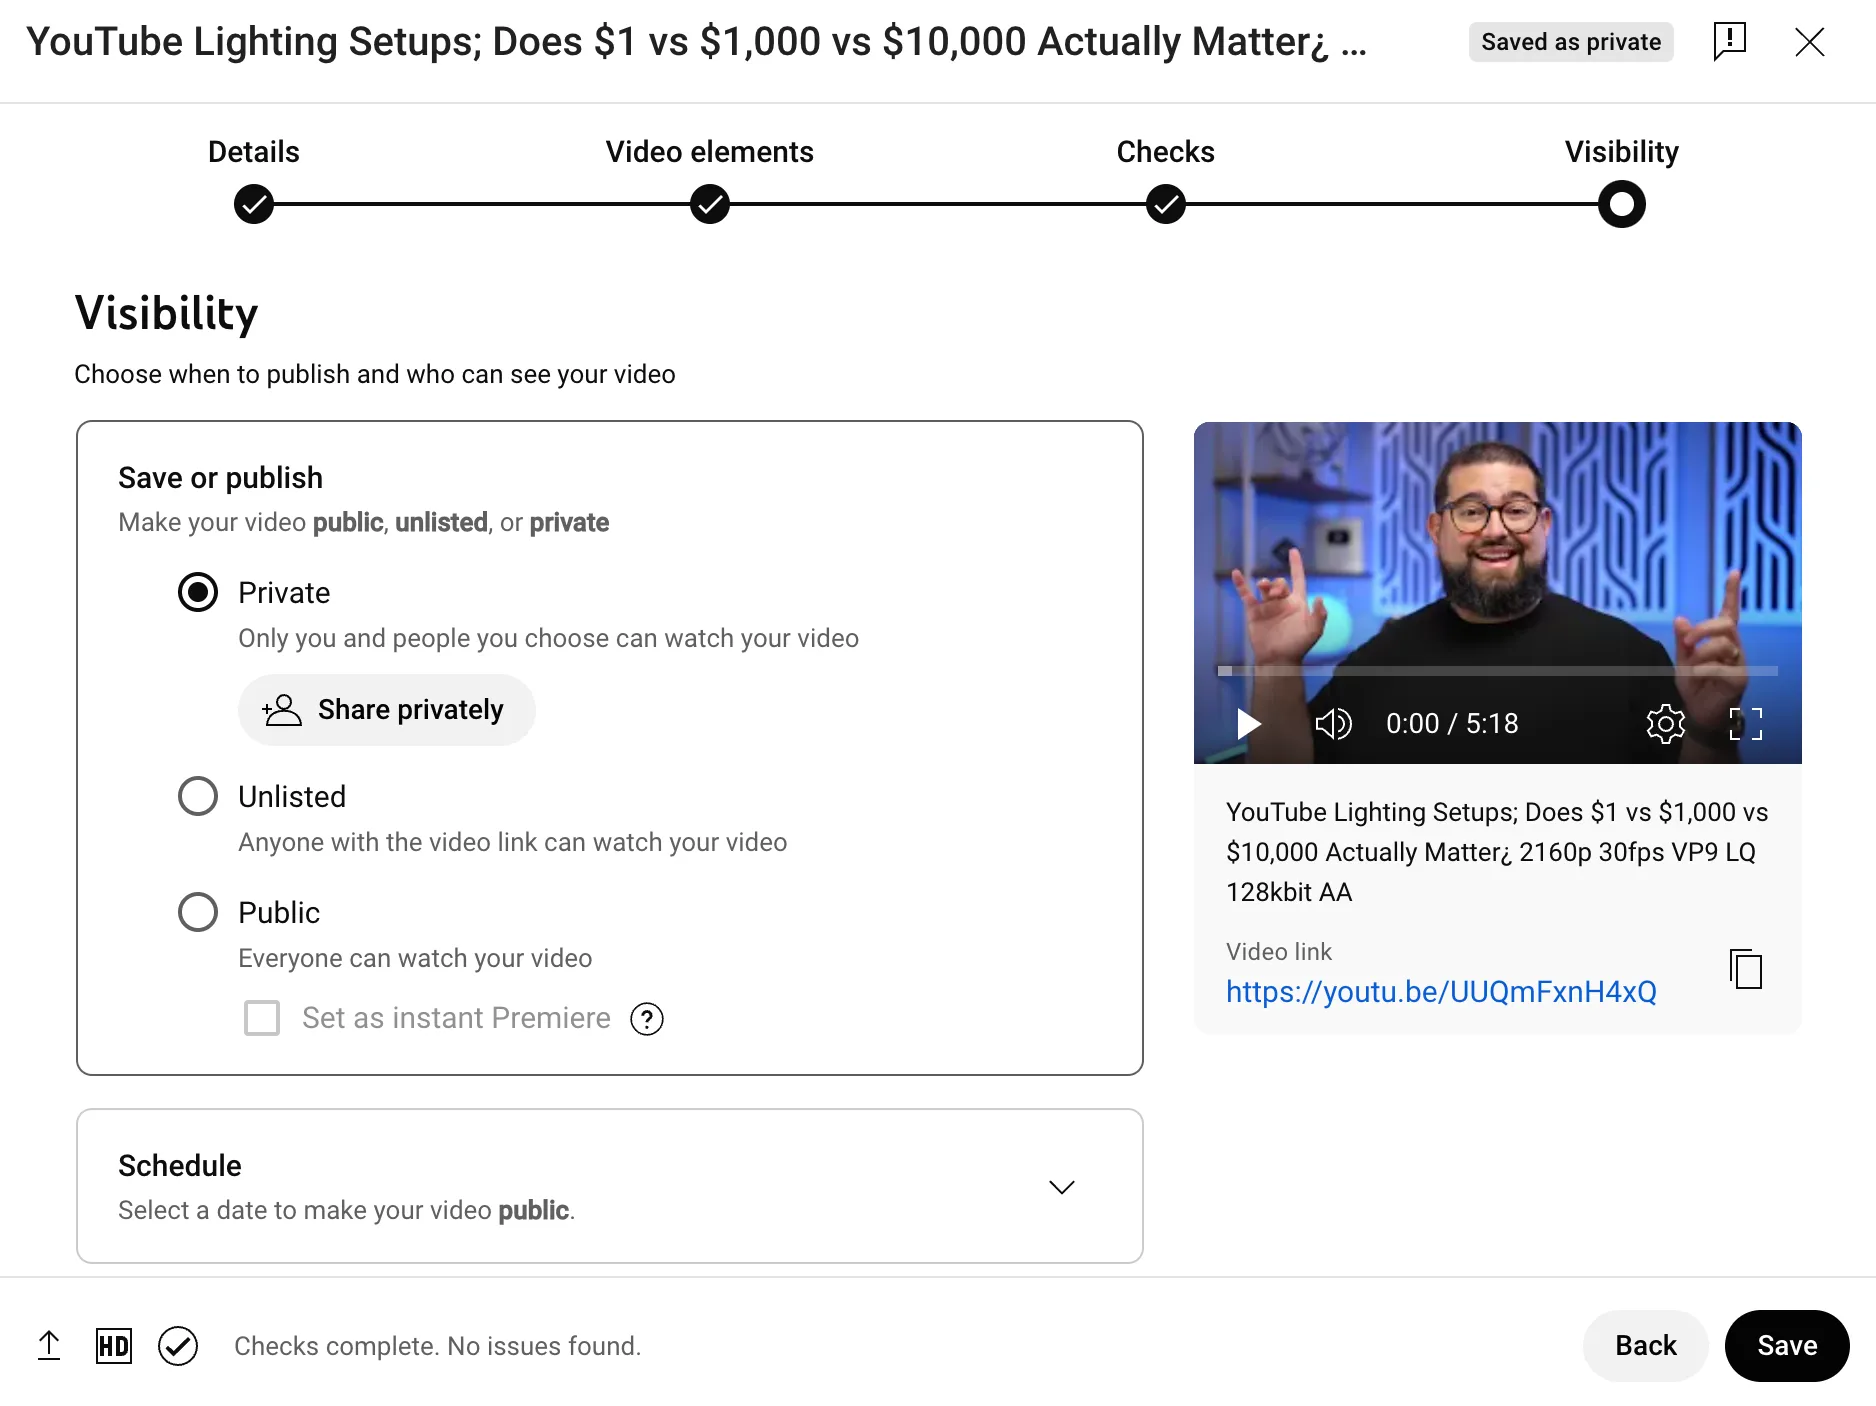
On the last page, make your video either “Private, Unlisted, or Public.” You can also choose to schedule the video. Click “Save” once done.
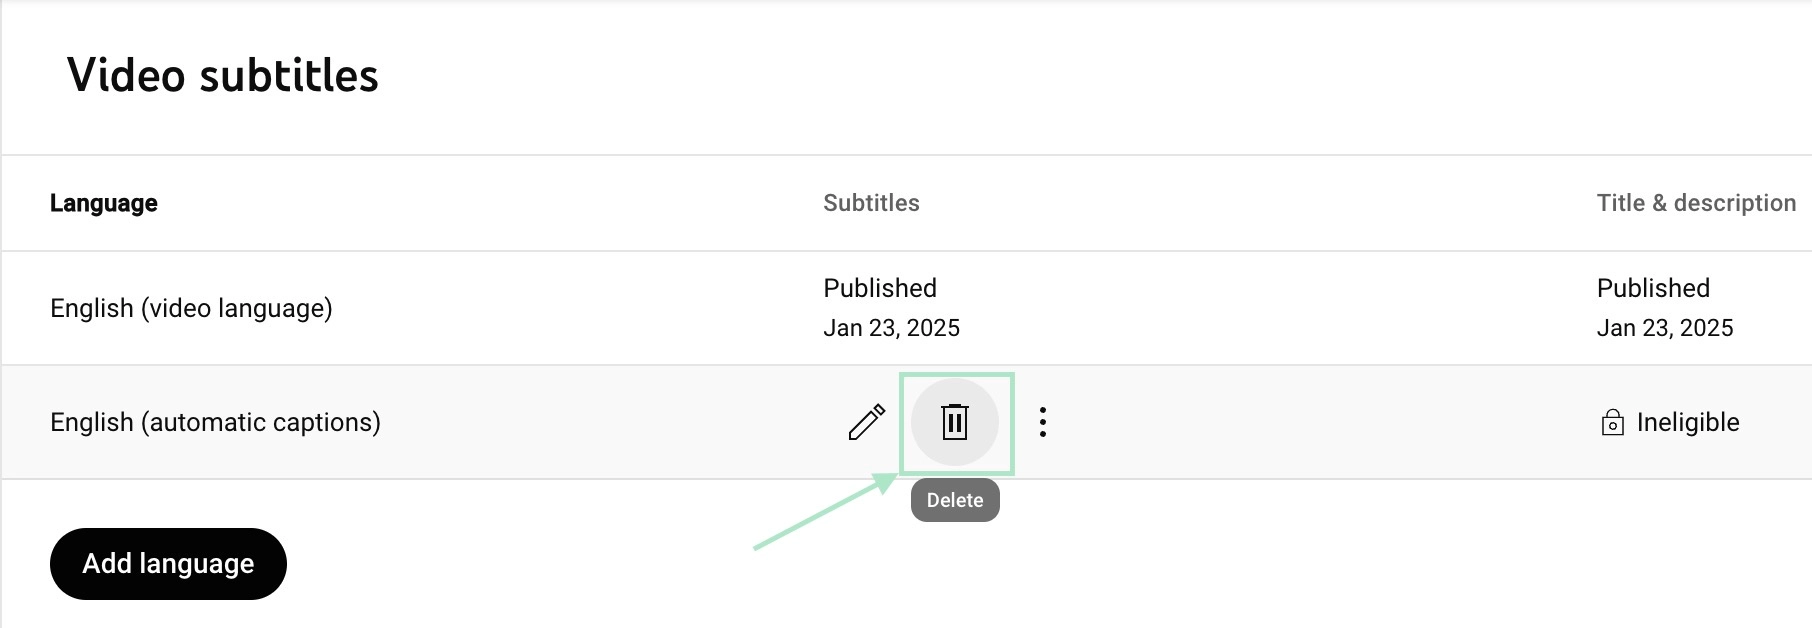
Step 5: Now, you’ll want to delete the automatic transcription that YouTube creates. To do so, hover over the video's thumbnail on the “Channel content” page. Click “Details.”

Then, choose “Subtitles.” Afterward, go to the automatic captions, hover over the word “Published,” and click the “Delete” button to remove auto subtitles.
Step 6: That’s it! You have now uploaded your closed captions to your YouTube video.
FAQs on YouTube Automatic Subtitles
Can you make captions default on YouTube?
Yes, you can make captions default on YouTube. Follow the steps below:
For desktop
- Click on your profile picture in the top right corner.
- Select “Settings” from the drop-down.
- Click on “Playback and performance” in the left menu on the following page
- Check the box “Always show captions.”
- If you want auto-generated captions when available, click that option too.
For Android
- Open the YouTube app
- Tap your profile icon
- Go to “Settings”
- Click on “Captions”
- Enable “Show captions”
For iOS
There’s no option to make captions default on iOS. So, if you have an iOS device, manually tap the CC button when you watch any video on the YT app.
How do I set YouTube's automatic default subtitles language to English?
To set YouTube's automatic subtitles to default to English, follow these steps:
- Log into your YouTube account.
- Click on your profile picture in the top-right corner and select Settings.
- Go to Playback and performance.
- Under the Subtitles and Closed Captions section, ensure that subtitles are enabled.
- Navigate to the Language & Location section and set your Default Language to English.
YouTube will now attempt to display subtitles in English when available.
Can YouTube auto-generate subtitles in different languages?
Yes, YouTube can auto-generate subtitles in multiple languages. When a video has automatic captions enabled, YouTube’s AI generates subtitles based on the audio.
Viewers can also use the Auto-Translate option by clicking on the gear icon in the video player, selecting Subtitles/CC, and choosing a preferred language from the list of auto-translations.
Why are YouTube captions not working?
There are several reasons why YouTube captions might not be working:
- The video creator has not enabled captions or provided subtitles.
- The video’s language may not support automatic caption generation.
- There may be a temporary issue with YouTube’s captioning system.
- Your device or app settings may have disabled subtitles. Try refreshing the video, updating the app, or checking your device’s subtitle preferences.
How do I stop YouTube from automatically turning on captions?
To prevent YouTube from automatically enabling captions:
- Go to Settings in your YouTube account.
- Navigate to Playback and performance.
- Under the Subtitles and Closed Captions section, uncheck the option to always show subtitles.
If you’re watching on a mobile app, you can turn off captions for individual videos by tapping the gear icon, selecting Captions, and turning them off.


.webp)


