-in-5-Steps-(1).webp)


Table of contents:
Key takeaways:
- Starting a video podcast doesn’t need to be rocket science. With Riverside you can look like a pro even if you still occasionally forget which end of the microphone to talk into.
- Quality matters. Record in a quiet space, pick the right equipment, and rely on software that records locally.
- Consistency is key. A podcast that disappears for months is a podcast that gets forgotten.
- A little planning goes a long way, but don’t be too rigid. Define your concept and write down your episode outlines. But let conversations flow naturally.
- Analytics and audience feedback are tools you can use to keep your podcast fresh and engaging.
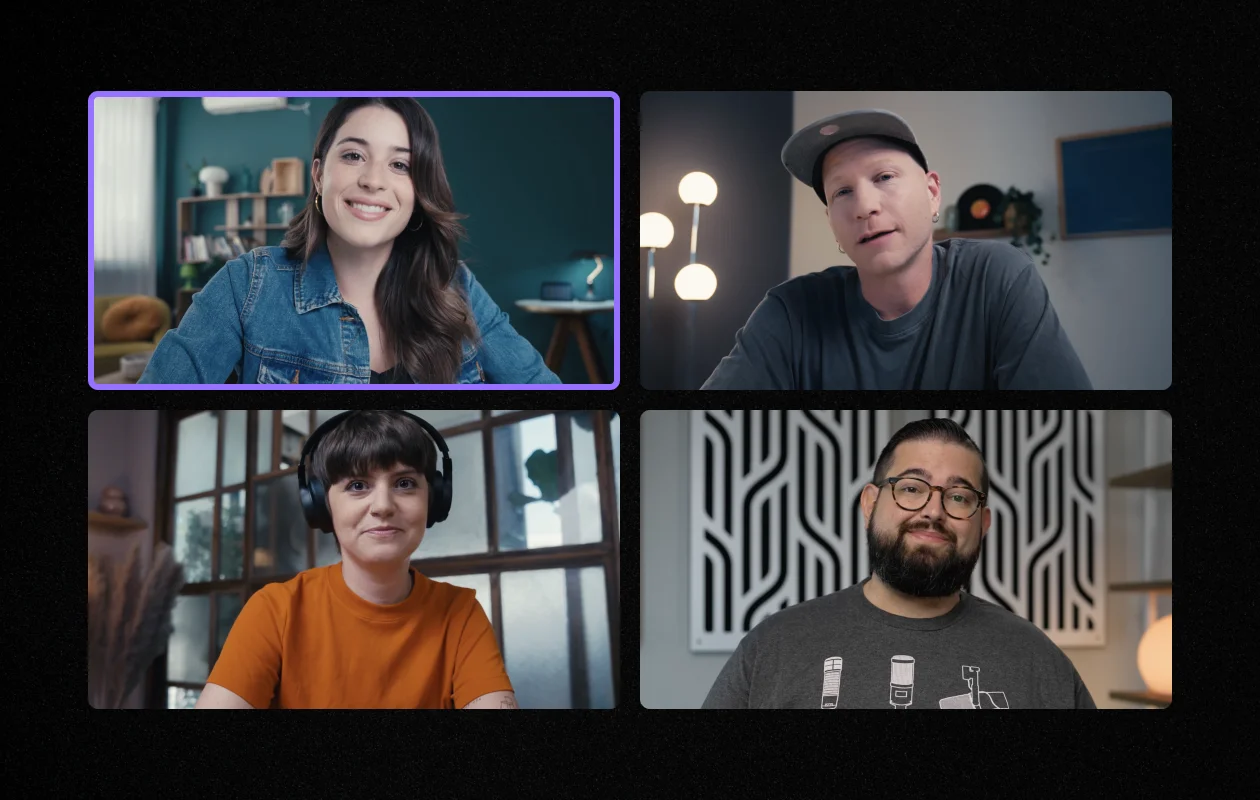
Audio is great — but these days, listeners expect to see you too.
If you’re already podcasting, adding video might feel like a big leap. But it’s actually one of the simplest ways to grow your audience and build deeper engagement.
I’ve been producing podcasts and video content for over a decade, and I currently co-host Primary Technology, a video podcast covering the latest in tech. I also run a YouTube channel with over 130K subscribers and average more than 1 million views a month.
In this guide, I’ll walk you through how to record a video podcast — from choosing the right gear and software to creating a smooth, high-quality workflow.
How to record a video podcast step by step
Creating a video podcast might seem daunting, but breaking it into simple steps makes it much more manageable. Here’s everything you need to know to set up, record, and publish your show.
Plan your video podcast
You can't skip straight to the end without a solid game plan, can you? Before you hit the record button, you need to spend some time planning.
Nail down your concept
What’s your show about? Who’s your audience? How will you make the most of the video format?
Choose a podcast topic that you’re passionate about, but one that aligns with your audience’s pain points. The clearer your focus, the easier it’ll be to attract the right audience.
Choose your format
Gaming live stream or in-person interviews? Guests or no guests? Tightly scripted or completely off-the-cuff? Your format isn’t just about style, it also determines what gear and software you’ll need.
You need to find the format that works for you. Doing an interview show can be very engaging, but it's tough to find interview guests–especially if you're trying to do regular released episodes. If you’re posting weekly then consider doing a co-host show with, just you and the same person every week. This is the format I use for Primary Technology.
Here are some format options you can play with:
Interview (in studio or remote)
Record in a podcast studio or from different locations with co-hosts or guests using online platforms.
Looking for a more dynamic feel? Grab a tripod and handheld mic for those on-the-street interviews.
Solo or monologue
Flying solo is also a viable option. Just you, the camera, and your audience. Keep those smooth-operator vibes going.
Live stream
Go live on YouTube, Twitch, or other platforms to interact with your audience in real time. Bonus: You can save the live streams for on-demand viewing later.
Educational or webinar
Establish yourself as an authority with a webinar approach. Use screen sharing and visuals to make complex concepts simple.
You may also want to consider your podcast's structure and the outline you’d like to follow for each episode.
For example, every time I record an episode, I have a shared note with my co-host or interview guest — we already have a flow planned. That helps with recording and also saves time during editing.
Think about scheduling
A bi-weekly schedule might be manageable if you’re doing quick, 15-minute solo takes on trending topics. But if you’re diving into hour-long, in-depth interviews, you’ll need more time to plan and produce.
Whatever you decide, consistency is key - your audience needs to know when to expect new episodes.
Learn more: How to Schedule a Podcast
Pick video podcast software
When it comes to recording and editing your video podcast, software is just as important as your microphone or camera.
If you’re still learning the ropes, don’t overcomplicate your life by diving headfirst into pro-level software like OBS Studio or DaVinci Resolve. You probably won’t need many of those advanced features anyway.
Instead, look for software that helps you record, edit, and publish with minimal friction. Ideally, it should include:
- A user-friendly interface for you and guests.
- High-quality recording - aim for 1080p or 4K.
- Automated tools to simplify editing and clean up audio.
- Built-in recording and editing, all in one place.
And if you’re recording with remote guests, check for local recording software. (Hello to Riverside.)
Unlike tools like Zoom or Skype, which rely entirely on internet quality, Riverside records audio and video locally on each participant’s device. That means you’ll get high-quality files even if someone’s Wi-Fi cuts out.
With Riverside, you’ll also benefit from:
- Progressive uploads, which means you don't lose your recording even if something crashes mid-show.
- Easy guest access via a single link (no downloads or accounts needed)
- Live streaming if you want to broadcast in real time and stream to social media platforms.
Read more: Check our guide on the best video podcast software for recording, editing, and publishing.
Purchase and set up equipment
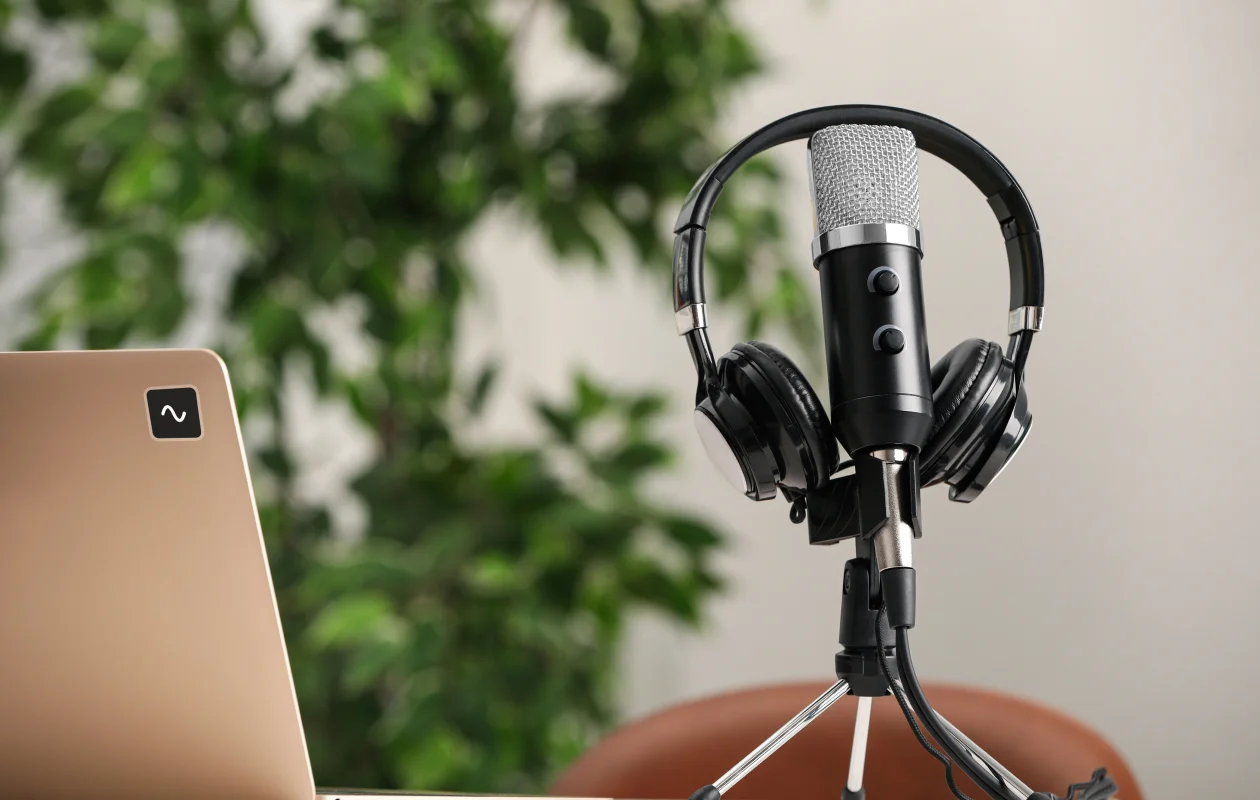
Having the right equipment ready to go is essential for creating a high-quality video podcast.
I highly suggest using the same setup for every episode recording. It’ll be familiar, save you from troubleshooting, and keep your audio and video consistent.
Disclaimer: Please see our help site guidelines to check the compatibility of any equipment with Riverside.
Here’s a quick list of what you need from the get-go:
Microphone
When choosing a microphone, consider your podcast type and recording setup:
For remote recording:
- You could use the built-in mic in your computer or webcam if you’re on a budget, but a dedicated mic will sound much better.
- Use a USB mic with a cardioid pattern (sensitive to front sound only).
Reccomendations: Shure MV6, Rode NT-USB, or Audio-Technica ATR2100x
For in-person, multi-person setups:
- Use XLR microphones paired with a USB audio interface or mixer.
Mic reccomendations: Behringer Ultravoice Xm8500 or Rode Procaster.
Interfaces and mixers reccomendations:
- 2 XLR inputs: Focusrite Scarlett 2i2 (3rd Gen).
- 4 XLR inputs: Behringer Xenyx Q1202USB or Tascam US-4×4.
Note: Mixers don’t allow multi-track output for separate editing - choose a USB interface for this.
Microphone accessories
Consider also getting a:
- Mic stand
- Shock mount
- Windscreen/pop filter
Read More: Complete guide on the best microphones for podcasting.
Camera
What cameras you choose depends on your setup.
If you record remotely, you’ll just need one camera or webcam for yourself and ideally your guests would have their own.
If not, guests can always use their smartphones as a budget-friendly alternative.
And, trust me, smartphones can do a decent job. My co-host uses his iPhone as his webcam, and it looks great. He just selects it in Riverside through Continuity Camera on the Mac.
If you’re recording in person, you may want more than one camera to create a multi-cam view. For example, you might want one camera on both you and your guests, one focused on you and one focused on your guests.
Again, you can use your smartphone and with the Riverside mobile app, even turn it into a secondary webcam.
Reccomendations:
- Beginner: A smartphone on a tripod or an entry-level camcorder like the Panasonic HC-V770 (Full HD or 4K).
- Semi-professional: Sony FDR-AX53 with 4K, fast autofocus, and Dolby 5.1 Surround Sound microphone for backup audio.
You’ll also want to make sure you’ve got a sturdy tripod to keep your camera stable.
Read More: Choosing the Best Podcast Camera for Video Podcasting
Headphones
Wearing headphones while recording is essential. They help you catch audio issues like background noise or muffled sound in real time. You also hear your podcast exactly the way your audience will.
I suggest you choose earphones that are most comfortable to your taste. For example, over-the-ear headphones are better for noise isolation and long-term comfort.
Reccomendations:
- Budget pick: Audio-Technica ATH-M30X — affordable, reliable, and similar in sound quality to the popular M50X.
- Premium pick: Bose QuietComfort 25 — lightweight with excellent noise cancellation, ideal for longer sessions or noisy environments.
Read More: 9 Best Podcast Headphones
Lighting
I’m a firm believer that even if you have a $2,000 mirrorless camera, it’s not going to look great if you don’t have good lighting.
Video lighting dramatically impacts video quality, ensuring consistent results regardless of location or weather.
Here are some options for your setup:
If you’re really on a budget, use natural light or position a lamp in front of you (never behind).
For studio setups try a 3-point lighting kit. This includes two softboxes in front andone overhead softbox slightly behind. A more budget-friendly alternative is a CFL lighting kit.
And if you’re willing to go all advance consider the:
- Aputure Amaran HR672 LED kit: Adjustable brightness, remote-controlled, with rechargeable batteries.
- Aputure AL-F7: Compact, flicker-free portable LED light with adjustable temperature.
Learn more in our full video lighting guide.
Record your podcast
Recording your podcast is the most exciting part. So sit down, take a deep breath, and get ready to enjoy the ride!
Set up your studio
Before you click on the record button, it’s time to get your setup ready. Let’s start by taking care of your equipment and studio:
Cameras
- Choose your angles: Single wide-angle shot or multiple cameras for dynamic angles? Mount your camera on a tripod, test framing, and adjust angles with someone in the shot.
- Make sure you can get to the end: Charge batteries (plus spares), format SD cards, and ensure you have enough storage for the entire episode.
- Keep it crystal clear: Give your camera or webcam lens a quick clean before recording to keep your video sharp and professional.
Audio
- Do a quick sound check: Test audio levels, adjust gain, and make sure you’ve selected the correct input, especially for remote recordings
Lighting
Close curtains to avoid inconsistent outdoor lighting, then maximize front lighting and minimize any light behind you. You want to eliminate weird shadows and ensure you’re adequately lit. You can also try a basic, 3-point lighting setup.
Set Decoration
Your background and props should tell a story before you even say a word. For example, if you’re talking about cinema, add some cool original movie posters.
Also, don’t forget to add branding. A neon sign with your podcast name, fan artwork, or even a simple backdrop with your logo can make your set look unique.
Record your podcast
Is your setup ready? Great, it’s time to hit record now! Riverside makes recording in up 4K video quality a breeze, just follow these steps:
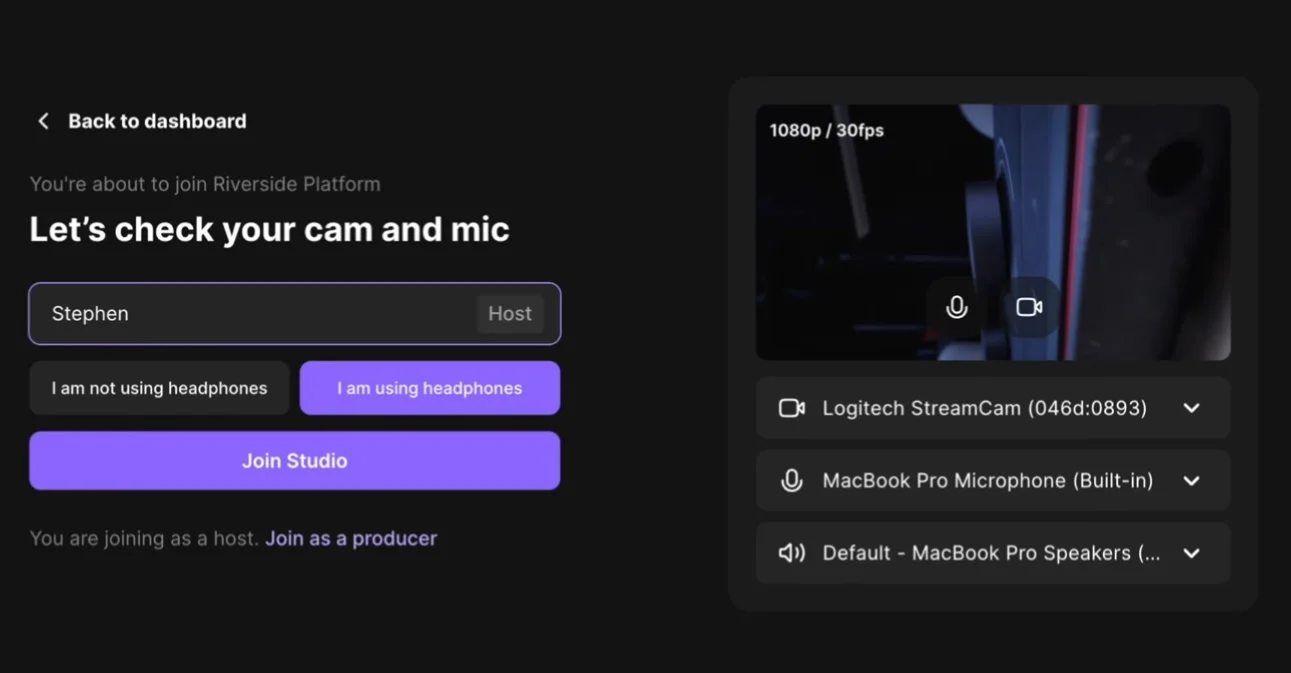
Step 1: Log into your Riverside account, open a studio, and click “Record” to start a new recording. (You can learn how here).
Setup your equipment in the lobby then select “Join studio”.
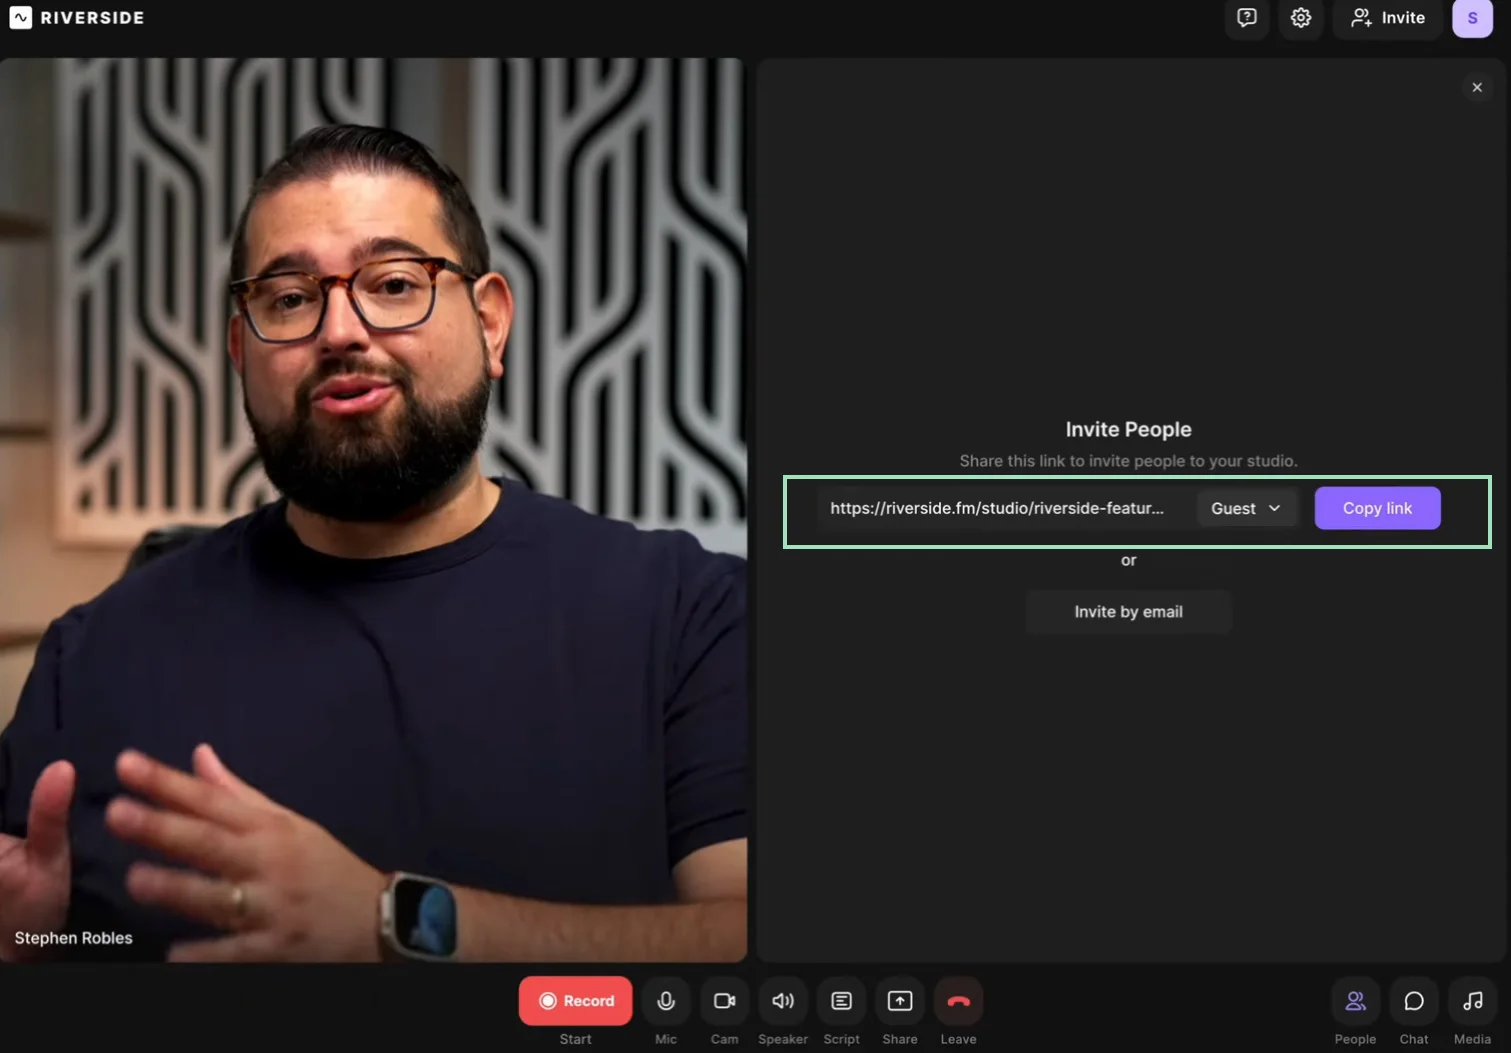
Step 2: In the studio, you can invite guests by sharing the invite link with them. You can invite up to 10 participants and you can assign someone to producer mode if you want a hand managing the technical aspects of your recording.
Step 3: Set up your studio.
You can click on the “Brand” and “Layout” buttons to customize your design, or click “Text” to add lower thirds.
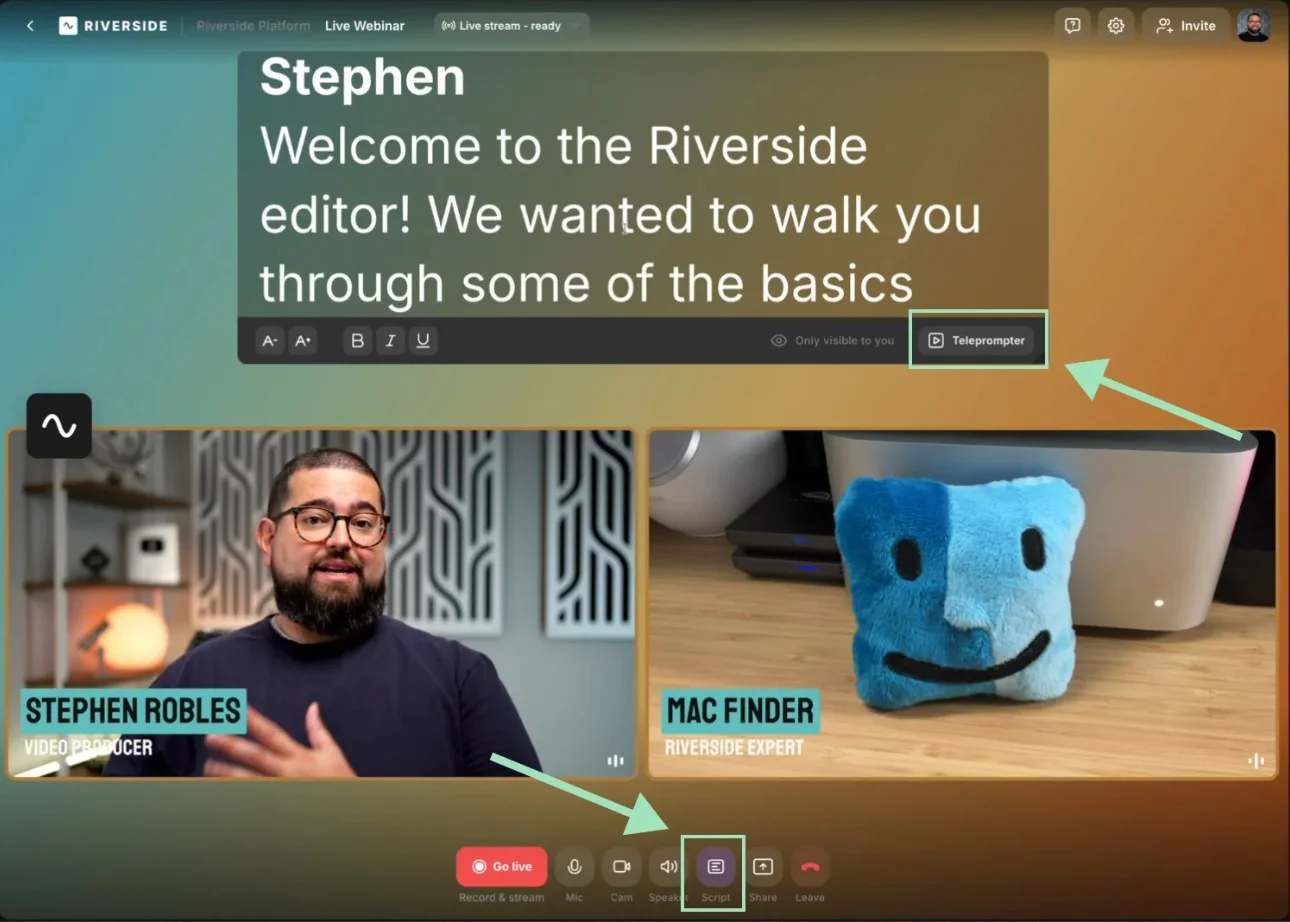
If you’ve got a script or set of questions you want in front of you, set up the teleprompter.
Click the “Script” button at the bottom of the screen, then click the “Teleprompter” button. Paste in your script and set the controls for speed, font size and display.
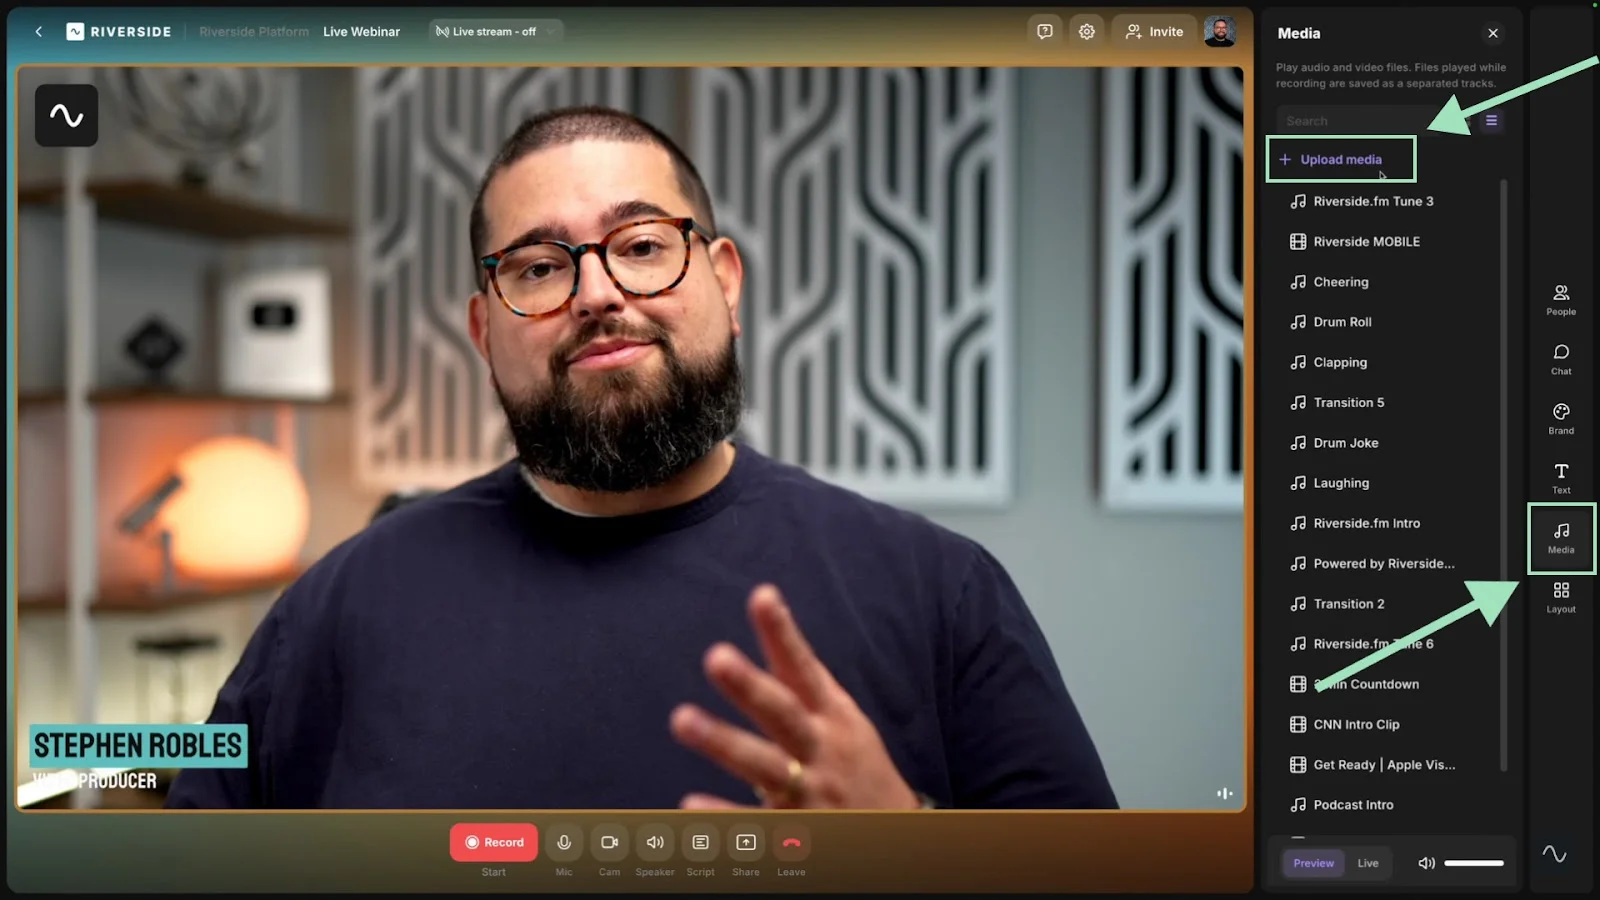
You can also set up any media you may want to include in your live show. Click on the “Media” button to view our free library, or upload your own files.
Step 4: If you want to go live, you’ll also need to set up your stream.
Click on the “Live stream” button at the top and connect to platforms like YouTube, Facebook, or LinkedIn.

Step 6: When you’re all set and your guests have entered the studio, you can click Record or go live at the bottom of the screen.
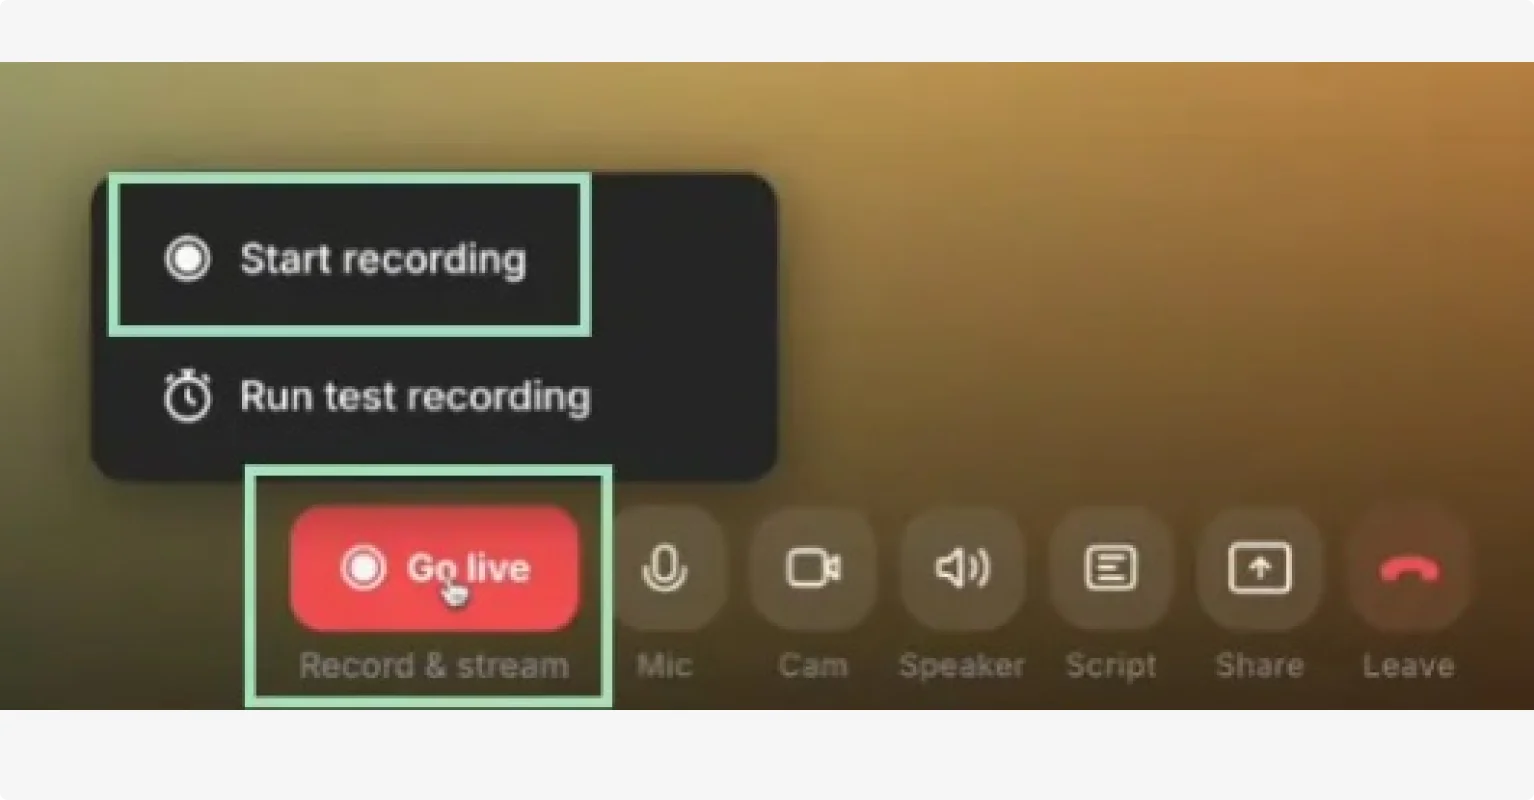
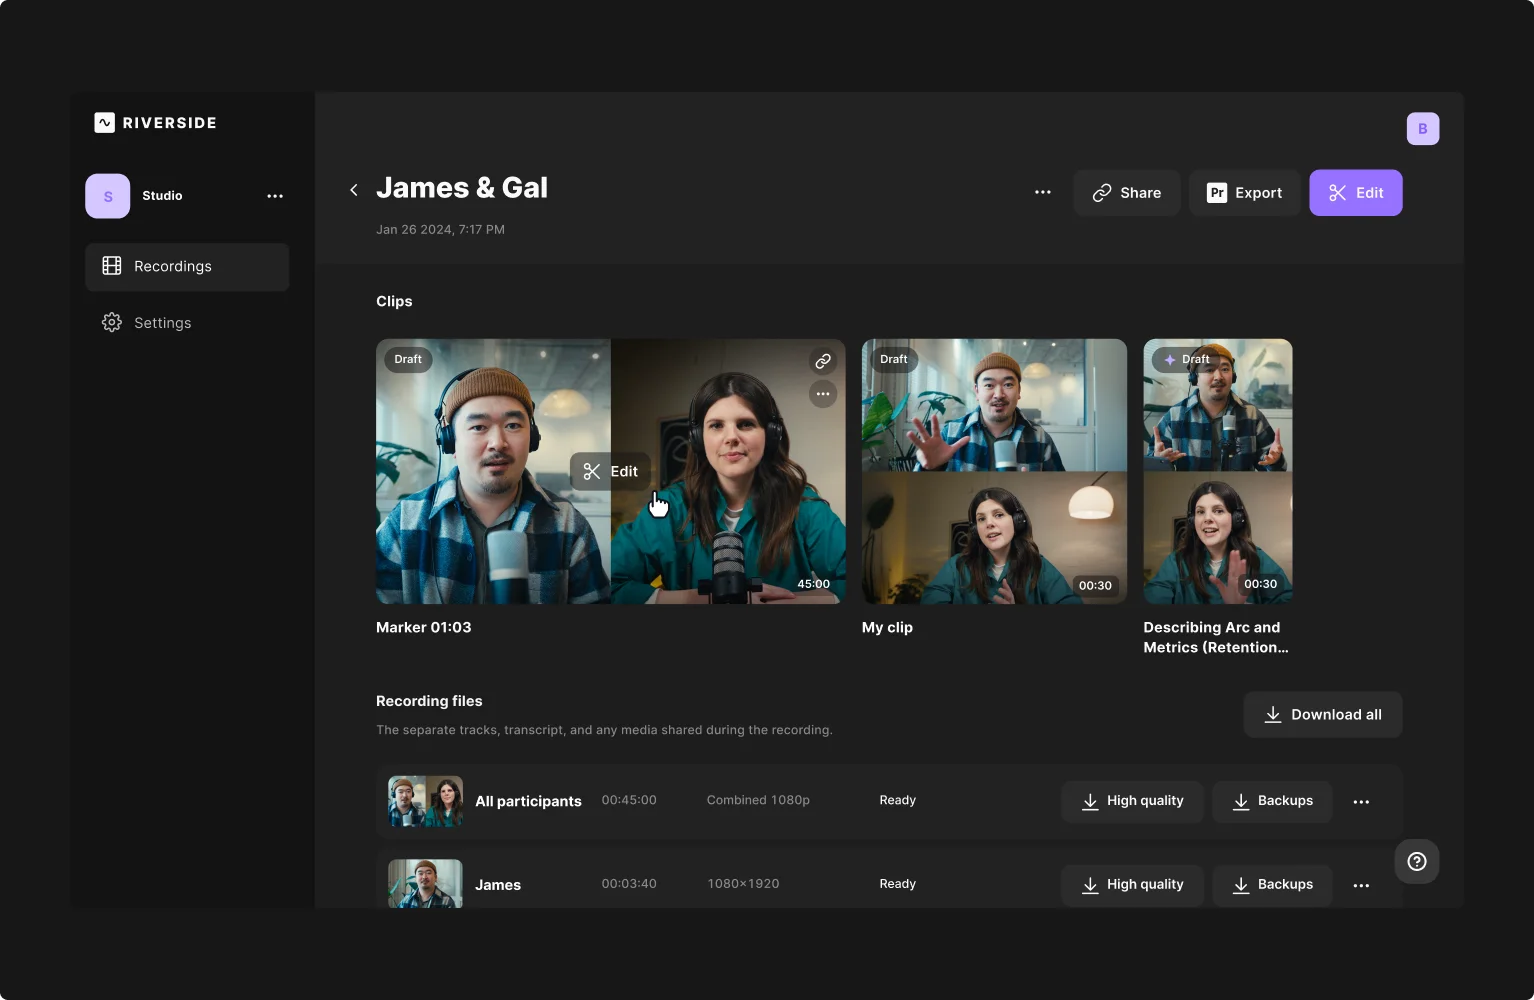
Step 7: When you’re done, click “Stop” and then “View Recordings” to access your new recording file.
Edit your recording
Once you've wrapped your recording, the editing process is where your podcast truly comes together.
With Riverside, you can edit your video podcast in just a few clicks. Here’s how:
Use Riverside’s text-based editor to trim the fat, removing false starts, blunders, and tangents that don't serve your content. Doing this in Riverside is just like editing a doc.

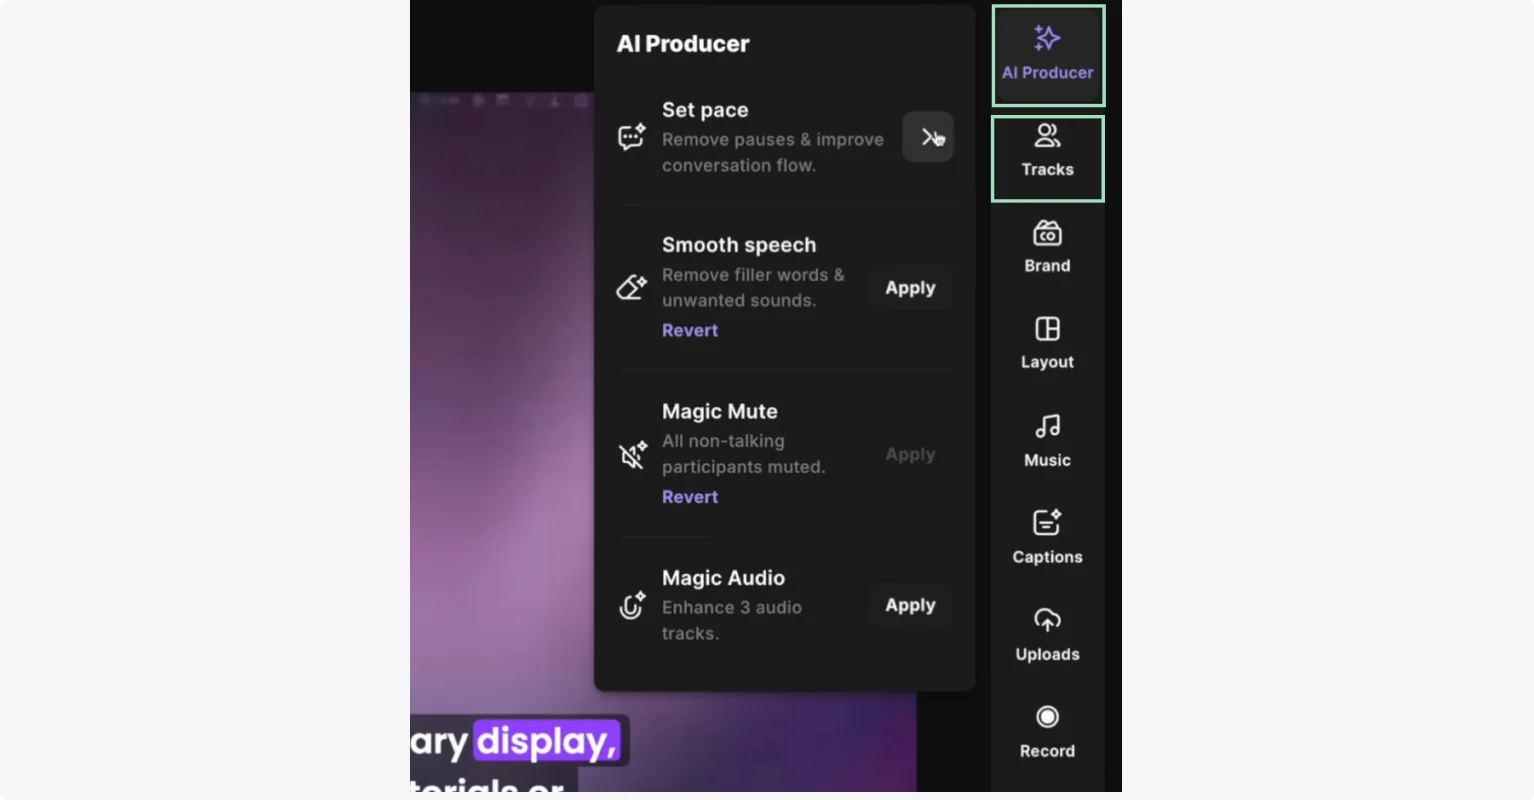
Clean up your audio by removing background noise, balancing levels, and removing awkward silences and filler words. Open the “AI Producer” tools to automatically do this with a few clicks.
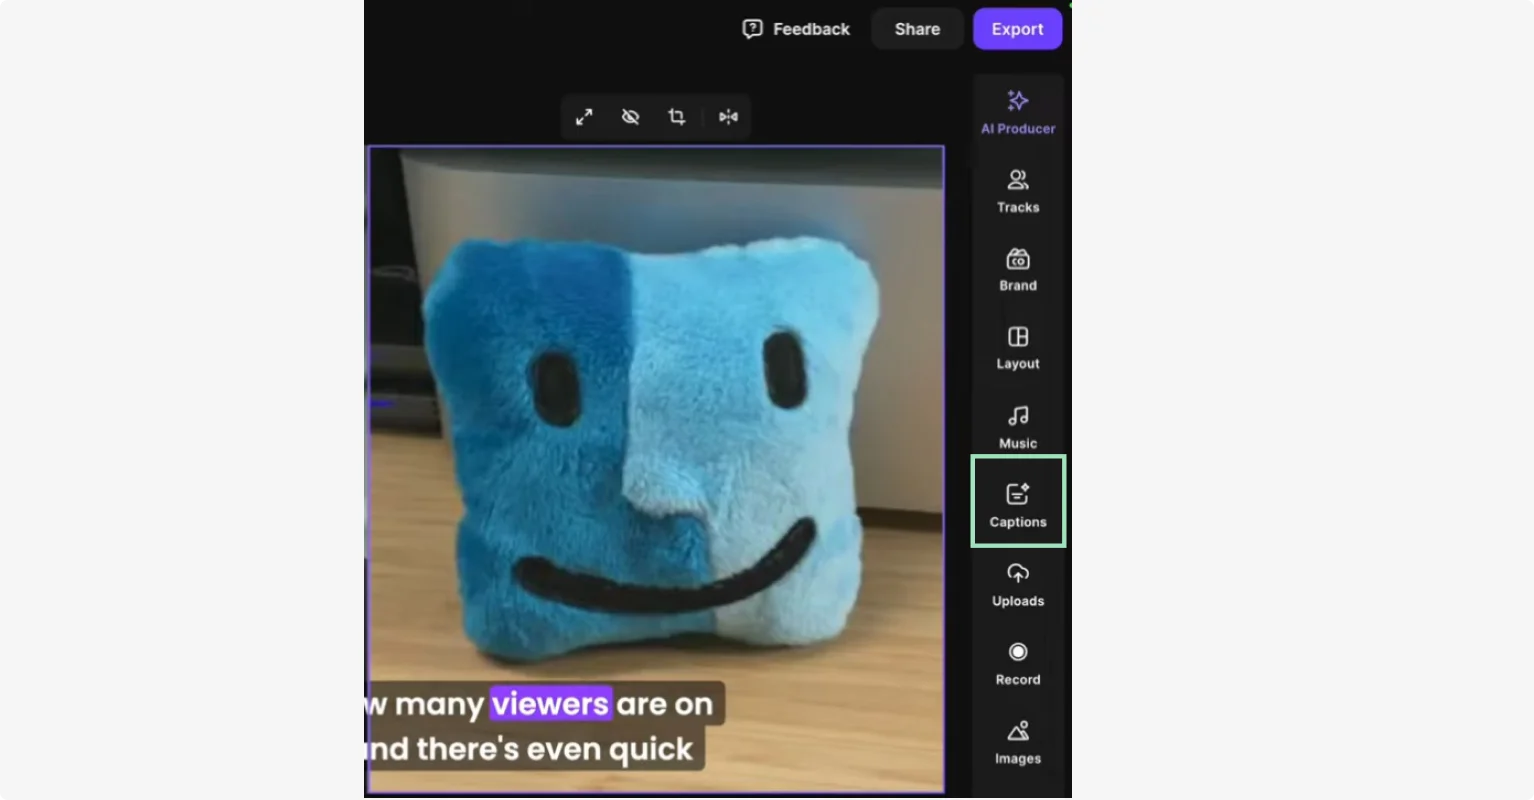
Next up, add captions. Riverside's AI-powered transcription tool generates them automatically. Just click on the “Captions” button on the right to add and edit them just the way you like (you can even save your presets for next time).
You can also customize your podcast with b-roll videos, images, text and music. And for the final branded look add your own logo and background.
Publish your podcast
Now that you’re done, getting your freshly edited podcast out into the world is the final step. To do this, you’ll have to first upload your video to a podcast host.
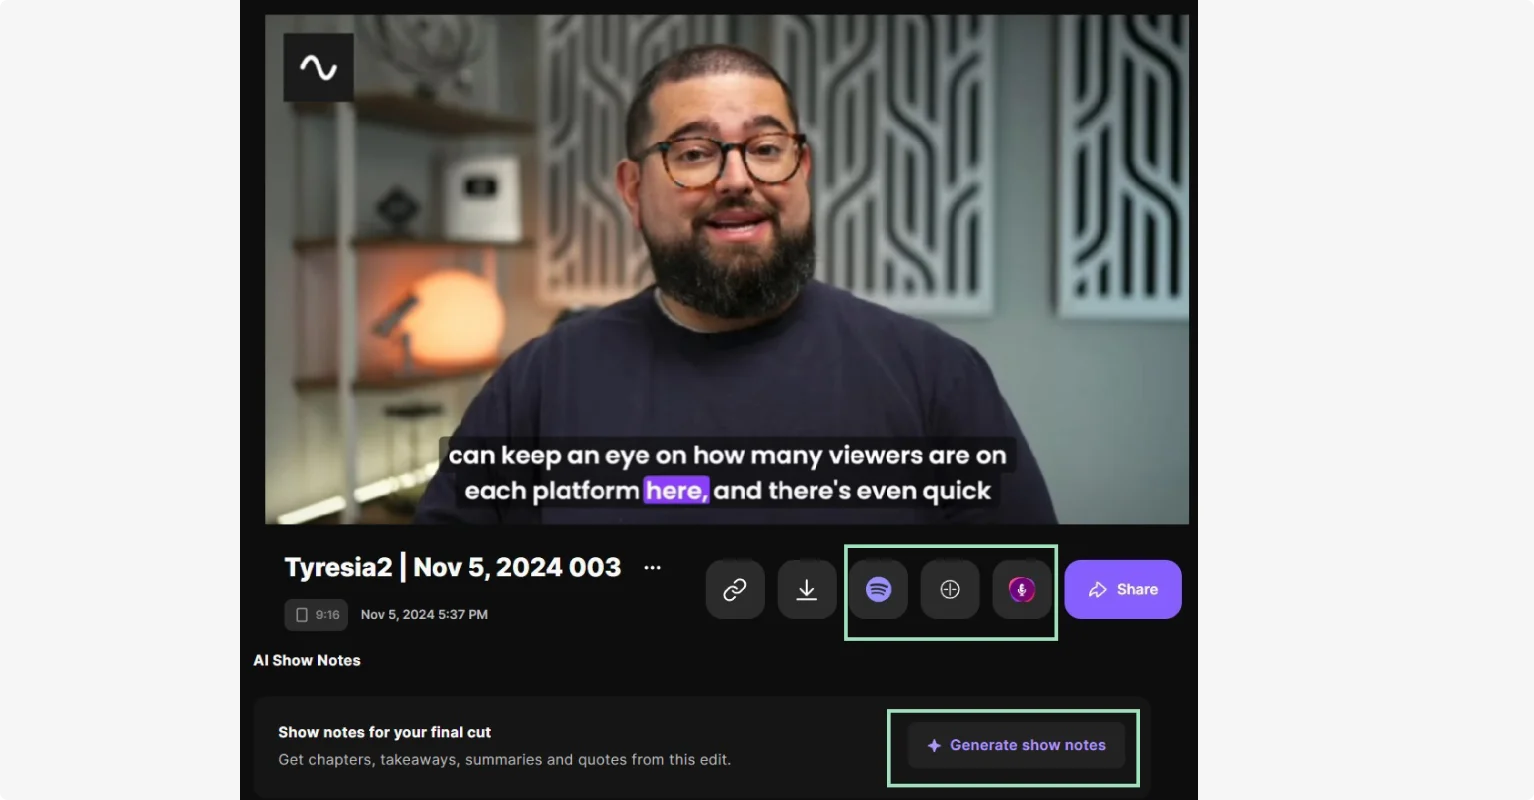
With Riverside, you can publish your podcast directly to top hosting platforms like Spotify, Castos, and Transistor. From your Project page, open your Export, then click on one of the hosting platforms logos at the bottom.
Next, you can automatically generate a podcast summary, takeaway, time-stamped chapters, and show notes by clicking “Generate show notes.”
Make sure to create an eye-catching thumbnail for your show too! Use Riverside to select a frame from your video or upload a custom image, then add your episode title with on-brand fonts and colors.
How To Record and Edit A Podcast For Beginners (For FREE!)
Promote your podcast
Now that your podcast has been published, it’s time to promote it so it can reach as many people as possible.
Here are a few tips:
- Use Riverside’s Magic Clips tool to create short promotional clips to share on social media. These bite-sized highlights will help maximize engagement and drive traffic to your show.
- Don't overlook the benefits of your automatic transcript for podcast SEO. When published alongside your video on your website or YouTube, it makes your content discoverable through search engines.
- Engage with your audience on social platforms to create a loyal community around your podcast. Then, encourage listeners to leave reviews and comments; engagement boosts visibility!
- If you have a budget to allocate to your marketing efforts, use email campaigns, giveaways, or even paid ads to reach a broader audience.
Read More: Complete Guide to Podcast Promotion
Tips for recording successful podcasts with video
Creating a successful podcast goes beyond just hitting “record.” Every detail matters.
These expert tips will help you deliver polished, professional episodes that resonate with your audience.
Prepare/research beforehand
Before you start your show, have a rough outline of how you’d like it to go. This will help you avoid rabbit holes and tangents and ask insightful, focused questions.
If your show dives deep into certain topics, research them beforehand for a meaningful, unique conversation that engages your audience beyond surface level.
Get your guests comfortable
A relaxed guest makes for better, more natural conversations. Take a few minutes before recording to chat and put them at ease, then make sure they’re comfortable with the setup.
Allow the show to go where it goes
A guiding structure can be useful, but don’t force the conversation into a rigid script or it will feel unnatural. If an interesting tangent comes up, roll with it and explore it, even if it wasn’t part of your original plan.
Be consistent
Consistency is more than just sticking to a regular publishing schedule. Create templates for your intro, outro, and segment transitions, and stick to a consistent format and tone across episodes. Your listeners should know exactly what to expect from each of your episodes.
Know your audience
One of the most important things I’ve learned as a podcaster is to stay focused on what’s valuable to your audience.
Too many podcasts start with a long biography or backstory that listeners could easily find online. Skip the filler and get straight to the good stuff — especially in interviews. Ask the questions your guest hasn’t answered a hundred times. That’s where the value is.
When you really understand what your audience wants — and deliver on it consistently — your podcast becomes something worth coming back to.
Record in high quality
Bad production will make your content look and sound unprofessional, distracting your audience from your message. Record in a quiet space with minimal echo, ensure proper lighting, and use reliable recording software that keeps the quality of your production high.
Monitor analytics
Your podcast metrics are more than just numbers. They tell a powerful story about what’s working (and what’s not). Where do people drop off? Which episodes perform best? Use these insights to refine your content’s quality and improve your connection with your audience.
FAQs on how to record a video podcast
Still need more information? Here are the answers to some frequently asked questions.
What is a video podcast?
A video podcast adds a visual component to the traditional podcast format.
Instead of just listening, your audience can watch the conversation — whether it’s a talking-head interview, a screen share, or a multi-camera studio setup.
Adding video helps you build a stronger connection with your listeners and makes your content easier to repurpose across platforms like YouTube, Instagram, and TikTok. It’s a simple way to grow your reach without creating separate content from scratch.
Is video podcast better than audio?
There’s no “better” format – it all comes down to what your audience is looking for and what content you’re going to produce.
Video podcasts add a “human factor” through facial expressions and can be repurposed across more platforms. But, audio-only podcasts are better for listeners on the go.
Can you record a video podcast on your phone?
Yes, you can! We’ve got a whole guide on how to record a podcast from your phone. The easiest way is using a mobile app like Riverside. You can record in up to 4K resolution and everything automatically syncs to the desktop site.
I suggest you plug in an external mic, and get a phone mount or stand to keep your device steady. There’s also light accessories you can add for a more professional recording.
How to record a video podcast for free?
It’s entirely possible to start a podcast for free using Riverside’s free plan and your phone's built-in camera app. You'll sacrifice some quality and convenience features that will make the process smoother. But if you’re starting out, that’s probably not so much of an issue.
How to record a video podcast on Spotify?
With Riverside, you can record, edit, and upload your video podcast directly to Spotify.
Just log in to your Spotify for Creators account, click “New episode” then select “Go to Riverside.” Record your podcast. When you’re done editing it, you can easily share it on Spotify by clicking on the Spotify logo in the “Export” menu.
We’ve got a whole guide here: How to start a podcast on Spotify
What platform should I use to record a podcast?
If you’re looking for simplicity and ease of use without sacrificing quality, Riverside is your best bet. You can record locally in up to 4K video and 48kHz uncompressed audio, then let AI help you quickly edit your podcast to perfection in minutes instead of hours. Riverside handles recording, editing, and publishing all in one place - no technical wizardry required.


