iPhone podcasting is the answer to our prayers.
Learning how to record a podcast on your iPhone correctly, means you’ll have a budget-friendly way to create a professional podcast on the go. Gone are the days of needing to book a studio session or haul heavy recording equipment around with you. iPhones offer impressive recording capabilities which means you don’t have to comprise on quality. With remote recording software, you can even interview guests on their iPhone, no matter where in the world they are.
So where to get started?
In this article, we’ll outline all the steps you need to record a podcast on your iPhone or iPad without a hassle. We’ll outline what equipment you need and which podcast recording app is best for high resolution podcasts.
The Best iPhone Podcast Equipment for Recording
Wondering what podcast equipment you need for recording content on your iPhone? This is everything you need for your iPhone podcast kit:
#1 - An iPhone, obviously! The more up-to-date your iPhone is, the better. As we all know the latest models have superb audio and video quality, and this will serve you well when recording a podcast from your iPhone.
#2 - An external microphone. Although iPhone quality is impressive, if you’re going to be regularly recording from your mobile, you may want to consider investing in an external microphone.
- Studio-quality audio. An external microphone will wildly improve your podcast audio quality, meaning your final recording will sound leagues better.
- Portable. External microphones are compact and portable, so you can take them everywhere.
- Easy to use. External microphones are extremely easy to use, plugging straight into your iPhone via a lightning connector.
#3 - A podcast recording app. Although it’s possible to go old-school by using the ‘Voice Memos’ app, luckily for us, there are many podcast-specific apps available on the App Store. We’ll be outlining the best options in this article.
The Best iPhone Podcast Microphones
A microphone for your iPhone is a sensible and long-term investment. This single piece of equipment will transform your audio quality and infinitely benefit your podcast recording.
N.B. All of the following mics are lightning port compatible (iPhone 5 and above).
External Microphone
These external mics plug directly into your iPhone’s lightning port, just like a charger - super simple, super effective!
- Price: $156
- Connectivity: Mounted via lightning, ‘plug and play’.
- Portability: Extremely compact, pocket-friendly, and durable.
- Adjustability/Mic Specs: ‘Multi-directional’, the microphone tilts, flips, and rotates so you can capture the best audio possible, and you can capture multiple audio sources.
Other specs:
- Windshield to protect your recording from interference.
- ShurePlus MOTIV Audio and ShurePlus MOTIV Video apps, free to download on the App Store. You can customize the performance and set up of your microphone and recording professional-level audio and video.
Things to consider:
- Most phone/tablet cases will need to be removed in order to connect the mic.
- There is considerable latency, which may impact your audio quality.
- Price: $164
- Connectivity: Mounted via lightning
- Portability: Small enough to fit in your pocket!
- Adjustability/Mic Specs: Two unidirectional mics in an X/Y configuration. You can adjust the mic angle from 90 degrees (for focussed recording) to 120 degrees for immersive wide-angle audio capture.
Other specs:
- Headphone jack, which doubles as a line output, allows you to monitor your audio whilst recording
- Extended lightning connector & removable spacer means the mic is compatible with most iPhone cases
- Zoom Handy Recorder App, allows you to monitor your levels, specify your recording preferences, and record your audio
- Price: $69
- Connectivity: Mounted via lightning
- Portability: Specially made for phones, so highly compact and portable.
- Adjustability/Mic Specs: Directional cardioid microphone that reduces background noise and focuses on what you are recording. Designed specifically for iPhones and iPads.
Other specs:
- Its 3.5mm jack doubles as a headphone output line for monitoring the audio you are recording.
- Comes with a clip to securely attach the mic to your phone and also comes with a windshield for outdoor recording.
- Easy setup with plug-and-play.
- Price: $55
- Connectivity: 3.5mm TRS output connection.
- Portability: Small and easily able to be move around.
- Adjustability/Mic Specs: Cardioid condenser microphone ideally made for cameras but can be adjusted for phones with the RØDE SC7, a TRS to TRRS cable.
Other specs:
- Body made out of aluminum for a higher level of radio frequency rejection leading to better, unaffected sound.
- No batteries are required, this mic runs on a simple plug-and-play.
- Easy to operate and can be used for various devices (with the right cable).
Wireless Lavalier Microphones
Lavalier mics clip straight onto your shirt. These are a good option if you’re worried about your or your guests’ mic technique. They’re also far more subtle, and less likely to intimidate guests who might suffer from stage-fright.
#1 Saramonic LavMicro Di Lavalier Mic Lightning
- Price: $115
- Connectivity: Lightning cable
- Portability: Lightweight and compact
Mic Specs:
- Omnidirectional microphone which clips onto your shirt
- Powered by your iPhone, so no need to charge or use external batteries
#2 Comic Wireless Lavalier Microphone System for iPhone, CVM-WS50
- Price: $206
- Connectivity: Wireless
- Portability: Small enough to bring with you
Mic Specs:
- Omnidirectional microphone
- 60 meter range
- Battery powered, USB charging
- Real-time monitoring and adjustment of levels
Find the perfect iPhone podcast mic with our guide: Best External Microphones for iPhone & iOS Recordings
The Best Podcast Recording Apps for iOS (&iPad)
1. Riverside
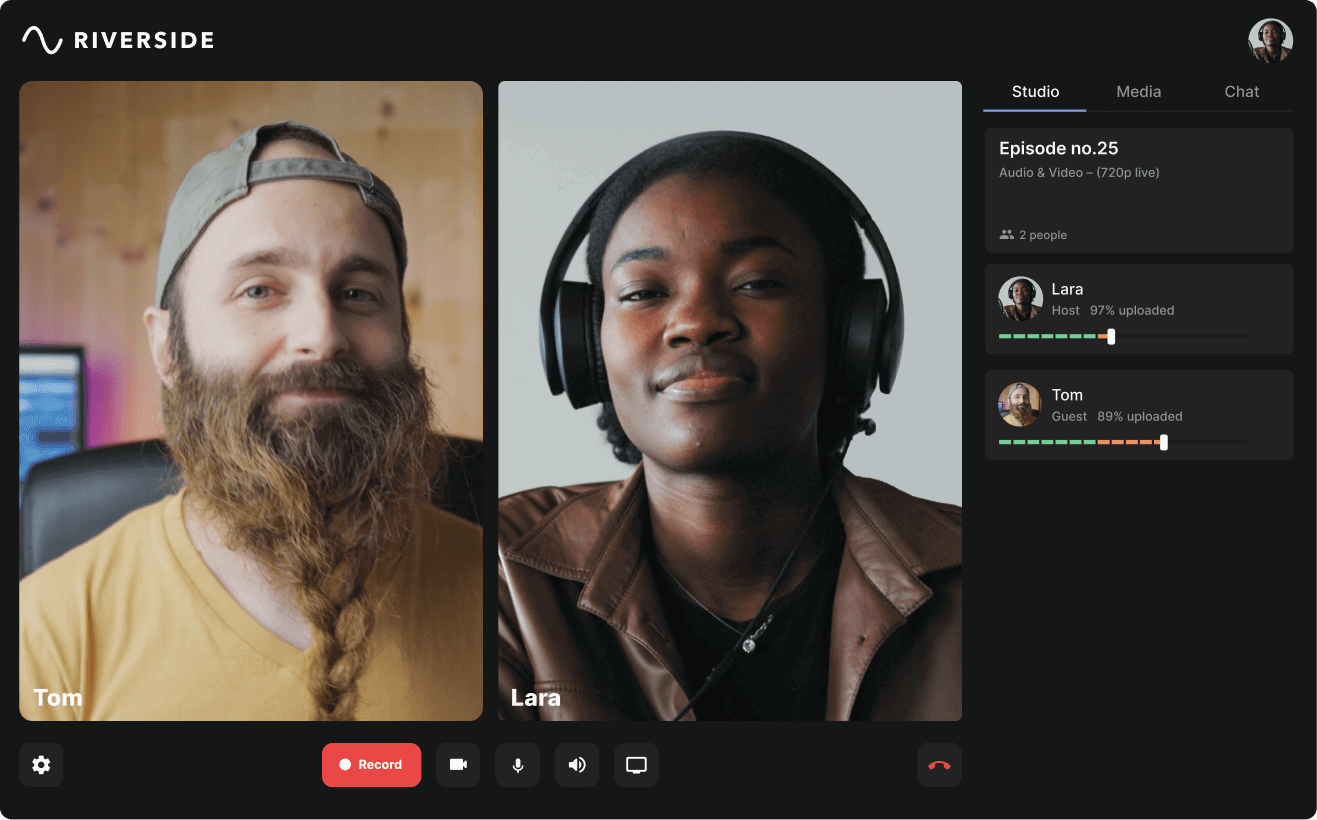
If you’re looking for a professional podcast studio that you can carry in your pocket, you’ve just found it! Riverside is a dedicated podcast maker that offers high-resolution video and audio recordings unaffected by glitchy internet. You can capture separate tracks of your podcast guests remotely, who can all join from their PCs, iPhones, iPads or even Android devices.
Advantages:
High-quality recordings independent of your internet connection.
- Each participant is locally recorded in full HD. This means a weak or intermittent internet connection will not negatively impact your audiovisual quality. Each of you will look and sound your best in your final recording.
- Audio is saved in WAV format. These are a lossless file format, which preserves the highest audio quality.
- Video can be captured in up to 4k resolution so your video podcasts look crisp and clear.
Note: the only limitation is your equipment - in this case, your iPhone. Some external microphones need a specific setup with the Riverside iOS app so the device can record your sound and play audio from the Studio at the same time. We suggest testing any external microphone during a FaceTime call to confirm that it will work on Riverside. See the links below for more information.
- How should I connect an external mic to record on iOS?
- What external microphone setups work best when recording with the iOS and Android mobile app?
Separate audio and video tracks in full HD.
- Unlike many other applications, with Riverside each participant’s audio and video recording is saved as a separate track on your Riverside dashboard. This means your post-production editing capacity is unlimited.
Progressive upload means no risk of data loss.
Just like our browser-based app, the iOS app progressively uploads each participant’s audiovisual tracks to the cloud server during your recording session.
- This means even if your internet cuts out or your iPhone malfunctions, you’re not vulnerable to losing your whole recording.
- You can monitor the status of your recordings and uploads during and after your session.
Remote recording.
- Riverside lets you record with up to 7 guests at one time.
Optimized Guest Experience.
- Intuitive interface which is extremely user-friendly.
- No need to make an account, just download the app and join your session.
Livestream your podcast.
- Riverside is optimized for several different streaming platforms, meaning you can livestream your recording session easily.
Ai automated transcriptions
- Receive highly accurate ai transcriptions straight after recording.
- You can download transcripts from your desktop in TXT or SRT format for easy content repurposing or quick video captions.
- Transcriptions are available in over 100 languages.
- Captioning tool for stylized video captions
Text-based video editor
- Edit your recordings as quickly as reading through a doc. Any text you delete in your transcript removes the matching video and audio in your recording.
- Search bar so you can navigate through your recording using your transcript.
- Multi-sync editing so no matter how many edits you make everything stays in sync.
Magic Clip tool
- Seamlessly turn your long-form recordings into short shareable videos.
- Simply click on the Magic Clips button and let AI identify key moments in your recordings, then turn them into shareable clips
- You can adjust clips in the editor to change their length, layout, or to just customize them.
Disadvantages
Editing features are only available on desktop
- You can only edit recordings from the desktop version. Luckily, this isn't complicated as all recordings are directly saved to your studio, no matter what device you recorded from.
For a fully-equipped podcast recording studio in your podcast, start recording with Riverside.

2. Podbean Podcast App
.webp)
Beyond its recording capabilities, Podbean is also a podcast hosting service. This means you can upload your podcast episodes directly to their platform, as well as others such as iTunes or Google Play.
Advantages:
Easy-to-use.
- The friendly and intuitive interface means Podbean is suitable for all users.
Add music to your recording.
- Podbean comes pre-loaded with various music tracks that you can add straight into your recording, but you can also add your own music or tracks if you’d prefer to add a personal touch.
Audio optimizing settings.
- Podbean automatically removes silences from your recording without distortion, saving you the hassle.
- The volume boost function normalizes volume levels making shows easier to listen to.
Live-cast your podcast.
- You can livestream your recording straight from the Podbean app.
Remote recording with up to 5 co-hosts and guests.
- Using the livestream function, you can record your podcast with up to 5 remote guests.
Easy podcast publication.
- Podbean is an ‘all-in-one’ platform, meaning you can record, (minimally) edit, and publish your podcast straight through their app.
Free to use.
- Although you need to pay extra for more bandwidth and storage.
Disadvantages:
Lower-quality audio.
- Podbean saves your recording in MP3 and M4a format. These are compressed - ‘lossy’ - file formats that sacrifice audio quality in favor of compact file size, meaning your overall podcast recording quality will suffer.
Internet interference.
- Podbean does not locally record each participant, meaning your podcast is at the mercy of your internet connection. Any glitches or dropped signals will be reflecting in your final recording.
- If you do want local recordings, you’ll need to ask each participant to record themselves using either external hardware or software such as Quicktime, save their recording, and then upload their individual files.
Cannot record video.
- You cannot currently record video using the Podbean app, so if you want to record your participants during your session, you’ll have to set up and record a simultaneous Skype or Zoom call.
Minimal editing capacity
- Although they advertise editing capability, the in-built tools are fairly limited. You can only ‘top & tail’ your recording - meaning you can choose where it starts and ends. You can also create a fade-in or fade-out effect. However, for more advanced editing or serious interventions, you’ll need to use additional specialist software.
- No separate tracks. Your editing capabilities are also curtailed by the fact that Podbean gives you a single track recording of your podcast, meaning you’re stuck with moments where participants talk over one-another, for example.
Your guests need to make an account.
- To join your livecast and download the app, your guest needs to make an account with Podbean.
3. Spreaker Studio App
Spreaker is a one-stop shop for podcast hosting, creation, distribution and monetization.
Advantages:
All-in-One.
- You can record, (minimally) edit and publish your podcast all in one place
Livestream your podcast.
- You can livestream your podcast recording straight from the Spreaker Studio app.
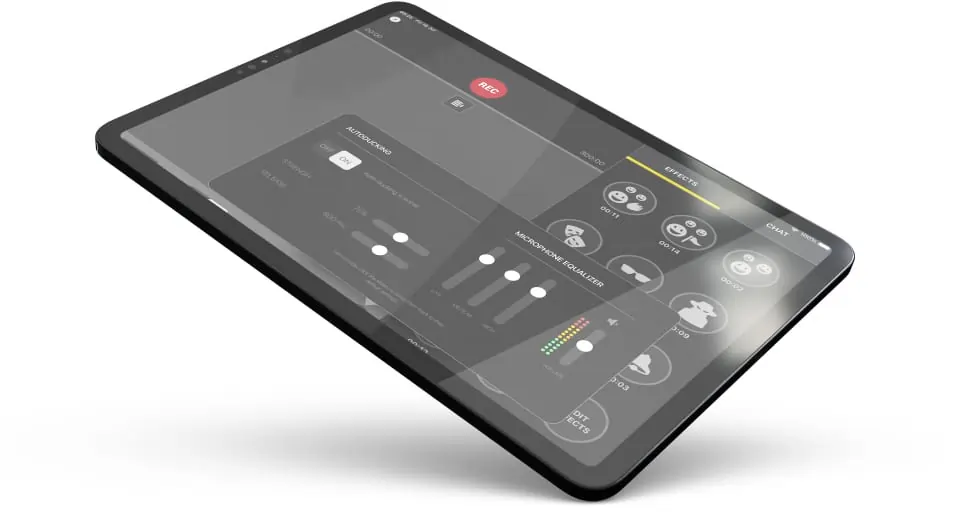
In-built features
- Auto-duck and mic controls help you regulate and monitor your vocal and audio levels.
- When enabled, auto-ducking automatically lowers music volumes when you start speaking into your mic.
Analyze your podcast stats.
- The Spreaker app lets you monitor and analyse how your podcast is performing so you can optimise community and listener engagement.
Disadvantages:
Low-quality audio.
- Spreaker saves your recordings as MP3 files. This is a compressed - ‘lossy’ - file format which compromises quality for compact size, resulting in sub-par audio.
It’s not possible to record with remote guests.
- In a COVID-19 world, remote recording is the new normal. Unfortunately, Spreaker does not have the in-built capacity to facilitate remote podcast recording.
- To record with a guest who is not in the same location as you, you have to integrate Skype - not only will each of you need a separate Skype account, but this will make your recording vulnerable to internet Interference
- Skype does not locally record each participant, which means your recording is likely to be negatively impacted by weak or dodgy internet connection.
Minimal editing capacity.
- The Spreaker editing tools are extremely limited. You cannot edit your recording other than trimming and cropping its length.
Limited storage space with the free plan.
- If you’re a prolific podcaster, it’s likely you’ll need more storage - the basic subscription starts at $6 / month.
4. Spotify for Podcasters (Previously Anchor)
Spotify’s free app for iOS which lets you create, record and distribute your podcast from your phone.
Advantages
All-in-One.
- As an all-inclusive service. You can record, upload and publish your episodes straight from their app to all major platforms.
Analytics.
- Monitor your podcast’s engagement and performance using Anchor’s insights and stats.
Jazz up your podcast with different audio.
- Anchor lets you add different types of audio to your episode such as voice messages, music, transitions, and general recordings.
Turn voice-notes into a podcast.
- Using the ‘Voice Messages’ function, you can have direct, private conversations through voice notes, and then either party can publish the audio to an episode!
- This means if you’re unable to record in real-time, you can still include your dream guest.
User-friendly and intuitive interface.
- Anchor divides your recordings into ‘building blocks’ of audio segments. These make it extremely easy to build and order your episode - simply drag and arrange in your desired order.
Remote recording with up to 4 guests.
- Using the ‘Record With Friends’ function, you can record with up to 4 remote guests at one time.
- Note - record with friends is not compatible with external microphones when used with the mobile app - so even if you wanted to, you cannot use an external mic.
Free to use!
- Free to use for everyone, making it extremely budget-friendly.
Disadvantages
No video recording.
- You can’t currently record or publish a video podcast using the Anchor app. Even if you’ve already recorded a video podcast, you can only upload the file and Anchor will automatically convert it to audio-only format.
Low audio-quality.
- The Anchor app records in M4A format instead of MP3 or even WAV - these are both compressed - ‘lossy’ - file formats, which compromise audio quality for the sake of file size.
Risk of data loss.
- Your recording is only processed and uploaded to your library once you have finished recording meaning there is a high risk of losing your material.
Internet Interference.
- The ‘Record with Friends’ function is dependent on a really stable WiFi connection- which, unfortunately, not many of us have. This means your recording is likely to be affected by glitches, interference, or lag.
Minimal Editing Capability.
- Anchor does not record each participant individually, so you’ve only got a single audio track to play with. This minimizes your post-production capabilities.
- The in-built tools are fairly limited. You cannot make edits to individual tracks. All you can do is arrange and order separate clips - note: this requires you to record each segment individually
Maximum File Size.
- Although Anchor offers unlimited free hosting - so you can upload as many files as you like - the individual file size is capped at 250 MB. This rules out bigger file (and optimised audio) formats such as WAV.
Cannot livestream.
- As we all know, live streamed podcasts are extremely popular and offer an opportunity for live interaction and engagement. Unfortunately, you cannot currently live stream your podcast using Anchor.
You cannot have more than one podcast associated with your account.
- This might be a problem if you’re bursting with ideas or are a jack-of-all-trades who wants to try their hand at more than just one podcast show.
Cannot mute yourself during remote recordings.
- You cannot mute yourself during a ‘Record with Friends’ call. This means that if someone has some unexpected ambient noise, this will interfere with your whole recording.
Tip! If you want to record a video podcast to publish on Spotify, check out Riverside's Spotify integration. Record in top-quality on Riverside, only to seamlessly export you video and publish to Spotify.
How to Create a Podcast on your iPhone or iPad using Riverside
Even though we've covered steps on how to record a podcast on iPhone, Riverside's app is also available on all iPad devices. This means you can use these steps to guide you to record or create a podcast on iPads as well.
How to record a podcast on your iPhone as a Host:
1. Download and open the Riverside app
Open the app and log in as a host with your Riverside account details.
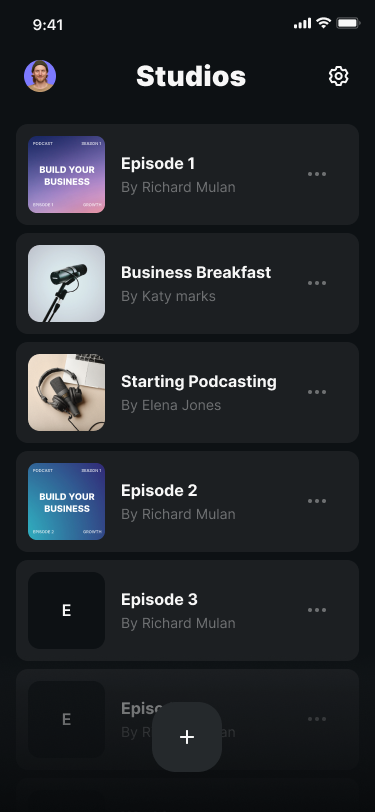
2. Choose a studio
Join one of your pre-existing studios or create a new studio. To create a new studio, select the '+' button Then, choose if your recording will be audio-only or audio and video.
3. Test your equipment
Add your name, then after you press 'Next' you'll get taken to the lobby. Here you can test your equipment and check all is in order. Once you’re ready to go, click Join.
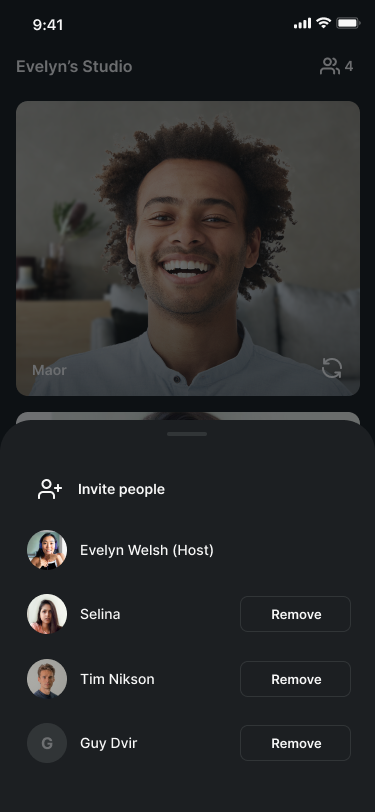
4. Invite guests
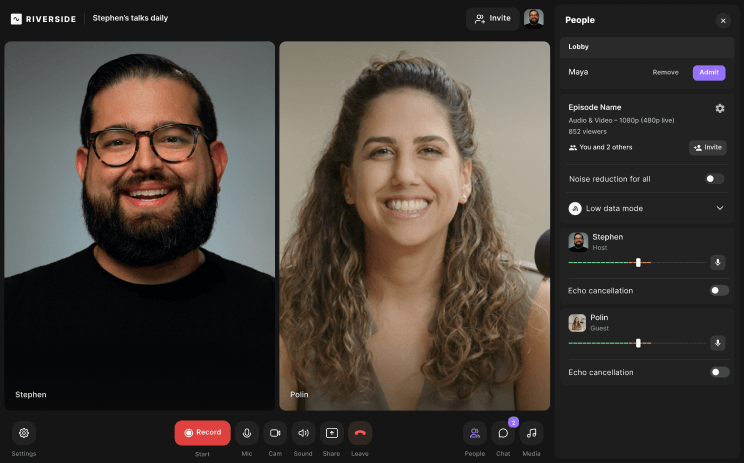
Once you’re in the studio, you’ll see the option to Invite Participants, if you haven’t already, click 'Invite'. You can also invite people before entering the studio. To do this go to your dashboard and click on the three dots menu then select 'Invite'.
You can either:
- Send your guests a link to jon
- Invite via Email
5. Start recording your podcast from your iPhone
Once your guests have joined and you’re all happy, click the Recording button on your top left and enjoy your session!
.png)
Your recording is locally recorded on each participant’s devices and progressively uploaded to the Riverside Dashboard as you go. You’ll be able to monitor how each upload is doing throughout your session.
Once your session is complete, keep your Chrome tab open and remind your participants not to close their app so that your respective uploads can be completed.
Once each participant’s upload is complete, you’ll be able to find your recordings in your Riverside dashboard, ready for post-production!
As a Guest:
1. Download the Riverside mobile app
Find and download the Riverside app from the App Store.
2. Join a studio through your invite
To enter your session, your guests will need an invite link or a QR code from you.
As outlined above, your guests will either receive their invitation through their email or via message if you’ve copied and pasted it to them.
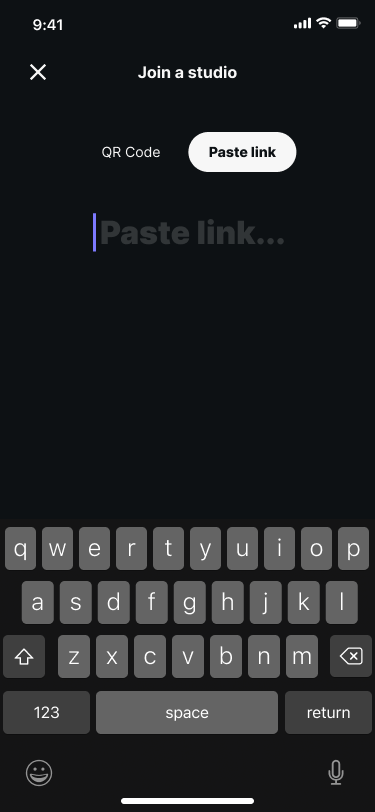
3. Enter your details and test your camera and mic
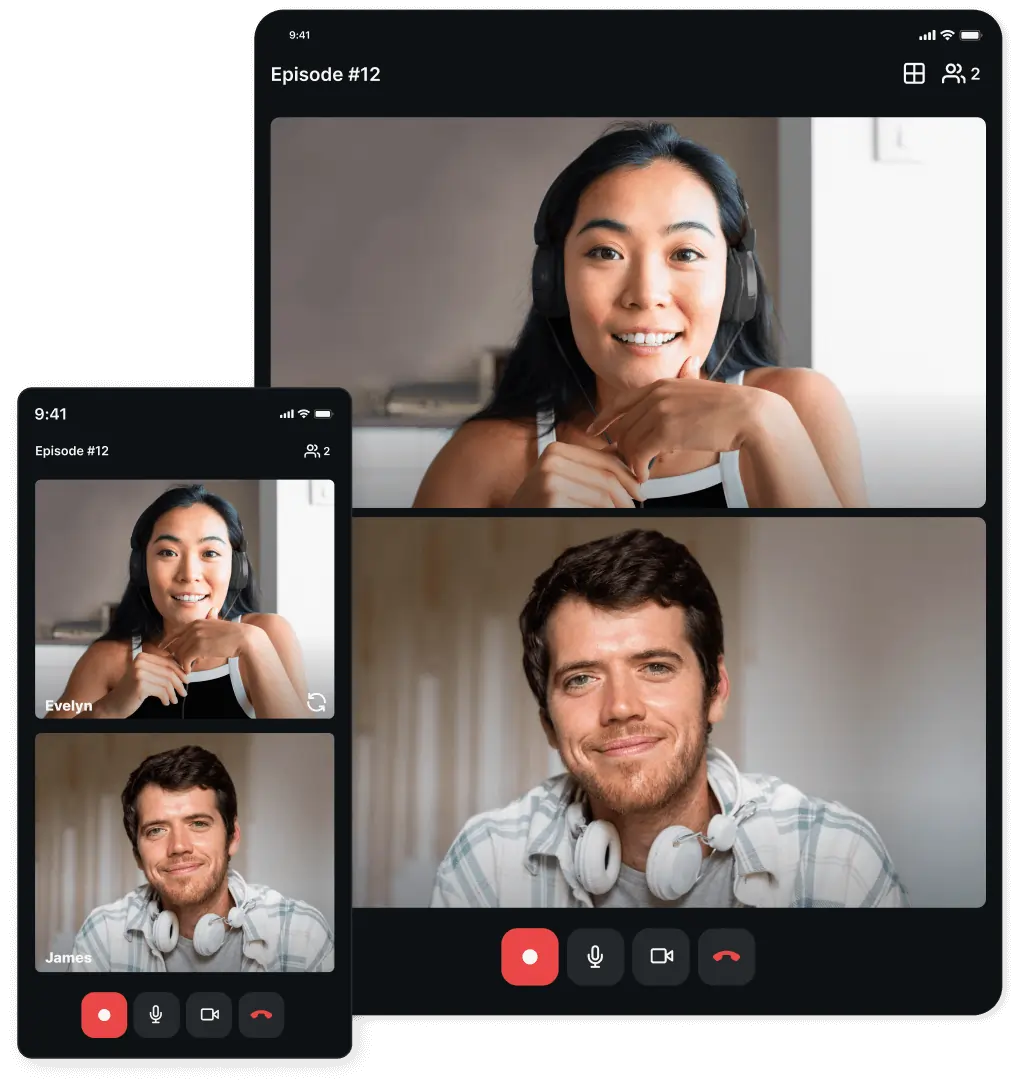
All they have to do is click on the link on their iPhone either in their inbox or messages, and it’ll automatically take them to their Riverside app. There, they’ll find themselves in the equivalent of the ‘Green Room’. They’ll be able to set their name and check how they look before they click Join the show.
.png)
4. Start recording with your host
Once you've joined the studio you can start recording with your host.
If a guest leaves the app during the recording, their video stream will immediately stop, but everyone else will still be able to hear them.
As always, guests' recordings will be progressively uploaded to the Riverside dashboard throughout your recording.
Guest can keep track of their upload progress by clicking on the three dots in the top right-hand corner of their screen, select Recordings Log View. This will show the user the current status of the recordings and uploads (also for past recordings).
Note: Make sure your guests keep the app open even after your session is complete - this is so that the upload can be completed.
Our guide covers all you need, but if you learn better visually, feel free to watch this video to walkthrough the Riverside iOS app.
Top Tips For Podcasting With An iPhone
Use a Podcast Recording App.
- You could go old-school and use Apple’s voice memos app to record your podcast, but you won’t be able to include remote guests.
- Using an app is convenient and hassle-free for both you, the host, and your guests. Plus, all your recordings will be conveniently stored in the same place - like on your Riverside dashboard.
Prioritize audio quality.
- When considering which podcast recording app to use, look for platforms, like Riverside, which use uncompressed and lossless audio file formats such as WAV. These will preserve your recording’s audio quality, so you can sound your best.
- Invest in an external microphone. If you’re on a tight budget, the internal microphone on your iPhone will be fine, but it won’t be capable of capturing the high-quality audio that an external microphone can.
- Consider microphone placement. This is an easy fix, but can really improve how your audio sounds.
- Use headphones. Wearing headphones during podcast recording allows you to monitor your audio, vastly improves your mic technique, prevents feedback, and allows you to hear your voice as others will.
Turn on Airplane Mode.
- This will prevent cellular feedback or distortion which might impact your audio.
- Ensure to keep your Wifi connection on though, otherwise you won’t be able to connect to your session!
Turn off Notifications.
- The last thing you want is to be interrupted by an incoming message or notification.
Record in a quiet place
- This may sound obvious and may not always be viable. However, wherever possible, try and locate a location which is protected from external ambient noise.
Mount your phone to keep it secure
- Mounting your phone will prevent your microphone from picking up vibrations or movements that might negatively impact your audio.
Test your audio before.
- Even if you’re ready to record, don’t neglect to test your audio levels before your session. This will protect you from any unexpected surprises and most recording apps have an in-built function to let you do this.
Bonus: How to record a clip from a podcast on iPhone
Are you looking to how to create clips or how to record part of a podcast on iPhone? It’s pretty simple if you’re using the right podcast recording app.
If you’re using Riverside you can create clips from a podcast you recorded on your iPhone using the following steps:
Step 1: Login into Riverside iPhone and invite guests to your recording studio of choice.
Step 2: Enter your studio, test out your equipment and when your guests arrive start recording as usual.
Step 3: Wait for all your recordings to upload and then login to Riverside on a desktop. Select the same studio to view your recordings and choose a take to edit.
If you'd like automated clips, simply click "Generate Clips" in the Magic Clips box. Our Ai tool will automatically generate clips from key moments of your recording.
Alternatively, you can create your own videos, by selecting "Go to Editor"
Step 4: In the editor, use the timeline to drag and trim your recordings into clips. You can also add video captions here or adjust your layout.
Step 5: When you are done, select ‘Export’ and when your clip is ready you can download it to share on any platform.
Final Thoughts
It’s pretty clear that iPhone podcasts are the future. Even in a post-COVID world, remote podcasting is unlikely to subside, and this is a convenient way to include international and far-flung participants. Plus, nowadays, everybody has an iPhone, so you don’t need to worry about your guests not having the right equipment.
As we’ve seen, there’s already an array of apps out there that have made it extremely easy to record a podcast from your iPhone. Obviously, app choice is personal - and we may be a little biased - but Riverside is the only app on the market which records locally in full HD, even on an iPhone.
You may be tempted by the ability to record, edit and publish your podcast all in one place - but the limited editing capacity combined with sub-par audio quality recording of most apps out there means you might be selling yourself short. Recording your podcast in full HD and editing using specialist software is a sure-fire way to publish a studio-quality podcast every single time.
We’ve brought the best of remote podcast recording to your iPhone. But don’t just take our word for it - try it out now!
Bonus FAQs
How do you create a podcast on iPhone?
Creating a podcast from your iPhone will be different based on the software you choose to use. In general, this is how you create a podcast on an iPhone:
- Plan your podcast.
- Record your podcast using a voice recorder or your choice of a dedicated podcast recording app.
- Edit and fine-tune your podcast through an editing app.
- Upload your podcast to your chosen podcast platform.
There are two main ways to record a podcast on an iPhone:
Back to Basics. Go back to basics, use the Apple voice notes application and get recording!
Use a podcast recording app. Use one of the wide array of iOS apps on the market. Every single one has optimized and foolproof iPhone podcast recording. Although, keep in mind the only app which allows you to record HD, locally recorded tracks is Riverside.
What is the best way to record a podcast?
This is a subjective question and really depends on who you are and what you’re looking for.
Home Studio. If you’re lucky enough to have a home studio, you’ll be able to record a high-quality podcast without even leaving your house! Using Riverside.fm on desktop is a great way to include international and remote participants in your podcast.
Hire a Studio. If you’ve got the budget, hire a studio space and get recording. Although this is not necessarily the most COVID-19 friendly option.
Use your iPhone. The Riverside app means you can now record HD podcasts straight from your phone. This is a great option if you’re always on the move, and enjoy spontaneous recording sessions.
Can you use a phone to record a podcast?
Yes, while we still recommend using an external microphone, you can definitely record a podcast from a phone. Recording a podcast on your phone is pretty much the same as recording from your desktop, the only difference is that you'll have to use a mobile-friendly recording app like Riverside. Riverside's mobile app even allows you to record remotely with other guests.
Can you film a podcast on your phone?
Yes you can. iPhone cameras boast impressive quality and can often outdo older DSLRs.
However, as we’ve seen many podcast recording apps don’t have the ability to record both audio and video. If you’re looking to include visuals, Riverside has you covered - both on desktop and iPhone.
What app should I use to record a podcast?
There are many recording apps you can use to record a podcast. Some options that are available on desktop devices include Audacity and Adobe Audition. You can also record on Garage Band if you're a Mac user. Although, for the best results, we suggest choosing software that's specifically focused on podcast recording. In this case, a platform like Riverside is ideal as it provides everything you need for podcasting including recording, editing, and easy distribution through Anchor. If you're recording a podcast on your phone, you'll need to use an app with mobile capabilities. Fortunately, there are also many mobile recording apps, Riverside being one of them.
How do I record my podcast for an audio-only platform?
Recording an audio-only podcast is easy! Simply choose your recording software, set up your studio, and start recording. if you're recording with Riverside, you'll follow the same process we've outlined above, you'll just choose to record in an audio-only studio.
For the best results we recommend you keep the following in mind:
- Use a quality podcast microphone
- Position your podcast microphone correctly
- Choose software with local recording instead of recording over the internet
- Prepare your guests before
- Record in separate tracks for more editing control
- Wear headphones so you can hear more clearly how your recording sounds
Read more on recording audio with our post on how to make your podcast recordings sound better.
Can I record a podcast on Apple podcast?
Currently, you can only upload recordings to Apple podcasts. You'll have to use a separate app for actually recording your podcast. You can use your iPhone's built-in recorder or you can try software like Riverside, that's specifically dedicated towards recording high-quality sounding podcasts.
How do I save a podcast to my iPhone?
Many of the apps we’ve looked at in this article let you save your podcasts directly onto the app, although editing capabilities are limited.
On Riverside, you’ll find your podcast recording in your personal dashboard - accessible at any time.


.png)