


.webp)


When it comes to creating content, the name of the game is making the most of what you’ve already got.
The same goes for videos: if you’ve already got high-quality recorded video content, you most definitely should be repurposing it. With the rise of podcasts, turning your content into your own show is a good place to start.
You can change videos into video podcasts or remove the visuals and upload to audio-only listening platforms. This is a great way to diversify your reach, connect with new audiences, and keep your content relevant even well after you first made it.
Ready to start? Here’s your ultimate guide on how to turn videos into podcasts.
Can you repurpose a video into a podcast?
You can definitely repurpose a video into a podcast. You can either use your video as it is (with some minor edits) or publish just its audio as a podcast. To transform a video into an audio-only podcast, you’ll need either access to the original multitrack recording or software that lets you separate your audio from your video. For video podcasts, you’ll probably need to do some tweaking and think about adding details such as captions, B-Roll and sound effects.
How to turn your video into a podcast: 2 Methods
The first thing you need to decide is whether you want to keep your podcast as video and audio or just audio. Doing both formats opens you up to more podcasting platforms which is also how you can expand your reach.
How to turn your video into an audio-only podcast
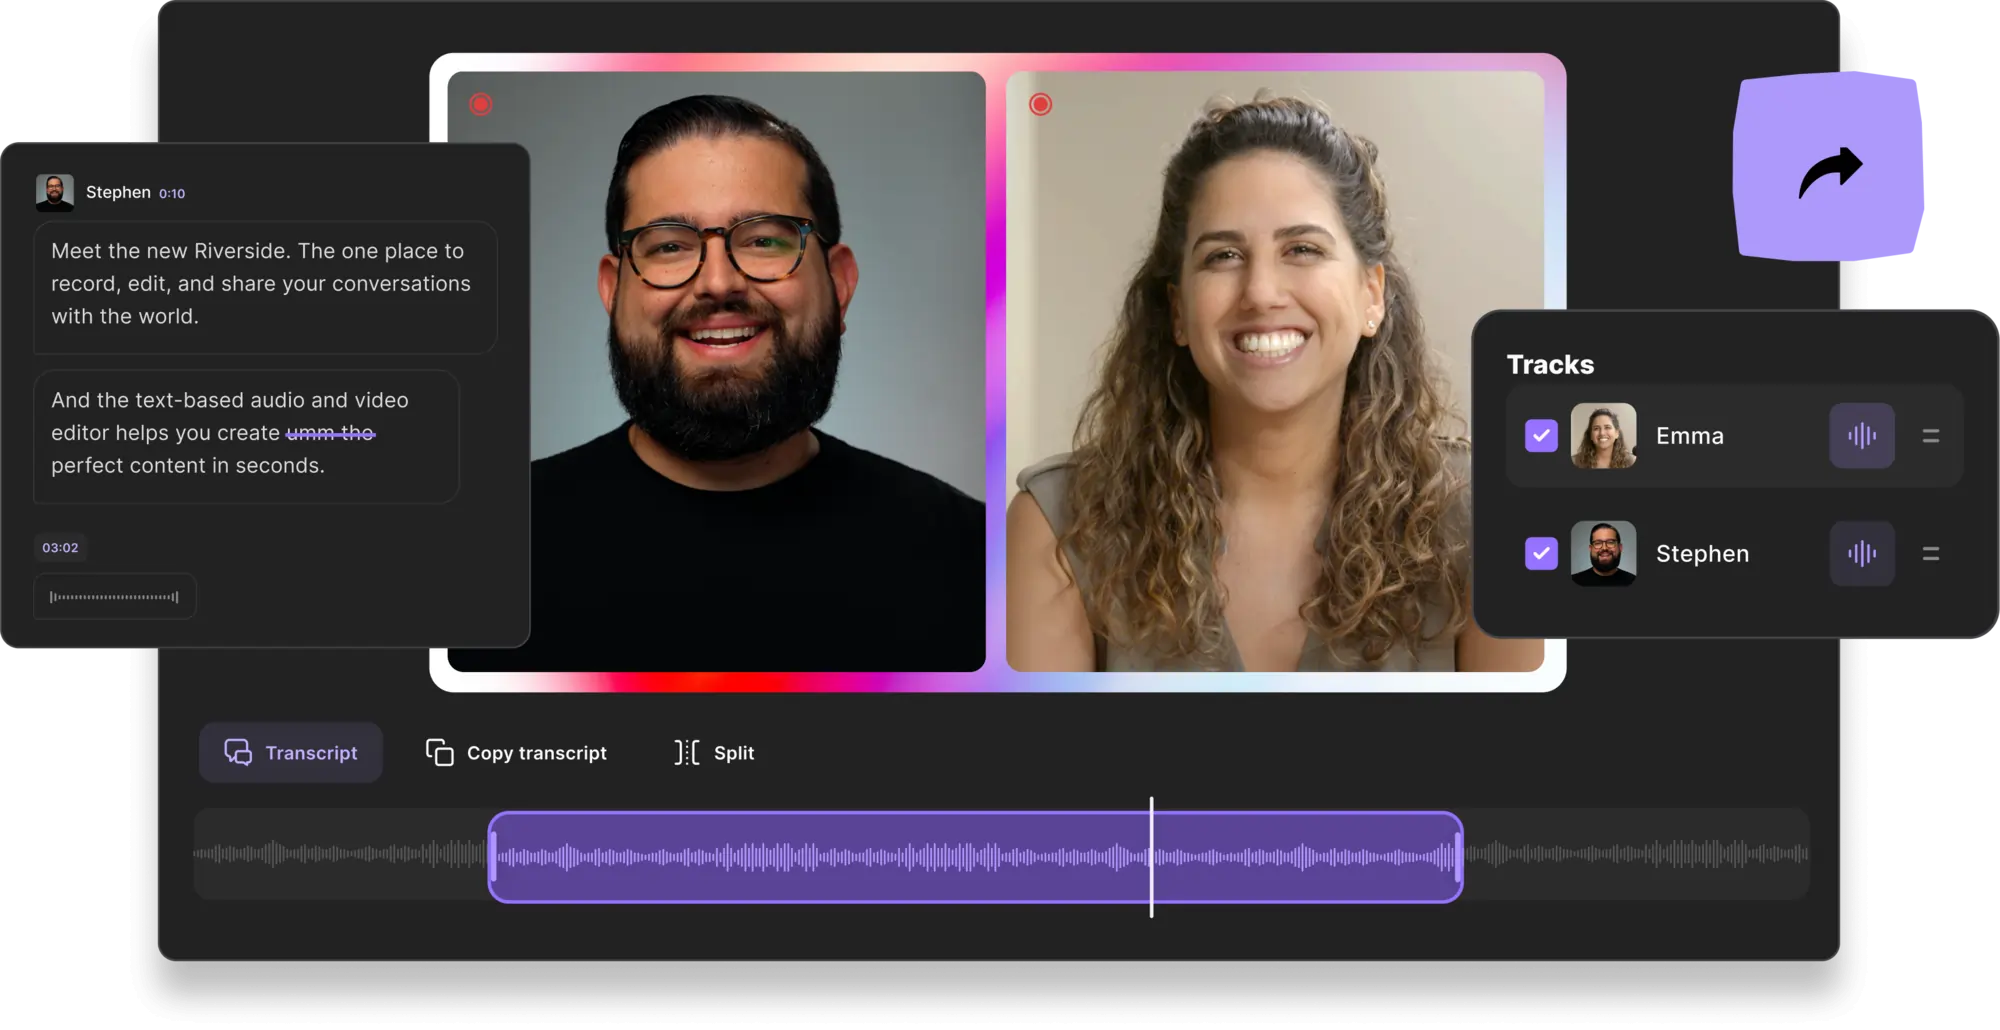
Ideally, you will have recorded your video with a platform like Riverside that automatically offers multitrack recording. This means that it records the audio and video of every participant onto a separate track. This makes turning your video into an audio-only podcast incredibly easy.
You can follow these steps to turn your video into an audio-only podcast on Riverside:
Step 1: Record your video in a Riverside studio or upload your own recording files. (You can learn how here)
Step 2: In the ‘view recordings’ page select the video recording you’d like to turn into an audio-only podcast and select ‘Go to editor’.
Step 3: In the Editor hover over the top tool bar, and select ‘Tracks’.
Step 4: Go to the track you’re working with and on the right click the option for ‘Use audio only’.
Step 5: Edit your audio as you need. You can trim your recording using the timeline, or you can use your recording transcript and delete text to cut out audio.
You can also polish up your sound with automated tools for background noise removal and audio-level normalization. It’s even possible to delete all silences in your recording in one quick click.
Step 6: When you finish editing your audio, simply select ‘Export’ and choose your audio quality before clicking on ‘Export’ again.
You’ll receive your audio-only podcast in an email, ready to share.
How to convert your video into an audio and video podcast
If you want to repurpose your video into a video podcast, there’s really not much to it. You could, in theory, go straight ahead and publish your video to YouTube or wherever else you want to post your video podcast.
You might want to edit your video down a bit or add a b-roll, depending on the nature of your content. You also shouldn’t overlook the importance of creating short-form clips to promote your new video podcast. You can rely on Riverside’s Magic Clips feature to do this automatically and quickly for you.
Here’s a quick look at some of the extra steps you should be taking to create an engaging podcast out of your existing video:
Edit your video to create a podcast
If you’re using Riverside, it’s easy to use one recording for multiple purposes. You can choose between various suitable layouts in the Editor, and trimming your video is as easy as deleting text.
Editing will likely involve cutting down or even eliminating certain sections to create a more engaging narrative. You may also consider adding B-Roll or sound effects depending on the nature of your video.
Add captions and create a transcript
Riverside’s editor features an AI-powered transcription feature which automatically transcribes your video content. You can use this transcription to create captions for your video podcast. Some podcasters also choose to include a transcription in their podcast description.
Create podcast art
You’ll need to create podcast cover art to go with your podcast. You can do this easily yourself using a tool like Canva, for instance, or you could hire a freelancer to make one for you.
Add podcast descriptions and chapters
To attract new listeners and give them a flavor of what your video podcast is all about, you need to include a description of your podcast episode. Try to avoid writing anything too wordy – keeping things quick and concise, but still intriguing is the balance you’re trying to achieve. On certain platforms like YouTube, including podcast “chapter” or “segment” timecodes can be a helpful way of helping your audience navigate your content.
Choose a podcast host and upload your video
Once you’re finished polishing up your video into a podcast, you should choose a podcast host and upload the finished product. Your podcast host should automatically distribute to the major listening platforms. You’ll also need to upload to YouTube separately.
Keep track of its performance
Don’t release your podcast into the world and forget about it. Keeping on top of your podcast analytics and monitoring its performance is a great way to keep improving your content moving forward.
Promote on social media
Part of your post-publication workflow should include podcast promotion and publication. This is especially important because your existing audiences might not realize that you’ve started publishing a podcast.
Record once, create multiple content with Riverside
Riverside is the ultimate partner in crime when it comes to creating flexible and reusable content. With a range of AI-powered features that streamline, simplify, and speed up your workflows, create high-quality audio and video content suitable for all different audiences and platforms. Let’s take a look at some of Riverside’s main features:
Magic Clips
Magic Clips is an AI-powered feature that automatically identifies key moments from your full-length video and edits them into social-media-ready clips and highlights. These are perfect for promoting your content on social media platforms like TikTok and Instagram as well as getting the most out of your video-turned-podcast.
Separate track recording
Riverside defaults to separate track recordings. This means Riverside records each participant’s audio and video on a separate track. Not only does this give you more control during post-production but it also means that you can record audio-only and video content – that’s ready to go – at the same time.
High-quality recording
You shouldn’t settle for anything but the best when it comes to your video and audio recording quality. Riverside can record up to 4K video and 48kHz audio. Plus, since it locally records each participant – meaning on each person’s own device rather than over the internet – you never have to worry about a bad connection messing up your recording.
Text-based editor
Riverside’s Editor is the perfect partner in crime for creating podcasts. Firstly, you get access to a text-based editor – which makes editing podcasts as easy as editing a Google doc. All you need to do is delete text in the transcript and Riverside will reflect those cuts in the actual video. You can also customize the layouts and backgrounds of your videos to really make them your own and add captions using Riverside’s automated transcription feature we mentioned earlier.
Remote recording with multiple participants
You can record video and audio with up to 7 remote participants. They can join from their browser or mobile app without signing up to Riverside. The ability to record remotely opens your horizons in terms of when, where and with whom you can record.
Other key features:
- Upload pre-recorded content to Riverside and make the most of all the editing tools.
- Mobile app and browser based for recording and editing everywhere and anywhere.
- Easy to use and intuitive workflows for both hosts and guests.
- AI-powered transcriptions in over 100 languages with over 99% accuracy. So you can add captions to your videos, transform your video/audio content into blogs or edit using Riverside’s text-based editor.
- Progressive upload means that your recording uploads to the cloud while you’re recording. So your tracks will be waiting for you in your Riverside dashboard when you’re done.
- Riverside’s media board means that you can live mix during your recording session with music and effects
- Customizable layout of your videos means that you can really make your content your own

Best practices for turning videos into podcasts
Here are some tips to think about when you’re turning your videos into podcasts:
- Consider length. What might have worked as purely video content might not fit into what is considered a “podcast”. Think about which elements of your video you want to keep and which you can potentially cut out.
- Keep your audience diverse. Turning videos into podcasts doesn’t mean doing away with video completely. You should aim to publish your podcast as both an audio and video podcast to maximize your audience.
- Change up your workflow. If you’re going to be turning your videos into podcasts regularly, it’s worth changing up your workflow to minimize the amount of work you have to do. Using Riverside means you can record video and audio at the same time.
- Add branding. To build up a loyal and consistent podcast listenership, you want your audience to become familiar with your podcast. To do this, you should introduce recognizable elements such as an intro jingle or certain segments. This might require additional editing if you’re reworking a pre-recorded video.
FAQs on How to turn video into podcasts
Can you convert YouTube videos to podcasts?
Absolutely. And you can also post video podcasts to YouTube to make sure that you’re maximizing your reach and exposure.
How do I get audio from a video?
If you record using Riverside, you don’t need to worry about separating your audio and video because they’ll be on individual tracks already. Otherwise, you can try saving your video as an audio file. Find more tips in our article about extracting audio from video.
Do podcasts have video as well as audio?
Yes. Though podcasts started out as an audio-only podcast in general, they’ve now diversified to include video content too. You can find video podcasts on platforms such as YouTube and Spotify.


.webp)


