What is resolution?
Resolution refers to the number of pixels in each dimension that make up a video image, commonly expressed as width x height. For instance, 1920x1080 for Full HD is a standard resolution.
While higher resolution results in sharper images, it also makes the file size larger, which can cause the video to lag if the internet speed isn’t good.
In podcasting, if you're producing a video version, using the right resolution, like 1080p or 720p, helps with clarity, especially if you’re distributing it on platforms like YouTube.
What resolution is best for videos?
Typically, 1080p is sufficient for most platforms, while 4K is better for high-quality content like films or video played on large displays.
Should I edit in 4K or 1080p?
Edit in 4K if your final output demands high resolution or if you need to zoom in during editing without losing quality. Use 1080p if you're working with smaller files or don’t require the highest possible resolution.
Is it better to have higher or lower resolution?
Higher resolution is generally better, as it provides clearer images and more flexibility for editing, but it also results in larger file sizes and requires more processing power.
Does higher resolution mean better video quality?
Higher resolution generally improves video quality, but factors like color grading, bitrate, and compression play a significant role as well.
How to set the resolution for live streaming on Riverside
- Log in to your Riverside account.
- In the ☰ menu, hover over the Studio and click the three dots (•••).
- Click Record.
- Enter your details on the Lobby page and click Join Studio.
- At the top, click Settings.
- Click Live Stream.
- Select 720p or 1080p under Streaming resolution.
This impacts the audience's view while local recording files maintain their original resolution, allowing you to download a high-resolution recording of the livestream afterward.
How to change the default resolution of your recording on Riverside
Before a studio session:
- Log in to your Riverside account.
- In the ☰ menu, hover over the studio and click the three dots.
- Select Settings.
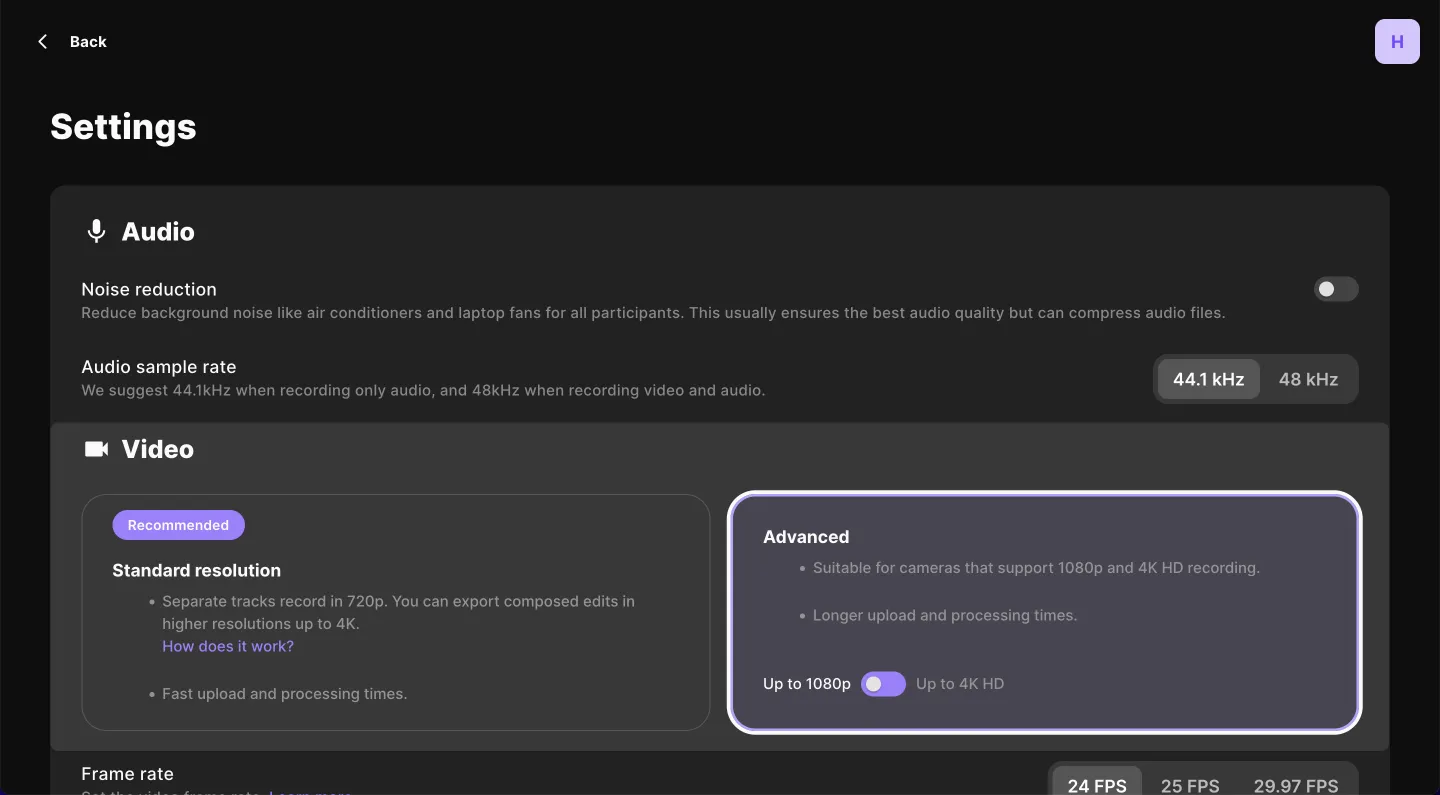
- Scroll to the Recording section and choose Standard or Advanced resolution.
- For Advanced, toggle between 1080p or 4K.

- The next recording will use the selected resolution.
During a studio session:
- Join the Studio as a Host or Producer.
- Stop the current recording.
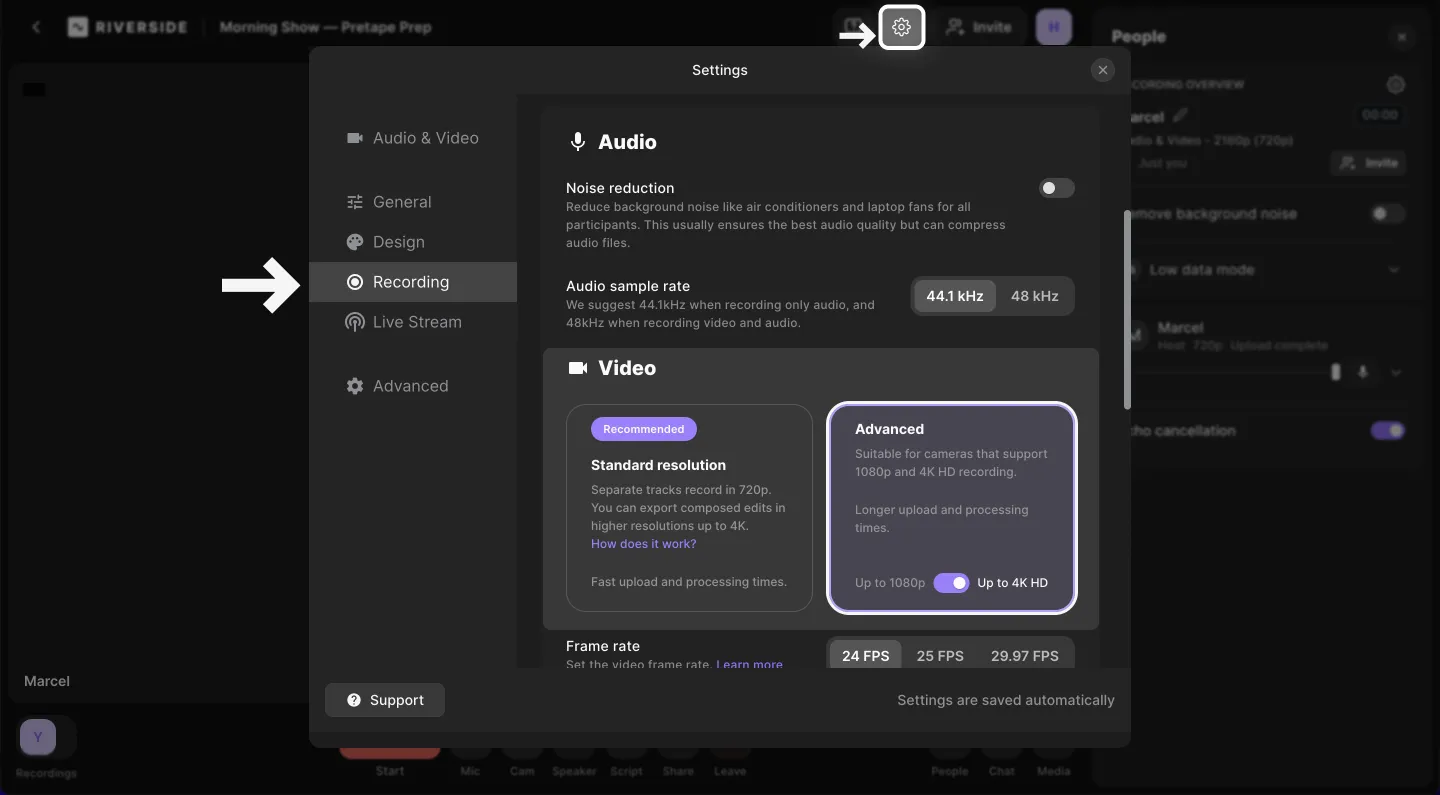
- Click Settings at the top.
- Go to Recording, choose Standard or Advanced, and select the resolution (up to 1080p or 4K).


